Table of Contents
Advertisement
Advertisement
Table of Contents

Related Manuals for Mesa/Boogie Roadster


Summary of Contents for Mesa/Boogie Roadster
- Page 1 Owner’s Manual...
- Page 2 Hello from the Tone Farm ...You, smart player and intuitive human, have put your trust in us to be your amplifier company. This is something we do not take lightly. By choosing this instrument to be a part of your musical voice, you have become part of the Mesa family...WELCOME! Our goal is to never let you down.
-
Page 3: Table Of Contents
ROADSTER Table of Contents Precautions ___________________________________________________________________________________ 0 Overview ____________________________________________________________________________________ 1-2 Getting Started ________________________________________________________________________________ 3 Helpful Hints ________________________________________________________________________________ 3-4 FRONT PANEL: MODES: Ch 1 & 2 CLEAN ________________________________________________________________________________ 5 Ch 1 & 2 FAT ___________________________________________________________________________________ 5 Ch 1 TWEED ___________________________________________________________________________________ 5 Ch 2 BRIT _____________________________________________________________________________________ 6 Ch 3 &... -
Page 4: Important Safety Instructions
IMPORTANT SAFETY INSTRUCTIONS Read these instructions. Keep these instructions. Heed all warnings. Follow all instructions. Do not use this apparatus near water. Clean only with dry cloth. Do not block any ventilation openings. Install in accordance with the manufacturer’s instructions. Do not install near any heat sources such as radiators, heat registers, stoves, or other apparatus (including amplifiers) that produce heat. -
Page 5: Overview
Roadster is more than just an amp. It’s a collection of amps housed in one chassis. This arsenal of sounds is so powerful that with them at your command, inspiration will take over and propel your playing to places you have only dreamed. -
Page 6: Overview
You’ve chosen an amp that will grow with you. This awesome preamp power is then sent to the Roadster’s Effects Loop section and we have provided a Series Loop to assure a match to whatever type of processing you choose. The Loop may be programmed active in any of the channels or, footswitched in and out on the fly. -
Page 7: Getting Started
Getting Started: 1.) After unpacking the amplifier remove the plastic webbing from all of the tubes (including the preamp tubes behind the row of power and rectifier tubes) and make sure all tubes are seated firmly in their sockets. 2.) Install the 5U4 Rectifier tubes (if they are not already in place) by bending back the spring steel tube clamps just enough so that the base of the tube will have to barely push the clamps out of the way as they go in. - Page 8 Helpful Hints: (Continued) 7.) The PRESENCE control determines a lot about the voicing of gain sounds. Set lower it will fatten and compress single note sounds and lend a liquid feeling to the strings in the 3 modes of Channels 3 & 4. Set higher it will add cut and brightness to the sound and can be useful in keeping Bass response tight, especially at high GAIN settings when searching for crunch rhythm sounds.
-
Page 9: Ch 1 & 2 Clean
GAIN high and clip the first tube stage, especially with single coil pickups. You’ll find a whole world of “in- between” or pushed sounds in TWEED that pay homage to the amazing tweed amps of yesteryear. Yet here in the Roadster there is just enough increased gain to take these sounds over the top and give you that extra fire and feel. -
Page 10: Ch 2 Brit
CHANNEL 3 & 4: RAW This new Roadster mode is the lowest gain of the three in the two high gain lead channels. Its less saturated nature greatly enhances the already versatile bag of sounds the two original lead channels offered. The range of gain available covers an extremely wide spectrum and it can be set to double as a formidable alternate clean mode, a low gain purring blues sound and beyond, all the way up to a grinding crunch or searing solo sound. -
Page 11: Ch 3 & 4 Modern
This control adjusts the predominant gain stage in each channels’ circuit with the function and taper being optimized for each individual channel. Remember that your Roadster is really three separate multi-mode amplifiers built onto one chassis, so though each channel looks identical, the GAIN control for each channel comes in a different place and adjusts a different point in that channels circuit. -
Page 12: Treble
The MID control is responsible for the blend of midrange frequencies in the mix and though its effect is not as dramatic as that of the TREBLE control, it plays an integral part in achieving any sound in your Roadster. It is capable of changing the feel dramatically as it blends in a group of frequencies that tend to soften or stiffen the way a sound feels to play. -
Page 13: Mid
PRESENCE control settings darken and, in fact, compress the signal which works well to fatten single note solo sounds, giving them girth and focus. Some of the best lead sounds in your Roadster will find the PRESENCE control in its lower regions, where a balanced, vocal response is achieved. -
Page 14: Master
NOTE: USING THE ROADSTER AS A POWER AMP ONLY It is possible to use the Roadster’s power section as a stand alone power amp for use with external preamps, as half of a stereo power rig or, as a slave for another Roadster in larger venues. Here’s how;... -
Page 15: Solo Control
Follow the cold start procedure described in the STANDBY section above when powering up your new Roadster. Now that we have reviewed the Channels and their Modes we are ready to go aft and check out the treasure chest of features that ride the Rear Panel. -
Page 16: Rear Panel
SPEAKERS: Two 4 Ohm, one 8 Ohm and one 16 Ohm jack are provided for speaker interfacing. The Roadster is not very sensi- tive to speaker mismatches and will not be damaged by them, except that very low ohmage loads will cause the power tubes to wear faster. -
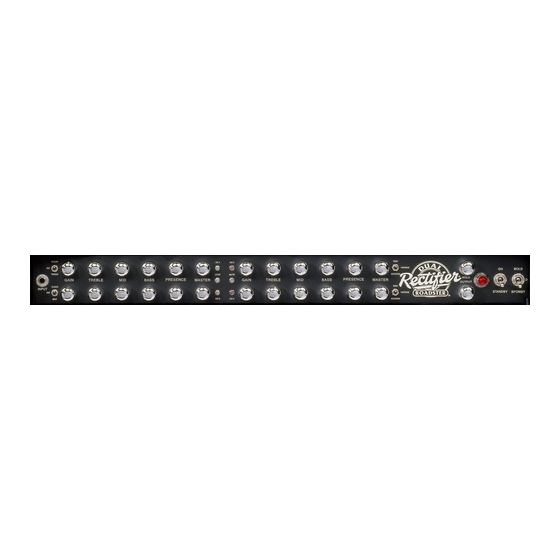
Page 17: Channel Strips
These 4 clusters of switches and controls house the specific features that can be pre-assigned per individual channel. Once you have deciphered one, you have learned the Roadster’s secret and are ready to roll, for they are simply repeated for the 4 channels. -
Page 18: Fx On / Fx Off Switches
Channel MASTER Controls become your final output level controls. This HARD BYPASS feature allows you to use your Roadster in all its raw glory in the studio where processing will be added later on a separate channel and you need every ounce of pure, unfiltered, Tone for a magical performance. -
Page 19: Using The Fx Return As A Power Amp Input
You will find the FX LOOP a welcome feature for all rack type processing and when good quality cables are used and kept to a length of 3 feet or less, you will notice very little if any degradation in the sound of your Roadster. -
Page 20: External Switching
These seven jacks are provided so that you may control the 4 Channels, the EFFECTS LOOP, The Reverb and the SOLO feature with an external master Switching device. This is essential to use the Roadster as part of a Midi rig where all sounds are called up via a Midi Footcontroller and both amplifier and effects settings are stored under a midi program number. -
Page 21: Fuse And Serial Number
That covers the features and functions on the Rear Panel and by now you should be ready to start crafting your dream Tone. If you would like some examples of ways to set the modes in your Roadster for different applications, you may find the following SAMPLE SETTINGS helpful. -
Page 22: Factory Sample Settings
FACTORY SAMPLE SETTINGS: CHANNEL 1 SETTING #1 Versa Clean CLEAN DIODE 100 WATTS FX ON TWEED GAIN TREBLE BASS PRESENCE MASTER CLEAN RECTO TRACKING WATTS BRIT CHANNEL 1 SETTING #2 Spank CLEAN DIODE 100 WATTS FX ON TWEED GAIN TREBLE BASS PRESENCE MASTER CLEAN... - Page 23 FACTORY SAMPLE SETTINGS: CHANNEL 2 SETTING #1 Skinny Skank CLEAN DIODE 100 WATTS FX ON TWEED GAIN TREBLE BASS PRESENCE MASTER CLEAN RECTO TRACKING WATTS BRIT CHANNEL 2 SETTING #2 Rhythm Mix CLEAN DIODE 100 WATTS FX ON TWEED GAIN TREBLE BASS PRESENCE MASTER...
- Page 24 FACTORY SAMPLE SETTINGS: CHANNEL 3 SETTING #1 Purring Blues VINTAGE DIODE 100 WATTS FX ON MODERN GAIN TREBLE BASS PRESENCE MASTER VINTAGE RECTO TRACKING WATTS MODERN CHANNEL 3 SETTING #2 Smooth Grind VINTAGE DIODE 100 WATTS FX ON MODERN GAIN TREBLE BASS PRESENCE MASTER...
-
Page 25: Factory Sample Settings
FACTORY SAMPLE SETTINGS: CHANNEL 4 SETTING #1 Atlantic Blues VINTAGE DIODE 100 WATTS FX ON MODERN GAIN TREBLE BASS PRESENCE MASTER VINTAGE RECTO TRACKING WATTS MODERN CHANNEL 4 SETTING #2 Stripped Grind VINTAGE DIODE 100 WATTS FX ON MODERN GAIN TREBLE BASS PRESENCE MASTER... -
Page 26: Diagnosing Tubes & Tube Maintenance
The power tubes should be all but quiet when they are tapped. If crackling or hissing changes with the tapping, you have probably found the problem. To confirm a noisy power tube, merely put the Roadster on Standby, remove it from its socket and turn it back on. - Page 27 DIAGNOSING PRE-AMP TUBE PROBLEMS: Because your amplifier is an all tube design, it is quite possible that you will at some point experience minor pre-amp tube noise. Rest assured - this is no cause for alarm and you can take care of the problem yourself in a matter of minutes by simply swapping tubes.
- Page 28 BIAS ADJUSTMENT: (Part of a continuing series) BEAM- An Article written by Randall Smith that CONFINING ELECTRODE we thought you might find interesting. CATHODE GRID ..SCREEN ..GRID PLATE .
- Page 29 BIAS ADJUSTMENT: (Continued) control grids. Voltage and current are NOT the same. Current is the AMOUNT of electricity, the “quantity” — and is measured in amperes. Voltage is the degree of electric charge — like the “pressure” to use the old water analogy. Let me illustrate how different voltage and current are: When you scrape your feet across a carpeted floor in dry, wintery conditions, your body can become charged with 50,000 to 100,000 volts of static electricity.
- Page 30 BIAS ADJUSTMENT: (Continued) Again, this has some merit .. but it’s still not as good as using tubes that are matched in the first place because compensating for the mis-match causes the push-pull circuit itself to become unbalanced. Two wrongs don’t really make a right.
-
Page 31: Speaker Hook-Up & Impedance Matching Guide
SPEAKER IMPEDANCE MATCHING & HOOK-UP GUIDE: IMPEDANCE: Wiring up speakers to provide the most effective load and making sure that all of them are in phase will help in creating the best sound possible. This is not too difficult, as long as you understand a few things about loading and how to connect your speakers to provide an optimal resistive load. -
Page 32: Speaker A Speaker B
SPEAKER IMPEDANCE MATCHING & HOOK-UP GUIDE: (Continued) PARALLEL: When wiring in parallel, the resistance of the speakers decreases. Two 8 ohm speakers wired in ( hooked-up ) Parallel results in a 4 ohm load. It’s easy to calculate the effect of a resistive load when all the speakers are all the same resistance. It is really not suggested to wire different resistive load values in Parallel ( 8 and 4, 16 and 8 etc. - Page 33 WIRING SCHEMES...Amplifier to Speaker Cabinets Partial back view of amplifier Partial back view of amplifier 8 OHM 4 OHM 4 OHM 8 OHM 4 OHM 4 OHM 8 Ohm Cabinet Partial back view of some Mesa amp 8 OHM 4 OHM 4 OHM 4 Ohm Cabinet 8 Ohm Cabinet...
- Page 34 WIRING SCHEMES...Amplifier to Speaker Cabinets Partial back view of amplifier Partial back view of amplifier 4 OHM 4 OHM 8 OHM 8 OHM 4 OHM 4 OHM 8 Ohm Cabinet 16 Ohm Cabinet 8 Ohm Cabinet 8 Ohm Cabinet SAFE MISMATCH CORRECT MATCH Partial back view of amplifier Partial back view of amplifier...
- Page 35 WIRING SCHEMES...Amplifier to Speaker Cabinets Partial back view of amplifier 16 Ohm 4 OHM 4 OHM 8 OHM SERIES BOX 8 Ohm 8 Ohm 8 Ohm Cabinet 8 Ohm Cabinet 8 Ohm Cabinet SAFE MISMATCH Partial back view of amp Partial back view of amplifier CORRECT MATCH 8 OHM...
- Page 36 WIRING SCHEMES...Amplifier to Speaker Cabinets Partial back view of amplifier 16 Ohm 4 OHM 4 OHM 8 OHM SERIES BOX 8 Ohm 8 Ohm 8 Ohm Cabinet 8 Ohm Cabinet 16 Ohm Cabinet SAFE MISMATCH Partial back view of amplifier 8 OHM 4 OHM 4 OHM...
-
Page 37: Feature Article: Irishmen, Pentodes & Triodes By Randall Smith
ON TRIODES, PENTODES & IRISHMEN: With apologies to Friends and Relatives from the Emerald Isle - who will make their appearance soon enough - the humor which follows is dedicated to the memories of Spec McAuliff and Fae (Rafael) McNally, two of the True Greats. As their numerical references suggest, the terms Diode, Triode and Pentode indicate the number of elements within the vacuum tube i.e. - Page 38 ON TRIODES, PENTODES & IRISHMEN: (Continued) Thus a diode tube - one with a cathode and an anode - is mostly used to rectify alternating current into direct current by passing it without restriction, but in one direction only. This also explains why closing time is strictly enforced at Irish pubs: During normal operation, the traffic flow is similarly unimpeded and uni-directional toward the bar and this process rectifies the work-day negativity.
- Page 39 PENTODES: (Continued) Thus the proper cocktail waitress - visible through the louvers - is scantily clad so as to be all the more effective at reinforcing the attractive influence of her bar and by being located in between the door and the bar, she serves as bait to lure customers past the door’s negative influence.
-
Page 40: Tube Layout Guides & Parts Sheet
PAGE 36... - Page 41 PAGE 37...
- Page 42 PAGE 38...
- Page 43 OOGIE The Spirit of Art in Technology Thank you for trusting MESA/Boogie to be your amplifier company and we wish you many years of toneful enjoyment from this handbuilt all tube instrument.
- Page 44 The Spirit of Art in Technology (707) 778-6565 FAX NO. (707) 765-1503 1317 Ross Street Petaluma, CA 94954 06/13/13...