Advertisement
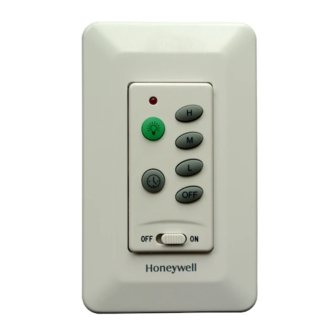
CEILING FAN AND LIGHT REMOTE
WITH WALL CONTROL
Model 40015 / Item # 0374122
User Guide
IMPORTANT SAFETY INSTRUCTIONS
1. Read and keep this instruction sheet for future reference.
2. Please note that all fixed wiring appliances should be installed by a qualified
electrician.
3. The supply to the receiver should be connected on its own circuit.
4. Switch off the power at the circuit breaker before working on receiver or ceiling fan.
5. This unit is to be used for the control of a ceiling fan and its electrical source must
be AC 110/120V, 60Hz.
6. Do not install in damp location or immerse into water. For indoor use only.
7. Do not use this remote with fans that have pre‐installed remote controls.
CAUTION: To reduce the risk of fire or injury, do not use this product in
conjunction with any variable (rheostat) wall control.
RECEIVER INSTALLATION INSTRUCTIONS
NOTE: This remote can work with a variety of hugger fan types, however, there is
typically very little space in the hanger bracket area to install a receiver. Therefore,
we do not recommend using this remote with hugger type or 5 speed ceiling fans.
1. After switching power off @ circuit breaker, remove ceiling fan canopy from the
mounting bracket. Disconnect existing wiring between ceiling fan and supply at
electrical junction box.
2. Slide the receiver into the mounting bracket per FIG.1 being careful not
to pinch the antenna wire.
3. The receiver will be inserted between the down rod and the mounting bracket.
4. Make wiring connections per FIG. 2.
5. Push all connected wires back into the junction box and reinstall the canopy onto
the mounting bracket.
6. Manually set fan speed control to HIGH and set light to ON using the pull chains.
NOTE: For the remote to function properly, the fan must be on HIGH speed and
lights must be ON to use.
CAUTION: Incorrect wire connection can damage this receiver and could
cause injury or fire.
WALL CONTROL INSTALLATION INSTRUCTIONS
1. Make the electrical connections to the wall control (transmitter) unit as shown in Fig3.
2. Carefully push all connected wires inside wall outlet box.
3. Secure wall control unit with 2 screws (not included) previously removed from the
existing wall outlet box.
4. After installed well, slide the Power On/Off switch on wall control to "ON" position.
NOTE: Before installing wall control, slide the switch to "OFF" position.
ACTIVATING THE LEARNING PROCESS (SMART SYNC)
NOTE: This remote is pre‐programmed from the factory and should work right out of
the box once the battery is installed. Should, for any reason, re‐programming be
needed please follow the learning process as follows:
1. After installation is complete and power is turned on, press and hold the "FAN OFF"
button for 3 seconds. Fan will turn on at high speed and light (if installed) blinks 3
times. This confirms that the SMART SYNC setting is active. You now have 30 seconds
to press the FAN OFF key. Tap the FAN OFF button again to turn off the fan.
2. If user cannot finish the setting within the 30 seconds time frame the main power
must be turned off and re‐started again. This will reset the unit. Repeat step 1 until
the LEARNING feature is activated as indicated.
S
S
S-
S
Available at www.HoneywellStore.com
NOTE: User must press "FAN OFF" key within 30 seconds after
main power is turned on.
FAN CANOPY
BRACKET
FIG 1
INSERTING RECEIVER
INTO CANOPY ASSEMBLY
WALL CONTROL LIVE (BLACK)
LIGHT
(BLUE)
MOTOR
(BLACK)
MOTOR
(WHITE)
FIG 2
)
CONNECTING THE RECEIVER
TO THE FAN
MOUNTING
NEUTRAL (WHITE)
ANTENNA
Advertisement

Related Manuals for Honeywell 40015


Summary of Contents for Honeywell 40015
- Page 1 CEILING FAN AND LIGHT REMOTE NOTE: User must press “FAN OFF” key within 30 seconds after main power is turned on. WITH WALL CONTROL Model 40015 / Item # 0374122 User Guide IMPORTANT SAFETY INSTRUCTIONS 1. Read and keep this instruction sheet for future reference. 2. Please note that all fixed wiring appliances should be installed by a qualified electrician. 3. The supply to the receiver should be connected on its own circuit. 4. Switch off the power at the circuit breaker before working on receiver or ceiling fan. 5. This unit is to be used for the control of a ceiling fan and its electrical source must be AC 110/120V, 60Hz. 6. Do not install in damp location or immerse into water. For indoor use only. 7. Do not use this remote with fans that have pre‐installed remote controls. ...
-
Page 2: Wiring
You shall be responsible for shipment and speed respectively. assume all costs and Fan Off – Tap lightly to the fan off. risks associated with any product return Light –Tap lightly to turn light on or off. NOTE: Compatible for use with compact fluorescent bulbs. The Honeywell Trademark is used under license from Honeywell International Inc. Honeywell International Inc. makes no representations Walk Away Light Delay – Tap once ‐ the light and fan turn off after 1 minute. Light or warranties with respect to this product. on the fan blinks once to confirm function is active. Press any button to cancel function. This product is manufactured for: Walk Away Light Delay Home Shield – Press and hold the Light and Delay buttons for 3 seconds. Light on the ... - Page 3 1. Locate wall mount in a convenient location to your retailer, call our customer service department toll free 2. Use two screws (included) and wall anchors to install wall at 1-877-580-4359 mount bracket as shown in FIG. 3 (Tools required for assembly: Philips screwdriver, not included) Model 40015 / Item # 0374122 User Guide (For Handheld Control) ACTIVATING THE LEARNING PROCESS (SMART SYNC) 1. After installation is complete and power is turned on, remove the battery cover on ...
- Page 4 Printed in China D/O (DIMMER SWITCH) FIG 1 REAR VIEW OF TRANSMITTER – SHOWN WITH BATTERY COVER REMOVED High Speed Medium Speed Low Speed Fan Off Light Dimmer FIG 2 TRANSMITTER OPERATION WALL MOUNT BRACKET FIG 3 WALL MOUNT BRACKET Available at www.HoneywellStore.com...