
Related Manuals for ZyXEL Communications PLA4211


Summary of Contents for ZyXEL Communications PLA4211
- Page 1 PLA4211 500 Mbps Mini Powerline Pass-Thru Ethernet Adapter Version 1.00 Edition 1, 05/2012 Quick Start Guide User’s Guide www.zyxel.com Copyright © 2012 ZyXEL Communications Corporation...
- Page 2 Related Documentation • Quick Start Guide The Quick Start Guide is designed to help you get up and running right away. It contains information on making your hardware connections. PLA4211 User’s Guide...
-
Page 3: Table Of Contents
Part I: User’s Guide ................... 5 Chapter 1 Introducing the PLA4211........................7 1.1 Overview .............................7 1.2 Expand Your Network with the PLA4211 .....................7 1.3 Ways to Manage the PLA4211 ......................8 1.4 Security ...............................8 1.4.1 Passwords ..........................8 1.4.2 Setting Up Security ........................8 1.5 Multiple Networks ..........................9... - Page 4 5.7 Troubleshooting ..........................38 Chapter 6 LEDs and Troubleshooting ........................41 6.1 LEDs ..............................41 6.2 Power and Light Problems ........................42 6.3 Configuration Utility Problems ......................44 6.4 Powerline Problems ..........................44 6.5 RESET/ENCRYPT Button Problems ....................45 Appendix A Legal Information......................47 Index ..............................51 PLA4211 User’s Guide...
-
Page 5: Part I User's Guide
User’s Guide... -
Page 7: Introducing The Pla4211
Figure 1 Expand Your Network with the PLA4211 Connect your PLA4211 to an Internet gateway such as a modem and plug it into an ordinary power outlet in your home. Plug a second PLA4211 into another power outlet and connect a computer to the PLA4211 for Internet access. -
Page 8: Ways To Manage The Pla4211
See Chapter 3 on page 17 for instructions on using the ENCRYPT feature. Use the PLA42xx Series Configuration Utility (or utility, for short) to manage the PLA4211. See Section 2.2 on page 10 for instructions on installing the utility. -
Page 9: Multiple Networks
It’s easy and only requires you to change a network name. It’s a good idea to ensure privacy of your communication. When you use the PLA4211 and other powerline adapters, the electrical wiring in your home becomes an extension of your Ethernet network. -
Page 10: Installing The Utility
H A PT ER Installing the Utility This chapter guides you through the installation of the configuration utility for your PLA4211. 2.1 Overview of the Installation Process The installation of the configuration utility does the following: Checks for and installs Microsoft’s .NET Framework version 2.0 software on your computer. This software is necessary for the installation of the PLA42xx Series Configuration Utility. - Page 11 Figure 3 .NET Framework Installation Process The Setup utility runs automatically. Click Yes or Next to continue through the initial screen. Click Cancel only if you want to abort the installation. Figure 4 InstallShield Wizard Start Screen PLA4211 User’s Guide...
-
Page 12: Low Power Mode
2.3 Low Power Mode Your PLA4211 is a certified green product. It goes into Low Power mode when there is no Ethernet connection. PLA4211 User’s Guide... - Page 13 Chapter 2 Installing the Utility When you plug the PLA4211 into an electric socket, it waits for an Ethernet connection. When no connection is detected after sixty (60) seconds, the Power LED blinks indicating that it is going into Low Power mode.
- Page 14 Chapter 2 Installing the Utility PLA4211 User’s Guide...
-
Page 15: Part Ii: Technical Reference
Technical Reference... -
Page 17: The Reset/Encrypt Button
Note: Because your PLA4211 goes into Low Power mode, it must be connected to a networking equipment for the RESET/ENCRYPT button to work. Refer to Section 2.3 on page 12... - Page 18 Repeat step in this section for the other powerline device you wish to connect. This must be done within 120 seconds of pressing the RESET/ENCRYPT button on the PLA4211. Note: Check the lights on the two powerline devices. The power ( ) and HomePlug ( lights should be blinking while the devices are connecting.
-
Page 19: Setting Up Multiple Networks
This sets up your powerline network between your powerline devices. 3.3 Setting Up Multiple Networks You can use the RESET/ENCRYPT button to set up multiple powerline networks using your existing powerline network. PLA4211 User’s Guide... - Page 20 Check the LEDs on both (A) and (C). When the power ( ) and HomePlug ( ) lights stop blinking and the power ( ) light shines steadily, the devices are connected. Figure 10 Two Separate Powerline Networks PLA4211 User’s Guide...
-
Page 21: Reset/Encrypt Button Behavior
See Troubleshooting in Chapter 6 on page 45 for suggestions on problems with the RESET/ ENCRYPT button and the lights. PLA4211 User’s Guide... -
Page 22: The Configuration Utility
This chapter shows you how to use the Configuration Utility (or Utility) to secure, manage and set up Quality of Service (QoS) on your powerline network. The PLA4211 is designed as a plug-and-play network expanding solution. This means that once you complete your hardware connections, the PLA4211s in your network (without additional configuration) are able to communicate with each other by sending and receiving information over your home’s electrical wiring (A). -
Page 23: Device Access Key (Dak)
To launch the PLA42xx Series Configuration Utility simply double click on the configuration icon on your desktop. Figure 12 PLA42xx Series Configuration Utility Icon Alternatively, start the utility by browsing to it from the start menu. Click Start > Programs > ZyXEL PLA42xx Series Configuration > PLA42xx Series Configuration. PLA4211 User’s Guide... -
Page 24: Configuration Screen
MAC Address This is a read-only field which shows the MAC address of the powerline adapter you are configuring. You can find the MAC address of your PLA4211 displayed on a sticker on the bottom of your device. PLA4211 User’s Guide... -
Page 25: Firmware Screen
Parameter Information Block (PIB) is similar to firmware. It contains the most basic operating instructions for the PLA4211 such as how to power up and how to load the firmware. You can check the ZyXEL website for firmware upgrades for your PLA4211. -
Page 26: Network Info Screen
Firmware Screen Figure 14 4.5 Network Info Screen Use the Network Info screen to see the rates at which a specific PLA4211 is communicating with other powerline adapters on your powerline network. Network Info Screen Figure 15... -
Page 27: Advanced Screen
Local, if it is the PLA4211 directly connected to the computer running the configuration utility. • Remote, if it is a PLA4211 in your powerline network but not directly connected to the computer running the configuration utility. MAC Address This field displays the MAC address of your powerline adapter. The MAC address of your powerline adapter can be found by looking at the label on your device. - Page 28 • Although device E receives audio or movie files, it does not send a lot of traffic, so the powerline adaptor attached to it can be set to a low priority. Figure 16 Priority Settings PLA4211 User’s Guide...
- Page 29 MAC Address This is a read-only field which shows the MAC address of the powerline adapter you are configuring. You can find the MAC address of your PLA4211 displayed on a sticker on the bottom of your device. Priority Select a priority setting from the drop-down box for traffic FROM your selected device.
-
Page 30: About Screen
4.7 About Screen Use the About screen to view information regarding the configuration utility and firmware version of the PLA4211 you are connected to. Click the icon in the top right corner of the utility to view the About screen. -
Page 31: Powerline Network Setup Tutorial
See the product specifications in the User’s Guide for a list of hardware and software compatible with the utility. Note: The PLA4211 in this tutorial is an example only. Your powerline adapter may be different. 5.2 Important Terms... -
Page 32: Accessing Your Powerline Adapter
• See Section 5.5 on page 34 to set up a second network with your new adapters. • See Section 5.6 on page 36 to set up a second network with your existing adapters. PLA4211 User’s Guide... -
Page 33: Adding A Powerline Adapter
Local (A). Check the Local adapter’s MAC address (B). It should match the MAC address listed on the label on the back of your powerline adapter. Figure 23 Adding a New Adapter PLA4211 User’s Guide... -
Page 34: Setting Up A New Network With A New Adapter
The figure below shows two powerline networks in a house. The first network (1) shows the home computer connected to a printer and access to the Internet. The second network (2) has no PLA4211 User’s Guide... - Page 35 Type a Network Name that is different from the Network Name for your existing network. Make sure you use the same new Network Name for all new adapters you want to add to your new network. Figure 27 Making a New Network with the New Adapter PLA4211 User’s Guide...
-
Page 36: Splitting A Network Into Two Networks
• Look for the DAK Password on a label on your powerline adapter. The DAK Password lets you access the adapter. • Select the Remote adapter you want to add (A) and type the DAK Password in the DAK Password field (B). PLA4211 User’s Guide... - Page 37 Click OK and type the DAK Password correctly in the DAK Password field. Figure 30 Incorrect DAK or No DAK • If you have correctly entered the DAK Password, click OK on the pop-up. Figure 31 Correct DAK PLA4211 User’s Guide...
-
Page 38: Troubleshooting
) LED (light) should light up on your adapter when it successfully connects to other adapters on your network. If it does not, try the following measures. • Make sure the adapter is plugged in to a power socket and the power socket is turned on. PLA4211 User’s Guide... - Page 39 Chapter 5 Powerline Network Setup Tutorial • Check you have entered the correct network name for your network. • Check your powerline adapter is connected to the same electrical circuit as other powerline adapters on your network. PLA4211 User’s Guide...
- Page 40 Chapter 5 Powerline Network Setup Tutorial PLA4211 User’s Guide...
-
Page 41: Leds And Troubleshooting
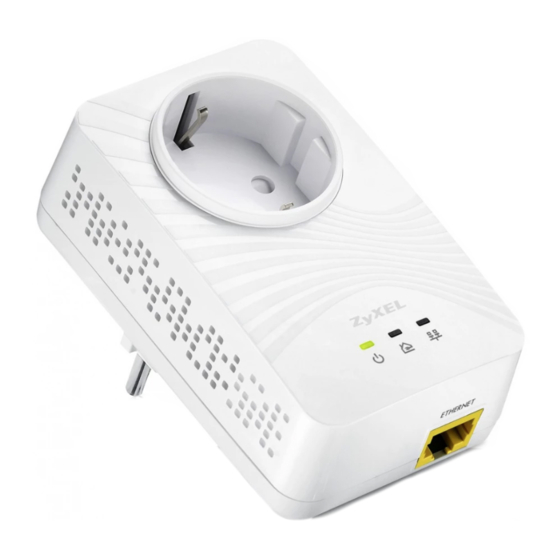
The following sections describes the lights on the PLA4211. The following figure is the front panel of the PLA4211. Use the lights to determine if the PLA4211 is behaving normally or if there are some problems on your powerline network. -
Page 42: Power And Light Problems
The PLA4211 does not turn on. None of the lights turn on. Make sure you are using the power cord included with the PLA4211. Make sure the power cord is connected to the PLA4211 and plugged in to an appropriate power source. Make sure the power source is turned on. - Page 43 Check the Ethernet adapter on your computer and make sure it’s enabled and working properly. If the PLA4211 is connected to an Ethernet switch or router, make sure the device is working correctly, and that the LAN network is working and configured correctly as well.
-
Page 44: Configuration Utility Problems
The PLA42xx Series Configuration Utility does not display all or any of my devices. • Inspect the LEDs on your PLA4211 and make sure that the ETHERNET and HomePlug LEDs are on or blinking. See Section 6.1 on page 41... -
Page 45: Reset/Encrypt Button Problems
• The POWER light on some powerline devices do not blink as part of the ENCRYPT process. Check your powerline device is a PLA4211. • For PLA4211, you cannot use the RESET/ENCRYPT button when it is in Low Power mode. Connect the PLA4211 to a computer/router then try again. - Page 46 I pressed the RESET/ENCRYPT button for 5 to 8 seconds, but the HomePlug light is still on. The HomePlug light is on, indicating it is still connected to another powerline device. Try again, pressing the RESET/ENCRYPT button for 5 to 8 seconds. PLA4211 User’s Guide...
-
Page 47: Appendix A Legal Information
ZyXEL Communications Corporation. Published by ZyXEL Communications Corporation. All rights reserved. - Page 48 ZyXEL warrants to the original end user (purchaser) that this product is free from any defects in material or workmanship for a specific period (the Warranty Period) from the date of purchase. The Warranty Period varies by region. Check with your vendor and/or the authorized ZyXEL local PLA4211 User’s Guide...
-
Page 49: Safety Warnings
Your product is marked with this symbol, which is known as the WEEE mark. WEEE stands for Waste Electronics and Electrical Equipment. It means that used electrical and electronic products should not be mixed with general waste. Used electrical and electronic equipment should be treated separately. PLA4211 User’s Guide... - Page 50 Appendix A Legal Information PLA4211 User’s Guide...
-
Page 51: Index
InstallShield wizard copyright introduction 22, 24 DAK (Data Access Password) ETHN Data Access Password, see DAK LINK disclaimer documentation LINK LED related local vs. remote adapter electrical and cable wiring MAC address electrical circuit boundaries management PLA4211 User’s Guide... - Page 52 Parameter Information Block, see PIB passwords 22, 24, 25 types of PIB (Parameter Information Block) warranty plug-and-play note priority settings web configurator application type priority levels private network problems and solutions product registration PWR LED receive rate registration product related documentation PLA4211 User’s Guide...