Table of Contents
Advertisement
Quick Links
Advertisement
Table of Contents

Related Manuals for Edimax ND-233E


Summary of Contents for Edimax ND-233E
- Page 1 ND-233E User Manual 09-2012 / v1.0...
-
Page 2: Table Of Contents
- CONTENTS - Chapter I Introduction ....................1 Highlights of your new Network IP Camera ............1 Safety Instructions ....................2 Packaging Contents ..................... 3 Familiar with your new Network IP Camera ............4 Installation of the Network IP Camera ..............8 Chapter II Using Network IP Camera by Web Interface .......... - Page 3 3-9-1 Settings ........................43 3-9-2 Media ......................... 45 3-9-3 Event Server ....................... 46 3-10 Recording to SD Card ....................50 3-11 SDHC ........................51 3-12 Log ......................... 53 3-13 Device Info ......................54 3-14 Maintenance ......................55 3-15 Language........................ 56 CHAPTER IV EDIVIEW 64-CHANNEL VIEWER ..............
-
Page 4: Chapter I Introduction
Built-in SD-card slot for local storage, which can act like a stand-alone DVR. Two Way audio. 3GPP Mobile Surveillance Supported. RS-485 communication supported. ONVIF Compliant. The ND-233E (PoE model) Supports IEEE802.3af Power over Ethernet (PoE) standard. -
Page 5: Safety Instructions
Safety Instructions Please follow the safety instructions listed below when you’re using this Network IP Camera, or you would harm this camera and / or yourself! Also, the warranty will become void if you disobey these safety instructions. This Network IP Camera is sophisticated electronic device; do not drop it from high places. -
Page 6: Packaging Contents
1.3 Packaging Contents Please check the contents of your new Network IP Camera when you unpack the package. If any item is missing, please contact your dealer of purchase for help. Item No. Description Quantity Network camera Power adapter CD (with utility software, user manual & multi-language QIG) Quick installation guide Tools package... -
Page 7: Familiar With Your New Network Ip Camera
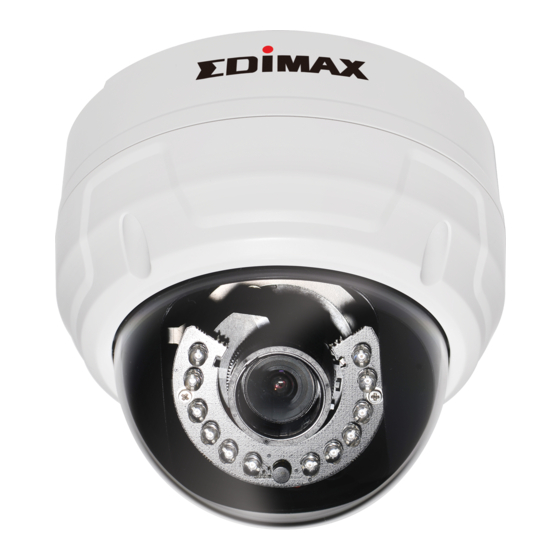
1.4 Familiar with your new Network IP Camera Item Description 1.Front Cover Bubble cover, Plastic cover. 2.Rear Cover Plastic cover. 3. I/O Including -Alarm I/O -Network -Audio I/O -Micro SD card slot -DC 12V power jack -Reset button [Front Cover]... - Page 8 Item Description 1. Bubble Cover Transparent bubble cover, for lens and LEDs protection. 2. Black inner cover Inside protection. 3. Anti - drop line Protective front cover drop during installation.
- Page 9 [Rear ] Item Description 1. IR LED Board IR illumination 2. Top Mount For Rotated function 3. Mid Mount For tilt function 4. Down Mount For pan function 5. LENS Vari-focal Lens 6. Main Board PCBA platform 7. SD Board Micro SD card slot and default button...
- Page 10 [I/O ASSIGNMENT] Item Description DC12Volt/2A input Audio output Audio input Digital input/Output(DV3.3Volt level allowed), AC24V input, and RS485 function. Network, RJ45 connector, two LED index, orange color is power index, green is network index Micro SD card slot Reset Button ※Please check the I/O cable attached index before insert or release any wire.
-
Page 11: Installation Of The Network Ip Camera
1.5 Installation of the Network IP Camera Please follow the instructions below to setup your new IP camera. 1. Connect Ethernet cable to LAN port. 2. Plug DC power adapter to power outlet on the wall. 3. Connect DC power cable to IP Camera’s DC power connector. 4. - Page 12 7. If this camera is connected to a PoE switch then the device can be powered on without use the power adapter. Note: The ND-233E (PoE model) supports IEEE 802.3af PoE standard. It can be powered via the Ethernet cable when connected to a PoE switch.
-
Page 13: Chapter Ii Using Network Ip Camera By Web Interface
Chapter II Using Network IP Camera by Web Interface 2.1 Locate the IP address of Network IP Camera You can use your new Network IP Camera by its web user interface via web browser. Currently the viewing system requirement for Network IP camera OS: Microsoft Windows XP/Vista/7 ■... - Page 14 Note: The contents of the CD-ROM can also be downloaded from the Edimax website: http://www.edimax.com/en/index.php 2. After the installation is complete, double-click the “EdiView_Finder” icon to execute the application. 3. Press ‘Discover’ button to search for all IP Cameras on your local network (make sure all IP Cameras are powered on and connect to local network first).
- Page 15 If you need to change a certain IP Camera’s IP address, you can also click on the IP Camera you wish to change IP address, then click ‘Change IP’ button to change select IP Camera’s IP address setting. If you no longer need to use this utility, click ‘Exit’ button to close it. Please note: If you have several network connections, such as “Wireless...
-
Page 16: Connect To Ip Camera's Web User Interface And Install Activex Plugin
2.2 Connect to IP Camera’s Web User Interface and Install ActiveX Plugin When you know the IP address of IP Camera, you can connect to it by Internet Explorer web browser by entering its IP address in address bar. The use login screen will appear when you get connected: IP Camera’s administrator username is ‘admin’... - Page 17 plugin. For IE 9: Click ‘Install’ button located at the bottom of IE to install ActiveX plugin. If you’re prompted that: ‘Windows Firewall has blocked some features of this program’ Click ‘Allow access’, or IP Camera will not be able to function properly. When you’re installing Internet Explorer plugin, you may also be prompted that if you want to allow changes to be made to your computer: Click ‘Yes’...
-
Page 18: Viewing Live Video
After ActiveX plugin is installed, you should be able to see the video stream from camera. NOTE: If this is the first time you use this IP Camera, you can refer to chapter 2.4 for instructions on Setup Wizard, which will guide you to complete the software setup of your new IP Camera. - Page 19 There are various controls on web page, here are descriptions of every control item: Item Description ‘Home’ button This button is visible in all setup pages of IP camera, and you can go back to live video view by clicking this button when you’re in other page.
- Page 20 original size. If your computer monitor’s resolution is not enough and you want to see full image view, switch to fit screen and image size will adjust automatically. ‘Connect’ button Start live video view. ‘Disconnect’ button Stop live video view. ‘Snapshot’...
- Page 21 algorithm to enlarge the video and some details may lost. If you need to focus on detail of specific objects in video view, please use optical zoom ring on lens set of IP camera. Enable / Disable When mute is enabled ( ), you will not hear mute button the voice from IP camera;...
-
Page 22: Client Settings
2.4 Client Settings In ‘Client Settings’ menu, you configure basic IP camera settings like data transfer protocol and data storage folder. To access ‘Client Settings’ menu, click ‘Client Settings’ button on the left. The following screen will appear:... - Page 23 Here are the descriptions of every setup item: Item Description RTSP Select this option to use RTSP (Real-Time Streaming Protocol) to transfer video data. HTTP Select this option to use HTTP (Hyper-Text Transfer Protocol) to transfer video data. If you don’t know which one you should use, select ‘RTSP’.
-
Page 24: Chapter Iii Advanced Configuration
Chapter III Advanced Configuration If you wish to configure IP camera’s settings, you can access IP camera’s ‘Configuration’ menu, which provides various kinds of system setting. To access configuration menu, click ‘Configuration’ button on the left. The ‘Configuration’ submenu will appear, please pick a setup item you wish to configure. -
Page 25: System
3-1 System In this menu, you can configure basic IP camera settings like hostname and time. Here are the descriptions of every setup item: Item Description Host Name Input the IP camera’s hostname here, it can be any meaningful words or characters that will help you to identify this IP camera. -
Page 26: Security
Timezone Select the time zone of residence from dropdown menu to keep correct date and time. Daylight Saving If the area you live uses daylight saving, check this box; otherwise do not check this box to keep time correct. Keep the current Select this option and date / time setting will not date and time be changed when you click ‘Apply’... - Page 27 - Guest (Can view IP camera’s video only) There can be multiple users, but only one administrator is allowed, and you can’t change administrator’s user name (it will always be ‘administrator’). Here are the descriptions of every setup item: Item Description Password / Retype Input administrator’s new password in both...
-
Page 28: Network
want to remove one user, click it in the list, and then click ‘Remove’ button. If no user is existed, ‘New Account’ message will be shown here. User Name Input new user’s username here. User name must be greater than 1 character and less than 32 characters. - Page 29 Here are the descriptions of every setup item: Item Description Select this option to assign an IP address to LAN port (or obtain an address from DHCP server automatically). Available options are: DHCP IPv4: Obtain an IPv4 IP address from DHCP server on LAN automatically.
- Page 30 DHCP IPv4 / IPv6: Obtain both IPv4 and IPv6 address from DHCP server on LAN automatically. Static IPv4 / IPv6: Assign an IPv4 / IPv6 address to IP camera manually. If you don’t have a DHCP server on your local area network, you must use this option to specify an IP address.
-
Page 31: Advanced" Setup Page
access IP camera’s web configuration interface. RTSP Port Input RTSP port number. When this port number changes, you must change corresponding settings in external network devices (NVR or CMS software) so they can receive this IP camera’s video. RTP Data Port Input RTP data port number here. - Page 32 Here are the descriptions of every setup item: Item Description Multicast Enable video multicast: Multicast Group Address: Input multicast group address here, must be an address between 232.0.0.0 to 232.255.255.255. Multicast video port: Input port number for video multicast here. Multicast RCTP video port: Input port number for RCTP video here.
- Page 33 DDNS Enable DDNS support if your ISP assigns dynamic IP address to you. You must register a dynamic IP service first. Currently this IP camera supports Dyndns, TZO and No-ip dynamic IP service. Provider: Select dynamic IP service provider. Host Name: Input the host name you obtained from dynamic IP service provider.
-
Page 34: Ip Filter
3-4 IP Filter When this IP camera is directly connected to Internet and not protected by firewall, this function acts like a mini built-in firewall to protect the safety of this IP camera and avoid attacks from hackers. - Page 35 Here are the descriptions of every setup item: Item Description Enable Filter Check this box to enable IP address filter, uncheck this Box to disable this function. Accepted IP list Here lists all IP address that can build connections to this IP camera. If you want to remove a set of IP address from the list, click on the IP address and click ‘Remove’...
-
Page 36: Video
3-5 Video You can adjust the image of the IP camera in this menu. There are 3 sub-menus in this menu: Image Setting, Video Setting, and Overlay, which can be accessed by tabs on the top: 3-5-1 Image Setting You can adjust the image parameters in this page. - Page 37 Here are the descriptions of every setup item: Item Description Brightness / Control the image parameters. Click ‘ - ' to decrease Contrast / value, or click ‘ + ‘ to increase value. You can also input Saturation / the value in the field directly. Sharpness Default Set all above values to default value ‘128’.
-
Page 38: Video Setting
‘Schedule’ and define starting and ending time by dropdown menu. When you finish with above settings, click ‘Apply’ button to save changes. 3-5-2 Video Setting You can adjust the video transfer parameters in this page. - Page 39 Here are the descriptions of every setup item: Item Description H.264 Select the compression of main stream: H.264 / MPEG4. /MPEG4 Video Select video resolution. Resolution - H.264: 2048x1536 (QXGA) / 1920x1080 (1080p) 1280x960 (960p) / 1280x720 (720p) 720x480 (D1) / 640x480 (VGA) 320x240 (QVGA) - MPEG4:...
-
Page 40: Overlay Setting
3-5-3 Overlay Setting You can adjust the video overlay parameters in this page. Here are the descriptions of every setup item: Item Description Enable Time Check this box to enable overlaying time stamp on Stamp video. Remove the Check this box to remove time stamp’s background color background color. -
Page 41: Audio
of the text (Text) readability of text in some cases. Enable Image Check this box to overlay a specific image on Overlay video, so you can show certain text / picture on the video and help people to identify this IP camera. -
Page 42: Motion
Here are the descriptions of every setup item: Item Description Enable Check this box to enable microphone. If you don’t Microphone want to hear voice from IP camera, you can uncheck this box to disable it. Audio Type The format is fixed as G.711 (Microphone) Microphone If the voice received by microphone is too loud or... - Page 43 Here are the descriptions of every setup item: Item Description Enable Motion Check this box to enable motion detection. Detection Enable Check this box to enable this motion detection (Window 1 to window. You can select window 1 to 3 to enable up Window 3) to 3 motion detection windows.
-
Page 44: Ptz Control (Rs-485)
(Window 1 to detection area’s title text so you can identify it. Window 3) Please note that you have to click ‘Apply’ button and the text will change. Percentage Select the percentage of pixel change that will trigger motion detection alert. Select a lower percentage and you can detect tiny changes in motion detection area. - Page 45 Here are the descriptions of every setup item: Item Description Enable RS-485 Check this box to enable RS-485 functionality. Use Pelco-D Select this option and RS-485 interface will output pan-tile control signal in Pelco-D format. This format is widely accepted by most of pan-tilt camera cradles. You have also input pan-tilt camera cradle’s address code in ‘Address’...
-
Page 46: Event
3-9 Event When there’s an event, you can use this setup page to define what IP camera should do, like send an Email or trigger digital output to activate external alarm. There are three setup pages: 1. Setting: Define a new event and manage events. 2. - Page 47 To add a new event, click ‘New’ button and the descriptions of every setup item is listed below: Item Description Enable Setting Check this box to enable this event. If you just want to disable this event temporarily, you can uncheck this box to keep this event and disabling while not deleting it.
-
Page 48: Media
Title Input any description text for this event so you can identify it quickly. You can use alphabets, numbers, and symbols include: !$-.@^_~ (no spaces allowed). Motion Check this box and this event will be activated when Detection one of motion detection window detects motion. Digital Input Check this box and this event will be activated when 1 ~ 2... -
Page 49: Event Server
Here are the descriptions of every setup item: Item Description One Snapshot Save a picture file when event is triggered. H.264 Video Save a H.264 video clip. You can also select the recording length before and / or after the time when event is triggered in ‘Pre Event’... - Page 50 A Samba server can be any computer running windows operating system with network neighbor function enabled. Many stand-alone network file server also support samba server function. Here are the descriptions of every setup item: Item Description FTP Server Check this box to enable FTP server upload. - FTP Server: Input FTP server’s IP address or hostname.
- Page 51 - Enable Passive Mode: Check this box to force IP camera to communicate with FTP server in passive mode (Some FTP Server may only work when you check this box, while others don’t). - Test FTP: Click this button to test FTP server settings above immediately.
- Page 52 - Authentication: Check this box when authentication is required by the Email server you’re using. You also need to input Email server’s username and password in corresponding field. - Requires SSL Encryption: If your Email server required SSL encryption, check this box. Please note that some Email server uses different port number than standard port 25 when SSL encryption is used.
-
Page 53: Recording To Sd Card
3-10 Recording to SD Card When a SD card is inserted into IP camera, you can save video files on it. Note: 1. Be sure that the SD Card format should be FAT32. The NTFS format cannot be supported by this camera. 2. -
Page 54: Sdhc
3-11 SDHC The IP camera module has an optional SD card slot PCBA board. The standard module does not include this board. The UI shows the capacity is 0 MB when the module without SD card slot and memory card. you need the function please check the option when you place the order of the IP camera module. - Page 55 Set the time range then click “Search” then shows the records like below.
-
Page 56: Log
3-12 Log You can check the usage log of IP camera here. In this page, you can click: 1. First page / Final page: Jump to first / final page of log. 2. Previous / Next: Jump to previous or next page of log. 3. -
Page 57: Device Info
3-13 Device Info You can check the information and network settings of this IP camera. These information are very useful when you need to repair or fix the problem of this IP camera. An example of device info page look like this:... -
Page 58: Maintenance
3-14 Maintenance You can do some maintenance job about this IP camera here. Here are the descriptions of every setup item: Item Description Reboot Click this button to reboot the IP camera. This function is useful when you find IP camera is not working properly. -
Page 59: Language
button. Restore from Restore IP camera’s configuration which is SD card device previously-saved on SD card. Upgrade Upgrade IP camera’s firmware. Click ‘Browse’ button to select a firmware image file on your computer first, then click ‘Upgrade’ button. 3-15 Language You can change the display language of web interface. -
Page 60: Chapter Iv Ediview 64-Channel Viewer
CHAPTER IV EDIVIEW 64-CHANNEL VIEWER 4-1 EdiView Installation Please follow the following instructions to setup EdiView on Windows Vista / 7 operating system. Please note: You must login as system administrator when you’re installing EdiView . 1. Locate EdiView setup file, and double-click on it to start EdiView software installation. - Page 61 2. You’ll see a User Account Control security warning message appear, click ‘Yes’ to continue. 3. Click ‘Next’ to continue. 4. Click ‘Install’ to begin installation.
- Page 62 5. ase wait while installation is being performed. This may take few minutes to done, please be patient.
- Page 63 6. The second part of installation will start automatically. 7. A new setup window will appear, please click ‘Next’ button to continue.
- Page 64 8. You can select a folder on your computer to install EdiView by clicking ‘Change’ button, or simply click ‘Next’ button directly to accept default folder. 9. Click ‘Install’ to continue.
- Page 65 10. Installation will take few minutes, please be patient. 11. Click ‘Finish’ when you see this message. EdiView is ready to use now.
- Page 66 12. MSDE (Microsoft SQL Database Engine) installation procedure will start at the same time. Please wait until it completes. 13. You’ll be prompted that this program has compatibility issues, click ‘Run program’ to continue.
-
Page 68: Ediview Interface
14. MSDE installation requires computer reboot to complete, click ‘Finish’ to reboot the computer. 15. A new icon will appear on your computer’s desktop, you can double click on it to start EdiView. 4-2 EdiView Interface To start EdiView , double-click EdiView icon on your computer’s desktop:... - Page 69 Or click ‘Start’ button of Windows, and select ‘All Programs’ -> ‘EdiView’...
- Page 70 You’ll see a User Account Control security warning message appear, click ‘Yes’ to continue. EdiView login window will appear. Default user ID is ‘admin’ and default password is ‘1234’, click ‘OK’ when ready.
- Page 71 The main window of EdiView will appear: Date/Time, Remaining disk Exit space Snapshot camera selection Camera View Function Keys Split-screen mode selector...
- Page 72 The descriptions of every item are listed as follow: Item Description Split-screen mode EdiView supports from 1 to 64 cameras split views. The selector video from IP camera will display in split-screen display cells, and you can view up to 64 IP cameras at the same time.
- Page 73 Select the file, and click ‘Open’ button to use the picture as background picture. To add a camera, right-click on the background picture and select ‘Add Camera…’ A new window will appear:...
- Page 74 Select the camera you wish to add from ‘Camera’ dropdown list, and check the box ‘Image Lost’ and / or ‘Motion Detected’ if you want to get a warning message when image lost of motion is detected, then select the direction of camera icon, this will help you to remember the orientation of camera on the EMAP.
- Page 75 Snapshot camera Here lists all IP cameras you have, select one camera selection from dropdown list for snapshot. Date / Time, Displays current date, time, and remaining disk storage Remaining Disk Space space. Exit Click this button to leave EdiView All camera’s video will displayed in ‘Camera View’...
- Page 76 bottom-right area of EdiView : The description of these items is listed as follow: Item Description Pan / Tilt control Click the direction arrow to control camera’s pan / tilt. Pan / Tilt speed Drag the slide bar to adjust the pan / tilt speed when you click pan / tilt control arrow.
-
Page 77: Configuration
4-3 Configuration Before you can use EdiView, you must configure at least 1 IP cameras. To enter configuration menu, click ‘Configuration’ button in EdiView’ main menu: The configuration menu will appear. There are 6 sub menus in the configuration menu: Device (Add or remove IP camera / video server) Recording (Configure video recording) System (Configure system-wide settings) -
Page 78: Device
4-3-1 Device You should configure at least one IP camera / video server before you can use EdiView , and you can manage all IP camera / video server here. To add a new IP camera, click ‘Add’ button:... - Page 79 IP camera setup window will appear on the right: If your IP camera is located on local area network, click ‘Search’ button. Wait for few seconds or few minutes until the search is complete, and all IP cameras found on your local area network will be listed: In this example, an IP camera has been found at IP address 192.168.2.3.
- Page 80 When an IP camera is found, you can also select it in the list and: View Image: View the live image from selected IP camera. Detail: Connect to selected IP camera’s web configuration menu. You can also select the video stream type you wish to use: Check ‘Enable Camera’...
-
Page 81: Recording
and the IP camera will be listed in EdiView and ready to use: Every IP camera has a check box, indicating if it is enabled. If a camera is not enabled, it will not be displayed in EdiView’s video view. You can also manage IP camera list by the following function: Enable All: Enable all IP cameras in the list. - Page 82 The descriptions of every item are listed as follow: Item Description Select Camera All IP camera’s Please select an IP camera from the list to setup its recording behavior. EdiView will attempt to connect to selected IP camera, if it’s not connectable, you’ll receive an error message later.
- Page 83 Use the mouse to click blocks on the grid pattern to assign the areas you wishes EdiView to detect / ignore motion. EdiView will detect motion for areas which are NOT covered by blocks only. To add or erase blocks: To add blocks, click + button;...
-
Page 84: System
without saving changes. You also have to setup sensitivity: Drag the slide bar to setup sensitivity level from 1 to 10. Larger number indicates more sensitivity. To apply this motion detection settings to all IP cameras, click ‘Apply to All Cameras’ button. When you finish setting, click ‘OK’... - Page 85 Item Description Host Name Input the host name of this computer. This will help you to identify this computer which is running EdiView on network. Camera Caption Add a text caption on camera view or not: No: Do not display caption on camera view Camera ID: Display Camera’s ID number Camera ID + Camera Name: Display both camera’s ID and camera’s name.
- Page 86 Add/Modify: You can click this button to add the drive / folder you specified above to storage space list, or select an existing storage space in the list to change its parameters then click this button to update its parameter. Remove: Select a pre-defined storage space and click this button to remove it from the list.
- Page 87 Full screen view when auto login: Switch to full screen display mode when auto login. Alarm Transmitted Send an E-mail notification with picture when e-Mail alarm is triggered (motion is detected): SMTP Server: Input the IP address or host name of SMTP server (mail server) you wish to use.
-
Page 88: Schedule
Password: Input the password used by SMTP authentication. Camera Scan Interval Input the time interval to wait between camera scan. Connection Retry Decides the behavior when EdiView lost communication with IP camera: Retry: Retry for the time you specified here. Always retry: Retry to connect to IP camera until successfully connected. - Page 90 A new window will appear on the right: You can configure a new schedule recording job here. The descriptions of every setup items are listed as follow: Item Description Weekly Schedule Select the time period in a week of this schedule.
- Page 91 To add or delete a time period, select ‘ADD’ or ‘DEL’ first, then click the time period block. Events Select the event to trigger recording: Round-The-Clock: Recording is time-activated (according to schedule). Motion Detection: Recording is motion-activated. DI Input: Recording is activated by DI (Digital Input) signal located on IP camera.
-
Page 92: Event
4-3-5 Event EdiView can send you an alarm E-Mail message so you can know something happened on the IP camera (motion detected, video lost, or connection lost). A sound can be played to notify the operator at the computer where EdiView is installed, too. To add a new event, click ‘Add’... -
Page 93: Security
Video lost: Alarm will be triggered when video server’s external camera signal is lost. Connection Lost: Alarm will be triggered when network connection to this IP camera is lost. You can select one alarm condition only here. If you want to specify more than one alarm condition for the same IP camera, Trigger Operation(s) Define the action which will be taken when... - Page 94 There are two kinds of user in EdiView: Administrator and user. Administrator can configure EdiView, while user can only view video of camera, and perform limited system configuration (schedule, record, and video playback).
- Page 95 Administrator’s user ID is always be ‘admin’ and cannot be changed. You can only change admin’s password in Administrator’s ‘Password’ and ‘Confirm Password’ field. Please input the same password in both fields for confirmation. To add a user, click ‘Add’ button, a new window will appear on the right:...
-
Page 96: Video Playback
The descriptions of every setup items are listed as follow: Item Description User ID Input the user ID used to login EdiView Description Input any descriptive text to help you to memorize the purpose of this user ID. Password / Input this user’s password in both fields. - Page 97 A new window will appear: To play a recorded video, you can use one of following two functions: Advanced Search Event Search...
-
Page 98: Advanced Search
Please refer to following chapters for detailed instructions of every search mode. 4-4-1 Advanced Search You can search for recorded video within specific time period, and get a list of record modes of all IP cameras. When you enter this menu, please specify start time and stop time:... - Page 99 Hour in a day DATE (You can input 0 - 23 in ‘Hour in a day’ field by keyboard directly). When you finish, click ‘SEARCH’ button to search for recorded video, and you’ll get a similar output like this: In this picture, a recorded video of ‘Camera 1’ has been found at 12 o’clock. A blue mark indicates it’s a ‘Round Clock’...
- Page 100 Blue: Manual Recording Green: Recording is triggered by motion Red: Recording is triggered by Digital Input To view the video, check the box of camera ID, then click play button. And the video will be prepared for playback.
-
Page 101: Event Search
4-4-2 Event Search You can search for video for playback by triggering event: round the clock, motion detection, or digital input. - Page 102 To search for video, you have to specify: 1) starting and ending time for video searching in ‘Start time’ and ‘Stop time’ field 2) Recording mode: Round Clock, Motion Detection, and I/O Mode (Digital Input). You can check all boxes you wish to search for. 3) Camera: You can check all cameras you wish to search for video.
- Page 103 Click here to select camera ID more than 17 When you finish, click ‘Search’ button to search for recorded video, and a list similar to this will appear: You can select the video clip you wish to play, and click ‘Play’ button.
-
Page 105: 4-4-3Video Playback
4-4-3Video Playback When a video is loaded, the video playback screen will look like this: Close Time Window Search / Capture Speed Control Video Playback Control Video Position Indicator The descriptions of every item are listed as follow: Item Description Close Window Click X mark to close video playback window. - Page 106 Stop video playback Start video playback Pause a playing video, click ‘Play’ to resume video playback Skip to next video frame Skip to the ending position of video clip Speed Control When video is stopped, you can click + or – button to adjust video playback speed: from 1/4 to 4x speed.
- Page 107 You can adjust image brightness / contrast by dragging corresponding slide bar, or click ‘Gray Scale’, ‘Sharpness’, ‘Soften’ to adjust image parameters. You can click ‘Save as’ button to save current image (you’ll be prompted for image saving location), or click ‘Print’ to print current image to printer.
-
Page 108: Chapter V Troubleshooting
Chapter V Troubleshooting Please don’t panic when you found this IP Camera is not working properly. Before you send this IP Camera back to us, you can do some simple checks to save your time: Problem Possible solution(s) description Can’t 1) Please check the IP address of IP Camera again. -
Page 109: Federal Communication Commission Interference Statement
Federal Communication Commission Interference Statement This equipment has been tested and found to comply with the limits for a Class B digital device, pursuant to Part 15 of FCC Rules. These limits are designed to provide reasonable protection against harmful interference in a residential installation. This equipment generates, uses, and... - Page 110 can radiate radio frequency energy and, if not installed and used in accordance with the instructions, may cause harmful interference to radio communications. However, there is no guarantee that interference will not occur in a particular installation. If this equipment does cause harmful interference to radio or television reception, which can be determined by turning the equipment off and on, the user is encouraged to try to correct the interference by one or more of the following measures:...
- Page 111 EU Countries Not Intended for Use None EU Declaration of Conformity English: This equipment is in compliance with the essential requirements and other relevant provisions of Directive 2004/108/EC. French: Cet équipement est conforme aux exigences essentielles et autres dispositions de la directive 2004/108/EC. Czechian: Toto zařízení...
- Page 112 --------------------------------------------------------------------------------------------------- -------------------- WEEE Directive & Product Disposal At the end of its serviceable life, this product should not be treated as household or general waste. It should be handed over to the applicable collection point for the recycling of electrical and electronic equipment, or returned to the supplier for disposal.
-
Page 113: Declaration Of Conformity
Declaration of Conformity We, Edimax Technology Co., Ltd., declare under our sole responsibility, that the equipment described below complies with the requirements of the European directive 2004/108/EC. Equipment: Indoor Megapixel Fixed Dome IP Camera Model No.: ND-233E Report No.: 128268R-ITCEP07V06... - Page 114 Notice According to GNU General Public License Version 2 This product includes software that is subject to the GNU General Public License version 2. The program is free software and distributed without any warranty of the author. We offer, valid for at least three years, to give you, for a charge no more than the costs of physically performing source distribution, a complete machine-readable copy of the corresponding source code.
- Page 115 Program or any derivative work under copyright law: that is to say, a work containing the Program or a portion of it, either verbatim or with modifications and/or translated into another language. (Hereinafter, translation is included without limitation in the term ‘“modification’“.) Each licensee is addressed as ‘“you’“.
- Page 116 received the program in object code or executable form with such an offer, in accord with Subsection b above.) The source code for a work means the preferred form of the work for making modifications to it. For an executable work, complete source code means all the source code for all modules it contains, plus any associated interface definition files, plus the scripts used to control compilation and installation of the executable.
- Page 117 9. The Free Software Foundation may publish revised and/or new versions of the General Public License from time to time. Such new versions will be similar in spirit to the present version, but may differ in detail to address new problems or concerns. Each version is given a distinguishing version number.