
Related Manuals for E-Mu Longboard61


Summary of Contents for E-Mu Longboard61
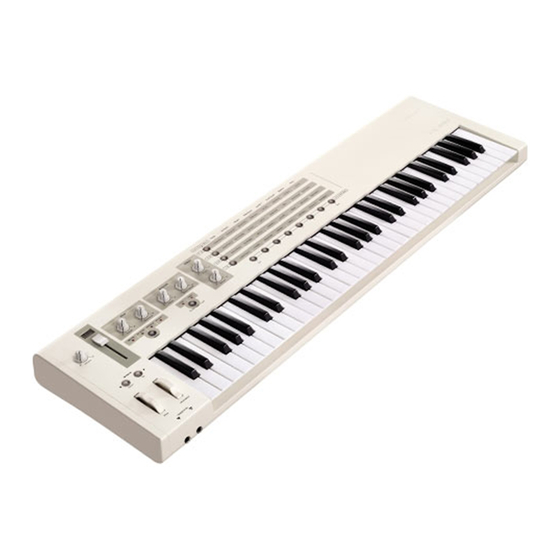
- Page 1 61-key Professional Performance Instrument 49-key Professional Performance Instrument User’s Guide...
- Page 2 Version: A E-MU World Headquarters E-MU Systems 1500 Green Hills Road Scotts Valley, CA 95066 Europe Japan Creative Labs (Ireland) Ltd. Creative Media K.K. Ballycoolin Business Park Kanda Eight Bldg. 3F Blanchardstown Dublin 15 4-6-7 Soto-Kanda IRELAND Chiyoda-ku, Tokyo 101-0021...
-
Page 3: Table Of Contents
Contents Introduction ........5 Features: . - Page 4 Rear Panel ........25 Control and Power .
-
Page 5: Introduction
INTRODUCTION Congratulations on your purchase of the E-MU LONGboard 61 or SHORTboard 49. You’ve just purchased an outstanding MIDI controller keyboard united with a 16-part multitimbral, 128-voice professional sample-based instrument and a custom 64MB sound set. LONGboard 61 or SHORTboard 49 are professional USB/MIDI instru- ment with unmatched playability, real-time control and programmability in portable 49 key, and 61 key packages. -
Page 6: Features
Features: • Velocity sensitivity and channel aftertouch • 128-voice polyphony • 16-part multitimbral synthesizer • 64 MB sound bank with 64 custom E-MU Keys programs and 128 General MIDI (GM) compatible programs • Built-in wireless E-MU PIPEline transmitter • Synthesizer controller kno bs (double as MIDI controllers) •... -
Page 7: Start Playing
START PLAYINg Your keyboard has been designed to be easy to use. Simply connect the power supply, connect headphones or your mixer/sound system, turn it on and start playing. 5VDC Adapter Two sets of stereo headphones can be connected. Power Switch Power to the keyboard is controlled using a three-position slide switch. -
Page 8: Powering Up
POWERINg UP Standalone Operation The keyboard can be powered using any of the following methods: • Via USB when connected to a computer • The included 5V @ 500mA power supply (not included) • With a USB type power supply •... -
Page 9: Basic Hardware Connections
BASIC HARDWARE CONNECTIONS Mac or PC 5VDC Adapter USB Cable (Use if not connected to computer via USB) (carrys MIDI data & power) SUSTAIN VOLUME RIGHT LEFT CH1 CH2 DC 5V SWITCH PEDAL DC IN 5V BATTERY POWER CONNECT CHANNEL MIDI OUT MIDI IN SELECT... -
Page 10: Midi Routing
MIDI ROUTINg LONGboard and SHORTboard automatically switch their MIDI connec- tions when a computer is connected to the USB port. With a computer connected there are two MIDI ports (USB Audio Devices 1 & 2 ) available on your computer. The keyboard connects to Port 1 Out and the internal sound engine. -
Page 11: Midi Path When A Computer Is Not Connected
MIDI Path when a Computer is NOT Connected With no computer connected to USB, the keyboard connects to MIDI Out and the internal sound engine. MIDI In connects to the internal sound engine. Port 1 Port 2 Keyboard MIDI MIDI LONGboard / Sound SHORTboard... -
Page 12: Wireless Audio Connection With E-Mu Pipeline
WIRELESS AUDIO CONNECTION WITH E-MU PIPEline LONGboard and SHORTboard have a built-in wireless audio transmitter compatible with the E-MU PIPEline wireless stereo audio transmitter/ receiver system. The keyboard’s transmitter operates in “paired” mode by default. Paired mode allows you to link your keyboard with one (and only one) PIPEline. - Page 13 Set the B/P switch to the (+) position (Paired mode). Set the R/T switch to the (-) position (Receive). Set the D/A switch to the (+) position (Analog). (LONGboard and SHORTboard don’t support digital mode.) Link Procedure On the Rear Panel of your Keyboard Press the Connect button.
- Page 14 Linking in Broadcasting Mode Here’s how to link your Keyboard to one or more PIPElines in Broad- casting mode. Turn on your Keyboard. Turn on your PIPEline(s), the white LED will blink. Setup Procedure Connect the Audio • Set up the PIPEline audio outputs to headphones; an audio mixer; or integrated amp and speakers.
-
Page 15: Setting Up Your Computer For Midi
SETTINg UP YOUR COMPUTER FOR MIDI The USB cable functions as a bidirectional MIDI cable, allowing you to record and playback your performance using MIDI sequencing software (not included). MIDI is a protocol consisting of data messages that are used to control synthesizers, sound modules, keyboards, or software “virtual instruments.”... -
Page 16: Front Panel Controls
FRONT PANEL CONTROLS Press & Hold to Select Different Groups Group 4 Piano Strings Pulse Piano Solina Strings TB 303/Rhodes Group 3 Honky Tonk Brass Section Synth Bass/Lead Group 2 Brite Piano Sax Section Slap/Horns Group 1 String Section Synthestring Select KEYS Column... -
Page 17: General Midi Programs
Bank 7, group 2 Programs Press and hold Group 2 button (when in E-MU Keys Bank) Wurly B3 888 3rd TB303 & OB, Juno SEM, Moog All Saws Wurly & Solina & All Out Clavinet & B3 & OBX & Squares &... - Page 18 general MIDI, group 3 Programs Press and hold Group 3 button while in General MIDI Bank. Bowed Fantasia Warm Pad Poly Synth Space Voice Metal Pad Halo Pad Sweep Pad Glass Group 3 5th Square Bass Square Synth Chiffer Saw Wave Charang Solo Vox Wave...
-
Page 19: Octave Buttons
Program MIDI Chn Velo Curve System Data Slider & Numeric Display This control is used to enter values while editing and as a performance controller while playing. You can change the function of this control by changing the CC Assign number. Octave Buttons The octave buttons transpose the keyboard up or down one octave. -
Page 20: Split Mode
Single/Split/Layer Button The keyboard can be “split” at any note to play one program on the lower section and a completely different programs on the upper section. Two sounds can also be “layered” over the entire keyboard. ► To Set the Keyboard Split Point: Press and Hold the Split button and press akey- board key to split the keyboard at a specific key. - Page 21 Synthesizer Controls These four controls allow you to modify the selected program. Turning a knob sets the parameter to the current knob position. Select the program again to restore the original setting. Cutoff � Controls the low pass filter cutoff frequency. Turning the control up allows more high frequencies to pass.
- Page 22 Saving Your Control Settings The settings of the six control knobs can be saved with the program allowing you to customize the sound set. Note: Only programs in the KEYS bank can be saved with modifications. General MIDI programs cannot be saved. Set the controls the way you want them.
- Page 23 System Menu MIDI CC - Allows you to assign MIDI Continuous Controller numbers to the data slider so it can be used as a performance control. After selecting a CC channel, the slider will send data to the internal synthesizer as well as sending MIDI CC data messages to an external MIDI synth or computer application.
-
Page 24: Volume Control
Velo Curve Selects 1 of the 8 velocity curves to customize the feel of the keyboard. When playing a velocity-sensitive sound (such as a piano), select a curve that provides the most natural response to your playing style. The selected velocity curve modifies the MIDI velocity data from the keyboard to MIDI Out and the internal sound engine. -
Page 25: Rear Panel
REAR PANEL Control and Power SUSTAIN VOLUME RIGHT LEFT DC 5V SWITCH PEDAL DC IN 9V BATTERY POWER DC Power Input Connect the supplied 5VDC @500mA power supply to this connector. You don’t need to use the 5VDC supply if the keyboard is connected via USB to your computer, or if running on battery power. - Page 26 Sustain Footswitch This jack accepts an on/off type footswitch to sustain held keys. Either a normally-open or normally-closed momentary footswitch can be used, as the polarity is automatically sensed on power-up. Control Footpedal This jack accepts a continuously variable footpedal to control the output volume.
-
Page 27: Digital Connections
Digital Connections CH1 CH2 CONNECT CHANNEL MIDI OUT MIDI IN SELECT PIPEline Link Button & Channel Selector These controls are used with the PIPEline wireless transceiver system. The keyboard functions a transmitter only. Setup: Set the channel number to match the channel set on the PIPEline receiver, then press the Link button. - Page 28 Windows XP and Vista LONGboard and SHORTboard are class-compliant devices and Windows will automatically detect and recognize them the first time you plug in the USB cable and turn the unit on. The keyboard will be listed as “USB Audio Device” in the Windows XP Control Panel, Sounds & Audio Devices, Audio, MIDI Music Playback.
- Page 29 Click the Add Device button. A new external device icon like the one shown at right appears. Double-click on the new external device if you want to set the MIDI Keyboard Properties. You have the option to name and change the icon for the device. Click Apply, then click the Close button to close the Properties window.
-
Page 30: Appendix
APPENDIX Troubleshooting Problem: Sustain pedal operation is reversed (the notes sustain when the pedal isn’t pressed and stop sustaining when the pedal is pressed). Solution: The sustain pedal polarity is sensed on power-up. Don’t press the sustain pedal during power-up or the sustain pedal operation may be reversed. - Page 31 Problem: The keyboard is connected to my computer with the USB cable, but I cannot locate the LONGboard or SHORTboard USB keyboard in my software’s MIDI devices dialog box. Solution: In Windows XP, your keyboard appears as a “USB Audio Device.” Select “USB Audio Device”...
-
Page 32: E-Mu Keys Program Chart
E-MU Keys Program Chart Grand Piano 33 CP-70 & String & Dyno Rhodes Electric Piano 34 Dyno & Strings B3 2nd Perc 35 B3 - 888 2nd & Rhodes Clavinet 1 36 Clavinet 1 & 2 Prophet 10 37 Matrix & Solina String Section 38 Solina &... -
Page 33: General Midi Program Chart
general MIDI Program Chart Piano Bass Piano 1 33 Acoustic Bass Piano 2 34 Fingered Bass Piano 3 35 Picked Bass Honky Tonk 36 Fretless Bass E.Piano 1 37 Slap Bass 1 E.Piano 2 38 Slap Bass 2 Harpsichord 39 Synth Bass 1 Clavinet GM 40 Synth Bass 2 Chomatic Percussion... - Page 34 Reed Synth Effects 65 Soprano Sax 97 Ice Rain 66 Alto Sax 98 Soundtrack 67 Tenor Sax 99 Crystal 68 Baritone Sax 100 Atmosphere 69 Oboe 101 Brightness 70 English Horn 102 Goblin 71 Bassoon 103 Echo Drops 72 Clarinet 104 Star Theme Pipe Ethnic...
-
Page 35: General Midi - Channel 10 Percussion
general MIDI - Channel 10 Percussion Select MIDI channel 10 from either bank. There are 8 GM Drum Kits. Program Drum Kit Program Drum Kit Standard Kit TR-808 Set Room Set Jazz Set Power Set Brush Set Electronic Set Orchestra Set ►... -
Page 36: General Midi Drum Map
general MIDI Drum Map (Applicable to Kits 1, 9, 17, 25, 26, 33) Key No. Sound Key No. Sound Acoustic Bass Drum Ride Cymbal 2 Bass Drum 1 Hi Bongo Side Stick Low Bongo Acoustic Snare Hi Conga Mute Hand Clap Hi Conga Slap Electric Snare Low Conga... -
Page 37: Specifications
SPECIFICATIONS general • Audio Channels: 128 • Data Encoding: 16-bit linear • Sample Playback Rate: 44.1kHz Connectivity • Audio Line Out: Left & Right 1/4” jacks • Headphone Output: (2) stereo 1/4” jacks • Footswitch • Controller Pedal Input • MIDI In, MIDI Out •... -
Page 38: Safety Information
SAFETY INFORMATION Refer to the following information to use your product safely, and to reduce the chance of electric shock, short-circuiting, damage, fire, hearing impairment or other hazards. Improper handling may void the warranty for your product. For more information, read the warranty available with your product. -
Page 39: Regulatory Information
REgULATORY INFORMATION Notice for the USA FCC Part 15: This equipment has been tested and found to comply with the limits for a Class B digital device, pursuant to Part 15 of the FCC Rules. These limits are designed to provide reasonable protection against harmful interference in a residential installation. -
Page 40: California Proposition 65 Statement
With Creative’s products, the exposure may be below the Proposition 65 level of concern, or could even be zero. However, out of an abundance of caution, Creative has elected to place the Proposition 65 warning on its products. -
Page 41: Weee Directive 2006/66/Ec
MODIFICATION: Any changes or modifications not expressly approved by Creative Technology Limited or one of its affiliated companies could void the user’s warranty and guarantee rights. -
Page 42: Weee Directive 2002/96/Ec
WEEE Directive 2002/96/EC The use of the WEEE Symbol indicates that this product may not be treated as household waste. By ensuring this product is disposed of correctly, you will help protect the environment. For more detailed information about the recycling of this product, please contact your local authority, your household waste disposal service provider or the shop where you purchased the product.