Advertisement
Quick Links
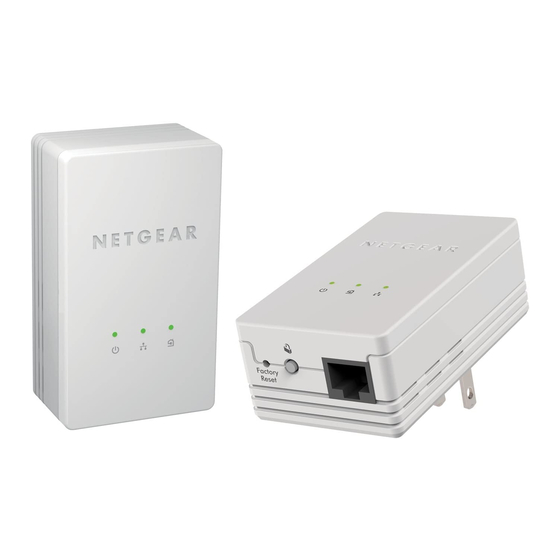
LED and Button Descriptions
Power LED
Ethernet LED
Powerline LED
Security button
Factory Reset button
Item
Description
Power
• Solid green. The electrical power is on.
LED
• Solid amber. The adapter is in power saving mode.
Power saving mode is disabled by default.
• Blinking green. The adapter is in the process of
setting up security.
• Off. There is no electrical power.
Ethernet
• Solid. The adapter is connected through the
LED
Ethernet port to a powered-on Ethernet device.
• Off. There is no Ethernet connection.
Item
Description
Powerline
• Solid. The adapter is connected to a Powerline
LED
network.
• Off. The adapter has not found any other
compatible Powerline devices using the same
encryption key.
The Pick A Plug feature lets you pick the electrical
outlet with the fastest link rate, indicated by the color of
the LED.
Green: Link
Amber: Link rate >
Red: Link
50 and < 80 Mbps
rate > 80 Mbps
rate < 50
(Fast)
(Medium)
Mbps (Slow)
Factory
Press the Reset button for 1 second, then release it to
Reset
return the Powerline adapter to its factory default
settings.
Security
After you plug in your new adapter, press the Security
Button
button for 2 seconds, then press the Security button
on one of the other adapters in your existing network
for 2 seconds. Both buttons must be pressed within 2
minutes.
To enable power saving mode, press and hold the
Security button for 10 seconds or more, then release
it. Pressing the Security button again powers the
adapter back on.
WARNING:
Do not press the Security button on the Powerline
adapter until installation is complete and the adapters are
communicating with each other (indicated by the blinking Powerline
LED). Pressing this button too soon can temporarily disable Powerline
communication. If this should occur, use the Factory Reset button to
return the Powerline adapter to its factory default settings.
Support
Thank you for selecting NETGEAR products.
After installing your device, locate the serial number on the
label of your product and use it to register your product at
https://my.netgear.com.
You must register your product before you can use NETGEAR
telephone support. NETGEAR recommends registering your
product through the NETGEAR website.
For product updates and web support, visit
http://support.netgear.com.
NETGEAR recommends that you use only the official
NETGEAR support resources.
You can get the user manual online at
http://downloadcenter.netgear.com
or through a link in the
product's user interface.
For the current EU Declaration of Conformity, visit
http://support.netgear.com/app/answers/detail/a_id/11621/.
NETGEAR, Inc.
NETGEAR, the NETGEAR logo, and Connect
with Innovation are trademarks and/or
350 East Plumeria Drive
registered trademarks of NETGEAR, Inc. and/
San Jose, CA 95134 USA
or its subsidiaries in the United States and/or
other countries. Information is subject to
change without notice. © NETGEAR, Inc. All
March 2013
rights reserved.
For indoor use only. Valid for sale in all EU
member states, EFTA states, and Switzerland.
Installation Guide
Powerline AV 200 Mini Set XAVB1301
Package Contents
Powerline
AV 200 Mini
Adapters
Ethernet
cables
Advertisement

Summary of Contents for NETGEAR Powerline AV 200
-
Page 1: Package Contents
The Pick A Plug feature lets you pick the electrical Package Contents outlet with the fastest link rate, indicated by the color of You must register your product before you can use NETGEAR Security button the LED. telephone support. NETGEAR recommends registering your product through the NETGEAR website. -
Page 2: Safety Information
Make sure that the Ethernet cables are working and securely plugged into the devices. Compatible Powerline and HomePlug AV certified devices include the NETGEAR XAV101, Press the Reset button on each device for 1 XAV1004, XAV2001, XAV2501, XAU2511, XAV2101, XAV2602, XAV1401, XAV1601 and XAVN2001....


