Panasonic AG-DVC20p Operating Instructions Manual
Agmini-dv camera/recorder
Hide thumbs
Also See for AG-DVC20p:
- Operating instructions manual (40 pages) ,
- Operating instructions manual (42 pages)

Related Manuals for Panasonic AG-DVC20p


Summary of Contents for Panasonic AG-DVC20p
-
Page 1: Operating Instructions
Operating Instructions Camera-Recorder Model No. Before operating this product, please read the instructions carefully and save this manual for future use. ENGLISH S0406T1106 -F @ Printed in Japan VQT0S55-1... - Page 2 IMPORTANT “Unauthorized recording of copyrighted television programmes, video tapes and other materials may infringe the rights of copyright holders and contravene copyright laws.” CAUTION: CAUTION THE AC RECEPTACLE (MAINS SOCKET OUTLET) RISK OF ELECTRIC SHOCK SHALL BE INSTALLED NEAR THE EQUIPMENT AND DO NOT OPEN SHALL BE EASILY ACCESSIBLE.
-
Page 3: Declaration Of Conformity
AG-DVC20P Trade Name: PANASONIC Responsible Party: Panasonic Corporation of North America One Panasonic Way, Secaucus, NJ07094 Support contact: Panasonic Broadcast & Television Systems Company 1-800-524-1448 This device complies with Part 15 of FCC Rules. Operation is subject to the following two conditions: (1) This device may not cause harmful interference, and (2) this device must accept any interference received, including interference that may cause undesired operation. -
Page 4: Important Safeguards
Important Safeguards 1. Read Instructions — All the safety and operating 9. Ventilation — Slots and openings in the cabinet are instructions should be read before the unit is provided for ventilation and to ensure reliable operated. operation of the video unit and to protect it from overheating. - Page 5 Important Safeguards (continued) 13. Outdoor Antenna Grounding — If an outside 17. Objects and Liquids — Never push objects of any antenna or cable system is connected to the video kind into this video unit through openings as they unit, be sure the antenna or cable system is may touch dangerous voltage points or short out grounded so as to provide some protection against parts that could result in a fire or electric shock.
-
Page 6: Table Of Contents
Contents Important Safeguards ............4 Playback mode Playing back tape ............. 26 Before using Slow-motion playback/frame-by-frame playback ....26 Variable-speed search function ........27 Standard Accessories............7 Playback on TV..............27 Optional Accessories ............7 Parts identification and handling......... 7 Lens cap and grip belt ............ -
Page 7: Before Using
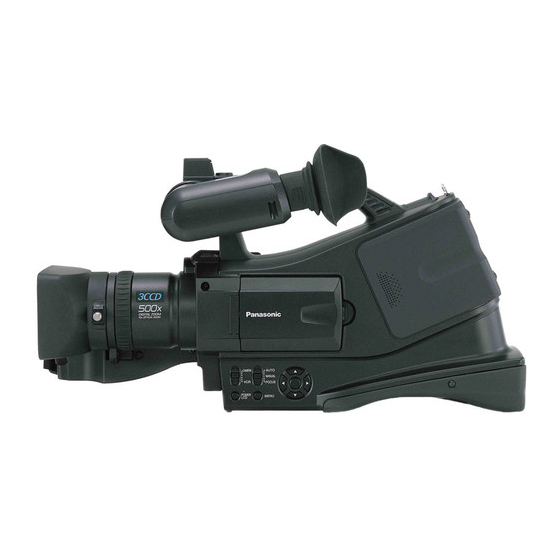
Before using Before using Parts identification and handling Standard Accessories ª Camera The followings are the accessories supplied with this product. (6) (7) (10) CAMERA AUTO MANUAL FOCUS POWER MENU (11) (12) Focus ring -25- White balance sensor -24- Recording lamp -32- 1) AC adapter, DC input lead, AC mains lead -10-... - Page 8 Before using (13) (25) (26) (27) (18) (14) (15) (28) (19) (16) (29) (17) (13) Eyecup (30) (31) (32) (33) -38- (14) Viewfinder -10- -38- (25) Shoulder strap holders (26) Sub zoom lever [W/T] -20- -26- Due to limitations in LCD production (27) Sub recording start/stop button -19-...
-
Page 9: Lens Cap And Grip Belt
Before using Lens cap and grip belt Attaching the shoulder strap We recommend that you attach the shoulder strap before going ª Attach the lens cap out of doors to record so as to avoid dropping the camera- To protect the lens surface, attach the lens cap. recorder. -
Page 10: Using The Viewfinder
Charge the battery before using this product. ≥Battery charging time ( -11- ≥We recommend using Panasonic batteries. ≥If you use other batteries, we cannot guarantee the quality of this product. ≥If the DC input lead is connected to the AC adapter, then the battery will not get charged. -
Page 11: Charging Time And Recordable Time
Before using ª Fitting the battery Charging time and recordable time Push the battery against the battery holder and slide it until it The times shown in the table below show the times at a clicks. temperature of 25 oC (77 oF) and a humidity of 60%. This is just a guide. -
Page 12: Inserting/Removing A Cassette
Before using ª Inserting/removing a cassette Inserting/removing the cassette ≥When the cassette holder is in action, do not touch anything Slide the [OPEN/EJECT] lever and open the cassette except the [PUSH] mark. cover. ≥When inserting a previously recorded cassette, use the blank search function to find the position where you want to continue recording. -
Page 13: Turning The Camera On
Before using Turning the camera on Using the screen display When the camera is turned on with the lens cap fitted, the Press the [ENTER] button at the center of cursor buttons, and automatic white balance adjustment may not function properly. icons will be displayed on the screen. -
Page 14: Switching The Language
Before using Switching the language Press the [3] or [4] button in order to select the item to be set. You can switch the language on the screen display or the menu screen. Set [LANGUAGE] >> select the desired language. Press the [ENTER] button to determine the setting. -
Page 15: Setting Date And Time
Before using Setting date and time Adjusting LCD monitor/viewfinder If the screen shows the incorrect date/time, then adjust it. ª Adjusting the brightness and color level ≥Set to Tape Recording Mode. Set [SETUP] >> [LCD SET] or [EVF SET] >> [YES]. Set [BASIC] >>... -
Page 16: Using The Remote Control
Before using ª Using the remote control Install a coin-type battery Install the coin-type battery supplied in the remote control ª Remote control before using it. While pressing the stopper 1, pull out the battery Using the remote control supplied will enable controlling almost all the functions of this camera to be controlled. - Page 17 Before using ª Selecting the remote control mode If 2 cameras are used simultaneously, set the mode for one pair of camera-recorder and remote control to [VCR1] and that of the other pair to [VCR2]. This will prevent interference between the 2 pairs.
-
Page 18: Record Mode
Record mode Record mode For more stable pictures. Check before recording Check the following by trying recording before important events such as weddings in order to verify that the image recording and audio recording work properly and that you know how to use the camera-recorder. -
Page 19: Recording On A Tape
≥We recommend using the SP mode for important recording. ≥In order to fully exhibit the performances of the LP mode, we recommend using Panasonic cassettes marked LP mode. ≥It is not possible to dub audio onto image recorded in the LP 1) Recording time elapse mode. -
Page 20: Zoom In/Out Function
Record mode Zoom in/out function Adjusting the Microphone Sensitivity Level You can zoom in up to 10koptically. You can adjust the microphone sensitivity for recording. ≥Set to Tape Recording Mode. Set [ADVANCE] >> [MIC LEVEL] >> [AUTO], [SETrAGC] Wide-angle recording (zoom out): or [SET]. -
Page 21: Recording Yourself
Record mode Recording yourself Night view functions You can record yourself while viewing the LCD monitor. You This function allows you to record color subjects in dark can record persons in front of the camera while presenting locations to stand out against the background. them the image. -
Page 22: Soft Skin Mode
Record mode Soft skin mode Fade in/fade out function This allows the skin color to be recorded in a softer tone. This is Fade in more effective if you record the bust image of a person. The image and audio gradually appear. ≥Set to Tape Recording Mode. -
Page 23: Recording Images For Wide-Screen Tvs
Record mode Recording images for wide-screen TVs Recording in various situations (Scene mode) This allows you to record images compatible with wide-screen When you record images in different situations, this mode TVs. automatically sets optimum shutter speeds and apertures. ≥Set to Tape Recording Mode. Cinema Function Images are recorded with a black belt appearing along the top Set the [AUTO/MANUAL/FOCUS] switch to [MANUAL]. -
Page 24: Recording In Natural Colors (White Balance)
Record mode ª Recording in natural colors (White balance) About the white balance sensor The white balance sensor detects the type of light source The automatic white balance function may not reproduce during recording. natural colors depending on the scenes or lighting conditions. If ≥Do not cover the white balance sensor during recording, or it so, you can adjust the white balance manually. -
Page 25: Manual Focus Adjustment
Record mode Manual focus adjustment Manual shutter speed/aperture adjustment If auto focusing is difficult due to the conditions, then manual Shutter Speed focusing is available. Adjust it when recording fast-moving subjects. ≥Set to Tape Recording Mode. Aperture Set the [AUTO/MANUAL/FOCUS] switch to [MANUAL]. Adjust it when the screen is too bright or too dark. -
Page 26: Playback Mode
Playback mode Playback mode Slow-motion playback/frame-by-frame playback Playing back tape ≥Set to Tape Playback Mode. (Slow-motion playback can ≥Set to Tape Playback Mode. only be performed by using the remote control.) Slow-motion playback If the image is recorded in the SP mode, then it will be played back at a speed approx. -
Page 27: Variable-Speed Search Function
Playback mode Variable-speed search function Playback on TV The speed of cue/review playback can be varied. Images recorded by this camera-recorder can be played back (This operation is only available when using the remote on a TV. ≥Insert a recorded tape into this camera-recorder. control.) ≥Set to Tape Playback Mode and play back a tape. -
Page 28: Edit Mode
Edit mode ≥For more information, refer to the operating instructions for Edit mode your TV set and recorder. Copying onto a DVD recorder or a VCR ≥When you do not need functional indications or date and time (Dubbing) indications, press the [OSD] button on the remote control for no indication. -
Page 29: Using The Dv Cable For Recording (Digital Dubbing)
Edit mode Using the DV Cable for Recording You can connect a digital video unit equipped with a DV connector and digitally transfer video and audio signals as well (Digital Dubbing) as time code. By connecting other digital video equipment with DV terminal ≥Before proceeding to connect or disconnect DV (IEEE1394) and the camera-recorder by using the DV cable (optional) 1, cable, be absolutely sure to turn off the power of the units. -
Page 30: Audio Dubbing
Edit mode ª Audio dubbing Before recording with audio dubbing ≥Set to Tape Recording Mode. You can add music or narration to the recorded cassette. ≥When you want to preserve the original sound taken during ≥Set to Tape Playback Mode. recording, set [SETUP] >>... -
Page 31: Menu
Menu ª Menu [TAPE PLAYBACK MENU] Menu list Menu figures and illustrations are provided for easy-to-understand explanations, and so they are different from the actual menu indications. ª [TAPE RECORDING MENU] 1) [BASIC] [DATE/TIME] -32- 2) [ADVANCE] [BLANK SEARCH] -19- [REC SPEED] -19- [REC STDBY]... -
Page 32: Menus Related To Taking Pictures
Menu Menus related to taking pictures Menus related to playback ª [DATE/TIME] ª [REC DATA] This switches between date and time indications. Set to [ON] and the settings (shutter speed, iris/gain values, ≥The camera-recorder automatically records the date and time and white balance settings ( ), etc.) used during the -24-... -
Page 33: Others
Others Others Warning/alarm indications If any one of the following indications lights up or flashes, Indications please check the camera-recorder. Various functions and the camera-recorder status are shown on Confirmatory indications the screen. Y: A cassette with the accidental erasure prevention slider Basic indications placed in the [SAVE] position is inserted. -
Page 34: Functions Cannot Be Used Simultaneously
Others Functions cannot be used simultaneously Before requesting repair (Problems and solutions) Some functions in the camera-recorder are disabled or cannot be selected due to its specifications. The table below shows Power/Body examples of functions restricted by conditions. 1: The camera-recorder power cannot be turned on. •... - Page 35 Others Recording Playback (Sound) 1: Recording does not start although power is supplied to 1: Sound is not played back from the built-in speaker of the the camera-recorder and the cassette is correctly camera-recorder or the headphones. 0 Is the volume too low? During playback, push the [W/T] lever inserted.
-
Page 36: Cautions For Use
Others Others Cautions for Use 1: The indication disappears, the screen is frozen, or no operation can be performed. ª About condensation • Turn off the power to the camera-recorder. If the power If you turn the camera-recorder on when condensation occurs cannot be turned off, press the [RESET] button, or detach on the head or the tape, condensation Indication [3] (yellow the battery or AC adapter and then reattach it. - Page 37 Others When normal playback cannot be performed even after the Do not use benzine, paint thinner or alcohol for cleaning head cleaning the camera-recorder. ≥Before cleaning, detach the battery or pull out the AC mains One possible cause is that normal recording could not be performed because the heads were dirty at the time of lead from the AC mains socket.
- Page 38 Others ª Do not throw old battery into fire. LCD monitor/viewfinder ≥Heating a battery or throwing it into a fire may result in an LCD monitor ≥When the LCD monitor gets dirty, wipe it with a dry soft cloth. explosion. ≥If the operating time is very short even after the battery has ≥In a place with drastic temperature changes, condensation been recharged, the battery has worn out.
-
Page 39: Explanation Of Terms
Others ª Explanation of terms White balance The image recorded by the camera-recorder may become ª Automatic white balance bluish or reddish under the influence of light sources. To avoid White balance adjustment recognizes the color of light and such phenomena, adjust the white balance. adjusts so the white color will become a pure white. -
Page 40: Specifications
Specifications Specifications AC adapter Specifications Power source: AC 110/120/220/240 V, 50/60 Hz, 18 w Camera-Recorder DC OUT: 8.4 V, 1.2 A (CHARGE) 7.8 V, 1.4 A (VTR) Power source: DC 7.9/7.2 V Power consumption: indicates safety information. 3.2 W (When the viewfinder is used) 3.4 W (When the LCD monitor is used) Dimensions (W 6.3 W (Maximum) - Page 41 Memo...
- Page 42 Panasonic Broadcast & Television Systems Company Unit Company of Panasonic Corporation of North America Executive Office: One Panasonic Way 4E-7, Secaucus, NJ 07094 (201) 348-7000 EASTERN ZONE: One Panasonic Way 4E-7, Secaucus, NJ 07094 (201) 348-7196 Southeast Region: (201) 348-7162 WESTERN ZONE: 3330 Cahuenga Blvd W., Los Angeles, CA 90068 (323) 436-3500...