Table of Contents
Advertisement
Quick Links
Advertisement
Table of Contents

Related Manuals for Gateway DC-T60


Summary of Contents for Gateway DC-T60
-
Page 1: User Guide
User Guide Gateway DC-T60 Digital Camera Version 1.0... -
Page 3: Table Of Contents
Checking out your Gateway DC-T60 digital camera ... . 1 Product features ........2 Package contents . - Page 4 Contacting Gateway ........76...
-
Page 5: Checking Out Your Gateway Dc-T60 Digital Camera
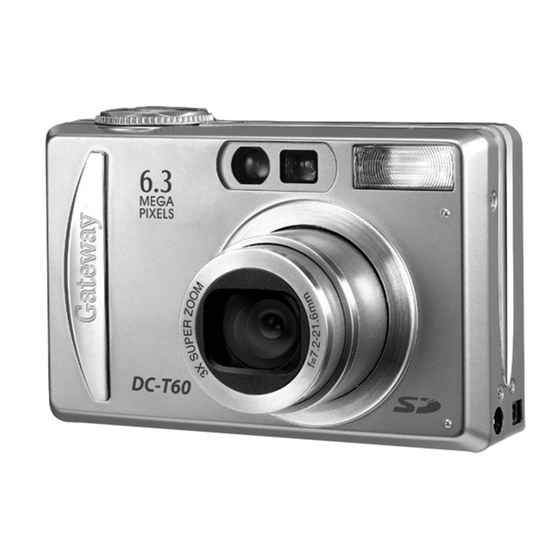
Checking out your Gateway DC-T60 digital camera Your new digital camera uses a 6.3 megapixel charged-coupled device (CCD) imager to produce high quality pictures with as high as 2816 x 2112 picture resolution. You can compose and view pictures through the optical viewfinder or on the 2.0” color LCD, then view the pictures on the 2.0”... -
Page 6: Product Features
Product features ■ The 2.0" color LCD makes it easy to compose your subject – for pictures and video clips. It also displays images that you have taken. ■ Recording medium 512 MB. ■ Camera mode camera to your preferences and take photographs according to the photographic conditions. -
Page 7: Package Contents
■ Quick start guide and user guide ■ USB cable ■ A/V cable ■ DC-T60 software CD with Windows 98SE USB driver, SimpleStar™ PhotoShow software, and .PDF user guides. ■ Camera wrist strap Operating system support ■ Windows XP ■... -
Page 8: Front
Front Shutter button Mode dial Component Mode dial Shutter button Power button Self-timer LED/ Auto focus LED Optical viewfinder Built-in flash Lens/Auto lens cover Self-timer LED/Auto Focus LED Power button Optical viewfinder Lens/Auto lens cover Description Lets you select Photography, Playback, and SET-UP camera modes. -
Page 9: Mode Dial
Mode dial Aperture priority Shutter speed priority Program mode Auto mode Playback mode Component Aperture priority Manual mode Portrait mode Sports mode Night scene mode Movie mode SET-UP SET-UP mode PC mode Playback mode Auto mode Program mode Shutter speed priority Manual mode Portrait mode... -
Page 10: Back
Back Diopter adjustment dial Component Diopter adjustment dial Viewfinder Viewfinder LED Zoom button Menu MENU button Speaker Delete button Display button Viewfinder Viewfinder LED Icon Description Lets you adjust the focus for the viewfinder window. This does not effect the picture focus. Lets you frame the picture. -
Page 11: Navigation/Set Buttons
Component Navigation buttons SET button Navigation/Set buttons Set button Exposure compensation/ backlight correction/ Navigate left button Component Set button Auto focus button Navigate up button Flash setting button Navigate right button Self-timer button Navigate down button Exposure compensation/ backlight correction button Navigate left button Icon... -
Page 12: Bottom
Bottom Component Battery/memory card compartment Tripod socket Sides Search dial Component Search dial Wrist strap eyelet DC IN 5V connector USB connector A/V Out connector Battery/ Memory card compartment Tripod socket Description Lets you access the camera battery and memory card. -
Page 13: Learning The Basics
Learning the basics Connecting the wrist strap Attach the wrist strap to carry the camera and help prevent the camera from dropping and getting damaged. To connect the wrist strap: Find the wrist strap that came with your camera. Thread the small looped end of the wrist strap through the wrist strap eyelet on your camera. -
Page 14: Installing The Battery
Installing the battery Caution Tips & Tricks To install the battery: If the camera is turned on, press and release the the top of your camera to turn off the camera. Slide the battery/memory card compartment cover open. Push the battery lock lever to the side, then insert the battery into your camera. -
Page 15: Connecting The Ac Power Adapter
Release the battery lock lever. The battery ejects slightly from the battery compartment. Remove the battery. Important Connecting the AC power adapter Use the AC power adapter to: ■ Charge the Lithium-ion rechargeable battery ■ Power your camera while recharging the battery ■... -
Page 16: Installing The Secure Digital (Sd) Memory Card
Installing the Secure Digital (SD) memory card Your camera comes with a 32 MB or larger SD memory card to store still pictures and video clips. The memory card stores the image files whether the camera is turned on or off. You can copy the files to a computer and delete the files from the memory card to free-up space for new pictures. -
Page 17: Turning On Your Camera
Tips & Tricks Turning on your camera To turn on your camera: ■ Press and hold the about one second. The LED momentarily turns green, then orange, then the LED turns off when the camera turns on. Tips & Tricks Tips &... -
Page 18: Setting The Date And Time
Setting the date and time Set the date and time the first time you use your camera or when you turn on your camera after leaving the battery out of the camera for an extended period of time. To set the date and time: Turn the camera on. - Page 19 To take your first picture: With the camera power turned on, set the mode dial to Auto mode Use the LCD to compose your picture. Frame the subject with the zoom buttons. Press the shutter button halfway down to automatically focus the image.
-
Page 20: Viewing Pictures On The Lcd
Press and release the turn off the camera. For more information about picture modes and options, see “Taking pictures” on page 20 and see “Using picture modes” on page 33. Viewing pictures on the LCD After you have taken your first picture you can view it on your camera’s LCD. -
Page 21: Recording Your First Movie
Recording your first movie The Movie mode Sound is also recorded with the video clip. Use the LCD to compose the video. Tips & Tricks Tips & Tricks To shoot your first video clip: With the camera power turned on, turn the mode dial to the Movie mode Use the LCD to compose your video clip. -
Page 22: Viewing Movies On The Lcd
Viewing movies on the LCD Use the Playback mode To view video clips on the LCD: With the camera power turned on, turn the mode dial to the Playback mode The last video clip you recorded is displayed on the LCD. Press the clip. -
Page 23: Deleting Pictures And Movies
Deleting pictures and movies You can erase the last picture or movie you took with the Quick Delete feature. To delete a picture or movie in the Quick Delete mode: With the camera power turned on, turn the mode dial to one of the photography modes. -
Page 24: Using Your Camera
Using your camera Taking pictures Your camera is equipped with both an optical viewfinder and a 2.0” full-color LCD to compose pictures. The LCD helps you accurately compose pictures. However, the LCD uses battery power when it is turned on. You can use the optical viewfinder to conserve battery power. - Page 25 Tips & Tricks To use the viewfinder to take pictures: Turn the camera on. See “Turning on your camera” on page 13. Turn the mode dial to a photography mode. If the LCD is turned on, press the button to turn off the LCD. Press the button one or more times, until appears.
-
Page 26: Understanding The Viewfinder Led
Understanding the viewfinder LED The viewfinder LED changes color depending on what mode you are in and what the status of the camera is. Color State Green Flashing Orange Flashing Viewfinder LED Power off Photography mode modes Battery Auto focus charging in successful and progress... -
Page 27: Lcd Information
LCD information Important Photography modes The following information appears on the LCD when you are in photography modes: Auto mode , Night scene mode Mode icon Focus icon White balance icon Metering icon Focus area Backlight correction icon Unsteady hold warning icon The following LCD information is representative of information that may be displayed in the various... -
Page 28: Movie Mode
The following information appears on the LCD when you are in photography modes: Program mode , Aperture priority mode Mode icon Focus icon White balance icon Metering icon Focus area Exposure compensation Unsteady hold warning icon Movie mode The following information appears on the LCD when you are in Movie mode Mode icon Focus icon... -
Page 29: Playback Modes
Playback modes The following information appears on the LCD when you are in picture Playback mode Mode icon The following information appears on the LCD when you are in video Playback mode Total time Play mode Folder Voice Protect number memo icon icon... -
Page 30: Setting The Focus
Setting the focus You can set the camera to focus on subjects with auto focus, macro focus, fixed at 1 meter. If you change the Focus mode, the camera retains the focus settings when the camera is turned off. The focus settings, however, are limited to the capabilities of the selected photography mode. -
Page 31: Using The Flash
For Auto mode , Aperture priority mode or Movie mode [No icon] Auto focus For Portrait mode [No icon] Auto focus Compose the picture. Press the shutter button down halfway to focus the image. The viewfinder LED turns green to indicate that the subject is in focus. - Page 32 The camera has four Flash modes: Icon Flash mode Auto flash Red-eye reduction Forced flash Suppressed flash Tips & Tricks Tips & Tricks Description The flash fires automatically according to the ambient lighting conditions. Auto flash only works in the Auto mode Select this mode for general photography.
-
Page 33: Setting The Picture Size And Quality
To change the flash settings: Turn the camera on. See “Turning on your camera” on page 13. Turn the mode dial to one of the photography modes. Press the button one or more times, until the icon for the setting you want to use is displayed below the battery icon on the right corner of the LCD: [No icon] Auto... -
Page 34: Determining The Number Of Pictures
Higher resolution and higher quality pictures offer the best photographic quality but produce larger image file sizes. Because of this, fewer pictures fit on a memory card. Use high resolution and high quality settings for pictures that you plan to print and for situations that require the finest detail. -
Page 35: Using The Zoom Feature
Press the button. The picture quality options are displayed. Press the then press the Press the Menu Using the zoom feature The optical zoom lets you take telephoto and wide-angle pictures. You can also enlarge pictures as much as 3 times the normal size using the optical zoom. - Page 36 Press the compose the picture: ■ Press the the subject on the LCD for a more close-up picture. The zoom status meter indicates the settings for the digital and optical zoom. Optical zoom:1x to 3x ■ Press the wider angle picture. Focus the camera and take the picture.
-
Page 37: Using Picture Modes
Use the the picture: ■ Press the the subject on the LCD for a more close-up picture. The zoom status meter indicates the settings for the digital and optical zoom. Optical zoom:1x to 3x ■ Press the wider angle picture. Focus the camera and take the picture. -
Page 38: Taking Pictures In The Auto Mode
Taking pictures in the Auto mode The Auto mode for your pictures. In Auto mode setting, focus, flash (if required), white balance, and system metering method are fully controlled by your camera. You compose the pictures and let your camera take care of the rest. To take pictures in the Auto mode Turn the camera on. -
Page 39: Taking Pictures In The Shutter Speed Priority Mode
Taking pictures in the Shutter speed priority mode When you take pictures in the Shutter speed priority mode ( camera gives priority to the shutter speed. The camera automatically sets the aperture value based on the shutter speed setting. When you set the camera to a fast shutter speed, moving subjects appear still in the picture. -
Page 40: Taking Pictures In The Aperture Priority Mode
Compose the picture. Focus the camera and take the picture. See “Setting the focus” on page 26. Taking pictures in the Aperture priority mode When you take pictures in the Aperture priority mode ( camera gives priority to the aperture setting. The camera automatically sets the shutter speed based on the aperture setting. -
Page 41: Taking Pictures In The Manual Mode
■ If the shutter speed value is displayed in white the exposure setting is correct for a picture. ■ If the combined aperture and shutter speed setting does not provide enough light for a good picture exposure, the shutter speed value is displayed in red. -
Page 42: Taking Pictures In A Scene Mode
slower shutter speed or smaller aperture value. The shutter speed and corresponding aperture setting are displayed on the LCD. ■ If the shutter speed or aperture value is displayed in white, the exposure setting is correct for a picture. ■ If the combined aperture and shutter speed setting does not provide enough... -
Page 43: Using Advanced Viewing Features
To take pictures in the Scene mode: Turn the camera on. See “Turning on your camera” on page 13. Turn the mode dial to one of the photography Scene modes: Portrait mode Compose the picture. Focus the camera and take the picture. See “Setting the focus” on page 26. - Page 44 Tips & Tricks To rotate pictures on the LCD: ■ In the Playback mode ■ Press the picture 90° counter-clockwise. ■ Press the picture 90° clockwise. To view thumbnail images: In the Playback mode button. The images are displayed as thumbnail views.
-
Page 45: Recording And Adding Voice Memos To A Picture
■ Press the the picture at 2x the normal size. While in zoom view, the green frame indicates what part of the picture you are viewing. ■ Press the the picture at 4x the normal size. While in zoom view, the green frame indicates what part of the picture you are viewing. -
Page 46: Listening To A Voice Memo
Press the highlight the Function tab. Press the highlight Voice Memo button. The Voice Memo options are displayed. Press the , then press the Press the Menu Tips & Tricks To add a voice memo to a picture in Playback mode: While viewing pictures in the Playback mode shutter button down all the way to... -
Page 47: Deleting Images
Deleting images You can delete the last image you took in the Playback mode To delete images in the Playback mode: Turn the camera on. See “Turning on your camera” on page 13. Turn the mode dial to the Playback mode The last image you took is displayed on the LCD. -
Page 48: Using Advanced Features
Using advanced features Using the self-timer You can use the camera’s self-timer before a picture is taken. You can also set the camera to take pictures in intervals to create a time-lapsed series of pictures. The camera has four self-timer modes: Icon Self-timer mode... -
Page 49: Adding Printing Information On The Sd Memory Card
To set the self-timer: Turn the camera on. See “Turning on your camera” on page 13. Turn the mode dial to one of the photography modes. Press the mode. Press the Self-timer more times, until the icon for the self-timer setting you want to use is displayed. -
Page 50: Lightening Or Darkening The Overall Picture Brightness
To select images for printing on a DPOF enabled printer: Turn the camera on. See “Turning on your camera” on page 13. Turn the mode dial to the Playback mode The last image you took is displayed on the LCD. View the image that you want to print with the camera’s DPOF feature. - Page 51 Use Exposure compensation/Backlight correction settings when the difference in brightness between the subject and the background subject is not well balanced. Also use this feature when the subject occupies only a small part of the picture composition and the contrast between the subject and the rest of the picture varies significantly.
- Page 52 Press the compensation or Backlight correction modes. Press the button one or more times, until the icon for the exposure compensation/backlight setting you want to use is displayed: [No icon] Auto If you selected the Backlight correction mode Step 6. If you selected the Exposure compensation mode exposure value with the search dial: ■...
-
Page 53: Protecting Files On Your Sd Memory Card
Protecting files on your SD memory card You can “lock” your memory card so images (files) on the card are read-only and cannot be deleted. Use this mode if you want to prevent erasing important images by mistake. Important To protect images: Turn the camera on. - Page 54 If you highlighted the to highlight indicates the image is locked. - OR - If you highlighted the navigation buttons to select a picture thumbnail view, then press button. The Locked mode icon locked. You can select additional thumbnail pictures to protect while in this mode.
-
Page 55: Formatting Sd Memory Cards
If you highlighted the to highlight unlocked image is displayed without the Locked mode icon - OR - If you highlighted the navigation buttons to select a picture thumbnail view, then press button. The Locked mode icon the image is unlocked. You can select additional thumbnail pictures to cancel image protection while in this mode. -
Page 56: Using The Setup Menus
Press the , then press the Execute OK message appears to indicate that the memory card is formatted. Using the Setup menus Your camera features Setup menus that lets you adjust, optimize, and change preset camera settings to your own customized preferences. After you adjust the settings, the changes are saved so the next time you use your camera they will continue to be in effect. -
Page 57: Menu Options
To use the Setup menu in Photography mode: Turn the camera on. See “Turning on your camera” on page 13. Turn the mode dial to one of the photography modes Press the Menu menu opens. Press the / to select menus and menu options. Press the button to adjust and select menu options. - Page 58 Setup menu Photography menu/ Function tab Description Contrast Sets the difference between bright and dark areas of pictures. Hard – Increases contrast Normal – Sets contrast automatically Soft – Decreases the contrast Color Sets the color preferences for pictures. Standard – Standard color Vivid –...
- Page 59 Setup menu Description LCD Brightness Sets the LCD brightness level. The LCD brightness adjustments range from -5 to +5. Press the button to brighten the LCD. Press the button to darken the LCD. Digital Zoom Sets the camera to take digital zoom pictures as much as 4 times the optical zoom capabilities.
- Page 60 Setup menu Photography menu/ AE/AWB tab Description Interval/Count Sets the camera to automatically take pictures at a fixed time interval for a set number of cycles. Press the buttons to change the interval settings. 1 Min. – Records pictures in 1 minute intervals. 3 Min.
- Page 61 Setup menu Description Metering Sets the camera light metering method for calculating the exposure. Multi – Measures the entire image area to calculate the picture exposure. Spot – Measures a small portion of the center of the image area to calculate the picture exposure. Sets the camera’s sensitivity to the lighting conditions.
- Page 62 To use the Setup menu in Playback mode: Turn the camera on. See “Turning on your camera” on page 13. Turn the mode dial to the Playback mode The last image you took is displayed on the LCD. Press the Menu opens.
- Page 63 Setup menu To use the Setup menu in SET-UP mode: Turn the camera on. See “Turning on your camera” on page 13. Turn the mode dial to the The Basic tab opens. Press the buttons to select menus and menu options.
- Page 64 Setup menu SET-UP menu/Basic tab Description Card Info. Provides information about the memory card size and the remaining available memory on the memory card. Fr. No. Reset Sets the camera to record pictures to a newly created folder starting with 0001. Cancel –...
- Page 65 Setup menu SET-UP menu/Custom tab Description Auto Off Turns off the camera after it has not been used for a specified period of time. This feature saves battery power and reduces battery wear. 1 Min. – Turns camera off after 1 minute of inactivity. 2 Min.
- Page 66 Setup menu Description Video Output Sets the video output format for the video equipment you are going to connect the camera to. NTSC – National Television System Committee (NTSC) system (used in North America) PAL – Phase Alternating Line (PAL) system (used in most European countries) System Info.
-
Page 67: Connecting Your Camera
Gateway DC-T60 Digital Camera software CD. If you use Windows 98SE as the operating system on your computer, install the Windows 98SE USB driver from the Gateway DC-T60 Digital Camera software CD. Windows XP, Windows 2000, and Windows ME operating systems do not require additional USB driver software. - Page 68 software” on page 63. Windows XP, Windows 2000, and Windows ME operating systems do not require additional driver software. Tips & Tricks To connect and transfer files from your camera to your computer using SimpleStar PhotoShow*: If you are using Windows 98SE, make sure that you have installed the USB device driver for the camera.
- Page 69 Connect the small square end of the USB cable to the camera’s A/V Out port, then connect the other end of the cable to your computer. Turn the camera on. A message tells you that new hardware was found. Turn the mode dial to message tells you that new pictures have been detected on a removable drive.
- Page 70 To transfer files from your camera to your computer using My Computer: If you are using Windows 98SE, make sure that you have installed the USB device driver for the camera. For more information, see “To install the Windows 98SE USB driver:” on page 63.
- Page 71 Click Start My Computer camera appears as a Removable Disk drive (drive letter E: or higher). Double-click the camera’s drive letter, double-click the folder, then double-click a sub-folder. The folder opens. DCIM . The My Computer window opens and the...
- Page 72 Click the file or folder you want to copy (press and hold the button when you click to select multiple files or folders), HIFT then right-click your selection. A menu opens. Click Copy Open the destination folder where you want to copy your pictures.
-
Page 73: Connecting To Your Tv And Viewing Pictures
Right-click inside the destination folder. A menu opens. Click . A copy of the file or folder appears in the new folder Paste location. Connecting to your TV and viewing pictures You can connect your camera to a TV to view the pictures that are on your camera’s memory card. - Page 74 Connect the A/V cable’s yellow RCA type connector to the yellow Video In jack on your TV. Connect the A/V cable’s white RCA type connector to the white Audio In jack on your TV. Turn the camera on. Turn the mode dial to the Playback mode Use the same controls on the camera to view images on a TV as you use to view pictures and video clips on the camera’s LCD.
-
Page 75: Frequently Asked Questions (Faqs)
■ Use rechargeable Lithium-ion batteries in your Gateway DC-T60 camera. Rechargeable batteries often get up to two times as many pictures on a fresh charge, so make sure your batteries are fully charged before taking a lot of pictures. -
Page 76: Using
: Why is there a delay when taking a picture with my digital camera? : There is a delay while the digital camera auto focuses on the subject. The camera also analyzes whether the flash is required and changes other automatic settings. There are other factors that can contribute to this delay. - Page 77 AC power adapter if available. : Can I use my AC adapter for the DC-T60 camera in other countries? : The AC adapter (US type) accepts voltages between 100 to 240 volts, 50/60 Hz.
-
Page 78: Terms
8 x 10 Larger than 8 x 10 : Should I have any concerns about putting my digital camera through the X-ray machines at the airport? : No, there is no evidence that putting your camera through an X-ray machine causes any harm. - Page 79 Similarly, a digital camera's CCD has a certain number of pixels that it is capable of capturing. The pixels are then stored on the camera’s memory card and later transferred to your computer. A camera with 1,000,000 pixels is a one megapixel camera.
-
Page 80: Contacting Gateway
Contacting Gateway Internet support For camera hardware support and information, go to the Gateway Support Web site at support.gateway.com. For camera software support for SimpleStar PhotoShow, go to the SimpleStar Web site at simplestar.com. Telephone support Talk to a Gateway Technical Support representative about a non-tutorial technical support question at 1-888-737-6949. -
Page 81: Specifications
Specifications Product specifications are subject to change without notice. Item Image sensor Image resolution Viewfinder Image quality Recording medium Compression format Image file format Lens Focus range Auto-focus Shutter speed Image capturing Digital zoom Metering system Exposure Exposure compensation White balance Flash Flash effective range ISO sensitivity... -
Page 82: Safety, Regulatory, And Legal Information
Do not place your camera on an unstable cart, stand, or table. To reduce the risk of electric shock, do not modify your camera or open the case. There are no user-serviceable parts inside. Opening the case voids the warranty. If your camera needs service, contact Gateway at: support.gateway.com... -
Page 83: Regulatory Compliance Statements
If such changes or modifications are be made, you could be required to stop operating the equipment. FCC declaration of conformity Responsible party: Gateway Companies, Inc. 610 Gateway Drive, North Sioux City, SD 57049 (605) 232-2000 Fax: (605) 232-2023 Product: ■ DC-T60 Digital Camera... -
Page 84: Trademark Acknowledgments
The information in this manual has been carefully checked and is believed to be accurate. However, changes are made periodically. These changes are incorporated in newer publication editions. Gateway may improve and/or change products described in this publication at any time. Due to continuing system improvements, Gateway is not responsible for inaccurate information which may appear in this manual. - Page 85 My Computer 66 transferring files with PhotoShow 64 connecting AC power adapter 11 camera to TV 2, 8, 69 USB cable to computer 65 connector A/V out 2, 8, 69 AC power 8 contacting Gateway 76 controls movie playback 18...
- Page 86 date setting 14, 61 DC IN connector 8 delete button 6, 19, 43 deleting files 6, 19, 43 movies 19 pictures from thumbnail views 43 video clips 19 digital zoom compared to optical zoom 74 turning on and off 55 using 32 diopter dial focusing viewfinder with 6...
- Page 87 viewing thumbnails 40 infinity mode focal distance 26 installing battery 10 Windows 98SE USB driver 63 ISO settings 57 language menu options 61 adjusting brightness 59 composing pictures with 20 conserving power 71 information 23 setting preview preferences 55 turning on and off 6 viewing movies on 18, 39 viewing pictures on 2, 7, 16 auto focus 4...
- Page 88 NTSC video output 62 operating system support MAC OS 9.0 and later 3 Windows 2000 3 Windows 98SE 3 Windows ME 3 Windows XP 3 optical zoom 31, 74 video output 62 PC mode 5, 22 photography menu 52, 53 modes 22, 23 picture capture mode 54...
- Page 89 taking night pictures 5, 38 taking portrait pictures 5, 38 taking sports pictures 5, 38 search dial setting 8 viewing pictures 8 viewing video frames 18 Secure Digital memory card 12 self-timer button 7 LED 4 mode 2 setting 45 using 44 SET button 7 setting picture quality 29...
- Page 90 Computer 66 to computer using PhotoShow 64 using PC mode 5 tripod socket 8 troubleshooting PC mode 73 turning on voice memos 54 TV mode shutter speed priority setting 5, 33, 35 connecting cable 65 driver for Windows 98SE 63 FAQs 73 port location 8 using...
- Page 92 Printed in China MAN T60 DIG CAM USR GDE R0 3/04...