Table of Contents
Advertisement
Quick Links
Advertisement
Table of Contents

Related Manuals for IBM T220


Summary of Contents for IBM T220
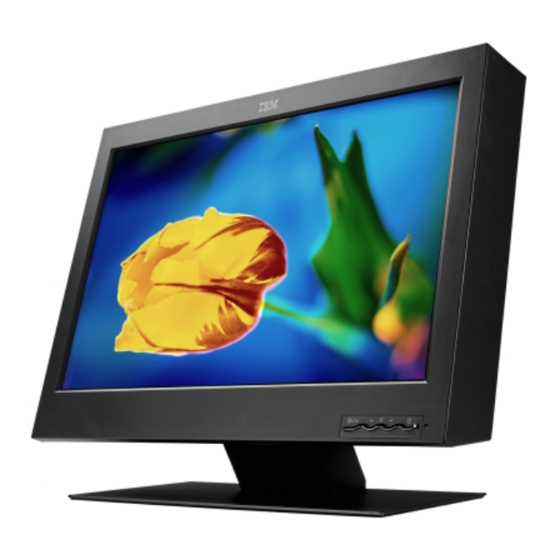
- Page 1 T220 Flat-Panel Monitor User’s Guide...
- Page 3 DANGER To avoid shock hazard: Do not remove the covers. Do not operate this product unless the stand is attached. Do not connect or disconnect this product during an electrical storm. The power cord plug must be connected to a properly wired and grounded power outlet.
- Page 4 Das Netzkabel ist an eine ordnungsgemäß verdrahtete und geerdete Steckdose anzuschließen. Jedes Gerät, mit dem dieses Produkt verbunden wird, muß ebenfalls an eine ordnungsgemäß verdrahtete und geerdete Steckdose angeschlossen werden. Um den Monitor von der Stromversorgung zu trennen, muß der Stecker aus der Steckdose gezogen werden.
- Page 5 Para aislar el monitor del suministro eléctrico, debe retirar el enchufe de la toma de alimentación. Esta toma deberá ser de fácil acceso. Movimentazione del monitor: Il monitor a colori è pesante, si consiglia quindi di maneggiarlo con attenzione. IBM raccomanda che il monitor venga mosso o sollevato da due persone.
- Page 6 FARE Sådan undgår du elektrisk stød: Kabinettet må under ingen omstændigheder fjernes. Undgå at anvende dette produkt, uden at vippe/drejefoden er monteret. Undgå at tilslutte eller frakoble dette produkt i tordenvejr. Netledningen skal være tilsluttet en korrekt jordet stikkontakt med korrekt ledningsføring. Alt udstyr, som tilsluttes dette produkt, skal også...
- Page 7 Hantering: Färgskärmen är tung och bör därför hanteras försiktigt. IBM rekommenderar att den flyttas eller lyfts av två personer. VAARA Sähköiskun vaaran välttämiseksi: Älä avaa laitteen kansia missään tilanteessa. Älä käytä laitetta, ellei jalustaa ole kiinnitetty. Älä kytke laitetta pistorasiaan tai irrota sitä pistorasiasta ukonilman aikana.
- Page 8 TEHLIKE Elektrik carpmasi tehlikesinden kacinmak icin: · Kapaklari cikarmayiniz. · Bu cihazi kaidesine takili durumda degilken calistirmayiniz. · Bu cihazi elektriksel firtina sirasinda prize takmayiniz veya prizden cikarmayiniz. · Elektrik kablosunun fisi, elektrik ve toprak baglantilari usulune uygun olarak yapilmis bir prize takilmalidir. ·...
- Page 10 VIII...
- Page 14 · · · · · · ·...
- Page 15 DANGER Electric current from the power cords, telephone lines and communication cables is hazardous. To avoid shock hazard, connect and disconnect cables as shown below when installing, moving, or opening the covers of this product or attached devices. The power cord must be used with a properly grounded outlet. Connect the power plugs to mains outlets located in the same panel.
- Page 16 First Edition (June 2001) The following paragraph does not apply to the United Kingdom or any country where such provisions are inconsistent with local law: INTERNATIONAL BUSINESS MACHINES CORPORATION PROVIDES THIS PUBLICATION “AS IS” WITHOUT WARRANTY OF ANY KIND, EITHER EXPRESS OR IMPLIED, INCLUDING, BUT NOT LIMITED TO, THE IMPLIED WARRANTIES OF MERCHANTABILITY OR FITNESS FOR A PARTICULAR PURPOSE.
-
Page 17: Lcd Considerations
Notices Attention v Do not exert strong pressure to the surface of the monitor screen. You may break the LCD panel. v Do not place heavy objects on top of this product. They may damage the monitor. v Do not touch the monitor screen with your fingers. Fingerprints and oil stains may remain on the screen surface. - Page 18 IBM may have patents or pending patent applications covering subject matter in this document. The furnishing of this document does not give you any license to these patents. You can send license inquiries, in writing, to: IBM Director of Licensing IBM Corporation North Castle Drive Armonk, NY 10504-1785...
-
Page 19: Table Of Contents
Contents Notices ......iii Attention ......iii LCD considerations . - Page 20 Statements for Other Countries ....43 Power Cord ......44 MPRII .
-
Page 21: Chapter 1. Before Setting Up
Chapter 1. Before setting up This guide contains information on how to set up and operate the IBM 9503 T220 Flat-Panel Monitor, hereafter called the monitor. This chapter describes the following: v Prerequisites v Unpacking v Checking parts Prerequisites You will need a personal computer or a workstation with: 1. -
Page 22: Checking Parts
Checking parts Check the box for the following items. If any items are missing or damaged, contact your place of purchase immediately. h Monitor h User’s Guide (This book) h Power adapter x 2 h Digital signal cable x 2 h Power cord x 2 (P/N: 07N1218, P/N: 07N1219) h Matrox video graphics card... -
Page 23: Chapter 2. Installing The Matrox Video Graphics Card
Chapter 2. Installing the Matrox video graphics card This chapter describes how to install your Matrox video graphics card. Notes: 1. Make sure that Windows 2000 Professional is installed in your personal computer or workstation. 2. Make sure that your personal computer or workstation has enough power to drive the Matrox video graphics card. - Page 24 6. Install the Matrox video graphics card firmly into the PCI slot, and tighten the screws. Attention: Inserting your Matrox video graphics card into a slot other than a PCI slot can damage your card, your computer, or both. 7. Close the computer cover.
-
Page 25: Chapter 3. Hardware Setup
Chapter 3. Hardware setup This chapter describes the following: v The placement of the controls, switches, and connectors. v The procedure for connecting the digital signal cable to the monitor and then to a personal computer or workstation. v The procedure for connecting the monitor to a power outlet. Locations Front view Rear view... -
Page 26: Connecting The Video Cables
Connecting the video cables 1. Clear a workspace, and turn the monitor face down on it. Attention: v Be careful not to pinch your fingers between the monitor and the surface when tilting the monitor. v Remove any objects from the surface. They might damage your screen. 2. - Page 27 3. Remove the connector cover. Connector cover Base stand 4. Connect the end of the digital signal cable marked A to the video connector marked A on the monitor, and tighten the screws. Do the same for the B markings. Attention: Be careful not to pinch your fingers when connecting the connectors.
- Page 28 5. Hook the digital signal cables to the cable clamps. Cable clamp 6. Turn off your personal computer or workstation and all attached devices. 7. Open the cover of your personal computer or workstation, if necessary. 8. Connect the end of the digital signal cable marked #1/#2 to the the video graphics card connector marked #1/#2 on your personal computer or workstation, and tighten the screws.
- Page 29 Note: The illustration below shows a conceptual view of the screen divided into four partitions and the cable connections. Each partition consists of 960 horizontal picture elements (pixels) and 2400 vertical pixels. The entire screen therefore contains 9,216,000 pixels (3840 x 2400). Chapter 3.
-
Page 30: Connecting The Power Cords
Connecting the power cords 1. Connect one end of the power adapter to the DC-IN connector. Do the same for the other power adapter. 2. Pass the two power adapter cords around the bracket and around the cable hook. - Page 31 3. Reinstall the connector cover on the monitor. 4. Reinstall the stand rear cover. 5. Connect the end of each power cord to its power adapter. Chapter 3. Hardware setup...
- Page 32 6. Connect the other end of each power cord to a correctly grounded ac power source. 7. Turn the monitor on by pressing the power switch. The power light comes on. Notes: a. When you turn off the monitor, wait at least five seconds before turning it on again.
-
Page 33: Chapter 4. Software Setup
Chapter 4. Software setup This chapter describes how to install the display driver in your personal computer or workstation. To install the display driver, do the following: 1. Power on the personal computer or workstation. The following screen appears. Press the F8 key while the operation bar is displayed. The Windows Extended Option menu appears. - Page 34 appears: Note: The Setup program setup.exe is installed in the Win2K folder. 4. Select English on the menu, and click Next. The following menu appears: 5. Matrox G200 Multi-Monitor appears four times on the display. Select all four entries and click Next. The following menu appears:...
- Page 35 6. Confirm the settings, and click Next. The Digital Signature Not Found menu appears: 7. Click Yes. The menu reappears. Do the same thing three more times, until the following menu appears: 8. Click Next. The Matrox PowerDesk Setup menu appears: Chapter 4.
- Page 36 9. Check the Restart my computer... box, and click Finish. The Windows system restarts, and the following screen reappears. Press the F8 key while the operation bar is displayed. The Windows Extended Option menu reappears. 10. Select Make VGA Mode Effective, using the up and down arrow keys, and press the Enter key.
- Page 37 11. Click the right mouse button from any area on the Windows desktop, and select Properties. The Display menu’s Background tab menu appears. Chapter 4. Software setup...
- Page 38 12. Click the Settings tab. The Settings tab menu appears. Select Partition 1 in the menu and set its color to True Color (24 bit) and the screen area to 960 x 2400; then click OK. The menu remains. 13. Select Partition 2 in the menu, and also set the color to True Color (24 bit) and the screen area to 960 x 2400.
- Page 39 14. Select Start on the bottom menu bar, and select Restart. The following prompt appears: 15. Select Restart, and click OK. 16. Click Yes. The system restarts, and the Windows desktop reappears. 17. Open any application and drag it across the screen partitions. If you can drag the screen, your display driver has been installed successfully.
-
Page 41: Chapter 5. Adjusting And Maintaining Your Monitor
Chapter 5. Adjusting and maintaining your monitor This chapter describes the following: v How to adjust the viewing angle. v How to adjust the brightness. v How to use the security keylock. v The operating status of your monitor. v How to maintain your monitor. Adjusting the viewing angle You can adjust the vertical angle of the monitor to avoid unnecessary light reflection and to make viewing easier. -
Page 42: Knowing The Operating Status Of Your Monitor
Knowing the operating status of your monitor You can know the status of your monitor by the color of the power light. Color Status Green The monitor power is on. Amber The monitor is in Standby mode to save power, or the video cable is not connected. -
Page 43: Maintaining Your Monitor
Also, refer to “Rear view” on page 5 for the location of the keyhole. Note: You are responsible for evaluating, selecting, and implementing the lock. IBM makes no comments, judgements, or warranties about the function, quality, or performance of the lock. Maintaining your monitor Before cleaning or performing any maintenance operation on your monitor, be sure to turn off the power on your monitor and personal computer or workstation. -
Page 45: Chapter 6. Troubleshooting
Chapter 6. Troubleshooting Is something wrong? If you suspect something is not working correctly, you should: 1. Turn on the computer and monitor. 2. Set the brightness control ( ) to the proper position. 3. Make sure that all cables are securely connected. 4. -
Page 46: Warranty Information
LCD defect. Warranty information Machine Name: IBM T220 Flat-Panel Monitor (M/T 9503) Warranty Period: Three (3) Years See the IBM Statement of Limited Warranty included in this publication for IBM’s warranty terms and conditions. The IBM Machine Warranty worldwide Web site at http://www-1.ibm.com/servers/support/machine_warranties/... - Page 47 7. Operating system and version number 8. Display driver version number If possible, stay by your computer system. Your technical support representative might want to go through the problem with you during the call. Chapter 6. Troubleshooting...
-
Page 49: Appendix A. Specifications
Appendix A. Specifications The specifications of the monitor are as follows: Dimensions Width: 547 mm (21.5 in.) Height: 437 mm (17.2 in.) Depth: 196 mm (7.7 in.) Weight Unpackaged: With base stand: 11 kg (25 lb) Power adapter x 2: 310 g (10.9 oz.) Tilt Angle: −5°... -
Page 51: Appendix B. Field-Replaceable Units (Frus)
Appendix B. Field–Replaceable Units (FRUs) FPU part number Part number Monitor (IBM 9503) 07N2190 07N1200 Power adapter 07N2187 02K6654 Digital signal cable 07N1246 07N1218, 07N1219 Video graphics card 07N1244 07N1241 Base stand 07N2194 07N1230... -
Page 53: Appendix C. Ibm Statement Of Limited Warranty
Appendix C. IBM Statement of Limited Warranty Part 1 - General terms This Statement of Limited Warranty includes Part 1 - General Terms and Part 2 - Country-unique Terms. The terms of Part 2 replace or modify those of Part 1. The warranties provided by IBM in this Statement of Limited Warranty apply only to Machines you purchase for your use, and not for resale, from IBM or your reseller. - Page 54 During the warranty period, IBM or your reseller, if approved by IBM to provide warranty service, provides without charge certain types of repair and exchange service to keep Machines in, or restore them to, conformance with their Specifications. IBM or your reseller will inform you of the available types of service for a Machine based on its country of installation.
-
Page 55: Part 2 - Country-Unique Terms
2. the amount of any other actual direct damages, up to the charges (if recurring, 12 months’ charges apply) for the Machine that is subject of the claim. For purposes of this item, the term ″Machine″ includes Machine Code and Licensed Internal Code. - Page 56 Where IBM is in breach of a condition or warranty implied by the Trade Practices Act 1974 or other similar legislation, IBM’s liability is limited to the repair or replacement of the goods or the supply of equivalent goods. Where that condition or warranty relates to right to sell, quiet possession or clear title, or the goods are of a kind ordinarily acquired for personal, domestic or household use or consumption, then none of the limitations in this paragraph apply.
- Page 57 NEW ZEALAND The IBM Warranty for Machines: The following paragraph is added to this Section: The warranties specified in this Section are in addition to any rights you may have under the Consumer Guarantees Act 1993 or other legislation which cannot be excluded or limited.
- Page 58 authorized service provider. You are responsible for transportation costs for Machines located outside 50 kilometers of an IBM authorized service provider. Governing Law: The applicable laws, that govern, interpret and enforce rights, duties, and obligations of each of us arising from, or relating in any manner to, the subject matter of this Statement, without regard to conflict of laws principles, as well as Country-unique terms and competent court for this Statement, are those of the country in which the warranty service is being provided , except that 1) in Albania,...
- Page 59 EGYPT Limitation of Liability: The following replaces item 2 in this Section: as to any other actual direct damages, IBM’s liability will be limited to the total amount you paid for the Machine that is the subject of the claim. For purposes of this item, the term ″Machine″...
- Page 60 UNITED KINGDOM Limitation of Liability: The following replaces items 1 and 2 of the first paragraph of this Section: 1. death or personal injury or physical damage to your real property solely caused by IBM’s negligence; 2. the amount of any other actual direct damages, up to 125 percent of the charges (if recurring, the 12 months’...
-
Page 61: Appendix D. Compliance
Appendix D. Compliance Federal Communications Commission (FCC) Statement IBM T220 Flat-Panel Monitor (M/T 9503) This equipment has been tested and found to comply with the limits for a Class A digital device, pursuant to Part 15 of the FCC Rules. These limits are designed to provide reasonable protection against harmful interference when the equipment is operated in a commercial environment. -
Page 62: European Union - Emc Directive
(Auszug aus dem EMVG vom 9.Nov.92, Para.3. Abs.4) Hinweis: Dieses Genehmigungsverfahren ist von der Deutschen Bundespost noch nicht veröffentlicht worden. European Union – EMC Directive This product is in conformity with the protection requirements of the EU Council Directive 89/366/ECC on the approximation of the laws of the Member States relating to electromagnetic compatibility. -
Page 63: Unione Europea - Directiva Emc (Conformidad Électromagnética)
Le prove effettuate sul presente prodotto hanno accertato che esso rientra nei limiti stabiliti per le le apparecchiature di informatica Classe A ai sensi del CISPR 22/Norma Europea EN 55022. I limiti delle apparecchiature della Classe A sono stati stabiliti al fine di fornire ragionevole protezione da interferenze mediante dispositivi di comunicazione in concessione in ambienti commerciali ed industriali. -
Page 64: Power Cord
Power Cord For your safety, IBM provides a power cord with a grounded attachment plug to use with this IBM product. To avoid electrical shock, always use the power cord and plug with a properly grounded power outlet. IBM power cords used in the United States and Canada are listed by the Underwriter’s Laboratories (UL) and certified by the Canadian Standards Association (CSA). -
Page 65: Mprii
76H3528 Liechtenstein, Switzerland 76H3530 Chile, Ethiopia, Italy, Libya 76H3532 Israel 76H3535 Korea 76H3526 Japan MPRII This product complies with Swedish National Council for Metrology (MPR) standards issued in December 1999 (MPRII) for very low frequency (VLF) and extremely low frequency (ELF) emissions. Hinweise Gemäβ... - Page 68 Printed in Japan...