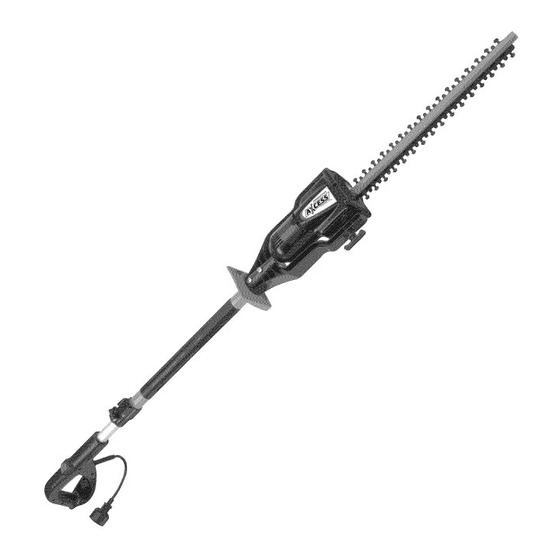
Remington Axcess Trimmer RM3017HP Owner's Manual
Electric pole trimmer
Hide thumbs
Also See for Axcess Trimmer RM3017HP:
- Owner's manual (42 pages) ,
- Owner's manual (44 pages)
Table of Contents
Advertisement
Available languages
Available languages
Quick Links
Download this manual
See also:
Owner's Manual
Advertisement
Chapters
Table of Contents

Related Manuals for Remington Axcess Trimmer RM3017HP


Summary of Contents for Remington Axcess Trimmer RM3017HP
- Page 1 ® Electric Pole Trimmer ER'S MODEL: RM3017HP iMPORTANT: Read and understand this manual before assembling operating this Pole Trimmer. improper use of Pole Trimmer can cause severe injury or death. Keep this manual for future reference. 769-08508 / O0 10/12...
- Page 3 Please call the Customer Support Department or visit our website for assistance: Llame al Departamento de Atenci6n al Cliente o visite nuestro sitio Web para soHcitar asistencia: Pour obtenir de I'aide, veuiliez appeler le service a la clientele ou visitez notre site web U.S.
-
Page 4: Table Of Contents
All information, illustrations and specifications in this manual are based on the latest product information available at the time of printing. We reserve the right to make changes at any time without notice. Copyright© 2012 MTD SOUTHWEST INC, All Rights Reserved. -
Page 5: Important Safety Information
iMPORTANT SAFETY iNFORMATiON ;AFETY WARNINGS WHILE OPERATING POLE Always wear eye protection that meets TRIMMER or exceeds the requirements of ANSI Z87.1. _lb WARNING: When using electric Stay Alert- Watch what you are doing. Use common sense. PoleTrimmers, basic safety precau- Use only electrical voltage noted on tions should always be followed... -
Page 6: Maintenance And Storage
iMPORTANT SAFETY iNFORMATiON MAINTENANCE AND STORAGE UNPACKING To reduce the risk of electric shock, the POLE TRIMMER Pole Trimmer has a polarized plug (one Remove Pole Trimlner m_dall other items blade is wider than the other) and will Maintain Pole Trimmer With Care from box. -
Page 7: Product Identification
PRODUCT iDENTiFiCATiON Cutter Blade Pivoting Power Head Hand Guard T-Handle Bracket Forward Grip Trigger Lock Button Cam-Levered Collet Trigger Lever Trigger Housing Power Cord Extension Cord Retainer... -
Page 8: Operating Trimmer
OPERATING POLE TRIMMER Keep cord away from cutting area. Make £t 4Bk WARNING: Read and sure cord does not catch on branches dur- derstand this owner's manual ing cutting. Inspect cord often. Replace before operating Pole Trimmer. damaged cords. Make certain you read and un- CONNECTING EXTENSION CORD derstand... -
Page 9: Starting Pole Trimmer
OPERATING POLE TRIMMER ADJUSTING POLE LENGTH Trigger Lock Button Position 2 The Remington brand Pole Trimmer has a telescoping pole assembly that has an ex- tendable range of 10 inches. A cam levered collet is used to hold the pole in position at any extended length. -
Page 10: Operating Positions
OPERATING POLE TRIMMER USING THE POLE TRIMMER TRiMMiNG A HEDGE To use the Pole Trimmer for trimming bottoms and sides of hedges and shrubs,hold The Pole Trimmer is a dual-purpose tool. It is Use the Pole Trimmer properly. Always the Pole Trimmer at the positions shown in designed to triln and shape t_dl, hard-to-reach... -
Page 11: Maintenance And Cleaning
MAINTENANCE AND CLEANING SERViCiNG POLE TRIMMER BLADE REPLACEMENT Remove screw that holds down cutter blade assembly (see Figure 18). IM- The Pole Trimmer is a double-insulated tool PORTANT" Be sure not to loose the WARNING: To prevent serious and contains some parts that can only be re- 8-32 locknut that secures this screw. -
Page 12: Troubleshooting
TROUBLESHOOTING WARNING: Unplug Pole Trimmer from power source before servicing. Severe injury or death could occur from Nre, electrical shock, or body contact with moving blades. Note: Fc,_addmonal help, visLtwww.remingtonpowertools.com. does Motor squeeze 1. Trigger lock button not pressed to release 1. -
Page 13: Warranty Information
WARRANTY iNFORMATiON MANUFACTURER'S LiMiTED WARRANTY FOR: The limited warranty set forth below is given by Remington LLC ("Remington") with respect with new merchandise purchased and used in the United States, its possessions and territories. Remington warrants this product against defects in material and workmanship for a period of two (2) years commencing on the date of original purchase and will, at its option, repair or replace, free of charge,... - Page 14 OTES/NOTAS...
- Page 15 ® ,® El_ctrica Podadora Pertiga ANUAL DEL PROPIETARIO iViODELO: RM3017HP llVlPORTANTE: Lea y entienda este manual antes de ensamblar u operar esta podadora de pertiga. El uso inadecuado de esta podadora puede ocasionar graves lesiones o la muerte. Guarde este manual para futura referencia.
- Page 16 Nos reservamos el derecho de hacer cambios en cualquier momento sin previo aviso. Copyright© 2012 MTD SOUTHWEST INC. Todos los derechos reservados.
-
Page 17: Inforivlacion Llvlportante De Seguridad
INFORIViACION IMPORTANTE DE SEGURIDAD . Use siempre guantes de goma y l0. Ponga protecci6n GFCI (Cortacircuitos _lb ADVERTENCIA: Cuando use calzado robusto cuando trabaje a la de falla a tierra) en el circuito o toma podadoras el_ctricas de pertiga, intemperie. que va usarse con la podadora. -
Page 18: Mantenimiento Y Almacenaje De La Podadora De Pertiga
INFORIViACION IMPORTANTE DE SEGURIDAD MANTENIMIENTO Y ALMACENAJE eldctrica, la podadora de pdrtiga tiene _IL PRECAUCION - Las cuchillas DE LA PODADORA DE Pt_RTIGA un enchufe polarizado (una cuchilla continean moviendose despues es mils ancha que la otra) y deberfi Mantenga la podadora de pertiga de apagado. -
Page 19: Identifioacion Del Produoto
IDENTIFICACION DEL PRODUCTO Cuchilla cortante ro,oo,o ,o, Agarradera frontal Bot6n de bloqueo gatillo Collar de palanca de leva Carcasa palanca del del gatillo gatillo alimentaci6n Retenedor del cord6n extensi6n... -
Page 20: Operaoion De La Podadora
OPERACION DE LA PODADORA Agarre la carcasa del motor de la cabeza Longitud Calibre AWG _,ADVERTENCIA: Antes de ope- de potencia y gire la cabeza de potencia del cord6n del cord6n rat la podadora de pertiga lea y a la posicidn de 0, 45 o 90 grades. entienda este manual.Aseg_rese 25 pies 18 AWG... -
Page 21: Arranque De La Podadora De Pertiga
OPERACION DE LA PODADORA ARRANQUE DE LA PODADORA Botdn de 'ueo del PIeRTIGA gatillo en la La podadora de pdrtiga tiene un botdn de bloqueo del gatillo ubicado en la parte superior del mango. Esta caracter_stica seguridad bloquea el gatillo en la posicidn OFF, evitando que la podadora de pdrtiga... -
Page 22: Regulaci6N De La Iongitud De La Pertiga
OPERACION DE LA PODADORA POSICIONES DE OPERACKSN REGULACION DE LA Si usa la podadora de pdrtiga para podar la parte inferior y lateral de setos y arbustos, LONGITUD DE LA PI_RTIGA Para usar la podadora de pdrtiga para podar sostengalapodadoraenlaposici6nmostrada setos y arbustos altos dif_ciles de alcanzar, La podadora de pdrtiga de la marca de Re- en la Figura 13. -
Page 23: Podado Deun Seto
OPERACl6N DE LA PODADORA PODADO DEUN SETO No fuerce 1a podadora de pdrtiga en vegetacidn densa. Un movimiento ligero de corte hacia Use correctamente la podadora de pdrtiga. atrfis y adelante puede ayudar el corte de Use siempre proteccidn visual, guantes vegetacidn densa y grande. -
Page 24: Manteniivllentoy Lllvlpieza
MANTENIMIENTO Y LIMPIEZA REEMPLAZO DE LA CUCHILLA SERVICIO A LA Retire el tomillo que sostiene al con- PODADORA DE PERTIGA junto cuchilla de corte (yea la Figura ADVERTENCIA: Para evitar 18). IMPORTANTE: Estd seguro de no La podadora de pdrtiga es una herramienta de perder la contratuerca 8-32 que asegura iesiones personaies graves, use... -
Page 25: Anallsls De Averias
ANALISIS DE AVER[AS _lL ADVERTENC[A: antes de dar servicio a la podadora de p&tiga descon6ctela de la fuente de alimenta- ci6n. Pueden ocurrir graves lesiones o la muerte por incendio, sacudida el6ctrica o contacto del cuerpo con partes m6viles. i N°ta:P'u'L_'btener'Lyud'L'Ld'ci_-'md'qs'teWww'remingt°np°wert°°is'c°m" E1 motor no functona cuando se aprieta 1. -
Page 26: Inforivlacion De Garantia
INFORMACION DE GARANTJA GARANTJA LIMITADA DEL FABRICANTE PARA: Remington LLC concede la garantia limitada establecida debajo para mercancias nuevas que sean compradas y usadas en los Estados Unidos, sue posesiones y territorios. Remington LLC garantiza este producto contra defectos en el material y la mano de obra durante un perlodo de dos (2) amos, a partir de la fecha de compra original y a su entera discreci6n, arreglara o substituira sin costo alguno cualquier pieza cuyo material o mano de obra se considere defectuoso. - Page 27 OTES/NOTAS...
- Page 28 ® Taille-Haie Perche I_lectrique A iViODi_LE" RM3017HP iMPORTANT : Vous devez lire et comprendre ce guide avant d'assembler ou d'utiliser ce taille-haie a perche. Toute utilisation non appropriee taille-haie peut entrai'ner de graves blessures, voire le deces. Conservez ce guide pour reference.
- Page 29 & I'impression de ce guide. Nous nous r6servons le droit d'effectuer des modifications & tout moment sans notification pr6alable. Copyright© 2012 MTD SOUTHWEST INC, Tous droits r6serv6s.
-
Page 30: Consignes De S¢:Curit¢: Importantes
CONSIGNES DE SI CURITE IMPORTANTES CONSIGNES DE S¢:CURIT¢: , Portez toujours des gants de caout- l0. Utilisez toujours un circuit ou une prise chouc et de solides chaussures lors- dlectrique dotde d'un disjoncteur de fuite de terre. A cet eft)t, vous pouvez que vous travaillez _ l'extdrieur. -
Page 31: Entretien Et Entreposage
CONSIGNES DE SECURITE IMPORTANTES N'appuyez pas sur le taille=haie Utilisez seulement des pisces de re- DEBALLAGE change identiques lorsque vous faites = L'appareil fonctionnera beaucoup Retirez le taille-haie _ perche et tousles l'entretien du taille-haie _tperche. mieux avec moins de risque de blessure articles de l'emballage. -
Page 32: Identification Du Produit
iDENTiFiCATiON DU PRODUIT Lame Moteur pivotant Protege-main Poign6e en T Suppo# Commutateur verrouillage Poign6e Bride avec levier came Bo#ier de G&chet_ g&chette Cordon 61ectrique D_posi#fdere_nue dela raflonge... -
Page 33: Utilisation Du Taille=Haie
iDENTiFiCATiON DU PRODUIT RALLONGE €:LECTRIQUE _lb AVERTISSEMENT : Lisez le Vous devez utiliser une rallonge dlectrique guide du propri6taire et assu- appropride avec le taille-haie _ perche. Uti- rez-vous de bien le comprendre lisez seulement des rallonges congues pour avant de vous servir du taille=haie l' utilisation extdrieure. -
Page 34: R6Glage De La Iongueur De La Perche
UTILISATION DU TAILLE-HAIE DI_MARRAGE DU TAILLE-HAIE Bouton de verrouillage Faites une boucle dans la rallonge, puis la g&chette - Position insdrez-la ?ttravers la partie infdrieure PERCHE de la poignde. Faites ensuite passer la Le taille-haie _t perche est dotd d'un bou- boucle dans le crochet mould dans la ton de verrouillage de la g_'tchette sur le... -
Page 35: Positions De Fonctionnement
UTILISATION DU TAILLE-HAIE RC:GLAGE DE LA LONGUEUR POSiTiONS DE FONCTIONNEMENT Pour vous servir du taille-haie _tperche pour tailler la partie infdrieure et les c6tds des haies DE LA PERCHE Pour vous servir du taille-haie h perche et des buissons, tenez le taille-haie dans la pour tailler des grandes haies ou de grands... -
Page 36: Taille D'une Haie
UTILISATION DU TAILLE-HAIE TAILLE D'UNE HAlE Faites de grands mouvements uniformes Si le taille-haie venait _tse bloquer, arretez-le immddiatement. Ddbranchez le taille-haie de va-et-vient pour couper les nouvelles Vous devez vous servir correctement pousses. N'essayez pas d'en tailler une de l'alimentation dlectrique, puis retirez les taille-haie h perche. -
Page 37: Entretien Et Nettoyage
ENTRETIEN ET NETTOYAGE ENTRETIEN DU TAILLE-HAIE .&. REMPLACEMENT DES LAMES Enlevez la vis qui retient l'ensemble de la l_ne (voir la Figure 18).IMPORTANT: PERCHE MISE EN GARDE : Pour eviter Assurez-vous de ne pas desserrer le Le taille-haie h perche est un outil h double contre-dcrou 8-32 qui fixe cette vis. -
Page 38: Dc:pannage
DEPANNAGE AVERT[SSEMENT : D6branchez le taiHe-haie a perche de la source d'alimentation avant d'en faire I'entretien. De graves blessures, voire le d6ces, pourraient d6couler d'un incendie, d'un choc 61ectdque ou du contact corps avec les pieces en mouvement. Note - P{mr plus de ddtads {_tlpcmr {_btentr de FaMe, visitez www.remingtonpowertools.com. Le moteur ne fonctiolme pas lorsque 1. -
Page 39: Information Sur La Garantie
iNFORMATiON SUR LA GARANTIE GARANTIE LIMITi_E DU FABRICANT POUR: La garantie limitee enonc6e ci-ap,res est accord6e par Remington LLC et concerne les marchandises neuves achetees et utilis6es aux Etats-Unis, ses possessions et territoires. Remington LLC garantit ce produit contre tout vice de matiere ou de fagon pendant une periode de deux (2) ans a.