Table of Contents
Advertisement
MO0406-EB
Getting Acquainted
Congratulations upon your selection of this CASIO watch. To get the most out
of your purchase, be sure to carefully read this manual and keep it on hand
for later reference when necessary.
Expose the watch to bright light to charge its battery before using it.
You can use this watch even as its battery is being charged by exposure to
bright light.
• • • • • Be sure to read "Battery" of this manual for important
information you need to know when exposing the watch to bright
light.
Applications
The built-in sensors of this watch measure direction, barometric pressure,
temperature and underwater depth. Measured values are then shown on the
display. Such features make this watch useful when hiking, mountain
climbing, skin diving, or snorkeling, or when engaging in other such outdoor
activities.
If the digital display of the watch is blank...
• The initial factory default setting is Power Saving on.
• The watch recovers from the sleep state if you move it to a well-lit area,
you press any button, or if you angle the watch towards your face for
reading.
It can take up to two seconds for the display to turn on.
*
• See "Power Saving Function" for more information.
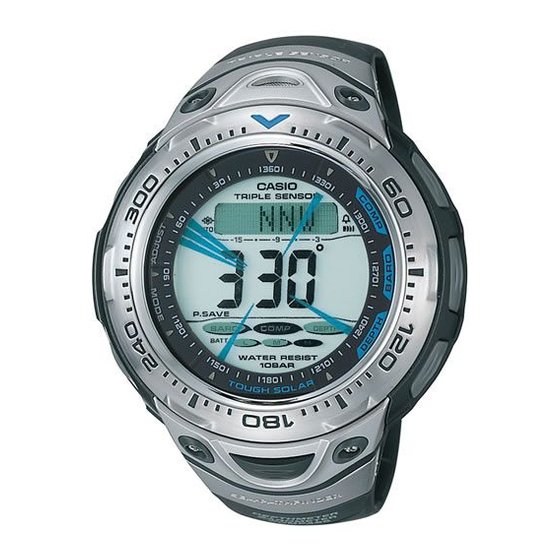
General Guide
• The illustration below shows which buttons you need to press to navigate
between modes.
• In any mode, press L to illuminate the display.
Countdown
Timer Mode
Stopwatch Mode
Alarm Mode
Timekeeping
Month – Day
Day of week
Seconds
Hour : Minutes
PM indicator
To set the time and date
1. In the Timekeeping Mode, hold down A until the seconds start to flash,
which indicates the setting screen.
2. Press D to cycle through the setting items in the sequence shown below,
and display the one you want to configure.
Seconds
Hour
Barometric
Depth Unit
Pressure Unit
Operation Guide 2825
If the P.SAVE indicator is on the display (either
flashing or steady), it means that the display is
blank because the watch's Power Saving function
has turned off the display to conserve power.
Power Saving automatically turns off the display
and enters a sleep state whenever the watch is
left for a certain period where it is dark.
Timekeeping Mode
Press D.
▲
Use the Timekeeping Mode to view the current
time and date. You also need to enter the
Timekeeping Mode to configure timekeeping
settings, as well as the following settings.
• Display illumination duration ("To specify the
illumination duration")
• Power saving on/off ("To turn Power Saving on
and off")
• Temperature unit ("To specify barometric
pressure and temperature units")
• Depth unit ("To specify the depth unit")
• Barometric pressure unit ("To specify
barometric pressure and temperature units")
12/24-Hour
Minutes
Year
Format
Temperature
Power
Unit
Saving
• The measurement functions built into this watch are not intended for
taking measurements that require professional or industrial precision.
Values produced by this watch should be considered as reasonable
representations only.
• When engaging in mountain climbing or other activities in which losing
your way can create a dangerous or life-threatening situation, always be
sure to use a second compass to confirm direction readings.
• This watch is intended for use up to skin diving and snorkeling. Never
use this watch while scuba diving.
• Never operate the buttons of the watch while underwater.
• CASIO COMPUTER CO., LTD. assumes no responsibility for any loss,
or any claims by third parties that may arise through the use of this
watch.
About This Manual
(Light)
*
if
• Pressing B, C, or E while in the Timekeeping Mode directly enters the
applicable sensor mode. To enter a sensor mode from the Countdown
Timer, Stopwatch, or Alarm Mode, first enter the Timekeeping Mode and
then press the applicable button.
Press B.
Digital
Compass Mode
• The following steps explain how to configure timekeeping settings only.
See the other sections of this manual for information about configuring
the display illumination duration, Power Saving, Temperature Unit, Depth
Unit, and Barometric Pressure Unit settings.
3. When the timekeeping setting you want to change is flashing, use E and/
or B to change it as described below.
Screen
To do this:
Reset the seconds to
Change the hour or minutes
Toggle between 12-hour (
and 24-hour (
Change the year, month, or day
4. After the settings are the way you want, press A to exit the setting screen.
Note
• Resetting the seconds to
59 causes the minutes to be increased by 1. In the range of 00 to 29, the
seconds are reset to
• With the 12-hour format, the P (PM) indicator appears on the display for
Month
times in the range of noon to 11:59 p.m. and no indicator appears for times
in the range of midnight to 11:59 a.m.
Day
Warning!
• Button operations are indicated using the
letters shown in the illustration.
• Each section of this manual provides you with
the information you need to perform operations
in each mode. Further details and technical
information can be found in the "Reference"
section.
Sensor Modes
Press C.
Press E.
Barometer/
Thermometer Mode
Press D.
Do this:
Press E.
00
Use E (+) and B (–).
12H
)
Press E.
24H
) timekeeping
Press E (+) and B (–).
00
while the current count is in the range of 30 to
00
without changing the minutes.
Depth Gauge Mode
1
Advertisement
Table of Contents

Related Manuals for Casio 2825


Summary of Contents for Casio 2825
-
Page 1: Getting Acquainted
Getting Acquainted Warning! Congratulations upon your selection of this CASIO watch. To get the most out • The measurement functions built into this watch are not intended for of your purchase, be sure to carefully read this manual and keep it on hand taking measurements that require professional or industrial precision. -
Page 2: Digital Compass
Operation Guide 2825 • You can adjust the rotary direction bezel so • With the 24-hour format, times are displayed in the range of 0:00 to 23:59, Direction bezel that the is aligned with the magnetic north without any indicator. -
Page 3: Depth Gauge
Take the watch to the place 30 sec. where you purchased it or to some other CASIO retailer to have it checked. Total time submerged: 1 minute 50 seconds • If the elapsed measurement time exceeds three hours, the watch will automatically switch to the Timekeeping Mode and store the data for the current dive into log memory. -
Page 4: Configuring The Countdown Timer
Operation Guide 2825 • The progress beeper and auto-repeat timer alarm do not sound while the To view log data watch is in the Depth Gauge Mode. 1. Enter the Depth Gauge Mode. • The watch can take about five minutes to display the correct water ) is shown on the display, press C to cycle through the data 2. -
Page 5: Alarm Operation
Operation Guide 2825 Alarms • While the hour or minute setting is flashing, use E (+) or B (–) to You can set five independent daily alarms. When change it. Alarm on indicator an alarm is turned on, the alarm tone sounds •... -
Page 6: To Specify The Illumination Duration
If you experience problems getting the metal objects and try again. Note that digital compass operation cannot be rechargeable battery to a full charge, contact your dealer or CASIO performed inside a train, boat, etc. - Page 7 • 30 seconds of Barometric/Thermometer Mode measurements per Whenever you have a sensor malfunction, be sure to take the watch to your original dealer or nearest authorized CASIO distributor as soon as • Stable operation is promoted by frequent charging.
-
Page 8: Digital Compass Precautions
Operation Guide 2825 Digital Compass Precautions Elapsed Time in Display Operation This watch features a built-in magnetic bearing sensor that detects terrestrial Dark magnetism. This means that north indicated by this watch is magnetic north, 60 to 70 minutes Blank, with Display is off, but all functions are which is somewhat different from true polar north. -
Page 9: Calibrating The Temperature Sensor
If keeps appearing, contact your original hPa (0.05 inHg). dealer or nearest authorized CASIO distributor to have the watch checked. • Pressing E and B at the same time returns to the factory calibration To perform northerly calibration 7.