Table of Contents
Advertisement
Owner's Manual
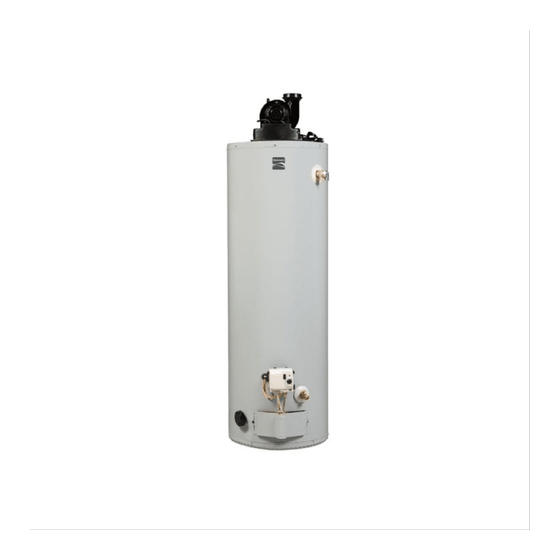
POWER MISER™ 6
ELECTRIC
WATER HEATER
FOR POTABLE WATER HEATING ONLY.
NOT SUITABLE FOR SPACE HEATING.
MODEL NO.
153.326362
153.326363
153.326462
153.326463
153.326562
153.326563
153.326662
153.326663
153.326762
153.326763
153.326862
153.326863
GAMA certification applies to all residential electric water
heaters with capacities of 20 to 120 Gallons. Input rating of
12kW or less.
Sears, Roebuck and Co., Hoffman Estates, IL 60179 U.S.A
PRINTED 0707
30 Gal.
30 Gal.
40 Gal.
40 Gal.
55 Gal.
55 Gal.
50 Gal. Medium
50 Gal. Medium
40 Gal. Medium
40 Gal. Medium
50 Gal. Short
50 Gal. Short
SAVE THIS MANUAL FOR FUTURE REFERENCE.
www.sears.com
1
• Safety Instructions
• Installation
• Operation
• Care and Maintenance
• Troubleshooting
• Parts List
185796-000
Advertisement
Table of Contents
Troubleshooting

Related Manuals for Kenmore 32686 - Power Miser 6


Summary of Contents for Kenmore 32686 - Power Miser 6
-
Page 1: Safety Instructions
Owner’s Manual POWER MISER™ 6 ELECTRIC WATER HEATER FOR POTABLE WATER HEATING ONLY. NOT SUITABLE FOR SPACE HEATING. MODEL NO. 153.326362 30 Gal. 153.326363 30 Gal. 153.326462 40 Gal. 153.326463 40 Gal. 153.326562 55 Gal. 153.326563 55 Gal. 153.326662 50 Gal. Medium 153.326663 50 Gal. -
Page 2: Safe Installation, Use And Service
SAFE INSTALLATION, USE AND SERVICE Your safety and the safety of others is extremely important in the installation, use and servicing of this water heater. Many safety-related messages and instructions have been provided in this manual and on your own water heater to warn you and others of a potential injury hazard. -
Page 3: General Safety
GENERAL SAFETY... -
Page 4: Table Of Contents
TABLE OF CONTENTS SAFE INSTALLATION, USE AND SERVICE ............................2 GENERAL SAFETY ..................................... 3 TABLE OF CONTENTS ..................................4 INTRODUCTION ....................................5 PRODUCT SPECIFICATIONS ................................5 MATERIALS AND BASIC TOOLS NEEDED ............................6 Materials Needed ..................................6 Basic Tools ....................................6 Additional Tools Needed When Sweat Soldering ........................ -
Page 5: Introduction
INTRODUCTION Thank You for purchasing a Sears water heater. Properly • The installation must conform with the instructions in this installed and maintained, it should give you years of trouble manual; electric company rules; and Local Codes, or in the absence of Local Codes, with the current edition of the free service. -
Page 6: Materials And Basic Tools Needed
MATERIALS AND BASIC TOOLS NEEDED Materials Needed To simplify the installation Sears has available the installation parts shown below. You may or may not need all of these materials, depending on your type of installation. DRAIN PANS AVAILABLE IN 20” EXPANSION TANKS FOR THERMAL EXPANSION CONDITIONS AVAILABLE IN 2 DIAMETER FOR WATER HEATERS... -
Page 7: Installation Instructions
INSTALLATION INSTRUCTIONS Removing the Old Water Heater The water passing out of the drain valve may be extremely hot. To avoid being scalded, make sure all connections are tight and that the water flow is directed away from any person. 4. -
Page 8: Facts To Consider About The Location
• Sensors mounted in the drain pan that turn off the water supply to the entire home when water is detected in the drain pan. • Water supply shut-off devices that activate based on the water pressure differential between the cold water and hot water pipes connected to the water heater. -
Page 9: Water Piping
HOTTER WATER CAN SCALD: Water heaters are intended to produce hot water. Water heated to a temperature which will satisfy clothes washing, dish washing, and other sanitizing needs can scald and permanently injure you upon contact. Some people are more likely to be permanently injured by hot water than others. -
Page 10: T & P Valve And Pipe Insulation
Fit T & P valve insulation over valve. Make sure that the insulation NOTE: To protect against untimely corrosion of hot and cold does not interfere with the lever of the T & P valve. water fittings, it is strongly recommended that di-electric unions or couplings be installed on this water heater when Secure all insulation using tape. -
Page 11: Filling The Water Heater
Position the valve downward and provide tubing so that any If after manually operating the valve, it fails to completely reset discharge will exit only within 6 inches (153 mm) above, or at and continues to release water, immediately close the cold any distance below the structural floor. -
Page 12: Converting The Lower Element
Converting the Lower Element Necessary element conversion parts are located in a small bag contained within the electrical junction box on top of the water heater. These instructions only cover the conversion of the convertible element, read this entire manual before attempting to install or operate the water heater. - Page 13 Tighten terminals 2 and 3 to ensure proper electrical connection. FIGURE 16. Failure to tighten terminal screws can cause a fire which can Remove the screws from terminal 2 of the element, and result in DEATH, SERIOUS BODILY INJURY, OR PROPERTY move the looped end of the wire aside.
-
Page 14: Wiring
11. Replace the access panel. FIGURE 21. 12. Complete wiring to the water heater, or if completed, turn “ON” electric power to the water heater after filling the tank with water. If wiring from your fuse box or circuit breaker box was aluminum for your old water heater, replace it with copper wire. - Page 15 5. Wiring Diagrams (see “Wiring Diagrams” section) have been 6. Use wire nuts and connect the power supply wiring to the supplied showing the two most common types of wires inside the water heater’s junction box. connections between the water heater and the power supply. You can easily see which type connection you have by 7.
-
Page 16: Wiring Diagrams
Wiring Diagrams STANDARD WIRING FOR 2 WIRE LEAD WATER HEATERS NON-SIMULTANEOUS OPERATION 240 VOLT DOUBLE ELEMENT FIGURE 24. WIRING FOR 3 WIRE LEAD WATER HEATERS NON-SIMULTANEOUS OPERATION 240 VOLT DOUBLE ELEMENT *NOTE: Some lower Hi-Temp Limit Switches may have 4 terminals. Use only the 2 terminals on left. -
Page 17: Service And Adjustment
SERVICE AND ADJUSTMENT Temperature Regulation The lower thermostat is factory set at a position which approximates 120°F (49°C), and is adjustable if a different water temperature is desired. Read all warnings in this manual and on the water heating before proceeding. HOTTER WATER CAN SCALD: Water heaters are intended to produce hot water. -
Page 18: Anode Rod Inspection
Temperature-Pressure Relief Valve Operation The upper and lower thermostats are adjustable if a different water temperature is desired. Read all warnings in the “Temperature-Regulation” section before proceeding. The temperature-pressure relief valve must be manually operated at least once a year. 1. -
Page 19: Thermostat Removal/Replacement
The water heater should be drained if being shut down during 1. Turn “OFF” the electrical power to the water heater at the freezing temperatures. Also, periodic draining and cleaning of junction box. sediment from the tank may be necessary. 2. - Page 20 4. Remove the two screws securing the access panel, and remove panel. FIGURE 33. 1. Before beginning turn “OFF” the electric power supply to the water heater. 5. Remove the insulation cap with handle. FIGURE 30. 2. Turn off the water supply to the water heater at the water Shut-off valve or water meter.
- Page 21 8. Clean the area around the element opening. Remove any Never use this water heater unless it is completely full of water. sediment from or around the element opening, inside the To prevent damage to the tank and heating element, the tank tank.
-
Page 22: Drain Valve Washer Replacement
18. Replace access panel. • Follow “Draining” instructions. See “Draining” section. 19. Turn “ON” electric power to water heater. • Turning counter clockwise, remove the hex cap below the screw handle. • Remove the washer and put the new one in place. •... -
Page 23: Troubleshooting Guide
TROUBLESHOOTING Start Up Conditions NOTE: Expansion tanks are pre-charged with a 40 psi air charge. If the inlet water pressure is higher than 40 psi, the expansion tank’s air pressure must be adjusted to match THERMAL EXPANSION that pressure, but must not be higher than 80 psi. Water supply systems may, because of such events as high line pressure, frequent cut-offs, the effects of water hammer among others, have installed devices such as pressure... -
Page 24: Air" In Hot Water Faucets
D. An excess of active hydrogen in the tank. This is caused by corrosion protective action of the anode. Smelly water may be eliminated or reduced in some water heater models by replacing the anode rod (s) with one of less active material, and then chlorinating the water heater tank and all hot water lines. -
Page 25: Water Is Too Hot
Make sure the electrical supply to your water heater is shut off system. See “High Temperature Shut Off System” “ON”. in the “Troubleshooting” section. Check for loose or blown fuses in your water heater circuit. During very cold weather, the incoming water will also be Circuit breakers weaken with age and may not handle colder and it will require a longer time to become heated. -
Page 26: Leakage Checkpoints
LEAKAGE CHECKPOINTS Never use this water heater unless it is completely full of water. To prevent damage to the tank and heating element, the tank must be filled with water. The water must flow from the hot water faucet before turning “ON” power. A. -
Page 27: Repair Parts List
REPAIR PARTS LIST KENMORE POWER MISER ELECTRIC WATER HEATERS MODEL NUMBERS 153.326362 30 Gallon 153.326363 30 Gallon 153.326462 40 Gallon 153.326463 40 Gallon 153.326562 55 Gallon 153.326563 55 Gallon NOTE:A UPPER ELEMENT: These water heaters are equipped with 3800 watt elements. - Page 28 REPAIR PARTS LIST KENMORE POWER MISER ELECTRIC WATER HEATERS MODEL NUMBERS 153.326662 50 Gallon Medium 153.326663 50 Gallon Medium 153.326762 40 Gallon Medium 153.326763 40 Gallon Medum NOTE:A UPPER ELEMENT: These water heaters are equipped with 3800 watt elements. LOWER ELEMENT: These water heaters are equipped with factory installed convertible elements, which can be operated at 3800 watts or 5500 watts.
- Page 29 REPAIR PARTS LIST KENMORE POWER MISER ELECTRIC WATER HEATERS MODEL NUMBERS 153.326862 50 Gallon Short 153.326863 50 Gallon Short NOTE:A UPPER ELEMENT: These water heaters are equipped with 3800 watt elements. LOWER ELEMENT: These water heaters are equipped with factory installed convertible elements, which can be operated at 3800 watts or 5500 watts.
-
Page 30: Notes
NOTES... -
Page 31: Notes
NOTES... -
Page 32: Warranty
During the second year you must pay the labor cost for parts or water heater installation. 1-YEAR EXCLUSIVE KENMORE LABOR WARRANTY For the first year from the date of purchase, Sears will, free of charge, supply and install new water heater parts for defective ones or a new water heater for one that develops a leak.