Table of Contents
Advertisement
Quick Links
Advertisement
Table of Contents

Related Manuals for Philips DS8550


Summary of Contents for Philips DS8550
- Page 1 Always there to help you Register your product and get support at DS8550 www.philips.com/welcome Question? Contact Philips EN User manual Käyttöopas DA Brugervejledning FR Mode d’emploi DE Benutzerhandbuch Manuale utente EL Εγχειρίδιο χρήσης NL Gebruiksaanwijzing...
-
Page 2: Table Of Contents
Contents Important Safety Notice Your Docking Speaker Introduction What’s in the box Overview of the main unit Overview of the remote control Get started Prepare the remote control Connect power Turn on Play Play from iPod/iPhone/iPad Play from Bluetooth device Play from an external device Adjust volume level Mute sound... -
Page 3: Important
1 Important Safety Important Safety Instructions a Read these instructions. b Keep these instructions. c Heed all warnings. d Follow all instructions. e Do not use this apparatus near water. f Clean only with dry cloth. g Do not block any ventilation openings. Install in accordance with the manufacturer’s instructions. - Page 4 m Refer all servicing to qualified service personnel. Servicing is required when the apparatus has been damaged in any way, such as power-supply cord or plug is damaged, liquid has been spilled or objects have fallen into the apparatus, the apparatus has been exposed to rain or moisture, does not operate normally, or has been dropped.
-
Page 5: Hearing Safety
How to connect a plug The wires in the mains lead are coloured with the following code: blue = neutral (N), brown = live (L). As these colours may not correspond with the colour markings identifying the terminals in your plug, proceed as follows: • Connect the blue wire to the terminal marked N or colored black. • Connect the brown wire to the terminal marked L or colored red. • Do not connect either wire to the earth terminal in the plug, marked E (or ) or colored green (or green and yellow). Before replacing the plug cover, make certain that the cord grip is clamped over the sheath of the lead - not simply over the two wires. Copyright in the U.K. Recording and playback of material may require consent. see Copyright Act 1956 and The performer’s Protection Acts 1958 to 1972. Important warning for users in Australia and New Zealand Instructions for changing fuses are included with this apparatus for users in the U.K only. Users in Australia and New Zealand should always engage a qualified electrician to perform any modifications to this apparatus. User-made modifications may result in property damage, personal injury or death. -
Page 6: Notice
You should use caution or temporarily discontinue use in potentially hazardous situations. Do not use headphones while operating a motorized vehicle, cycling, skateboarding, etc.; it may create a traffic hazard and is illegal in many areas. Warning • Never remove the casing of this apparatus. • Never lubricate any part of this apparatus. • Never place this apparatus on other electrical equipment. • Keep this apparatus away from direct sunlight, naked flames or heat. • Ensure that you always have easy access to the power cord, plug or adaptor to disconnect the apparatus from the power. Notice Any changes or modifications made to this device that are not expressly approved by Philips Consumer Lifestyle may void the user’s authority to operate the equipment. This product complies with the radio interference requirements of the European Community. - Page 7 Recycling Your product is designed and manufactured with high quality materials and components, which can be recycled and reused. When you see the crossed-out wheel bin symbol attached to a product, it means the product is covered by the European Directive 2002/96/EC: Never dispose of your product with other household waste. Please inform yourself about the local rules on the separate collection of electrical and electronic products. The correct disposal of your old product helps prevent potentially negative consequences on the environment and human health. Your product contains batteries covered by the European Directive 2006/66/EC, which cannot be disposed of with normal household waste. Please inform yourself about the local rules on separate collection of batteries. The correct disposal of batteries helps prevent potentially negative consequences on the environment and human health.
-
Page 8: Your Docking Speaker
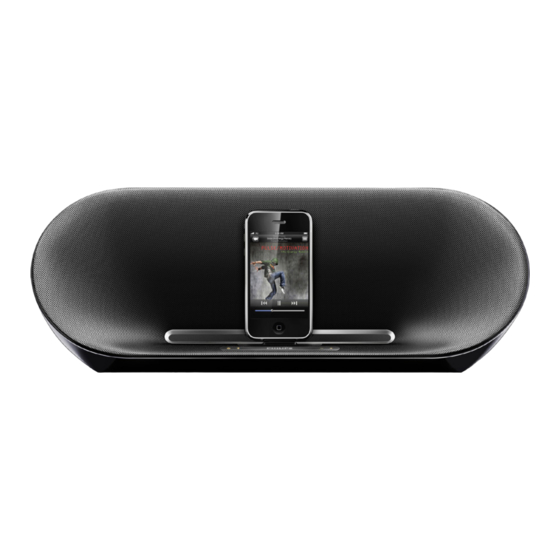
2 Your Docking Speaker Congratulations on your purchase, and welcome to Philips! To fully benefit from the support that Philips offers, register your product at www.philips. com/welcome. Introduction With this unit, you can enjoy audio from the iPod/iPhone/iPad and other audio devices. What’s in the box Check and identify the contents of your package: • Main unit • Remote control • 1 x AC adaptor • 1 x AC power cord • 1 x UK power cord •... -
Page 9: Overview Of The Main Unit
Overview of the main unit • Turn on/off the unit. • Select Bluetooth mode • Pair with Bluetooth device. -
Page 10: Overview Of The Remote Control
c iPod/iPhone/iPad dock • Adjust volume. e Built-in battery LED indicator f Power supply socket g AUX IN • Jack for an external audio device. Overview of the remote control • Mute volume. • Select Bluetooth mode • Pair with Bluetooth device. • Select Aux-in mode Up/down keys • Navigate through the iPod/iPhone menu. - Page 11 e Fast forward/backward keys • Fast reverse or fast forward within a track or iPhone/iPod. • Skip to the previous/next track. • Start or pause play. g VOL +/- • Adjust volume. h MENU • Access the iPod menu. i OK • Confirm a selection. • Select iPod/iPhone dock mode...
-
Page 12: Get Started
3 Get started Always follow the instructions in this chapter in sequence. If you contact Philips, you will be asked for the model and serial number of this apparatus. The model number and serial number are on the bottom of the apparatus. Write the numbers here: Model No. __________________________ Serial No. ___________________________ Prepare the remote control Caution • Risk of explosion! Keep batteries away from heat, sunshine or fire. Never discard batteries in fire. For first-time use: Remove the protective tab to activate the remote control battery. To replace the remote control battery: Open the battery compartment. Insert one CR2032 battery with correct polarity (+/-) as indicated. Close the battery compartment. -
Page 13: Connect Power
Note • Before pressing any function button on the remote control, first select the correct source with the remote control instead of the main unit. • If you are not going to use the remote control for a long time, remove the battery. Connect power Caution • Risk of product damage! Ensure that the power supply voltage corresponds to the voltage printed on the bottom of the unit. • Risk of electric shock! When you unplug the AC adaptor, always pull the plug from the socket. Never pull the cord. • Before connecting the AC adaptor, ensure you have completed all other connections. Insert the plug from the AC adaptor to the DC IN socket on the back of the main unit. Connect one end of the AC power cord to the AC adaptor. - Page 14 Connect the other end of the AC power cord to the wall outlet. Built-in Battery Note • Always bring your product to a professional to remove the built-in battery. Caution • Danger of explosion if battery is incorrectly replaced. Replace only with the same or equivalent type. The unit can also operate on built-in rechargeable battery. Battery power LED indicator Medium Yellow Full Green Note • Use only the supplied AC adapter to charge the battery. To recharge the built-in battery: Connect the unit to the mains power supply.
-
Page 15: Turn On
Turn on Press on the main unit. Switch to ECO standby The unit switches to standby mode automatically, when: • (at DOCK mode) the iPod/iPhone is disconnected from the unit. • (at AUX mode) the device no longer playing music for more than 5 minutes. • (at Bluetooth mode) the Bluetooth device is disconnected from the unit for more than 5 minutes. • In standby mode, press , on the remote control, the unit switches on at the corresponding source. About ECO power You can switch the unit to ECO power standby mode to save power consumption. -
Page 16: Play
4 Play Play from iPod/iPhone/iPad You can enjoy audio from iPod/iPhone/iPad through this unit. Compatible iPod/iPhone/iPad Apple iPod, iPhone and iPad models with a 30-pin dock connector. Made for : • iPod (5th generation) • iPod nano (1st generation) • iPod nano (2nd generation) • iPod nano (3rd generation) • iPod nano (4th generation) • iPod nano (5th generation) • iPod classic • iPod touch (1st generation) • iPod touch (2nd generation) • iPod touch (3rd generation) • iPhone • iPhone 3G • iPhone 3GS • iPad. Load the iPod/iPhone/iPad Place the iPod/iPhone/iPad in the dock. -
Page 17: Play From Bluetooth Device
• To skip to a track, press fast forward/backward keys. • To search during play, press and hold fast forward/backward keys, then release to resume normal play. • To navigate the menu, press MENU, then press up/down keysto select, and press OK to confirm. Charge the iPod/iPhone/iPad When the unit is connected to AC power, the docked iPod/iPhone/iPad begins to charge. • You can also charge your iPod/iPhone via the built-in battery. Before charging your iPod/iPhone via the built-in battery, ensure the Fidelio battery-charging function is turn on. • You cannot charge your iPad via the built-in battery. To charge your iPad, connect the unit to AC power. Play from Bluetooth device Pair with Bluetooth deivces Press to select Bluetooth source. » The unit starts searching for Bluetooth device. The Bluetooth indicator under button on the main unit flashes rapidly. Turn on Bluetooth function on your device. When “PHILIPS DS8550” displays, select it to start connection. When prompted for a password, enter “0000”. -
Page 18: Play From An External Device
» If connection is successful. the unit beeps and the indicator turns on stably. » If the pairing cannot be completed within one minute, the indicator flashes slowly. • If your Bluetooth device is already paired with DS8550 before, you just need to find out the “PHILIPS DS8550” on your Bluetooth menu, then confirm the connection. To disconnect Bluetooth device, • Move it beyond the communication range; or • Press ; or • Turn off the connected device Play audio files from bluetooth devices Note • Make sure the Bluetooth connection between the unit and the device is active. •... -
Page 19: Mute Sound
Mute sound During play, press MUTE to mute/unmute sound. 5 Product information Note • Product information is subject to change without prior notice. Specifications Amplifier Rated Output Power 2X15 W RMS Signal to Noise Ratio 85 dB Aux-in Link 0.6 V RMS 10 kohm General information AC power (power adaptor) For CE: OH-1065A1803500U2(EU) For USA: OH-1065A1803500U(UL) Input: 100-240V~, 50/60Hz, 1.5A; Output: 18V 3.5A; Operation Power <40W Consumption ECO Standby Power <1W Consumption Dimensions... -
Page 20: Troubleshooting
6 Troubleshooting Warning • Never remove the casing of this apparatus. To keep the warranty valid, never try to repair the system yourself. If you encounter problems when using this apparatus, check the following points before requesting service. If the problem remains unsolved, go to the Philips web site (www.philips.com/support). When you contact Philips, ensure that the apparatus is nearby and the model number and serial number are available. No power • Ensure that the AC power plug of the unit is connected properly. •... - Page 21 The audio quality is poor after connection with a Bluetooth-enabled device. • The Bluetooth reception is poor. Move the device closer to the system or remove any obstacle between the device and the system. Cannot connect with the system. • The device does not support the profiles required for the system. • The Bluetooth function of the device is not enabled. Refer to the user manual of the device for how to enable the function. • The system is not in the pairing mode. • The system is already connected with another Bluetooth-enabled device. Disconnect that device or all other connected devices and then try again. The paired device connects and disconnects constantly. •...
- Page 22 Année/mois (aaaa/mm) au cours de laquelle le marquage CE a été apposé) EUROPEAN DECLARATION OF CONFORMITY (DECLARATION DE CONFORMITE CE) We / Nous, PHILIPS CONSUMER LIFESTYLE B.V. (Company name / Nom de l’entreprise) TUSSENDIEPEN 4, 9206 AD DRACHTEN, THE NETHERLANDS (address / adresse) declare under our responsibility that the product(s): (déclarons sous notre propre responsabilité...
- Page 23 © 2013 Koninklijke Philips Electronics N.V. All rights reserved. DS8550_10_UM_V6.0...