Table of Contents

Related Manuals for Miele H 4020 BM


Summary of Contents for Miele H 4020 BM
-
Page 1: Operating Instructions
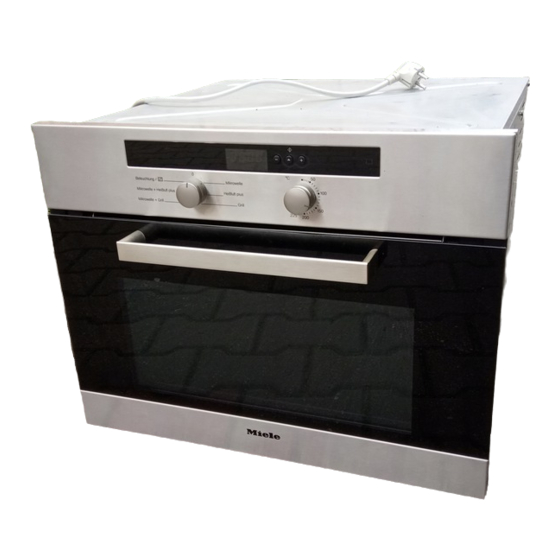
Operating instructions Microwave combination oven H 4010 BM, H 4020 BM To avoid the risk of accidents or damage to the appliance it is to read these operating instructions before it is installed or used for the first time. M.-Nr. 06 230 140... -
Page 2: Table Of Contents
......... 4 . - Page 3 ..... . 31 Time of day display (P I) ..........31 Audible tone (P 2) .
- Page 4 a Function selector e Grill element b Timer f Oven interior lighting c Temperature selector g Three shelf levels d Temperature indicator light h Oven door...
- Page 5 The glass tray is suitable for use with all cooking functions. The combi rack must always be used with the glass tray. It can be used either way up to vary the height between it and the grill element and thus suit the cooking function and type of food being cooked.
-
Page 6: Microwave Function
If the connection cable is installation, safety, operation and damaged, the new cable must be care of the appliance. fitted by a Miele approved service technician. Keep these operating instructions in a safe place and pass them on to Do not use the microwave function any future user. - Page 7 Before connecting the appliance to appliance until after maintenance or the mains supply make sure that repair work has been carried out. the rating on the data plate This equipment may only be corresponds to the voltage and installed in mobile installations frequency of the household supply.
- Page 8 It is important that the heat is allowed to these can be a fire hazard if allowed to spread evenly throughout the food overheat. being cooked. If smoke occurs in the oven, to This can be achieved by stirring and/or avoid fuelling any flame do not turning the food, and by observing a open the oven door.
- Page 9 Never place the hot glass tray (or Always stir or shake baby milk and food any other hot cooking containers) after heating it up, and taste it first to on a cold surface, such as a tiled or make sure it is not too hot. granite worktop.
- Page 10 This can lead to the liquid boiling over available from specialist shops. suddenly and explosively. Danger of Similarly, hard-boiled eggs should not burning. be reheated using microwave heat as this may lead to the eggs exploding, The formation of bubbles can be so even after they have been taken out of strong that the pressure forces the oven the oven.
- Page 11 To check food temperature, first damage which may be caused by interrupt the cooking process. cockroaches or other vermin will not be Then use a thermometer specifically covered by the guarantee. approved for food use to measure the temperature of the food. Never use a thermometer containing mercury or Before disposing of your old liquid, as these are not suitable for use...
- Page 12 Old appliances contain materials which can be reclaimed or recycled. Please The transport and protective packing contact your dealer, your local waste has been selected from materials which collection centre or scrap merchant are environmentally friendly for disposal about potential recycling schemes. and can normally be recycled.
- Page 13 To enter the time of day the function ^ Wipe out the using selector must be at "0". warm water and a little washing up liquid. Dry with a soft cloth. Do not close the oven door until the oven interior is dry. ^ Wash the have a slight smell on ^ Connect the appliance to the...
- Page 14 will affect the speed at which it is cooked. Microwave cooking offers the benefits of speed, convenience and nutritional As heat is produced directly in the advantages when food does not require food, browning or crisping. – food can generally be cooked without adding much liquid or cooking oil –...
-
Page 15: Traditional Oven Functions
– Microwave + Fan plus h Y This oven offers the following traditional oven functions: – Microwave + Grill h n – Fan plus Y The combination programmes enable – Grill n. food to be reheated and cooked quickly with even browning results. These cook and brown the food. -
Page 16: Material And Shape
Microwaves When using microwave power you should always place the food / dish centrally on the glass tray and slide the tray into the first shelf level from the bottom. Placing the dish on the floor of the oven will give unsatisfactory and uneven results. - Page 17 Exceptions: – If recommended by the producer, Heat-resistant glass or ceramic glass pre-cooked meals in aluminium foil are ideal for use in the microwave oven. containers can be defrosted and Crystal glass contains lead which reheated in the appliance using microwave power.
- Page 18 There is a danger that they will ignite when heated. Plastics must only be used with Microwave-Solo. They must be heat-resistant to a minimum of Wooden dishes are not suitable. 110 °C. Otherwise the plastic may Moisture contained in the wood melt and fuse with the food.
- Page 19 The h symbol will flash in the display to tell you to start the process. If in doubt as to whether glass, earthenware or porcelain plates or dishes are suitable for use in a microwave oven, a simple test can be performed: ^ Place the container centrally on the glass tray and slide into the lowest...
- Page 20 Sealed glass containers, such as – prevents too much steam escaping, jars of baby food must be opened especially when cooking foods which before they are placed in the oven. need longer to cook, such as Do not attempt to heat them up potatoes.
-
Page 21: Controls
The oven controls consist of an oven function selector and a temperature selector. The temperature can be freely selected within the given range using the The function selector can be turned clockwise or anti-clockwise. The temperature selector must only The following settings are available: be turned in a clockwise direction as –... -
Page 22: Timer
The timer can: – show the time of day, – be used as a minute minder, – switch the oven off, or on and off l m g ) automatically. The timer is operated with the V, The display will vary depending on which symbol the triangle V is buttons and the display. - Page 23 , use the immediately to make any When the appliance is first changes to the setting selected: connected to the power supply, or – The increases the value after a power cut, "I2:00" will flash in shown. the display. – The decreases the value shown.
-
Page 24: To Set The Minute Minder
The minute minder can be used to time – the l symbol flashes for approx. 1 any activity in the kitchen, e.g. boiling eggs. minute. You can enter a time up to a maximum – a buzzer sounds five times, if it is of 12 hours. - Page 25 When you enter a cooking duration, the The timer can be used to switch the oven will switch off automatically after appliance off or on and off the duration entered has elapsed. automatically. To do this: It is a good idea to set the oven to switch on and off automatically for ^ Place the food in the oven.
- Page 26 Then set the To use the automatic switch-on and switch-off functions on the oven, both the cooking duration and the end time l m g ) must be entered. For example: The current time of day is 10:45. You ^ Call up the ) symbol with the V wish a roast with a cooking duration of 1 h 30 min to be ready at 13:30.
- Page 27 ^ Call up the symbol for the setting to At the end of the cooking duration be checked. – the oven heating switches off automatically. The microwave power level will show in – the cooling fan will continue to run for the display.
- Page 28 ^ Whilst triangle V is flashing, use the When using microwave power you button to enter the required should always place the food / dish duration in minutes:seconds centrally on the glass tray and slide (e.g. 1 minute 30 seconds). the tray into the first shelf level from The h symbol will flash in the display the bottom.
- Page 29 Microwave mode can be combined with either Fan plus or Grill. Before starting a combination programme you must first select the microwave power level and the time for the process. You can enter a duration of up to a ^ Turn the function selector to maximum of 2 hours.
-
Page 30: Microwave + Grill H N
^ Use the button to enter the required duration in hours:minutes (e.g. 1 hour ^ Turn the function selector to 30 minutes). Microwave + Grill h n. The display shows a suggested power level of 300 W. You can enter a duration of up to a maximum of 2 hours. - Page 31 You can alter the time of day display (Programme 1) and the buzzer (Programme 2). The altered settings are retained after a power cut. "P I" will appear in the display. ^ Press the V button. The time of day display can be switched on or off.
- Page 32 ^ Use the or button to scroll from "0" to "3" There is a choice of 3 different tones or alternatively, the buzzer can be The corresponding buzzer will sound switched off. as you do so. ^ Press the V button. To alter the setting: ^ Turn the function selector to the "Light This confirms your entry.
- Page 33 The microwave function can be used to defrost food gently and quickly. Allow the food to stand at room The following settings are temperature long enough to allow the recommended as a general guide: temperature to spread evenly throughout the food. –...
- Page 34 10 - 15 Cream 250 ml 13 - 17 Butter 250 g 8 - 10 5 - 10 Cheese slices 250 g 6 - 8 10 - 15 Milk 500 ml 14 - 16 10 - 15 Quark / Cream cheese 250 g 10 - 12 10 - 15...
- Page 35 The microwave function is particularly The time required depends largely on suitable for reheating food. the nature of the food, its initial temperature and the amount to be Select the following microwave power cooked. Food taken straight from the settings to reheat food refrigerator takes longer to reheat than drinks.
- Page 36 Coffee, drinking temperature 60 – 65 °C 1 cup, 200 ml 0:50 – 1:10 – – Milk, drinking temperature 60 – 65 °C 1 cup, 200 ml 1– 1:50*** – – Water bring to the boil 1 cup, 125 ml 1 –...
- Page 37 Microwave, traditional and combination programmes are all suitable for Place the food in a microwave-safe dish cooking. and cover it. Place the dish on the glass tray and This method is suitable for cooking slide into the lowest shelf level. casseroles as well as dishes with pasta, Add a little water to vegetables which rice and semolina etc.
- Page 38 ^ Slide the glass tray with the combi ^ Place the dish on the glass tray and rack into the first shelf level from the slide into the lowest shelf level. bottom. Only use heat-resistant, The following containers are suitable: microwave-safe crockery.
- Page 39 Meatballs in gravy (400 g meat) 10 – 12 2 – 3 Stew (750 g meat) 2 – 3 Chicken in mustard sauce approx. 800 g 2 – 3 Chicken curry approx. 900 g 2 – 3 Chicken risotto approx. 1.6 kg 3 –...
- Page 40 Roast ham 1,000 g 300 W + Fan plus 160 °C approx. 65 Honey roast ham 1,000 g Fan plus 180 °C approx. 70 Veal roast 1,000 g Fan plus 180 °C approx. 120 Meat loaf approx. 1,200 g 300 W + Fan plus 180 °C approx.
-
Page 41: Microwave H
For simultaneous defrosting and reheating or cooking the following Microwave + Grill hn is suitable for functions are suitable: cooking and then browning the top of – Microwave h ready made meals. Select a microwave power level of 450 watts. The grill –... - Page 42 The following grill settings are suitable Place the rack on the glass tray and for browning food: slide into the second or third shelf level from the bottom, depending on the type – Grill n of food you are grilling. –...
- Page 43 Pre-heat the grill for approx. 5 minutes. Steak 25 – 30 Burgers 30 – 35 Sausages 20 – 25 Fish fillet 16 – 20 Toast 2 – 4 Toast with topping 5 – 9 Tomatoes 8 – 10 Peaches 7 – 10 1) Third shelf level 2) Turn half way through the grilling time.
- Page 44 The following settings are suitable for used, but results may not be as good baking: as with dark non-reflective tins. – Fan plus Y Baking times should not be set too long. This can lead to the cake etc. – Microwave + Fan plus h Y. drying out.
-
Page 45: Baking Chart
Do not use paper based containers Eating food which has been cooked coated with aluminium foil, such as correctly is important for good are sometimes provided with packet health. cake mixes. There is the danger of these catching fire. Only bake cakes, pizza, chips etc until they are golden brown. - Page 46 Victoria sandwich 150 - 170 55 - 70 Farmhouse fruit cake 150 - 170 70 - 80 60 - 70 Muffins 150 - 170 25 - 35 Marble cake 150 - 170 60 - 70 Fresh fruit cake with topping (glass tray) 150 - 170 45 - 50 Fresh fruit cake (glass tray)
-
Page 47: E-Cloth
A microfibre "E-Cloth" is available from the Miele UK Spare Parts Department, Aluminium surfaces and controls which is suitable for cleaning surfaces may suffer discolouration or damage such as stainless steel, glass, plastic if soiling is left on them for too long. - Page 48 The controls may suffer The appliance front and controls are discolouration or damage if soiling is susceptible to scratches and left on them for too long. abrasions. Remove any soiling straight away. Please observe the separate cleaning Avoid: instructions for –...
- Page 49 Clean the oven interior using a solution To neutralise odours in the oven, put a of hot water and washing up liquid or cup of water with some lemon juice in mild detergent applied with a sponge, the oven and simmer for a few minutes. soft brush or damp cloth.
- Page 50 Wash and dry the rack after each use. Remove stubborn soiling with a stainless steel cleaner. The glass tray can be washed in hot water and washing up liquid, or in the ^ Lower the grill element gently. dishwasher. Do not use scouring agents. These Do not use force to lower the would scratch.
- Page 51 Installation work, maintenance and repairs may only be carried out by The halogen lamp is defective and suitably qualified and competent needs to be replaced: persons in accordance with national and local safety regulations to Disconnect the appliance from the ensure safety.
- Page 52 ^ Check whether, When cooked by microwaves, food begins to cook from the outside first, – after interrupting a cooking process the inside of the food relying on the using microwave power that you slower conduction of heat. remembered to restart the programme, If food is cooked at a high power level it is possible that the heat may not have...
- Page 53 If it is not possible to remedy a fault by following the instructions given above, contact the Service Department. On no account open the appliance casing. This appliance should only be repaired by a suitably qualified technician trained by Miele.
- Page 54 In the event of any faults which you cannot easily remedy, please contact – your Miele Dealer – the Miele Service Department (see back cover for address). When contacting your Dealer or the Service Department, please quote the model and serial number of your appliance.
- Page 55 30 mA (in accordance with DIN VDE 0664, VDE 0100 Section 739). If the cable is damaged a new cable must be fitted by a Miele approved ser- vice engineer. If the appliance is connected via an isolator switch the plug must be cut off...
- Page 56 If this appliance is fitted with a non-rewireable plug, the following information applies: if the socket outlets are not suitable for the plug supplied with this product, it must be cut off and an appropriate plug fitted. The fuse carrier and fuse should be removed from the old plug and disposed of.
- Page 57 The appliance is suitable for installation: – in a tall unit in combination with an oven – in a tall unit on its own – in a base unit If fitted underneath a hob, the installation instructions for the hob must also be taken into account.
- Page 58 ^ Connect the appliance to the electricity supply. ^ Place the oven into the oven housing unit as far as the oven trim and align. ^ Open the oven door, and with two screws secure the oven to the side walls of the furniture unit through the holes in the oven trim.
- Page 60 Alteration rights reserved / 1804 M.-Nr. 06 230 140 / 00 M.-Nr. 06 230 140 / 00 H 4010 BM, H 4020 BM gb / GB This paper consists of cellulose which has been bleached without the use of chlorine.