Table of Contents
Advertisement
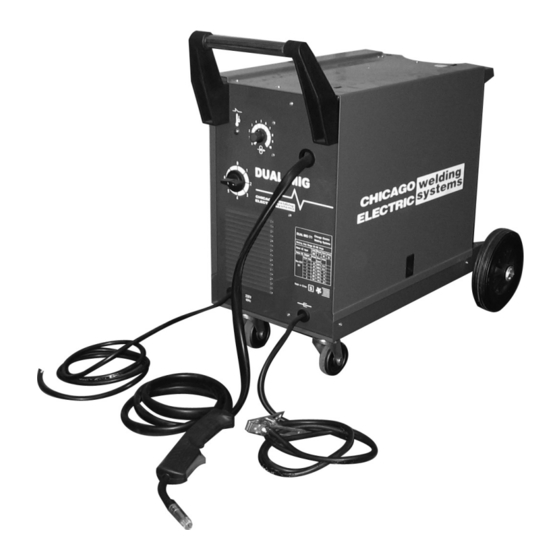
Dual MIG WelDer
Set up anD OperatInG InStructIOnS
Visit our website at: http://www.harborfreight.com
read this material before using this product.
Failure to do so can result in serious injury.
SaVe thIS Manual.
Copyright
2006 by Harbor Freight Tools
©
contained herein may be reproduced in any shape or form without the express written consent of
Harbor Freight Tools. Diagrams within this manual may not be drawn proportionally. Due to continuing
improvements, actual product may differ slightly from the product described herein. Tools required for
assembly and service may not be included.
For technical questions or replacement parts, please call 1-800-444-3353.
cover revised 09l
Model
93793
. All rights reserved. No portion of this manual or any artwork
®
Advertisement
Table of Contents

Related Manuals for Chicago Electric 93793


Summary of Contents for Chicago Electric 93793
- Page 1 Harbor Freight Tools. Diagrams within this manual may not be drawn proportionally. Due to continuing improvements, actual product may differ slightly from the product described herein. Tools required for assembly and service may not be included.
-
Page 2: Table Of Contents
Inspection, cleaning, and replacement ........26 replacing the Welding torch liner .............. 27 parts lists and Diagrams ..............28 Wiring Schematic .................... 28 parts list ......................29 assembly Diagram ..................30 trOuBleShOOtInG .................32 WarrantY ..................34 SKU 93793 For technical questions, please call 1-800-444-3353. Page 2... -
Page 3: Product Specifications
Keep bystanders, children, and visitors away while operating a power tool. Distractions can cause you to lose control. Protect others in the work area from debris such as chips and sparks. Provide barriers or shields as needed. SKU 93793 For technical questions, please call 1-800-444-3353. Page 3... -
Page 4: Electrical Safety
Stay alert. Watch what you are Do not force the tool. use the correct doing, and use common sense when tool for your application. The correct operating a power tool. Do not use SKU 93793 For technical questions, please call 1-800-444-3353. Page 4... - Page 5 SerVIce tool service must be performed only by qualified repair personnel. Service or maintenance performed by unqualified personnel could result in a risk of injury. SKU 93793 For technical questions, please call 1-800-444-3353. Page 5...
-
Page 6: Specific Safety Rules
Maintain labels and nameplates on that can catch and hold molten metal or the Welder. These carry important sparks. information. If unreadable or missing, contact Harbor Freight Tools for a • Keep clothing free of grease, oil, replacement. solvents, or any flammable substances. - Page 7 Clean and purge containers before use an approved respirator. applying heat. Vent closed containers, including castings, before preheating, welding, or cutting. SKU 93793 For technical questions, please call 1-800-444-3353. Page 7...
- Page 8 • Never weld on a pressurized or a closed WarnInG! This product, when used cylinder. for welding and similar applications, SKU 93793 For technical questions, please call 1-800-444-3353. Page 8...
-
Page 9: Grounding
29 through 31 are included. If low resistance path to carry electricity any parts are missing or broken, please call away from the user, reducing the risk of Harbor Freight Tools at 1-800-444-3353 as electric shock. soon as possible. SKU 93793 For technical questions, please call 1-800-444-3353. -
Page 10: Assembly Instructions
BracKet (40) BOttOM panel (36) axle BracKet (40) BOttOM cOtter pIn (41) VIeW WaSher (42) cOtter pIn (41) Wheel (43) axle (44) caSter (37) BOlt WaSher (42) FIGure B SKU 93793 For technical questions, please call 1-800-444-3353. Page 10... -
Page 11: To Install A 2 Lb. Wire Spool
Axle (13) onto the Shaft, using the spring securing it in place. (See Figure c.) underneath and the washer and nut above. (See Figure c.) WelDInG SpOOl SpOOl axle SpOOl clIp FIGure c REV 07j SKU 93793 For technical questions, please call 1-800-444-3353. Page 11... -
Page 12: To Route The Wire
Leave the Access Panel (31) of the Welder open so that the Wire Feed Assembly can be observed. (See Figure F, next page.) Remove the Gun Nozzle (51a) and Contact Tip (51b). SKU 93793 For technical questions, please call 1-800-444-3353. Page 12... - Page 13 See pages 15-17. heaD heaD tuBe (51c) tuBe (51c) WelDInG nOzzle nOzzle WIre (51a) (51a) cOntact cOntact tIp (51b) tIp (51b) FIGure F SKU 93793 For technical questions, please call 1-800-444-3353. Page 13...
-
Page 14: To Change Wire Settings
Wire Feed Assembly as discussed in the previous pages of this manual. tenSIOn SWInG aDJuStInG arM (15a) KnOB (15b) FeeD rOller BracKet (15i) ScreW (15j) FIGure G SKU 93793 For technical questions, please call 1-800-444-3353. Page 14... -
Page 15: Setting The Gun Polarity For Wire Type
Connecting Plug to lock it in place. (See Figure I.) GrOunD caBle WIth claMp (53, 52) WelDer tOrch caBle (SIDe VIeW) BOlt, lOcK WaSher, nut cOnnectInG pluG FIGure I GrOunD terMInal SKU 93793 For technical questions, please call 1-800-444-3353. Page 15... -
Page 16: To Install A Gas Cylinder
Adjust the flow rate of the gas by turning the Flow Adjust. The typical flow rate is 10-30 CFH (cubic feet per hour). Make sure to check the Welding Wire manufacturer’s recommended flow rate. SKU 93793 For technical questions, please call 1-800-444-3353. Page 16... -
Page 17: Operating Instructions
Once the unit returns to service, follow a more conservative duty cycle routine to help prevent excess wear to the Welder. (See Figure K.) 0 10 20 30 40 50 60 70 80 90 100 FIGure K Duration of use SKU 93793 For technical questions, please call 1-800-444-3353. Page 17... -
Page 18: Setting Up The Weld
Securely clamp the Ground Clamp (52) as close as possible to the metal object to be welded, or to the metal workbench where the object is mounted and electrically connected. (See Figure l.) SKU 93793 For technical questions, please call 1-800-444-3353. Page 18... -
Page 19: Holding The Welding Torch
Skin welding surface to ignite the arc. This burns can occur. never breathe arc will cause the Welding Wire to stick to fumes. (See page 8.) the workpiece. SKU 93793 For technical questions, please call 1-800-444-3353. Page 19... -
Page 20: Weld Settings Chart
Welding Instructions continued on next page. SKU 93793 For technical questions, please call 1-800-444-3353. Page 20... - Page 21 Diagnosis” section beginning on page 23. After making any necessary adjustments, continue the weld while carefully following the DUTY CYCLE guidelines. (See Figure n.) Welding Instructions continued on page 25. SKU 93793 For technical questions, please call 1-800-444-3353. Page 21...
-
Page 22: Weld Diagnosis
Keep arc on leading edge of weld puddle. Reduce wire feed speed. Hold gun at proper angles as stated under Increase weld speed. Holding The Torch on page 20. SKU 93793 For technical questions, please call 1-800-444-3353. Page 22... - Page 23 *this test WIll damage the weld it is performed weld area: on. this test is OnlY an indicator of weld technique and is not intended to test working Protect the weld area from drafts. welds. SKU 93793 For technical questions, please call 1-800-444-3353. Page 23...
-
Page 24: When The Weld Is Completed
The hammer can be used to knock off any excess spatter and to help knock down any ridges. Make sure not to damage the weld or material when striking it. The wire brush can then be used to help remove oxidation and some fine spatter. SKU 93793 For technical questions, please call 1-800-444-3353. Page 24... -
Page 25: Inspection, Maintenance, And Cleaning
Secure welding wire to the spool, cut it Make sure the entire Welding Torch (51) near the spool, and remove it from the is completely cool before proceeding. torch and cable. SKU 93793 For technical questions, please call 1-800-444-3353. Page 25... -
Page 26: Please Read The Following Carefully
AND LICENSED TECHNICIANS AND NOT BY THE BUYER. THE BUYER ASSUMES ALL RISK AND LIABIL- ITY ARISING OUT OF HIS OR HER REPAIRS TO THE ORIGINAL PRODUCT OR REPLACEMENT PARTS THERETO, OR ARISING OUT OF HIS OR HER INSTALLATION OF REPLACEMENT PARTS THERETO. SKU 93793 For technical questions, please call 1-800-444-3353. Page 26... -
Page 27: Parts Lists And Diagrams
DIaGraMS Wiring Schematic SKU 93793 For technical questions, please call 1-800-444-3353. Page 27... -
Page 28: Parts List
Copper Bolt, M8 Cable Tip Cable Tip Front Panel Rectifier Rack Bolt, M10 x 25 Left Handle Socket Lock Washer Voltage Control Washer Circuit Board Access Panel Circuit Board Bracket Latch SKU 93793 For technical questions, please call 1-800-444-3353. Page 28... -
Page 29: Assembly Diagram
Diagram nOte: Some parts are listed and shown for illustration purposes only and are not avail- able individually as replacement parts. SKU 93793 For technical questions, please call 1-800-444-3353. Page 29... - Page 30 Diagram (continued) Wire Feed Mechanism (15) SKU 93793 For technical questions, please call 1-800-444-3353. Page 30...
-
Page 31: Troubleshooting
Have a qualified technician inspect and repair/replace as necessary. If the steps above do not solve the problem or if the repairs involved are too complex, contact a qualified technician. SKU 93793 For technical questions, please call 1-800-444-3353. Page 31... -
Page 32: Weak Arc Strength
If needed, replace Contact Tip (51b) with proper size and type. If the steps above do not solve the problem or if the repairs involved are too complex, contact a qualified technician. SKU 93793 For technical questions, please call 1-800-444-3353. Page 32... -
Page 33: Warranty
We will Harbor Freight Tools also warrants to the original return repaired products at our expense, but if we purchaser, for a period of one year from date of...