Table of Contents
Advertisement
Quick Links
I
k_.
14_
U
_m
k._
U
Iii
GEAppliances.com
Safety Instructions
.........
2-e
Operating Instructions
Clock and Timer ...................
16
Control Lock Out ..................
18
Energy Saver IVlode ...............
18
Oven ..........................
11-22
Adjust the Oven Thermostat ..... 18
Aluminum Foil ...................
13
Broiling, Broiling Guide ..........
14
Controls ..........................
11
Convection Oven ................
15
Power Outage ...................
12
Sabbath Feature .................
19
Self-Cleaning .................
20, 21
Special Features .................
18
Steam Cleaning ..................
22
Timed Baking ....................
17
Surface Units ....................
7-9
Coil Surface Units .................
29
Control Knobs ....................
23
Drip Pans ........................
29
Glass Cooktop ................
27, 28
Lift-Off Oven Door ................
25
Lift-Up Cooktop ...................
29
Light .............................
26
Oven Heating Elements ...........
25
Racks ............................
25
Standard-Clean Oven Interior ....
24
Vent ..............................
24
Tips ..... 30-33
Accessories ...................
34
Consumer Support
Consumer Support ......
Back Cover
Warranty .........................
35
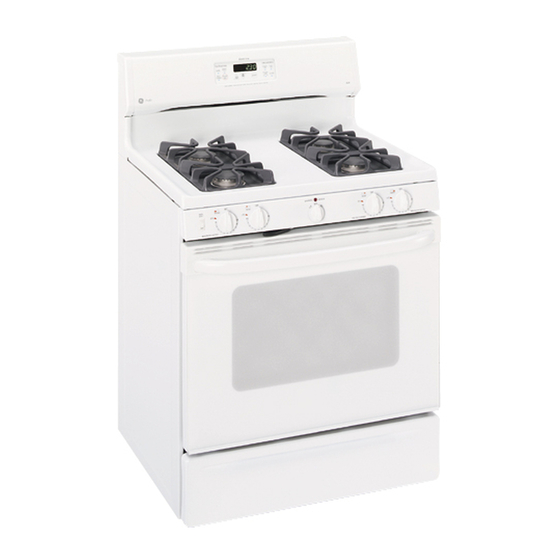
Quickset III and
Quickset IV Models
For a Spanish
version of this
manual,
visit our Website at
GEAppliances.com.
Para consultar
una version
en espa_ol de este manual
de
instrucciones,
visite nuestro
sitio
de internet
GEAppliances.com.
In Canada contact us at:
www. GEAppliances.ca
Write the model and serial
numbers
here:
Model #
Serial #
You can find them on a label
behind the drawer or behind the
lower oven door on the front of
the range frame.
Printed on
Recycled Paper
49-80632
03-11
GE
Advertisement
Table of Contents

Related Manuals for GE Appliances Quickset III


Summary of Contents for GE Appliances Quickset III
-
Page 1: Table Of Contents
GEAppliances.com Safety Instructions ..Operating Instructions Clock and Timer ....Control Lock Out ....Quickset III and Energy Saver IVlode ....Quickset IV Models Oven ......11-22 Adjust the Oven Thermostat ..18 Aluminum Foil ....Broiling, Broiling Guide ..Controls ...... -
Page 2: Oven
IMPORTANT SAFETY INFORMATION. READ ALL INSTRUCTIONS BEFORE USING. [A WARNING I Read all safety instructions before using the product. Failure to follow these instructions may result in fire, electric shock, serious injury or death. ANTI-TIP DEVICE To reduce the risk of tipping the range, the range must be secured by a properly installed anti-tip Tji0-Over... - Page 3 GEAppliances.com [A WARNING ] GENERAL SAFETY INSTRUCTIONS iiiil}i Use this appliance for its intended purpose as described Do not touch the surface units, the heating elements in this Owner's Manual. or the interior surface of the oven. These surfaces may be hot enough to burn even though they are dark in Be sure your appliance is properly installed and color.
- Page 4 IMPORTANT SAFETY INFORMATION. READ ALL INSTRUCTIONS BEFORE USING. WARNING j IN THEEVENTOFA FIRE,TAKETHEFOLLOWING STEPS TO PREVENT THE FIRE FROM SPREADING: *:, Do not use water on grease fires. Never pick up a If there is a fire in the oven during self-clean, turn the flaming pan.
- Page 5 GEAppliances.com IA WARNING 1RADIANT COOKTOP SAFETYINSTRUCTIONS (Some models) iiiil}i Use care when touching the cooktop. The glass surface Use CERAHA BRY1-E ® ceramic Cooktop Cleaner and of the cooktop will retain heat after the controls have CERAHA BRYTE ® Cleaning Pad to clean the cooktop. been turned off.
- Page 6 IMPORTANT SAFETY INFORMATION. READ ALL INSTRUCTIONS BEFORE USING. [_ WARNING JSELF-CLEANINGOVEN SAFETYINSTRUCTIONS (Some models) The self-cleaning feature operates the oven at temperatures high enough to burn away food soils in the oven. Follow these instructions for safe operation. Before operating the self-clean cycle, remove pans, If the self-cleaning mode malfunctions, turn the oven off and disconnect the power supply.
- Page 7 Using the surface units, ion some mode_sI GEApUionces.c jA WARNING settings. Keep flammable FIRE HAZARD: Never leave the range unattended items away from the cooktop. Turn off all controls when with the cooktop on medium or high done cooking. Failure to follow these instructions can result in fire, serious injury or death.
- Page 8 Using the surface units, Throughout this manual, features and appearance may vary from your model. Warming Zone Using the Warming Zone (on some models) Forbest results,all foods on the WARMING IAWARNING ZONEshould be covered with a lid or aluminum foil. When warming pastries or breads, the FOOD POISONHAZARD:Bacteria may grow in cover should be vented to allow moisture to food at temperatures below 140°F.
- Page 9 GEAppliances.com The following information will help you choose cookware which will give good performance on glass cooktops. For Models With a Radiant Glass Cooktop The radiant cooktop features heating units beneath a smooth glass surface. cooktop is used for the first time. It is caused NOTE:A slight odor is normal when a new by the heating of new parts and insulating materials and will disappear in a short time.
- Page 10 Selecting types of cookware for radiant glass cooktop models. The following information will help you choose cookware which will give good performance on glass cooktops. Stainless Steel: Porcelain Enamel on Cast Iron: recommended recommended if bottom of pan is coated Aluminum: Porcelain Enamel on Steel: not recommended...
-
Page 11: Controls
Using the oven control clock and timer features and settings. GEApplionces.c Throughout this manual, features and appearance may vary from your model. ® Bake/Temp Recall Pad o AutomaticOven Automatic Oven Light Touch this pad to select the bake function. This lights anytime the oven has been programmed using the Cooking Time Bake Light Temp Recall... -
Page 12: Power Outage
Using the oven control clock and timer features and settings. Throughout this manual, features and appearance may vary from your model. Flashing Display - Power Outage If a flashing time is in the display,you have experienced If your oven was set for a timed oven operation and a a power failure. -
Page 13: Aluminum Foil
Using the oven. GEAppliances.com How to Set the Oven for Baking TochangetheoventemperatureduringBAKE cycle, [Z] Touchthe Bakepad. touchthe Bakepad and thenthe + or - padsto get the newtemperature. Touchthe + or - padsuntilthe desired temperatureisdisplayed. Check food for doneness at minimumtime on TouchtheStart/On pad.Theovenwill start recipe. - Page 14 Using the oven. How to Set the Oven for Broiling Door Positioning During Broiling: For models JSS28 and JDS28, Use Lo Broil to cook foods such as poultry or thick cuts of meat thoroughly without overbrowning them. Placethe food on a broiler grid in a broiler pan designed for broiling.
-
Page 15: Convection Oven
Using the convection oven. (on some models) GEAppliances.com to Set the Oven for Convection Convection Baking Baking Ideal for evenly browned baked foods cooked on multiple shelves. FY] Touch the Convection Bake pad. Good for large quantities of baked foods. F_ Touch the + or - pads until the desired Good results with cookies, biscuits, temperature... -
Page 16: Clock And Timer
Using the clock and timer. Not all features are on all models. To Set the Clock lock 6 ¸¸¸¸¸¸¸:!t The clock must be set to the correct time If the + or - pads are not touched within one of day for the automatic oven timing functions minute after Step !, the display reverts to the to work properly, The time of day cannot be original setting. -
Page 17: Timed Baking
Using the timed baking feature, con some mode sI GEAppliances.c Do not lock the oven door with the latch during timed cooking. The latch is used for self-cleaning and steam-cleaning only. NOTE: Foods that spoil easily-such as milk, eggs, fish, stuffings, poultry and pork-should not be allowed to sit for more than 1 hour before or after cooking. -
Page 18: Special Features
Special features of your oven control. Press and hold the + and- pads at the same Energy Saver Mode Con some models) time to enable or disable this feature. This will To save energy, you con turn off the time of turn the display on or off. -
Page 19: Sabbath Feature
-'-using the Sabbath feature. (on some mode/s) (Designed for use on the Jewish Sabbath and Holidays) GEAppliances.com TheSabbath f eature canbeusedforbaking only. I t cannot b eusedforbroiling, self-cleaning, convection b aking, steamcleaning ordelaystartcooking. NOTE: Theovenlightcomes onautomatically (on somemodels) whenthedoorisopened andgoesoffwhenthedoorisclosed. The bulbmayberemoved. See theOven LightReplacement section. -
Page 20: Self-Cleaning
Using the sdf-cleaning oven. some [_CAUTION] FIREHAzARD:Wipegreaseandheavys°ilfr°m°venbef°reself-deaning'Failuret°d°s°may result in an oven fire. A CAUTION j Never place cooking utensils, baking stones, foil, or any other items on the oven floor. Even jitems rated for high temperature may permanently adhere to oven bottom or cause heat damage to the oven, flooring or items in storage drawer. -
Page 21: Self-Cleaning
GEAppliances.com to Delay the Start of Self-Cleaning _onsome models) Hake sure the clock shows the correct time of The display will show the start time. It will not day. be possible to unlatch the oven door until the temperature drops below the lock temperature. [7] Latch the door. -
Page 22: Steam Cleaning
Using Steam Clean. con s ome mode/s The range should be at room temperature before CAUTION the oven bottom becomes hot beginning the Steam Clean cycle. If the oven is too hot, ] During the steam clean cycle, "hot" will appear on the display and the cycle will not enough to cause burns. -
Page 23: Care And Cleaning
Care and cleaning of the range. GEAppliances.c Be sure all controls are off and all surfaces are cool before cleaning any part of the range. If your range is removed for cleaning, servicing or any reason, be IA, WARNING j sure the anti-tip device is reengaged properly when the range is replaced. -
Page 24: Vent
Care and cleaning of the range, Porcelain Oven Interior (on standard-clean models) With proper care, the porcelainenamelfinish on fumes will help loosenthe burned-on greaseand food. the insideof the oven-top, bottom, sides,back and insideof the door-will stay new-lookingfor If necessary,you may usean oven cleaner. Follow years. -
Page 25: Lift-Off Oven Door
GEAppliances.com Lift-Off Oven Door The door is very heavy. Be careful when With the door at Hinge arm Bottom removing and lifting the door. the same angle as the removal Do not riftthe door by the hand@. position, seat the To remove the door'. -
Page 26: Light
Care and cleaning of the range, A WARNING j the electrical power tothe range atthe main f use o rcircuit breaker panel. j SHOCK OR BURN HAZARD: Before replacing oven light bulb, disconnect Failure to do so may result in electric shock or burn. [A CAUTION BURN HAZARD: The glass cover and bulb should be removed when cool. - Page 27 Cleaning the glass cooktop, con some m odels; GEAppliances.c Normal Daily Use Cleaning ONLYuse CERAIV]A BRVTE ® Ceramic Cooktop r-_ Shakethe cleaning cream well. Apply a Cleaner on the glass cooktop. Other creams few drops of CERAHABRYTE ® Ceramic may not be as effective. Cooktop Cleanerdirectly to the cooktop.
- Page 28 Cleaning the glass cooktop, some mode/s Metal Marks Scratches This should be removed immediately [Z] Be careful not to slide pots and pans across your cooktop. It will leave metal before heating again or the markings on the cooktop surface. discoloration may be permanent.
-
Page 29: Drip Pans
Care and cleaning of the coil cooktop, con some modelsl GEAppliances.c Be sure the controls are turned to OFF and the surface units are cool before attempting to remove them. Surface Units Diip Tocleanthe surfaceunits,turn the controlto the Toreplace a surface unit: highestsettingfor a minute.Thecoilswill burn off Replace the drip pan intothe recess anysoil. -
Page 30: Troubleshooting Tips
Before you call for service... Troubleshooting Tips Save time and money! Review the charts on the following pages first and you may not need to call for service. Possible Causes What To Do Surface units will not Improper cookware , Use pans which are flat and match the diameter maintain a rolling boil being used. - Page 31 GEAppliances.com Possible Causes What To Do Food does not bake Oven controls improperly set. • See the Using the oven section. or roast properly Rack position is incorrect, . See the Using the oven section. or the rack is not level. Incorrect cookwareor cookware * See the Using the oven section.
- Page 32 Before you call for service... Troubleshooting Tips Possible Causes What To Do Storage drawer Rear drawer support is . Reposition the drawer. See the Storage Drawer is crooked on top of the guide rail. Removal instructions in the Care and cleaning of the range section.
- Page 33 GEAppliances.com Possible Causes What To Do "F -" and a number You have a function . Disconnect all power to the range for at least or letter flash error code. 30 seconds and then reconnect power. If the function in the display error code repeats, call for service.
-
Page 34: Accessories
Get the most out of your Broiler Pan! (Not for use with Broiler Drawer models.) Use your pan and grid cover to broil hamburgers, seafood, steaks, vegetables, bacon, chops and so much more! The pan below catches the excess fats and oils. . Genuine GE Part Easy To Clean Warranty . - Page 35 USA. If the product is located in an area where service by a GE Authorized Servicer is not available, you may be responsible for a trip charge or you may be required to bring the product to an Authorized GE Service location for service.
- Page 36 Schedule Service GEAppliances.com Expert GE repair service is only one step away from your door. Get on-line and schedule your service at your convenience any day of the year! Or call 800.GECARES (800.432.2737) during normal business hours. GEAppliances.com...