
Related Manuals for Grace Digital TUNER PRO GDI-IRTP800

Summary of Contents for Grace Digital TUNER PRO GDI-IRTP800
- Page 1 TUNER PRO Internet Radio Tuner by Grace Digital User’s Guide Model no. GDI-IRTP800 ______________________________________________...
-
Page 2: Table Of Contents
Setting the alarm ........................23 Setting the sleep timer ......................25 Configuring ‘My Stuff’ ........................25 Registering an account on Grace Digital Audio’s website............25 Configuring ‘My Profile’ ......................26 Configuring ‘My Stations’ ......................26 Configuring ‘My Streams’ ......................26 Configuring ‘My Podcasts’... - Page 3 Locate the shared audio files using the tuner ................31 Listening to a single shared track ....................32 Listening to a complete shared album..................32 Arranging (Queuing up) tracks for playback later ..............33 Arranging (Queuing up) albums for playback later ..............33 Controlling playback .........................
-
Page 4: Important Safety Instructions And Warnings
Important Safety Instructions and Warnings Please read before installation If this Internet tuner has been moved from a cold place to a warm place, DO NOT plug it in for 2-3 hours (e.g. from a cold car boot to a warm room). There is a possibility that moisture may have condensed in the Internet tuner, this can cause damage to your Internet tuner. - Page 5 WARNING: To reduce the risk of fire or electrical shock, do not expose the product to rain or moisture. The product shall not be exposed to any dripping or splashing. Objects filled with liquids, such as vases, should not be placed on the product. ...
- Page 6 ADVISORY This Product is intended for North American markets. The GRACE Wireless Internet Tuner Series & TUNER PRO GDI-IRTP800 is in compliance with the essential Requirements and other relevant provisions of Directive 1999/5/EC ADVISORY FCC Compliance and Advisory Statement: This device complies with Part 15 of the FCC Rules.
-
Page 7: Quickstart Guide (Wireless Connection)
“Power” on the front panel will light red when in standby and turn off when the unit is actively powered. The display should turn on within approximately 4 seconds and the LED should turn off. The messages that are briefly displayed will be ‘Grace Digital Tuner’, ‘Starting…’ then ‘Scanning’. - Page 8 the 1 letter or number in your password is located and positioned in the center of the tuner’s display. Press the dial inward to select the 1 letter. Continue this process until the final letter or number is selected. Once your password is entered, scroll, located and select ‘END’. NOTE: If you make a mistake at anytime, press the ‘back’...
-
Page 9: Contents
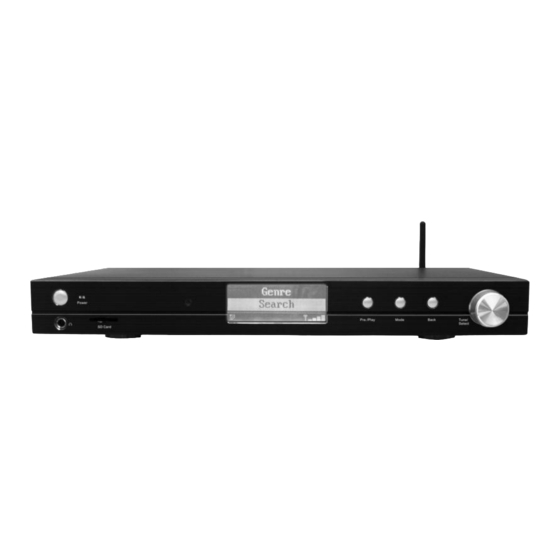
Contents TUNER PRO GDI-IRTP800 Power Adapter Remote Control User’s Guide Tuner controls & connections Power Button Power LED Indicator Remote Control Lens LCD Display Previous / Play Button Mode Changing Button Back Button Tuning / Select Dial 6.35 mm Headphone Jack SD Card Slot External Wifi Antenna Ethernet Jack... -
Page 10: Tuner Remote Control Functions And Controls
Tuner remote control functions and controls REMOTE CONTROL 1. MUTE: < Press to mute the voice of Earphone only> 2. POWER: <Press to switch the internet tuner ON/OFF> 3. 0--9: <Numeric buttons for Store and Recall functions> 4. Back: <Press to go back to the previous display> 5. -
Page 11: Connect Your Tuner To Your Network
Your Tuner can be connected to the internet using a WIRELESS or a WIRED connection. Once powered on, the display on the front of the tuner will light up and show: Grace Digital Tuner After a few seconds, the screen will change to show:... -
Page 12: Step 2 - Scan For A Wireless Network Connection
Step 2 - Scan for a wireless network connection When the display shows <Scan for networks>, press the ‘Tuner/Select’ button. NOTE: IF you make an error at any point, press the ‘Back’ button to return the previous screen The TUNER will then scan for all available wireless networks and will display: Scanning IIIIIIIIIIIIIIIIIII IF the tuner does not find a wireless network router, the display will show:... -
Page 13: Step 3 - Connect To The Wireless Network
Step 3 - Connect to the wireless network When the ESSID for the router you want to connect is displayed on the screen, press OK. IF your network is not configured to require an encryption code, the screen should display: Connecting to Network then:... - Page 14 After approximately 3 seconds, the display goes into the password entry mode: <END ◄ ► A BCDEF> █ To enter the password, use the Tuner/Select DIAL or the UP/DOWN buttons on the remote to select each letter/number/symbol of the password in turn, pressing OK after each letter. NOTE: WEP and WPA passwords are upper and lower case sensitive and MUST be entered exactly...
-
Page 15: Wired Network Connection & Tuner Settings
Wired network connection & tuner settings Wired connection, settings & network configurations The ‘Settings’ section on your Tuner offers numerous sub-menus that allow you to set and modify Network configurations and other features and functions for your Tuner. <Settings> In the main menu, you will find from where you can modify basic configurations and settings. - Page 16 IF Auto is selected, your Tuner will detect automatically for either wired connection or wireless connection. IF Wired Only is selected, your Tuner will only connect through a Wired connection. IF Wireless Only is selected, your Tuner will only connect through Wireless Wi-Fi connection. Configuring the radio to only use a Wired Ethernet connection Selecting ‘Wired Only’...
-
Page 17: Listening To Your Internet Radio Tuner
Listening to Your Internet Radio Tuner Settings & Network Configurations Changing the volume – headphone connection The volume control on the unit is just for adjusting the volume for the headphone. You can change the volume by turning the Tuner/Select Dial clockwise to increase the volume and counter-clockwise to decrease the volume. - Page 18 Grace Digital tuner. You can either enter your Sirius user name and password onto the Grace Digital website or through this portion of the tuner’s menu.
-
Page 19: Choosing A Pandora Tuner Station
Choosing a Pandora tuner station (Personal Tuner) This section allows for the new Grace Digital Personal tuner services. The current service is Pandora. Prior to this feature working you must first register your tuner on the Grace web site. Please see registering your tuner. After this is complete you can enter in your Pandora user name and password. -
Page 20: Playing A Preset Tuner Station
Requesting a station that is currently unavailable If you want to listen to a particular tuner station which is currently not available online, you can visit the Grace Digital Audio web site at www.grace.reciva.comand enter in a request to add the station to the list. - Page 21 1. Turn the Dial to choose <Live> or <On Demand>, then press the ‘Select’ button. IF you choose <Live> then the tuner plays the current output from this station as normal. If you choose <On Demand> more screens are displayed and you can choose what you want to listen.
- Page 22 < Clock Setup > Sleep Timer 5. Turn the Dial until the display says <Set Time/Date> < Set Time/Date > Set Alarm 6. Press the ‘Select’ button. Pacific Central Eastern 7. Turn the Dial until the correct time zone is seen on the display. Push the ‘Select’ button to set your time zone.
-
Page 23: Setting The Clock
Setting the alarm 1. Press the ‘Select’ button. NOTE: IF you make a mistake at any point, press the BACK button to go back to the previous screen 2. Turn the Dial until the display shows <Alarm Clock> Stations < Alarm Clock >... - Page 24 7. If you choose “Yes” then the display enables you to set the time for the alarm. Set Alarm 15:06 8. After selecting < 1 Off 12:00 AM> you can choose the time to set the Alarm. Set Alarm 12:00 AM 9.
-
Page 25: Setting The Sleep Timer
Setting the sleep timer 1. Choose Alarm Clock 2. Choose Sleep Timer 3. Then scroll the Select Dial form between 30 seconds and 99 hours. When the desired time is reached, Press the select Dial. The tuner will stay on until the timer is reaches zero. Configuring ‘My Stuff’... -
Page 26: Configuring 'My Profile
‘Update’ button to save them. Configuring “My Stations’ 1. It is possible to search for tuner stations that are available in Grace Digital Audio’s stations’ database from Grace Digital Audio’s website. Whenever stations are searched for on the website, they will be displayed in a list of search results together with a link to ‘Add to My... -
Page 27: Configuring 'My Podcasts
Configuring “My Pandora’ 1. In order to use the Pandora feature on the Grace Digital Internet tuner you must 1st have an active Pandora account. You can create a Pandora account at www.pandora.com or www.grace.reciva.com. -
Page 28: Accessing Pandora Feedback Menu
‘password’. After you have done this please unplug your tuner from power and wait 15 minutes. Plug the tuner back in and turn the tuner on to listen to your Pandora stations on your Grace digital tuner. 5. You can then listen to your Pandora music section via the following menu choices. -
Page 29: Media Player Quickstart Guide
Media Player Quickstart Guide The Media Player allows you to play unprotected audio files (AAC, AIFF, MP3, RM, WAV, WMA) and play lists (M3U) stored on a networked PC or Apple. It has been verified to work with Windows 2000 and Windows XP, and Apple OSX. Set Up your Windows PC to enable the tuner to access your audio files via Windows Shares Windows XP... - Page 30 4. Open ‘Windows Explorer’ by right clicking on the Start menu and selecting ‘Explore’. Create a new directory in the ‘Public’ directory and move your media files into this new directory. 5. Right click on the directory just created and select ‘Share…’. Ensure that the directory is listed as being shared, if not, click on the ‘Share’...
-
Page 31: Locate The Shared Audio Files Using The Tuner
Turn on ‘AirPort’ (or wireless sharing). Wait for a few minutes for the changes to take place. 5. The tuner should now be able to access the MAC from its ‘Media Player > Windows Shares’ menu after entering in the MAC account’s short name and password on the tuner. Locate the shared audio files using the tuner 1. -
Page 32: Listening To A Single Shared Track
Listening to a single shared track 1. Turn the Dial until ‘By Artist’ is displayed. 2. Press the SELECT button. 3. Turn the Dial until the required artist is displayed. 4. Press the SELECT button. 5. Turn the Dial until the required album name is displayed. 6. -
Page 33: Arranging (Queuing Up) Tracks For Playback Later
Arranging (Queuing Up) tracks for playback later 1. Highlight the required track. 2. Press the SELECT button. ‘Track Added To Queue’ will be displayed. Arranging (Queuing Up) albums for playback later 1. Highlight the required album. 2. Press the SELECT button. 3. -
Page 34: Browsing The List Of Tracks Currently (Queued Up) For Playback
Browsing the list of tracks currently arranged (queue up) for playback 1. Press the BROWSE button. The currently playing track name will be displayed. 2. Turn the Dial to see which tracks are queued up for playback. 3. If you want to jump to a particular place in the queue then press the SELECT button when the required track is displayed. -
Page 35: Playing Tracks In The List (Queue) Repeatedly
5. Press the SELECT button. 6. Turn the Dial until ‘Shuffle’ is displayed. 7. Press the SELECT button. 8. Turn the Dial to select YES/NO to confirm that shuffle mode should be enabled. Playing tracks in the list (queue) repeatedly 1. -
Page 36: Set Up A Windows Pc To Allow The Tuner To Access Your Audio Files Via A Upnp Server
Set up a Windows PC to allow the tuner to access your audio files via a UPnP server 1. If your PC is running Microsoft Windows XP or Windows Vista, then you can use Windows Media Player 11 (WMP11) to act as your UPnP (Universal Plug and Play) media server 1.0. - Page 37 5. From the ‘Media Sharing’ window, the tuner will be listed as an unknown device. Click on the unknown device listed, then click the ‘Allow’ button and then click ‘OK’. Allowing your TUNER to connect:...
-
Page 38: Locating And Playing Media Files Using The Tuner And Upnp
Locating and playing media files using the tuner and UPnP 1. Once the UPnP server is configured to share media files with the Internet tuner, you can play the files by doing the following on the tuner. 2. Keep pressing BACK to get to the tuner’s top-level menu and then turn the Dial to select ‘Media Player’. -
Page 39: Arranging (Queuing Up) Upnp Tracks For Playback Later
Arranging (queuing up) UPnP tracks for playback later 1. Highlight the required track. 2. Press the SELECT button. ‘Track Added To Queue’ will be displayed. Arranging (Queuing Up) albums for playback later 1. Highlight the required album. 2. Press the SELECT button. 3. -
Page 40: Playing Tracks In Random Order
4. Turn the Dial to highlight ‘Yes’ or ‘No’. 5. Press SELECT to confirm whether you actually want to delete the track from the queue. 6. If ‘Yes’ was selected then ‘Removed From Queue’ will be displayed. 7. To remove all tracks from the queue, keep pressing BACK until the ‘Media Player’ menu item is selected, press SELECT and then turn the Dial to select ‘Clear Queue’... -
Page 41: Settings Menu
Use this option to download new firmware (also referred to as Service Pack or Version on your Tuner) for the Tuner from the Grace Digital Audio portal on the Internet. If there is new firmware available, the tuner will prompt you if you want to download it or not. Note, at this... -
Page 42: Language
<Register> This will display a key that can be used to register the tuner on the Grace Digital Audio Customer portal: www.grace.reciva.com <Clock Setup>... -
Page 43: Upnp
• The ‘active’ state is when there is user activity. • ‘Standby’ is the state when the tuner has been turned off. 2. Rotate the Dial to highlight the desired menu mode and press SELECT. The tuner will now display the current backlight value for this menu mode. You can alter this value by rotating the Dial to increase or decrease it. -
Page 44: Troubleshooting
Troubleshooting Please read the User’s Guide carefully to ensure proper use of your system and to enjoy your TUNER’s basic and advanced features. Please keep this User’s Guide for future reference. If you experience any trouble with your internet radio TUNER, then you may find it useful to visit the help section on our webpage: http://grace.reciva.com/ , or http://www.reciva.com If you have trouble connecting your TUNER to your wireless network, these steps may help to resolve the problem:... -
Page 45: Specifications
Try using a PC to play back the stream via the broadcaster’s web site. If you can play back the station with a PC, use the form at http://grace.reciva.com/ , or contact us at http://www.gracesupport.com/ to notify us so that we can address the station data Specifications ... - Page 46 This warranty does not imply any acceptance by Grace Digital, retailers or its agents for consequential loss or damage and specifically excludes fair wear and tear, accident, misuse of unauthorized modification.
-
Page 47: Customer Service And Support
The warranty does not cover: (a) damage or failure caused by or attributed to acts of God, abuse, accident, misuse, improper installation or improper maintenance, alteration, lightning or excessive voltage or current; (b) any repairs other than those provided by a GDI-IRTP800 authorized service facility; (c) consumables such as fuses or batteries;... - Page 48 2. In the Media Sharing dialog box, select the Share my media check box.
- Page 49 3. In the list that appears below the Share my media to: check box, click your Tuner*, click Allow. The selected device will now show a green tick and then click OK. • If your device does not appear in the list of devices perform the following steps; 1.
-
Page 50: Step 2: Play Music On The Internet Tuner
Step 2: Play Music on the Internet Tuner After installing and configuring your tuner and Windows Media Player 11, you are now ready to play music wirelessly. The following steps describe how to play music using the Tuner. 1. Use the control, to select “UPnP Servers” from the “Media Player” menu. 2. - Page 51 Grace Digital Inc., San Diego, CA...