Table of Contents
Advertisement
Advertisement
Table of Contents
Troubleshooting

Related Manuals for Precor EFX 5.21


Summary of Contents for Precor EFX 5.21
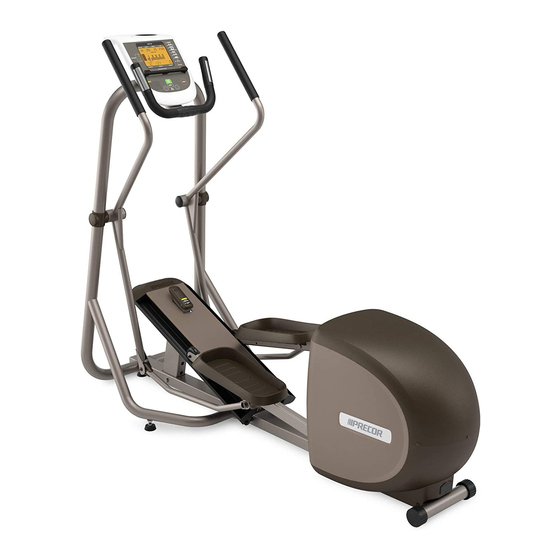
- Page 1 Assembly Guide ® 5.21 ® 5.23 Elliptical Fitness Crosstrainers...
-
Page 3: Installation Requirements
When fully tightened, the head of the fastener should be flush with the it was not included with your EFX, please contact your Precor dealer for the product. If it is not, cross-threading has occurred. Do not attempt to rework correct Precor power cord. -
Page 4: Hardware Kit
Hardware Kit Fasteners Quantity Additional Fasteners for EFX5.23 only Quantity (G) Buttonhead screw (M8 x 50 mm) (A) Hex head screw (M8 x 20 mm) (B) Flat washer (M8) (H) Flat washer (M8) (J) Locknut (M8) (C) Buttonhead screw (M8 x 12 mm) (D) Lock washer (M8) 2 —... -
Page 5: Assembly Steps
Assembly Steps Important: Read the Installation Requirements before assembling the EFX. Ask your assistant to hold the right stabilizer, which has the cable protruding from both ends, next to the base frame. Connect the base cable. An audible click is heard when the cable is properly attached. - Page 6 (D). Partially tighten. CAUTION: Make sure you do not pinch the cables while attaching the console bracket. Any damage caused during installation is not covered by the Precor Limited Warranty. Insert the bottom buttonhead screw (C) with lock washer (D). Partially tighten.
- Page 7 Important: If your EFX is a 5.23 model, you will need to attach the movable arms. If your EFX is a 5.21 model, please skip steps 8-11. Attach the right moving handlebar. Slide the handlebar pivot joint onto the stabilizer axle (use a rubber mallet if needed). Secure the handlebar using one buttonhead screw (E) and one washer (F).
- Page 8 Connect the 4-pin connector and the RJ45 to the appropriate receptacles on the back of the display console. You will hear the cable click into place when it is properly attached. Place the excess cable into the console bracket. Connect the green grounding wire to the middle receptacle marked GND.
- Page 9 Adjusting the Ramp The EFX ramp incline can be set to one of three positions: Low (15 degrees), Medium (20 degrees), or High (25 degrees). If you are on the equipment, dismount. To adjust the ramp, you can straddle the equipment with one foot on either side or stand to one side of it.
- Page 10 Turn the unit On. Use the power switch to turn the unit On. Check that the Precor banner appears on the display. If the display remains blank, cycle the power. If the display continues to remain blank, check the cable connections.
- Page 12 Precor Incorporated ©2011 Precor Incorporated 20031 142nd Avenue NE www.precor.com P.O. Box 7202 EFX 5.21/5.23 AG 300085-201, en Woodinville, WA USA 98072-4002 15 September 2011 1-800-347-4404...
- Page 13 QUICKSTART™ Begin Your Workout with QUICKSTART CAUTION: Before using the EFX, read all these instructions. Failure to do so may result in serious injury. To begin exercising immediately without personalizing your exercise • Do not allow children or those unfamiliar with its session, take the following steps.
- Page 14 If the touch heart rate feature does not work for you, If you are a beginner, start a cardio-conditioning program Precor recommends that you use a chest transmitter Note: To receive an accurate reading, the strap needs to to slowly adjust your body to a comfortable level of strap.
- Page 15 ® 5.21 ® 5.23...
-
Page 17: Important Safety Instructions
Do not leave included with your EFX, please contact your Precor children unsupervised around the equipment. dealer for the correct Precor power cord. For a list of • Make sure all users wear proper exercise clothing and... - Page 18 Use the equipment only for its intended purpose as treadmill, and at least 80 inches (2 meters) away described in this manual. Do not use accessory from objects behind the treadmill. attachments that are not recommended by Precor. Such attachments may cause injuries. Owner’s Manual: Important Safety Instructions...
-
Page 19: Grounding Instructions
EFX, please contact your Precor • Do not attempt to service the equipment yourself, dealer for the correct Precor power cord. For a list of except to follow the maintenance instructions in this authorized Precor dealers in your area, please contact manual. -
Page 20: Hazardous Materials And Proper Disposal
(WEEE), determine the framework for the Federal law requires proper disposal of these batteries. If return and recycling of used equipment as applicable you plan to dispose of your equipment, contact Precor throughout the European Union. The WEEE label Commercial Products Customer Support for information indicates that the product is not to be thrown away, but regarding battery removal. -
Page 21: Regulatory Notices For Cardiovascular Exercise Equipment
Equipment residential installation. The EFX generates, uses, and can Precor equipment has been tested and found to comply radiate radio frequency energy and, if not installed and with the following applicable safety standards. - Page 22 Failure to follow these instructions might damage the unit and ATTENTION: Haute Tension will void the Precor Limited Warranty. If an appropriate Débranchez avant de réparer cord for your location was not included with your EFX, please contact your Precor dealer for the proper Precor power cord.
-
Page 23: Obtaining Service
For information about product operation or service, see the Precor web site at www.precor.com. For future reference, write the model, serial number, and date of purchase for your unit in the space provided. The serial number is printed on a label located beneath the power receptacle (Figure 1). -
Page 24: Table Of Contents
Table of Contents Important Safety Instructions ......1 Workout Options ..............20 Adjusting the Ramp ..............21 Safety Precautions ..............1 Choosing QUICKSTART ............22 Grounding Instructions ..............3 Selecting a Program ..............23 Hazardous Materials and Proper Disposal ......4 Cooling Down After a Workout ..........23 Product Recycling and Disposal .......... - Page 25 Maintenance ................36 Cleaning the Equipment ............36 Long-Term Storage ..............37 Precor Residential Equipment Limited Warranty ................. 38 Owner’s Manual: Table of Contents...
-
Page 26: Efx Features
EFX Features The EFX is equipped with features designed to help you meet your fitness goals. These features include: • Stationary handgrips with heart rate feature • Moving handlebars (EFX 5.23 only) • Preset programs • Comprehensive resistance settings • Manually adjustable ramp with three settings The Locking Pin Figure 2: Remove locking pin before exercising... -
Page 27: Using The Stationary Handrail
Using the Stationary Handrail Location To maintain your balance, always grasp a stationary It is important to keep a minimum distance of one foot (30 handrail when you step on or off the foot pedals, and when cm) around the EFX open and free from obstacles such as you use the keypad. -
Page 28: Heart Rate Features
Heart Rate Features Important Safety Instructions Note: Handheld heart rate performance may vary based on a user’s physiology, fitness level, age, and other factors. Read the following before using the heart rate or You may experience an erratic readout if your hands are SmartRate features. -
Page 29: Exercising To Your Target Heart Rate
Exercising to Your Target Heart Rate Note: If the handheld heart rate sensors do not work for you, then we recommend that you use a chest transmitter strap. A CAUTION: Before beginning any fitness program, see your chest strap is not included with this model. physician for a thorough physical examination. -
Page 30: Using Smartrate
The SmartRate indicator bars do not appear when: The calculation used to determine your maximum aerobic • You press QUICKSTART at the Precor banner. heart rate is (220 minus your age). When you multiply it by the percent indicated in Table 1, you can understand the •... -
Page 31: Display Console
RESET key: Press this key to end your exercise session and view your workout summary. Pressing the key a second time, causes the display to reset to the Precor banner. Owner’s Manual: Display Console... -
Page 32: Using The Upper Display
Using the Upper Display DISTANCE—Displays an estimate of your cumulative distance travelled in miles or kilometers based on your resistance level, weight, and caloric expenditure. You can use the DISTANCE display as a unique motivational unit of HEART RATE CALORIES DISTANCE TIME measurement and realize your fitness goals by varying the... -
Page 33: Using The Center Display
Using the Center Display PROGRAM PROFILE—In most programs, the resistance setting affects the column height in the program profile as shown in Figure 7. The profile raises or lowers according to which arrow key is pressed. HEART RATE CALORIES DISTANCE TIME 888.8 888.8... -
Page 34: Using The Lower Display
Using the Lower Display STRIDES/MIN—Displays the number of strides you complete in a minute up to a maximum value of 510 strides per minute. A stride is an exaggerated walking movement. If you start in a position with one foot pedal forward, a stride is completed when you move the rear foot pedal all HEART RATE CALORIES... - Page 35 Manual Program. Refer to Choosing QUICKSTART. RESET–Press RESET to end an exercise session or return to the Precor banner. RESISTANCE–Press and hold the RESISTANCE arrow keys to increase or decrease the resistance from 1 to 16.
-
Page 36: Workout Options
Steps... Know your physician-recommended heart rate target zone. To start exercising Use the QUICKSTART key. 1. Turn the unit On. The Precor banner scrolls across the immediately display. To view the list of Press the PROGRAMS key. 2. Hold on to a stationary handrail while stepping on to programs the foot pedals. -
Page 37: Adjusting The Ramp
Adjusting the Ramp The EFX ramp incline can be set to one of three positions: Low (15 degrees), Medium (20 degrees), or High (25 degrees). 1. If you are on the equipment, dismount and straddle the equipment with one foot on either side or stand to one side of it. -
Page 38: Choosing Quickstart
Weight 150 lb (68 kg) 2. Maintain a comfortable and consistent stride rate while exercising. 1. While the Precor banner scrolls, press QUICKSTART to begin the Manual Program. 3. Use the RESISTANCE arrow keys to adjust the resistance. Note: The SmartRate feature is disabled when you select QUICKSTART from the Precor banner. -
Page 39: Selecting A Program
4. Manually adjust the ramp to your to your preferred 2. Press RESET to view the workout summary. incline. 3. Press RESET again to return to the Precor banner. Important: Hold on to a stationary handrail. Step off the EFX when the lift has stopped moving. -
Page 40: Pausing During A Workout Or The Cool-Down Period
Note: The workout statistics include warm-up and cool- pedaling. down periods. 2. To return to the Precor banner before the workout summary ends, press the RESET key. 3. Turn Off the EFX and lock the foot pedals in place with the locking pin. -
Page 41: Programs
Weight Loss and feel that you have an intermediate or advanced fitness level, you probably have established goals. The Precor Fat Burner web site (www.precor.com) can give you many ideas about Cross Trainer fitness workouts and advice from the experts. Interval... -
Page 42: Program Tips
Program Tips Manual Program • Begin at the Precor banner. Refer to Workout Options. The Manual Program (P1) profile begins as a flat line. • A blinking column indicates your position as you You control resistance progress through a program. -
Page 43: Weight Loss Program
Weight Loss Program Fat Burner Program The Weight Loss Program (P2) The Fat Burner Program (P3) is is targeted at lowering body fat targeted at lowering body fat while improving muscle tone while improving muscle tone PROGRAM PROGRAM and conditioning. Use this and conditioning. -
Page 44: Crosstrainer Program
CrossTrainer Interval Program Program The Interval Program (P5) is one of the best for conditioning The CrossTrainer Program (P4) your cardiovascular system. has preprogrammed settings PROGRAM PROGRAM The program raises and lowers and an initial resistance of 1. your level of exertion repeatedly for the specified period of The program consists of optimized settings combined with time. -
Page 45: Hill Climb Program
Hill Climb Program Gluteals Program The Hill Climb Program (P6) The Gluteals Program (P7) is has preprogrammed settings in designed to exercise your a fixed pattern. It is designed to gluteal muscles. PROGRAM PROGRAM increase muscle tone, cardio- The program consists of alternating forward and backward conditioning, and endurance over several weeks. -
Page 46: Heart Rate Program
Heart Rate Program The Basic HRC Program (P8) adjusts the resistance to maintain your heart rate within PROGRAM two beats per minute of the target heart rate while you exercise. To help you monitor your heart rate while using this program, Target HR Achieved appears at the top of the SmartRate display when your heart rate is within two beats per minute of the target heart rate. - Page 47 These tips provide general • Automatic resistance changes appear in the information regarding how the program functions. For more RESISTANCE display. information and exercise suggestions, refer to the Precor web site at www.precor.com. • A cool-down period is incorporated into the program. •...
-
Page 48: Advanced Programming And Troubleshooting
ENTER key at • View the odometer the Precor banner, then entering the appropriate key • Display the number of hours you have used your EFX combination. Any remaining key presses must occur •... -
Page 49: Selecting A U.s. Standard Or Metric Display
The default factory setting is set to display U.S. standard. To change this setting, perform the following 1. At the Precor banner, press and hold ENTER while steps: pressing the following keys in sequence without pause. -
Page 50: Viewing The Error Log
4. When you no longer need the information in the error log, press QUICKSTART for at least four seconds to 1. At the Precor banner, press and hold the RESET key erase it. NO ERRORS appears on the display and for at least four seconds to view the error log. -
Page 51: Troubleshooting Heart Rate Program
Troubleshooting Heart Rate Program Table 2. Erratic heart rate readings Table 2 may help you understand and troubleshoot erratic What appears heart rate readings. on the display Cause What to Do Nothing The heart rate To receive Customer Important: A heart rate can only be detected when the receiver is not Support, refer to EFX is turned On and you hold on to both touch-sensitive... -
Page 52: Maintenance
Use a soft nylon scrub brush to clean know that the EFX needs service. the foot pedals. To order parts or to contact a Precor authorized service provider in your area, refer to Radio Frequency Interference (RFI). -
Page 53: Long-Term Storage
Long-Term Storage When the EFX is not in use for any length of time, turn it Off. Make sure that the power cord is unplugged from its power source and is positioned so that it will not become damaged or interfere with people or other equipment. Owner’s Manual: Maintenance... -
Page 54: Precor Residential Equipment Limited Warranty
To make claim under warranty, the buyer must notify Precor or their authorized Precor dealer within 30 days after the date of discovery of any nonconformity and make the affected product available for inspection by Precor or its service representative. - Page 55 Options / Accessories 4. Except in Canada, Precor does not pay labor outside the United States. Many options or accessories have components that are 5. Warranties outside the United States and Canada may vary. connected internally or mounted inside the electronic console.
- Page 56 Exclusive Remedies For any product described above that fails to conform to its warranty, Precor will provide, at their option, one of the following: (1) repair; (2) replacement; or (3) refund of the purchase price. Precor Limited Warranty service may be obtained by contacting the authorized dealer from whom you purchased the item.
- Page 57 Please detach and mail in the warranty registration within ten days of purchase.
- Page 59 EFX5.21/EFX5.23 Elliptical Fitness CrossTrainers Product Specifications Electronic Readouts EFX5.21 EFX5.23 % Complete SmartRate* Length: 77 in (196 cm) 77 in (196 cm) Average Heart Rate* Strides per Minute Width: 29 in (74 cm) 29 in (74 cm) Calories Target Heart Rate Height: 61 in (155 cm) 61 in (155 cm)
- Page 60 Precor aggressively seeks U.S. and foreign patents for both the mechanical construction and the EFX 5.21/5.23 OM 300998-301, en Precor Incorporated visual aspects of its product design. Any party contemplating the use of Precor’s product designs Warranty #301997-101, en 20031 142nd Ave NE is hereby forewarned that Precor considers the unauthorized appropriation of its proprietary rights P.O.