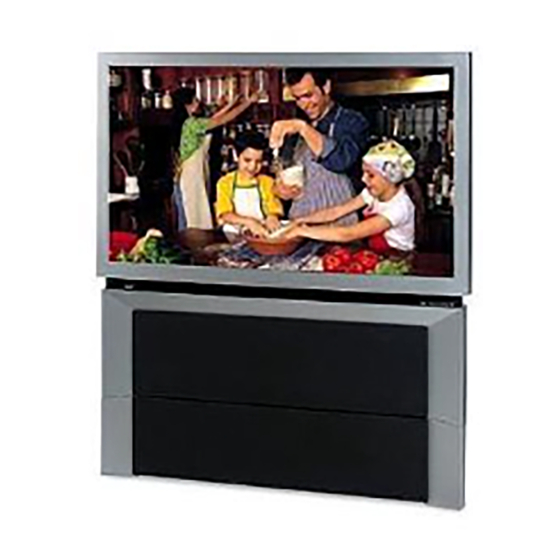
Toshiba 46H84 Owner's Manual
Hide thumbs
Also See for 46H84:
- Service manual (47 pages) ,
- Owner's manual (64 pages) ,
- Mode d'emploi (64 pages)
Table of Contents
Advertisement
Quick Links
Advertisement
Table of Contents

Related Manuals for Toshiba 46H84


Summary of Contents for Toshiba 46H84
- Page 1 SerialNo.:...
-
Page 2: Impo_Ant Safety Information
Dear Customer, Thank you for purchashlg this Toshiba T_LThis manual wifl help you use the many exciting features of your new TV. Before operating the TV, please read this manual It MakesADifference completely, and keep it nearby for future reference. - Page 3 installation, Care, arid Service mmportant Safety mnstructions 1) Read these instructions. 2) Keep these instructions. Foilow these recommendations and precautions and heed all 3) Heed all warnings. warnings when instaIIing your TV: 4) Follow all instructions. 16) Never modify this equipment. Changes or modifications may void: a) the warranty', and b) the user's authority to operate this equipment under the rules of the Federal...
- Page 4 (4:3) media on a system. widescreen (16:9) display (gray bars on left and right sides of screen]. Care Service For better performance and safer operation of your TOSHIBA TV, follow these recommendations and precautions: WARNING: RISROF ELECTRIC / I \ SHOCK, Never attempt to servicetI_e yourself.
- Page 5 Feature (Model 57H84 only) Toshiba TV modeH57H84 has a spHitcabinet feature that Always handle and treat the top section of the TV cabinet dhows disassembHyof the cabinet into two sections during [;with the viewing screen}, which contains a glass mirror, instaHHation.
-
Page 6: Table Of Contents
Impo_ant Safety information ......Using the POP double-wiIidow fbature ......}5 Switching the main and POP pictures ..... }6 introduction ..............Switcbh_g the speaker somid of'maD_ a_d _Hcome to 3\)shiba ............POP pictures ............Exploring !:our _ew TV ........... POP double-window aspect ratio ......Connecting your TV .......... -
Page 7: Introduction
Welcome to Toshiba Congratulation!! You have purchased one of"the finest proiection TVs on the market. Tire goal of"tills manual is to guide you througl: setting up and operating your Tos}:iba TV as quickly as possible. This manual applies to models 46H84, 51 H84 and 57H84. Bef_re you start reading, check yx_urmode_ and serial rmmbers o:1 die back of"the TV. -
Page 8: Connecting Your Tv
Compoueut video cables come in sets of three, and are f_r use with video equipment that has component vide() inputs. (Cok)rStream _°is Toshiba's brand of coolponent vide().) e HDMI is fi)r use wkb vide() equipment that })as a HDMI... -
Page 9: Cormecting A Vcr
Connecting a VCR Note." T!_i._; com_ectio_l allows ro watch local channels video /f you have a mono VCR, (;onnect L/Mono programs, play or record on the VCP, while watching and record f'rom one channel while watching another cMnneL VCR Audio OUT usi/W on/y one audio cab/e You will need: /f you have a VCR with S-vkieo, use an S- video cab/e (//7 tile S vk/eo jacksj instead of... -
Page 10: Comlectirrg A Cable Coiiverter Box Arid Vcr
Connecting a cabme converter box and VCR Note; TLis connection allows you to watct_ and record basic and premium cable cha,mds, watch videotapes, and record one channel while If you have a morro gcf4, r;onnecf L/Mono VCR Audio OUT uskw or_/yone audio cab/e.. watching ai_other cl_a*mel.To watch basic cable and use the TV's f'eatures, select ANT- 1. -
Page 11: Coimectirrg A Dvd Player Or Satellite Receiver Arrd Avcr
Connecting a DVD player or satellite receiver and a VCR Note: This connection allows yot* to watcll DVD/satellite, VCR, and TV qualily programs, a*ld record one TV channd while watc!_ing anov{ser F:r)r the highest possib/e picture from a channel DVD p/ayer or sate/tire i_r'e/ver without component video or HDM/, use an S-video You will need:... - Page 12 Connecting a DVD player with ComorStream (component video) and a VCR Note: TLis connection allows you ro watc5 [)V[), \ICR, program.% Fbrthe hiLqhest possib/e pir;'t_Jr_ quality, u se and record TV programs. videoc:ables c.omponent (or a HDMI cable) Your TV Las ColorStream _ (component video) inputs. Connecting beDween the TVandDVD p/ayeL your TV to a [)VD player with component video inputs (such as a...
-
Page 13: Cormectiiig A Dtv Receiver/Set-Top Box With Colorstream _' (Compoiierrt Video) Arrd A Vz2R
Connecting a DTV receiver/set-top box with ColorStream (component video) and a VCR Note: This comlection allows you to watch DTV (digital TV), VCR, and For the highest possib/e, picture quality, use TV programs, and record DTV and TV programs. e_mponent video cables (or a HDM/ cable) Your TV has ColorStream (compone*lt video) irlputs. -
Page 14: Cormectiiig P_Vo Vcrs
Connecting two VCRs Note; This co,mection allows you m record (dub/edir) fFom one VCR to /f you have VCfRs vvHf_Swide< use S-video another VCR while watching a videotape. You can also record from cables #_stead of standard video cab/es for one TV channel while watching another TV channel. -
Page 15: Cormecting A Hdmi Device To Tbe Hdmi D_Put
Connecting a HDM! device to the HDM! input Notes." digital HDM][ 1 (High Definition Multimedia ]nterf'ace) is the first HDM/, the HDM/ /ego and Nigh-DefinilTbn tmcompsessed consm_ler eJectronJcs inter_]_ce that supports /gfu/t/meci/?_/n_effac'e are Tfademaff<s of standard. One iack supports bod_ video and attdio information. regisiered tTs, demar?s of HDMI Licer_sirW The HDMI inp_t on <w_r TV is designed to accept HDMI program material in digital f'orm from EIA/CF_5-861/861 B-compliant 2... -
Page 16: Cormecting A Dvi Device To Hdmi Input
Connecting a DV! device to the HDM! input * one HDM_-D\q conversion cable If the external device has DVi output one pair of"standard audio cables only, use a HDMbDVHconversiort cable to connect to the HDMI jack on the TV. DVIdevice Also, connect the Audio out signal front (for example, set4op box or DVD player) the external device (set-top box or DVD... -
Page 17: Using The Remote Control
%_r TV remote control can operate yot_r TV a_d most cable converter boxes, satellite receivers, VCRs, DVD players, and HTIBs (home theater in a box), even if"they are different brax_ds. If you have a Toshiba device: _)ur T\ 7 remote con{rol is preprogrammed to operate most Toshiba devices. -
Page 18: Programmd_G The Remote Control To Opelate A Cable Converter Box, Satellite Receiver, Vcr, Dvd Player, O17 Htib (Home Theater In A Box)
Your Toshiba TV remote control is preprogmmmed to operate most RECALL Toshiba devices. To program your T\/" remote control to operate a POWER non-Tosi_iba device (or a Toshiba device that it is not preprogrammed to operate), f'ollow the steps below. For derails on using the remote... -
Page 19: Remote Control Codes (Coilt.)
Technics:072 Pordand: 012, 013, 015 ]VC: BL:076 Tcchwood:075 DVDd)88, VCP.=082 Totevision:009, 010, Proscan:001,002, 048 C Petm<v:005, 006, Toshiba:000, 013, 076, RCA: Proton: 061 007, 008, 009,010, 077, 078 f)gf).-089, VCR=083 Unkec: 073 023, 024, 025,026, Quasar: 045 Yamaha:079, 080, 081... - Page 20 Using the remote controm to operate a cabme converter box, sateNte receiver, VCR, DVD player, or HTIB (home theater in a box[} Note2 Ifyuu have a nun-Tusiaiba device or a Tushiba device that the remute Ever? after the TV r_mote (;onlrel is control is not preprogrammed to uperate,...
-
Page 21: Learning About The Rer'_]Oteco_Xrol
Learning about the remote control The buttom; _sed fbr operating tile TV only are described here. POWERtuttis the TV on and off RECAkL displays screen iMbrmation (page 57) STEEPsets the TV to turn off at a specific time (page 51 ) TV/VmDEO selects video input source (page 49) MUTEmutes the sound (page 53) DeviceSwitchswk&es bep_vee_ T\_... -
Page 22: Setting Up Your
Setting up your TV Learning about the menu system After you have installed the batte*ies and programmed the remote control, you will need to set some preferences on the TV using the menu system. You can access the mem_ using the buttons on your TV or remote control. -
Page 23: Cha_Giiig Tire Orr-Scree_ Display ]Arrguage
Changing the on-semen display language You can choose f:rom three different languages (English, French and Spanish) fi_r the on-screen display of ad_usmlem menus and messages. TV front panel To selec_ a language: 1. Press MENU, and dlen press _ or _ undl d_e SET UP mem_ appears. -
Page 24: Adding Ci_Aimels To The Tv's Memory
Addin 9 channels to the TV's memory Notre: Wl_en you press Ci_annel A or V, your TV will stop only on the c!_annels stored in the TV's channel memory. lune the 77/to _, channel nU progl_,mmed in the channe/ memory, you must use the Follow the steps below and on the next page to program all active... -
Page 25: Addhrg A_D Erasing Cbamrels Manually
Adding and erasing channels manually Afrer you have programmed the d_annels a_ttomatically, you can manually add or erase specific channels. TV front panel To add or erase chamlels: 1. Select the chamlel you want to add or erase, lf'you are adding a cha*mel, you must select tile cham_el using the Cham_el Number buttons. -
Page 26: Adjusting The Color Coilvergerrce
Adjusting the comor convergence This projection TV uses three separate TV tubes: red, greem and blue. TLe red, green, and blue images are proiected onto tile screen wt_ere they converge ro form a full-color picture. You can see a clear picture only when the three images converge correct!>... - Page 27 6. Press A (up), V (down), _ (left), or _ (righQ o_ die remote control to converge d_e red or blue line into the green line. ÷ +'t' ++ ÷ ÷ ÷ ÷ KNTfflR : TO OHAN( COLOR EXIT FINISH AE;JHSTMKNT ÷...
-
Page 28: Using The Tv's Features
Using the TWs features Adjusting the channem settings Switching between two channels using Channel Return The Channel Return feature allows you to switch between avo channels without entering an actual channel number each time. 1. Select the first channel (or video mode) you want to view. 2. - Page 29 3. Pres._; E NTER to display the FAVORITE CH memo. _OtOS: CH ]INPUT will be highlighted. ° Tile FAV T& bul?ons operal_ as MENU _ _ bu_l_/_5 wt_en a me,*_d is o/> scr_eR * Tile favorite channel feature is notava_i'ah/e FAVOR I TE in ANT2 fflodJe...
- Page 30 Labeling channels Channel labels appear above &annel number display the on-screen each time you tmn on the TV, change a channel, or press RECALL. You can choose any four characters to identi@ a channel. RECALL To create channel labels: 1. Press MENU, and then press _ or _ until the CUSTOM mesm appears.
-
Page 31: Selectd_Gthe Picture Size
Viewing the wide-screen picture formats t[480i and 480p s{gna{sonmy) You can view 4801 and 480p t'ormat programs 1,1a variety of picture Nc_mber sizes--Nac_ral, TLea_er _,_fide1, TLea_er \'qi& 2, TLea_er Wide 3, and FcdL Tl_e way tl_e image displays in any o( tLe picture sizes will vary depending on the lormat of"the program you are viewing. - Page 32 Theater Wide I picture size _otoJ * The picture is non-unifbrmlv enhrged--the center of rhe • To se/ec't the p/r;'tTJf_site, press P/C S/ZE on tT_e remote eoRtfo/ oF se/ect P/CTURE picture remains close to its SIZE k_ff_e P/CTURE menu, original proportion, but the left •...
- Page 33 ScrolJing the Theater W_de piclture (Theater Wide 2 and 3 onJy) 1, Press PIC S_ZE to select the Theater -Wide 2 or 3 mode, 2, Press MENU, and then press _ or !_ until PICTURE menu appears, 3. Press A or V to highlight P_CTURE SCROLL, @ O@ p F OTURE AUTO...
-
Page 34: (Theater Wide 2 A_D 3 Oii
Using the AUTO ASPECT feature (480i signals only) When the AUTO ASPECT feature is se{-to ON and the TV receives a Note: The AUTO ASPECT feature is not avaHab/e 480i signal, the picture size is automatically selected (as described in when viewing antenna (cable) or HDM/ input the fbllowing table). -
Page 35: Using The Pop Double-Wiiidow Fbature
)Vote." Using the POP double-window feature o TheSPL/Tbultons on/he fe,meZe o ontm/ The POP (picture-out-picture) feature splits tile screen into a double op_gf_t#, //,,e TV's POP feat_lf_5: window that allows you to watch woo programs at the same time, The "... -
Page 36: Switching The Main And Pop Pictures
Switching the main POP pictures Press SWAP wt_ile you are using the POP feature to switch the main and POP pictures. Switching the speaker sound of main and POP programs Press _ or _ while you are using the POP f'eature to switch the so_tnd (main or POP) f?om the speakers. -
Page 37: Pop Double-Window Aspect Ratio
POP douMe-wJndow aspect ratio Note: The POP double-window f'eatttre displays each picture according to The AUTO ASP_-CT feal_re (p_ge ;¢4) its input signal aspect ratio, as illustrated below. d_)es not opeml_ in POP double-window mode, o Aspectmtio is the ratio ofwidlh lo height of lf_e picture. - Page 38 Using the favorite channel search function You can use tLe f'avorite cLannel search function to quickly scan your f'avorite cLannels (see ' Programming your f'avorite cLannels" on page 1. Press FAVORITE. TLe TV automatically enters POP mode, and begins a twelve- picture scan of your f2_voritecLannels in tLe POP window.
-
Page 39: Using The Locks Metal
Using the LOCKS menu Note; The LOCKS menu inckuJes the V-Chip, CH Lock, Video Lock_ and New PIN Code fimcdons. You can use these f:_mcdons after entering The V-Ch/io &nc.tion is ava&b/e on/;/for the _he correct PIN code. tZS V-Ch@ system 27e Canadian I/C('hip sysl_/7?is <lot suppofiecZ Entering the PUN code... -
Page 40: Enable Blocking
ENABZE BE.OCKuNG LOCKS menu 1. From the LOCKS memo, press _ or & to highligllt V-CHIP, and then press ENTER. The V-CHIP menu appears. LOCKS ::::::::::::::::::::::::::::::::::::::::::::::::::::::::::::::::::::::::::::::::::::: ..................2. Press V or A to hig!_ligbt ENABLE BLOCKING, CHIP ::::: E N_ B_E _BiL ¸Q_ _ I::IN_ _ %iiiiiiiiiiiiiiiiiiiiiii_ i_ N _i@i!i!i!i!i!i!i!i!i!i!i!iiiii... -
Page 41: Mpaa Rating (I_Depe_Derrt Rating System For Movies)
MPAA RATING (independent rating system for movies) 1. From the ILCHIP menu, press V or A to highlight MPAA RATIN& and then press ENTER, ILCHIP men u MPAA RATING mem_ appears. 2. Press A or _1'to highlight MPAA RATING, V-CHIP t'TH I p 3. -
Page 42: U_]Lockirrgplog_Ams Temporarily
UnMcking programs temporarily 1. If'you try to watch a TV program that exceeds the rating limits set, the IV enters program lock mode, Af}ei 4 seconds_ starts the auto f_worite channel search ftmction (see page 38). _)u can either unlock the program temporarily (see steps 2-4) or select a non-locked program to watch. - Page 43 Tounlock individual channds: 1. From the LOCKS menu, press A or T to highlight CH LOCK, then press ENTER. appears. LOCK mentt 2. Press AT@ _ to highlight the channel you want to unlock, then press ENTER. LOOK @=SELECT g*_'F_N:<;L 3.
-
Page 44: Locking Video Irrputs
Locking video inputs With the VIDEO LOCK feature, you can lock out the input sources (Vide() 1, Video 2, \ride() 3, ColorStream HD 1, ColorStream HD2, HDMI) and channels 3 and 4. You will not be able to select the input somces with the TV/VIDEO button or Cl_annel buttons unless you clear the setting. -
Page 45: Adjustdlg Tire Picture
Adjusting the picture Selecting the picture mode Note; You can select your desired picture wpe f?om fbur picture modes: ff you se/ec't one of fire factory-set picture Sports, Standard, Movie, and Preference. modes (SPORT,f,1 STANDARDS or MOVJ£) and then charwe a piclum qua/ity se_ir W (/br exomp/e, i/_c/ease the c_,?t£#s,9, the 19Jolt.!fF_ Sports... -
Page 46: Saving New Preference
Saving new preference You can save the PICTURE qualities (contrast, [}rightness, color, tint, sharpness and color temperat_tre) you adj_tsted in the picture preference mode. To save your new preferences: 1. Press MENU, and then press *q or _ until the PICTURE menu appears. -
Page 47: Sejectdlgtbe Scaii Velodty Modulation (Svm)
Selecting the Scan Velocity Modulation {SVM_ Note: The SVM _earure enhances picture contrast and sharpness. This feature has three modes: HIGH, LOW, and OFE SVM )s not/wquired when viewing some h_qh quallty vide_omaledaL If you am To select the SVM f_eature: watch//w h_qt>qualfly video material, you may 1. -
Page 48: Resetting Picture Adiustments
Resettingpicture adjustments The RESET fimction adjusts the picture qualities to the fbllowhg f'actory settings: Mode ......sports Sharpness ..... center (50) Contrast ....max (100) Color temperature ... cool SVM ......high Brightness .... center (50) CableClear DNR ... auto Color .... -
Page 49: Sejectdlg The Video Input Source
Selecting the video input source Note: Press d_e TV/VIDEO on the remote control or the TI7 ro vbw a signal " Wt,,en Colo£5"lfoam HD _ or HD 2 £ from another device connected to y)ur TV, such as a VCR or DVD player (see ilk_strarions bdow). -
Page 50: Usd'igthe Closed Captio_ F'cature
Using the closed caption feature The closed caption feature has two options: * Captions_An on-screen display of"the dialogue, narration, and sound effects of'TV programs and videos that are closed captioned (usually marked as "CC" in TV listings). * Text_An on-screen display ofinfbrmation not related to the current program, such as weather or stock data (when provided by individual stations). -
Page 51: Setting Tile On-Timer
Setting the ON-timer To set tSe ON<liner to turn the TV on automadcally: 1. Press MENU, and then press _ or _ until the CUSTOM menu appears. 2. Dess A or T m _figldigllt ON TIMER, arid allen press ENTER. 3. -
Page 52: Settdlg Tile Clock
Setting the clock To set the clock: Note : 1. Press MENU, and then press @ or _ until the SET UP menu /f the TV_ power soume is intemlplec] (the appears. power c'oo/ is unp/ugged or a power f_ilufe 2. -
Page 53: Adjusting Tire Sourrd
Adjusting the sound Muting the sound Press MUTE to temporarily reduce (1/2 MUTE) or turn off (MUTE) she sound. Wl:ile the sound is of}_the screen will display _112 MUTE" or '_MUTE" in the lower right corner. Every time you press --RECALL the btttton, the mute mode will change in the following order. -
Page 54: Using Tbe Wow _'V Surround Sound Feature
Using the WO_V _ surround sound feature NOg@f WOW is the latest audio enhancement technology combined with If the broadcast/s rnonaula/, the SRS 3D SRS 3D and TruBass of SRS Labs individual technologies. The feature effect does not wofl<, uses stereo signals f_om a TV broadcast or video inpuL To adiust the WOW feature: 1. -
Page 55: Resetting Your Audk} Adjustme_Ts
Resetting your audio adjustments The RESET function returns the audio ad)ustments to the following fhctory settings: Bass ....center (50) Treble ....centd (50) Balance .... centd (0) To reset the audio adjustments: @ ®@ 1. Press MENU, and then press @ or _ until the AUDIO menu appears. -
Page 56: Turrri*_Gof'f" The Built-D_ Speakers
Turning off the buiJt-in speakers , and then press ENTER. Note: to turn the TV speakers off'when you connect thisfeature M_,kesure the volume conlfb/ of youf audk_ audio system (See '_Connecdng an audio systen? _ on page 16). amp//tier/s set to a moderate//stenit_glevel To turn of_"... -
Page 57: Selectdlg Tire Bad£Grotmd Of'tire Memt Display
Selecting the background of the menu display _¢_ucm cllange t_e background of t_e meim display by selecting from solid preset types: shaded (gray). --RECALL To select the background: 1. Press MENU, a_]d the11press _ or _ _mtil d_e CUSTOM memt appears. -
Page 58: Appendix
Televiskm System Dimensions NTSC standard 46H84: Widtt_ xx-x/x inches (xxx ram) xx-x/x inches (xxx ram) Heigt_t xx-x/x inches (xxx ram) Channel Coverage Depth 47-3/5 inches (1,209 ram) VHF: 2 ttwough 13 51H84: Widtt_ UHF: 14 through 69 Height 50-2/5 inches (1,280 ram) Cable TV: Mid band (A-8 through A-l, A through I) Depth 22 inches (570 mm) -
Page 59: Doubleshootiiig
Troubleshooting possible cause of Before calling a service technician, please check the f_dlowh_g table f_r a the symptom SOI_le SOlHtions_ So_t_tion Symptom TV will not turn on , Make sure the power cord is plugged in, then press POWER. * The remote control batteries may be dead. Replace the batteries. * Check the antenna/cable connections. -
Page 60: Limited U_Ited States K)_Lrrantv
Limited One (1} Year Warranty on Parts an_t Labor* (1} Visit TACP's web site at www.toshiba.eo_/taep ol call TACP war]ants this television and its pats against defects in toll free ] 800 63] 38] 1 to find the neaest TACP... -
Page 61: Ld_Tited Canada \_M:arrtv
MAY NOT APPLY TO YOU UNDER SUCH epe_ated in Canada, CIRCUMSTANCES. (4] Label setvice charges re1 set installation, setup adiustmer_t FST PURE@ is a registered t rademark o f Toshiba A merica 0onsume_ R oducts, L L,C of custolsrer albd i_]stal)ation oJ Jepair of antenna cohtloJs, 0104 systems are not covered by these warranties. - Page 62 Picture adjustments COLOR TEMPERATURE ..........A/V cabbs (standard:) ............Picture mode ..............ANT 1/2 ................... Picture quality ..............Antenna cabbs (coaxia0 ........... Picture-out-picture (POP} AUDIO OUT sound, sebcdng ........CH SCAN button ............Audio system connection ..........POP CH AT buttons ............. Auto aspect ................
- Page 63 TOSHIBA PRODUCTS, AMERnCA CONSUMER L.LoC° HEAD OFFICE: 82 TOTOWA ROAD, WAYNE, NJ 07470, U.S.A. NATIONAL SERVICE DIVISION:1420-B TOSHIBA DRIVE, LEBANON, TN 37087, U.S.A. TOSNtBA CANADA LTD. HEAD OFFICE: 191 McNABB STREET, MARKHAM, ONTARIO, L3R 8H2, CANADA-TEL: (905} 470-5400 SERVICE CENTERS:...