Sharp AQUOS LC-37D43U Operation Manual
Hide thumbs
Also See for AQUOS LC-37D43U:
- Operation manual (60 pages) ,
- Service manual (22 pages) ,
- Parts manual (11 pages)
Table of Contents

Related Manuals for Sharp AQUOS LC-37D43U


Summary of Contents for Sharp AQUOS LC-37D43U
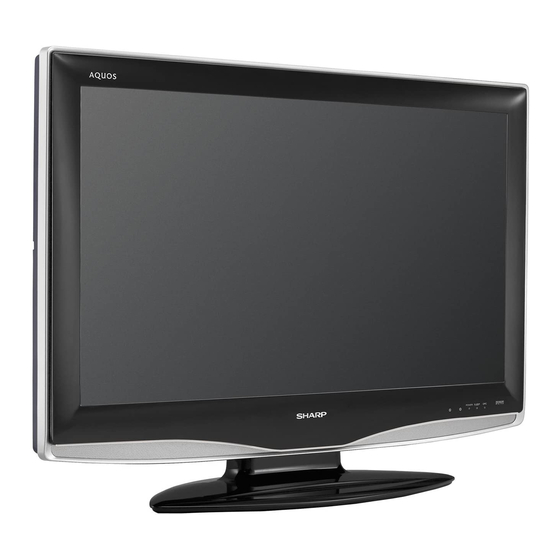
- Page 1 SHARP_ LC-32D43U LC-37D43U LiQUiD CRYSTAL TELEViSiON TELI'=VISEUR ACL TELEVISOR CON PANTALLA DE CRISTAL L|QUIDO OPERATION MANUAL MODE D'EMPLOI MANUAL DE OPERACION AQUOS Hii:311Tl|'" DiGiTAL ........1245 NYCE...
- Page 2 LC-32D43 LC-37 LiQUiD CRYSTAL TELEViSiON ENGLISH OPERATION MANUAL ,, The illustrations and on screen displays in this operation manual are for explanation purposes and may vary slightly from the actual operations. ,, Menu items that are not selectable are grayed out. ,, The examples used throughout this manual are based on the LC 32D43U model.
-
Page 3: Trademarks
DECLARATION OF CONFORMITY: SHARP LIQUID CRYSTAL TELEVISION, MODEL LC-32D43U/LC-37D43U This device complies with Part 15 of the FCC Rules. Operation is subject to the following two conditions: (1) This device may not cause harmful interference, and (2) this device must accept any interference received, including interference that may cause undesired operation. -
Page 4: Dear Sharp Customer
DEAR SHARP CUSTOMER Thank you for your purchase of the Sharp Liquid Crystal Television. To ensure safety and many years of trouble-free operation of your product, please read the important Safety instructions carefully before using this product. iMPORTANT SAFETY iNSTRUCTiONS... - Page 5 iMPORTANT SAFETY iNSTRUCTiONS chen sink, or laundry tub; in a wet basement; or near a swimming pool; and the like. bowl,kitWater and Moisture -- Do not use tills product near water for example, near a bath tub, wash product on an unstable base call cause the product to fall, resulting in serious personal injuries as well as damage to the product.
- Page 6 iMPORTANT SAFETY iNSTRUCTiONS ', Outdoor Antenna Grounding -- If all outside antenrla is connected to tile television equipment, be sure the antenna system is grounded so as to provide some protection against voltage surges and built-up static charges. Article 810 of the National Electrical Code, ANSI/NFPA 70, provides information with regard to proper grounding of the mast and supporting structure, grounding of the lead in wire to an antenna discharge unit, size of grounding conductors, location of antenna discharge unit, connection to grounding electrodes, and requirements for the grounding electrode.
-
Page 7: Quick Reference
Supplied accessories Make sure the following accessories are provided with the product. [:]I Remote control unit "AAA" size battery AC cord Cable Clamp (x 1) Stand unit Operation manual (xl) (x2) (xl) Oabletie (x 1) ( x 1) (×1) Page 8 Page 8 Page 7 Page7... - Page 8 QUICKREFERENCE STOP! To safely remove the AQUOS television from the box It's best to use 2 people to remove the AQUOS television for stability. Lift onto installation location as the diagram illustrates. Ventilation & Cleaning Tips Keep your AQUOS television in a well ventilated area and make sure not to place it by a heat source or use near water.
- Page 9 IF THE UNIT DOES NOT POWER ON - UNPLUG THE AQUOS TELEVISION FROM THE OUTLET AND REPEAT THE INSTALLATION STEPS. IF YOU STILL ENCOUNTER NO POWER, PLEASE CONTACT US AT 1-800-BE-SHARP. Please refer to the BASIC ADJUSTMENT SETtiNGS SECTION for EZ Setup and basic channel setup functions and USING EXTERNAL EQUIPMENT SECTION for other device connections (DVD, VCR, AUDIO, etc) in your AQUOS operation manual.
- Page 10 ......... Using external equipment ........Trademarks ............. Displaying an external equipment image ... 29 DEAR SHARP CUSTOMER ........Input Select ............iMPORTANT SAFETY iNSTRUCTiONS ....3 Displaying an image from HDMI equipment ..30 Supplied accessories ..........Input Skip ............
- Page 11 Remote control sensor OPC indicator* OPC sensor* SLEEP indicator** POWER indicator** *OPC: Optical Picture Control (See page 25.) **See page 15 for TV status indicator. HDMI terminal (INPUT 4) HDMI terminal (INPUT 5) PC IN terminals (INPUT 6) Antenna/Cable AUDIO terminals (INPUT 5) DIGITAL AUDIO OUTPUT terminal INPUT 3 terminals INPUT 2 terminals...
-
Page 12: Part Names
Part names "IV POWER: Switch the TV power on or enters standby mode. (See page 15.) DISPLAY: Display the channel information. SOURCE POWER: Turns the power of the externaJ equipment on and off. External equipment operational buttons: Operate the externaJequipment. 0 - 9: Set the channel. -
Page 13: Remote Control Unit
Preparation Use the remote control unit by pointing it towards the remote control sensor on the TV. Objects between the remote control unit and the remote control sensor may prevent proper operation. ,, Do not expose the remote control unit to shock, in addition, do not expose the remote control unit to liquids, and do not place in an area with high humidity. -
Page 14: Preparation
Preparation You can connect many types of external equipment to your TV like a Blu-ray disc player, HD-DVD player, DVD player, VCR, Digital %/tuner, HDMI equipment, game console or camcorder. To view external source images, A VCR, game console, camcorder and other select the input source from INPUT on the remote audiovisual equipment can be conveniently connected control unit or on the %/. - Page 15 Preparation You can use the INPUT 4 or INPUT 5 terminal when connecting HDMI equipment. HDMI cable ,, When using an HDMPDVI converqon cable, input the audio signal to AUDLO terminal of iNPUT 5. When receiving an incompatJbb qgnal, such as 1080p, the message below appears without the image on the screen. For an incompatible video signal: "An incompatibb video qgnal has been received.
- Page 16 Watching Simple operations for watching a TV program Press POWER on the TV, or TV POWER on the remote control unit. vo_ + INPUT POWER ,, POWERindicator (Green):The TV is on. (Aftera few seconds, a window appears with sound.) POWER "...
-
Page 17: Antennas
Watching "iV When you turn on the TV for the first time, it will automatically memorize the broadcasting channels where you live. Perform the following steps before you press TV POWER on the remote control unit. Insert the batteries into the remote control unit. (See page 8.) Connect the antenna cable to the TV. - Page 18 Watching "iV Method Using OH/VV on the remote control unit or on the You can change channels in several ways. Method Press FLASHBACK to switch to the previously tuned channel. Press FLASHBACK again to switch back to the currently tuned channel. ,, FLASHBACK will not work if no channel has been changed after the TV is turned on.
-
Page 19: Watching Tv
Watching [] Using MUTE on the remote control unit Mutes the current sound output. [] Changing the volume You can change the volume on the TV or on the remote control unit. Press MUTE. " @ will be displayed on the screen for 30 minutes, and the C::C30 sound is silenced. - Page 20 Watching The TV has a feature that allows reception of sound other than the main audio for the program. This feature The types of audio transmitted in a digital broadcast is called Multi-channel Television Sound (MTS). The TV include SURROUND as well as MONO and STEREO. with MTS can receive mono sound, stereo sound and In addition, it is possible for multiple audio tracks to Secondary Audio Programs (SAP).
- Page 21 Basic adjustment settings Use the following buttons on the remote control to Example operate the menu. Option <lp VoO_ ,u#,o CB(_/SAT FUNCTION SOURCE LIGHT (3D (Z) (_E) ® (_E) EB (Z) (Z) (33OO Item displayed in yellow (Z) QO ,, This indicates the item currently selected. ,, Press ENTER to go to the adjustment screen for this item.
-
Page 22: Table Of Contents
Basic adjustment settings Picture Picture OPC ................Page 25 OPC ................Page 25 Backlight ..............Page 25 Backlight ..............Page 25 Contrast ..............Page 25 Contrast ..............Page 25 Brightness ..............Page 25 Brightness ..............Page 25 Color ................Page 25 Color ................ -
Page 23: Ez Setup
Basic adjustment settings You can run EZ Setup again, even after setting up the If initial setup does not memorize all the channels in preset channels. your region, follow the instructions below to manually memorize the channels. Language setting Antenna setting Select from among 3 languages: English, French and Spanish. -
Page 24: Antenna Setup-Digital
Basicadjustment s ettings Channel memory s etting Press ,_/y to select "Signal Strength". Press M ENU todisplay theMENU screen, and ,, The signal strength of DIGITAL channel is displayed. The signal information is based on the thenpress _ 11/1_ toselect "Setup". current channel. -
Page 25: Favorite Cr
Basic adjustment settings Using Favorite ON on the menu screen You can also set your favorite channels in "Option" on the MENU screen. This function allows you to program 4 favorite channels, in 4 different categories. By setting the Select the channel you want to register as a favorite channels in advance, you can select your favorite channel. -
Page 26: Opc
Basic adjustment settings Automatically adjusts the brightness of the screen. Adjusts the picture to your preference with the following picture settings. Press MENU to display the MENU screen, and then press 41/_ to select "Picture". Press MENU to display the MENU screen, and then press _11/1_to select "Picture". -
Page 27: Advanced Color Temp
Basicadjustment s ettings This TV provides various advanced functions for Automatically detects a film-based source (originally optimizing the picture quality. encoded at 24 frames/second), analyzes it then recreates each still film frame for high-definition picture quality. Press MENU to display the MENU screen, and then press _ll/l_ to select "Picture". -
Page 28: Treble
Basic adjustment settings You can adjust the sound quality to your preference Surround function allows you to enjoy realistic "live" sound, with the followinc settings. Press MENU to display the MENU screen, and FREEZE MENU then press 41/1_ to select "Audio". Press to select "Surround",... -
Page 29: Power Control
Basic adjustment settings Power control setting allows you to save energy. This setting allows you to optimize the settings of Digital broadcasting. No signal off When set to "Enable", the power will automatically shut down if there is no signal for 15 minutes. You can output digital audio to an AV amplifier or Press MENU to display the MENU screen, and similar device whose DIGITAL AUDIO INPUT terminal... - Page 30 Using e×temal equipment If the image does not come in clearly from the external equipment connected to INPUT 1, you may need To view external source images, select the input to change the input signal type setting on the '<Input source from INPUT on the remote control unit or on Select"...
-
Page 31: Input Skip
Using external equipment This setting allows you to skip the HDMI/PC-IN Input on the Input Selection operation. To watch an HDMI/PC-IN equipment image, select "INPUT4" or "INPUT5" from "INPUT Press MENU to display the MENU screen, and SOURCE" menu using INPUT on the remote then press _/_ to select "Setup". -
Page 32: Auto Sync
Useful adjustment settings Ordinarily you can easily adjust the picture as necessary to change image position using Auto Sync. For automatically adjusting the PC image. In some cases, however, manual adjustment is needed to optimize the image. Press MENU to display the MENU screen, and then press _11/1_to select "Setup". -
Page 33: Position
Useful adjustment settings You can also select a language from the Setup menu. If complex adjustments are made and the settings Select from among 3 languages: English, French and cannot be restored to normal, you can reset the Spanish. settings to the factory preset values. Press MENU to display the MENU screen, and Press MENU to display the MENU screen, and then press _11/_ to select "Setup". -
Page 34: Input Label
Useful adjustment settings Lets you set the input terminal displayed when using Allows you to set a time when the TV automatically the INPUT SOURCE menu or channel display. switches to standby. FAVO INPUT FLASHBACK ©0 ®®®s91 Press SLEEP. FREEZE MENU ©... - Page 35 Useful adjustment settings Stretch mode is available for HD programs. Suitable for viewing wide-screen 1.78:1 aspect-ratio AUOIO programs. When viewing 1.85:1 programs, the stretch CB_SAT _D FUNCTION FREEZE M£NU mode will still show very thin black bands at the top SOUROE LIGHT and bottom of the screen.
- Page 36 Useful adjustment settings You can select the screen size. C%/SAI FUilCTION ,, Connect the PC before making adjustments. (See page SOURCE LIGHT 14.) ,, Selectable screen size may vary with input signal type. Press ViEW MODE. ', The View Mode menu displays. Example FREEZE MENU...
-
Page 37: Audio Only
Useful adjustment settings Allows you to select what controls the audio output, Perform the following steps to set the Option menu items on this page. FREEZE MENU Fixed ,, Sound via speaker is adjusted with VOL +/- on the remote control unit or VOL-/+ on the TV. -
Page 38: Input Signal
Useful adjustment settings STANDARD For a highly defined image in a normal AV MODE gives you 7 viewing options to choose from lighting to best match the surrounding environment of the TV, [Enhanced Picture Contrast: on] which can vary due to factors like room brightness, type of program watched or the type of image input MOVIE For a movie... - Page 39 Useful adjustment settings Press CC. " This will present the Closed Caption information display. Your TV is equipped with an internal Closed Caption Press CC while the Closed Caption information decoder. It allows you to view conversations, narration is still on the screen. and sound effects as subtitles on your TV.
- Page 40 Useful adjustment settings ,, For resetting adjustments to tile factory preset values, This function allows you to adjust the closed caption press A/T to select "Reset", and then press ENTER. screen appearance to suit your preference. ,, The default value depends on the broadcasting station. Press MENU to display the MENU screen, and Selectable items available...
-
Page 41: Parental Ctrl
Useful adjustment settings Input the same 4-digit number on the "Reconfirm" screen as in step 4 to confirm. New Secret No. Allows you to use a secret number to protect certain settings from being accidentally changed. IMPORTANT: Three conditions must be met to enable the V-Chip (see pages 40 to 45): Secret No. - Page 42 Useful adjustment settings Changing the secret number Clearing the secret number Allows you to change your current secret number. Allows you to clear your secret number. Repeat steps 1 to 2 in Setting a secret Repeat steps 1 to 2 in Setting a secret number.
- Page 43 Useful adjustment settings V-CHIP is an electronic filtering device built into your TV. This tool gives parents a great degree of control over broadcasts accessed by their children. It allows parents to select programs judged suitable for child viewing while blocking ones judged not suitable.
- Page 44 Useful adjustment settings Voluntary movie rating system (MPAA) TV Parental Guidelines ('iV Guidelines) Press MENU to display the MENU screen, and Repeat steps 1 to 4 in Voluntary movie then press _11/1_to select "Setup". rating system (MPAA). Press A/Y to select "Parental CTRL", and then press ENTER.
- Page 45 Useful adjustment settings Canadian Rating Systems • The TV rating systems in Canada are based on the Canadian Radio-Television and Telecommunications Commission (CRTC) policy on violence in television programming. While violence is the most important content element to be rated, the structure developed takes into consideration other program content like language, nudity, sexuality and mature themes.
- Page 46 Useful adjustment settings Canadian English ratings Canadian French ratings Press MENU to display the MENU screen, and Repeat steps 1 to 4 in Canadian English then press _11/_ to select "Setup". ratings. Press A/Y to select "Can. French Ratings", Press A/Y to select "Parental CTRL", and and then press ENTER.
- Page 47 Other viewing options Allows you to capture and freeze a moving image that You can operate the connected AV products (AV you are watching. Receiver, Cable Box, SAT tuner, DTV, VCR, DVD, LD) using the presetting manufacturer function of your remote control unit.
- Page 48 15, 22, 30 08, 11,20 Proscan Dynatech Emerson 21,32, 35 03, 24 Fisher 09, 10, 11 Samsung 07, 12 Funai 28, 29 Sharp 01, 10 G.E. Sony 05, 25 Goldstar Toshiba Hitachi Yamaha 06, 47 Zenith instant Replay JC Penney...
- Page 49 Other viewing options _='===_ [] Cable control buttons When the FUNCTION is set to CBL/SAT, the cable converter connected to the TV can be operated using t to 4. SOURCE POWER Turns the cable converter power on and off. 0--9 Press a button (or buttons) that corresponds to the channel that you wish to watch.
- Page 50 Other viewing options [] VCR control buttons The remote control unit button will function as follows when the FUNCTION of the remote control unit is set to VCR. Tv T_ v_R _u_,o ,, Press INPUT until the input connected to the VCR is selected. The following 1 to 8 can be used to control the VCR.
- Page 51 TV requires special skill that should only be performed by qualified service personnel. Customers should not attempt to do the work themselves, SHARP bears no responsibility for improper mounting or mounting that results in accident or injury, Using an optional bracket to mount the TV •...
- Page 52 Appendix Problem Possible Solution " No power " Check if you pressed TV POWER on the remote control unit. (See page 15.) If the indicator on the TV does not light up, press POWER on the TV. ,, Is the AC cord disconnected? (See page 7.) ,, Has the power been turned on? (See page 15.) ,, Unit cannot be operated.
-
Page 53: Appendix
2 The dimensional drawings are shown on the inside back cover. ,, As part of policy ef continuous improvement, SHARP reserves the right to make design and specification changes for product improvement without prior notice. The pertormance specification figures indicated are nominal values of production units. - Page 54 CLEARING THE SECRET NUMBER If you forget the secret number, clear the secret number using the following procedure. Press MENU to display the MENU screen, and then press _11/1_ to select "Setup". Press A/Y to select "EZ Setup", "CH Setup", "Parental CTRL" or "Reset", and the Secret number input screen displays.
- Page 55 The copyrights for the software components and various relevant documents included with this product that were developed or written by SHARP are owned by SHARP and are protected by the Copyright Act, international treaties, and other relevant laws. This product also makes use of freely distributed software and so[tware components whose copyrights are held by third parties.
-
Page 56: Calling For Service
In no event shall Sharp be liable, or in any way responsible, for any damages or defects in the Product which were caused by repairs or attempted repairs performed by anyone other than an authorized servicer. - Page 57 OF CANADA 335 Britannia Road East, Mississauga, Ontario For more information on this Warranty, Sharp Extended Warranty Offers, Sharp Canada Products, Accessory Sales, Dealer or Service SHARP Locations, please call (905) 568=7t40 --(- Visit our Web site: www.sharp.ca SERVICE Revision 04/22/03...
- Page 58 Dimensional drawings LC=32D43U Unit: inch/(mm) 31 _/32 (796) 279A_ (700.0) 1945/,_4 ( 500) 1945/,_4 (500) 3%2 (83) 35%4 (97) 77/8(200) LC=37D43U 35_V64(913) ..i ,_ ,_ 3225/64(822.6) 2185/64 (547) 7% (200) 4% (117) 3_%4 (97) 11_%,_(293) l...
- Page 59 SHARR SHARP ELECTRONICS CORPORATION Sharp Plaza, Mahwah, New Jersey 07430-2135 SHARP CORPORATION Printed in Mexico Imprim6 au Mexique Impreso en M6xico TINS-D004WJZZ 06P12-MX-NG...