Table of Contents
Advertisement
Advertisement
Table of Contents

Related Manuals for Westinghouse SB908


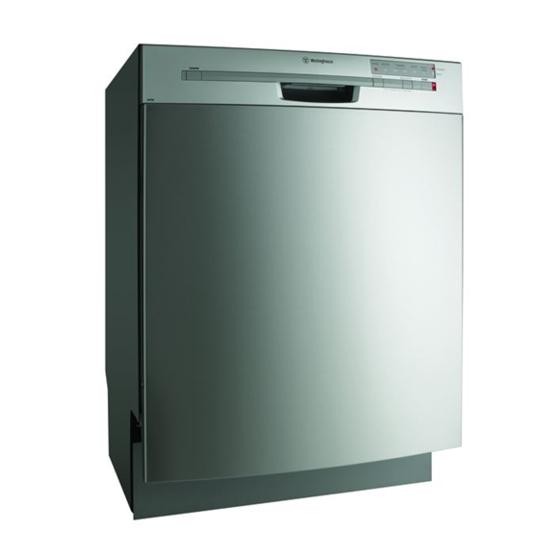
Summary of Contents for Westinghouse SB908
- Page 1 user manual Dishwasher SB908...
- Page 2 So when we say we’re thinking of you, you know we mean just that. Electrolux. Thinking of you. Westinghouse. We are part of the Electrolux family. Share more of our thinking at www.electrolux.com...
-
Page 3: Table Of Contents
contents 3 Contents Safety information Product description Control panel First use Daily use Washing programmes Care and cleaning Something not working Technical data Hints for test institutes Installation Building-in Environment concerns Warranty The following symbols are used in this manual: Important information concerning your personal safety and information on how to avoid damaging the appliance. -
Page 4: Safety Information
4 safety information Safety information ● If the supply cord is damaged, it must be replaced by the manufacturer or its service agent In the interest of your safety and to or a similarly qualified person in ensure correct use, before order to avoid a hazard. - Page 5 safety information 5 5 safety information Child safety Installation ● ● This appliance is not intended for Check your dishwasher for any use by young children or infirm transport damage. Never connect persons unless they have been a damaged machine. If your adequately supervised by a dishwasher is damaged contact responsible person to ensure that...
-
Page 6: Product Description
product description Product description Upper basket Pressure balancing device Detergent dispenser Rinse aid dispenser Rating plate Filters Lower spray arm Upper spray arm... -
Page 7: Control Panel
control panel 7 Control panel POWER button To activate the Button LOCK function, press the button LOCK for 5 seconds, PROGRAM selection button the button lock light blinks for 15 seconds, then when it is permanently on, it indicates the key lock is active. Button LOCK The button lock key stops anyone from changing the selected program. - Page 8 control panel Indicator lights WASHING Illuminates when a washing program is running. READY Illuminates when a washing program has ended. It also has the added function of visually signalling an alarm due to a malfunction of the machine. Button LOCK Flashes for 15 seconds when the Button LOCK is pressed for 5 seconds.
-
Page 9: First Use
first use 9 First use Before using your dishwasher for the The dispenser holds about 110 ml of first time: rinse aid, which is sufficient for between 16 and 40 dishwashing Ensure that the electrical and ● cycles, depending upon the dosage water connections comply with setting. -
Page 10: Daily Use
10 daily use Clean up any rinse aid spilt during filling with an absorbent cloth to avoid excess foaming during the next wash. Only use branded rinse aid for dishwashers. Never fill the rinse aid dispenser with any other substances (e.g. dishwasher cleaning agent, liquid detergent). - Page 11 daily use 11 For washing in the dishwasher the following cutlery and dishes are not suitable: - Cutlery with wooden, horn, china or mother-of- pearls handles. - Plastic items that are not heat resistant. - Older cutlery with glued parts that are not temperature resistant.
- Page 12 12 daily use Open the door and slide out the The 2 rear rows of prongs on the baskets to load the dishes. lower basket can be easily lowered to allow you to load pots, pans and The lower basket bowls.
- Page 13 daily use 13 The cutlery basket For best results we recommend you use the cutlery grids. If the size and dimensions of the cutlery do not allow the use of the Long bladed knives stored in an grids, they can be easily hidden or upright position are a potential removed.
- Page 14 14 daily use The upper basket The upper basket is designed for plates (dessert plates, saucers, dinner plates of up to 24 cm in diameter), salad bowls, cups and glasses. Arrange items on and underneath the cup racks so that water can reach all surfaces.
- Page 15 daily use 15 Adjusting the height of the upper basket If washing very large plates you can load them in the lower basket after moving the upper basket to the higher position. Only adjust the height when the upper basket is empty. Maximum height of the dishes in the lower basket upper basket lower basket With upper basket raised...
- Page 16 16 daily use Use of detergent 20 = approximately 20 g of detergent 30 = approximately 30 g of detergent Only use detergents specifically 3. All programmes with prewash need designed for use in dishwashers. an additional detergent dose (5/10 g) that must be placed in the Please observe the manufacturer’s prewash detergent chamber (2).
- Page 17 daily use 17 Use of Tablets Select and start a washing programme These products are detergents with a combined cleaning, rinsing and salt 1. Check that the baskets have been functions. They can also contain other loaded correctly and that the spray agents depending on the kind of arms are free to rotate tablets you choose («3 in 1», «4 in 1»,...
- Page 18 18 daily use End of the washing program The dishwasher will automatically ● stop. Interrupt or cancel a washing The light of the program just ended program in progress ONLY if it’s ● will remain on. absolutely necessary. Attention! Hot steam may escape The READY light illuminates.
-
Page 19: Washing Programmes
washing programmes Washing programmes Program Degree of Type of load Program description soil Partial load 1 cold rinse (to avoid food RINSE Any. (to be scraps from sticking together). completed This program does not require later in the the use of detergent. day). -
Page 20: Care And Cleaning
20 care and cleaning Care and cleaning Cleaning the filters 4. Take hold of the coarse filter (A) by the handle with the hole and The filters must be checked and remove from the microfilter (B). cleaned from time to time. Dirty filters will degrade the washing result. - Page 21 care and cleaning 21 Prolonged periods of non- operation If you are not using the machine for NEVER try to remove the spray any prolonged period of time you are arms. advised to: If residues of soil have clogged the holes in the spray arms, remove them 1.
-
Page 22: Troubleshooting
22 something not working Something not working The dishwasher will not start or stops during operation. Certain problems are due to the lack of simple maintenance or oversights, which can be solved with the help of the indications described in the chart, without calling out a service technician. - Page 23 something not working 23 Fault code Malfunction Possible cause Solution The program does The dishwasher Close the door ● ● not start door has not been properly closed The main plug is Insert the main ● ● not plugged in plug The fuse has Replace the fuse...
- Page 24 24 something not working The wash results are not satisfactory The dishes are not clean The wrong washing program has been selected. ● The dishes are arranged in such a way as to stop water ● reaching all parts of the surface. The baskets must not be overloaded.
-
Page 25: Technical Data
technical data 25 Technical data Dimensions Width 59,6 cm Height 82 cm Depth 58,2 cm Electrical connection Information on the electrical connection is given Voltage - Overall power - on the rating plate on the inner edge of the Fuse dishwasher’s door Water supply pressure Minimum... - Page 26 26 technical data Consumption values Program Program Energy Water duration consumption consumption (in minutes) (in kWh) (in litres) Rinse <0,1 FAST_30 60° NORMAL ECO 0,82 - 0,92 14 - 16 100 - 110 (Test programme for test institutes) NORMAL 65° 1,3 - 1,5 19 - 21 95 - 105...
-
Page 27: Hints For Test Institutes
hints for test institutes 27 Hints for test institutes Testing in accordance with AS/NZS The rinse aid dispenser must be filled 2007 must be carried out with the and the door must be opened at the appliance fully loaded and using the end of cycle for 30 minutes for drying test program (see "Consumption assessment. -
Page 28: Installation
installation Installation Water supply connections This dishwasher may be fed with either hot (max. 60°) or cold water. Any electrical and/or plumbing However, a hot water supply is not work required to install this always efficient with very soiled crockery appliance should be carried out by as it shortens the washing programmes a qualified electrician and/or... -
Page 29: Drain Hose
installation 29 Likewise the internal diameter of the Always use a new hose-set when couplings used for connections to the connecting the appliance to the waste outlet must be no smaller than water mains. An old hose-set must the diameter of the hose provided. not be reused. - Page 30 installation Electrical connection Safety standards require the appliance to be earthed. Prior to using the appliance for the first time, ensure that the rated voltage and type of supply on the rating plate match that of the supply where the appliance is to be installed.
-
Page 31: Building-In
building-in 31 Building-in This dishwasher is designed to be Adjusting the height of the fitted either under a kitchen counter or dishwasher a worksurface. To adjust the height proceed as It is essential that the recess follows: dimensions indicated in the illustration 1. - Page 32 32 building-in Fitting the steam protection Fit the steam protection onto the front part of the worktop, using the screws The dishwasher must be secured provided. to the underside of the worktop or to adjacent units by using the brackets supplied. Neglect to do this can cause injury or damage.
-
Page 33: Environment Concerns
environment concerns 33 Environment concerns Packaging material Old appliance The packaging materials include This appliance should be handed over recyclable items. The plastic to the applicable collection point for components are identified by recycling. By ensuring this product is markings, e.g. >PE<, >PS<, etc. disposed of correctly, you will help Please dispose of the packaging prevent potential negative... -
Page 34: Warranty
34 warranty Warranty 5. Parts and Appliances not supplied by Electrolux are not FOR SALES IN AUSTRALIA AND NEW ZEALAND covered by this warranty. APPLIANCE: Dishwasher This document sets out the terms and conditions of 6. Where you are within an Electrolux service area, this product warranties for Electrolux branded appliances. - Page 35 warranty 35 Limitation of Liability (a) in the case of Appliances, at its option, to the replacement or repair of the Appliances or the 10. To the extent permitted by law: supply of equivalent products or the (a) Electrolux excludes all warranties other than as payment of the cost of replacing the Appliances or contained in this document;...
- Page 36 117 994 690 -00-09032007...