Edimax CV-7428nS User Manual
N300 universal wi-fi bridge
Hide thumbs
Also See for CV-7428nS:
- Brochure & specs (4 pages) ,
- Quick install manual (18 pages) ,
- Manual (5 pages)
Table of Contents
Advertisement
Quick Links
Advertisement
Table of Contents

Related Manuals for Edimax CV-7428nS


Summary of Contents for Edimax CV-7428nS
- Page 1 CV-7428nS User Manual 09-2012 / v1.0...
- Page 2 COPYRIGHT Copyright Edimax Technology Co., Ltd. all rights reserved. No part of this publication may be reproduced, transmitted, transcribed, stored in a retrieval system, or translated into any language or computer language, in any form or by any means, electronic, mechanical, magnetic, optical, chemical, manual or otherwise, without the prior written permission from Edimax Technology Co., Ltd.
-
Page 3: Table Of Contents
CONTENTS PRODUCT INFORMATION......................4 I-1. Package Contents ........................4 I-2. Top Panel ..........................4 I-3. LED Status ..........................5 I-4. Rear Panel ..........................6 I-5. Safety Information ........................6 I-6. System Requirements ......................7 QUICK SETUP ..........................8 II-1. WPS Button Setup ........................8 II-2. -
Page 4: Product Information
I. PRODUCT INFORMATION Thank you for purchasing the Edimax CV-7428nS N300 Universal Wi-Fi Bridge. For smart TV’s, Blu-ray, gaming or other home entertainment devices, the CV-7428nS enables you to bridge a Wi-Fi connection to a wired-only device. Eliminate Ethernet cables and enjoy 802.11n Wi-Fi connection across multiple entertainment devices. -
Page 5: Led Status
I-3. LED Status Item Color Status Description Wireless bridge is on. Flashing Device is booting up. Green (Power) Wireless bridge is off. WPS connection has been established successfully. The LED will remain on for 5 minutes. WLAN activity – transferring Flashing or receiving data. -
Page 6: Rear Panel
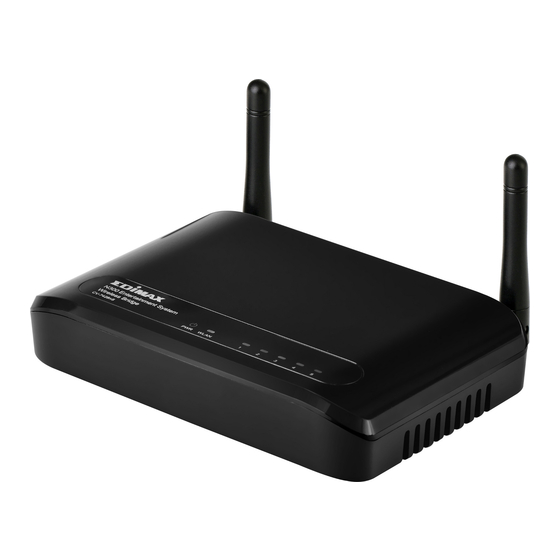
I-4. Rear Panel (a) Antenna (a) Antenna (1 of 2) (2 of 2) (b) LAN Ports (c) Power Port (d) WPS/Reset Button a. Antenna Fixed dipole antenna. b. 10/100M LAN Ports Connect computers or other network devices to these ports using an Ethernet cable. -
Page 7: System Requirements
kitchen or bathroom. 3. Do not pull any connected cable with force; carefully disconnect it from the wireless bridge. 4. Ensure that the wireless bridge is firmly secured to a wall or ceiling. In the event of damage due to the wireless bridge falling from its location, the warranty of the wireless bridge is void. -
Page 8: Ii. Quick Setup
II. QUICK SETUP Your wireless bridge can be up and running in a matter of minutes. There are two ways you can quickly setup your wireless bridge - using the WPS button or using iQ Setup on your computer. II-1. WPS Button Setup Note: If your root network access point/router does not have a WPS button or if you encounter... - Page 9 3. The WPS function of the wireless bridge will now be active for 2 minutes. So, within 2 minutes, please press the WPS button on the wireless router/access point of your root network, to activate its WPS function also. Note: Different routers/access points may require you to press and hold the WPS button for different lengths of time –...
-
Page 10: Ii-2. Iq Setup
3. Open a web browser, and you will be prompted for a username and password. Note: If you are not prompted for a username and password, please enter “http://edimax.go” into the URL bar. 4. Please enter the default username “admin” and the default password... - Page 11 Windows: Mac: 5. You will see the iQ Setup screen, as shown below. All available Wi-Fi networks will be listed – please select the Wi-Fi network you would like the wireless bridge to connect to. If your selected Wi-Fi network requires a security key, a new field will appear when you select your Wi-Fi network.
- Page 12 “Refresh” to refresh the list. 6. Click “NEXT” to continue, and Internet Explorer and Firefox users will be asked to confirm if you wish to add “http://edimax.go” to your bookmarks. We recommend that you do so for future use.
- Page 13 9. The device name and security type will be displayed on the screen. Click “APPLY” to restart the wireless bridge and make the settings take effect, or click “Back” to go back to the previous screen. 10. When you click “APPLY”, the system will restart. Please wait until the restart completes.
-
Page 14: Ii-3. Hardware Installation
Your wireless bridge is now configured and ready for use with your wired network device, such as smart TV, Blu-ray player or games console. Please see Hardware Installation for guidance on using the wireless bridge with your network device. II-3. Hardware Installation I. -
Page 15: Ii-4. Resetting The Wireless Bridge
Figure ii II-4. Resetting the Wireless Bridge In the event that the wireless bridge malfunctions or stops responding, you can reset the device back to its factory settings. To do so, press and hold the WPS/Reset button on the rear panel of the device for at least 10 seconds. When the green PWR LED begins to flash, release the WPS/Reset button and wait for the device to restart. -
Page 16: Iii. Browser Based Configuration Interface
“admin” and the default password “1234”. Mac: Open a web browser and enter “http://www.edimax.go” into the URL bar. You will be prompted for a username and password, please enter the default username “admin” and the default password “1234”. - Page 17 “Show All Bookmarks”. Or you can click on the bookmarks icon under the URL bar. Then, select “Bonjour” from the menu in the left panel. Finally, click on “edimax.go” in the lower panel on the right side.
-
Page 18: Iii-1. Home
You will be prompted for a username and password. Please enter the default username “admin” and the default password “1234”. Both Windows and Mac users will now arrive at the browser based configuration interface home screen. You can navigate around this interface using the menu down the left side, which contains 6 categories: III-1. - Page 19 III-1. Home The Home page shows the basic status and information of the wireless bridge. Note: This screenshot is an example. The information you see on your screen will likely differ from this screenshot. Uptime Displays the total passed time since the device was turned on.
- Page 20 ESSID Displays the current ESSID (the name used to identify this wireless bridge). Channel Displays the current wireless channel Number number Security Displays the current wireless security setting. BSSID (MAC) Displays the device’s MAC address. A MAC address is a unique, fixed ID for this device, it cannot be modified.
-
Page 21: Iii-3. Wps Setting
III-3. WPS Setting Wi-Fi Protected Setup (WPS) is the simplest way to build a connection between your wireless router/access point and the wireless bridge. You don’t have to select an encryption mode and enter a long encryption passphrase – simply press a button on the wireless router/access point and on the wireless bridge, and WPS will do the rest for you. - Page 22 Enable WPS Check this box to enable or disable WPS Wi-Fi Protected All information related to WPS will be Setup displayed here. Information WPS Status Displays WPS status. If data encryption settings for the wireless bridge have never been set, “unConfigured” will be shown here.
-
Page 23: Iii-4. Wireless Advanced
Passphrase Key Shows the WPA passphrase here, though all characters will be replaced by asterisks for security reasons. If encryption is not set on the wireless bridge, this field will be blank. Device Configuration options for the device’s WPS Configuration settings can be found here. - Page 24 Fragment Set the Fragment threshold of the wireless Threshold radio. Please do not modify the default value if you don’t know what this does, the default value is 2346. RTS Threshold Set the RTS threshold of the wireless radio. Please do not modify the default value if you don’t know what this does, the default value is 2347.
- Page 25 different kinds of data, to give higher priority to applications which require instant responses. This improves the performance of such network applications. IPTV Multicast Enable internet TV multicast packet to to Unicast unicast. Multicast Data When you disable IPTV multicast to unicast, Rate you can set the data rate of the multicast packet here.
- Page 26 III-5. Administrator In “Administrator” you can change the login information for your wireless bridge, which you use to access the browser based configuration interface. Additionally, you can modify the IP address of the wireless bridge. Password Settings You can change the password used to login to the browser-based configuration interface here.
- Page 27 Note: If you select “Obtain an IP address automatically” then you will need to use the access key (http://edimax.go) to access the browser-based configuration device. Select “Obtain an IP address automatically” to assign an automatic IP address to the wireless bridge or select “Use the following IP address”...
- Page 28 IP Address Specify an IP address here. This IP address will be assigned to wireless bridge. Subnet Mask Input the subnet mask of the new IP address. Gateway Input the network’s gateway IP address. Address Note: After you modify the IP address of the wireless bridge, enter this IP address into the URL bar of a web browser in order to access the browser based configuration interface.
-
Page 29: Iii-6. Configuration Tool
III-6. Configuration Tool The wireless bridge’s configuration tool enables you to back up or restore the settings, upgrade the firmware and reset the device. Select “Configuration tool” from the sidebar. You will see the following screen: Backup Settings Click “Save” to save the current settings on your computer as a config.bin file. -
Page 30: Firmware Upgrade
Selecting “Firmware upgrade” from the “Configuration Tool” menu allows you to update the system firmware to a more recent version. You can download the latest firmware from the Edimax website. Note: Do not turn off or disconnect the access point during a firmware upgrade, as this could damage the device. -
Page 31: Reboot
Click “CONTINUE” to save the changes but not apply them yet. This allows you to make further changes in the browser based configuration interface, before applying them all at once. Click “APPLY” to restart the device and implement any changes. The device will restart itself. - Page 32 Windows: Mac: You will see the following screen, and a timer will count down from 60 seconds. When the timer reaches zero, click “OK” to return to the browser-based configuration interface.
-
Page 33: Iv. Appendix
IV. APPENDIX IV-1. Configuring your IP address Before you use the wireless bridge, please make sure your computer is set to use a dynamic IP address. This means your computer can obtain an IP address automatically from a DHCP server. This is a simple procedure, which is explained step by step in IV-1-1. -
Page 34: Iv-1-1. How To Configure Your Computer To Use A Dynamic Ip Address
follow the guide appropriate for your operating system in IV-1-2. How to modify the IP address of your PC or Macintosh. Note: For guidance on how to assign a new IP address to the wireless bridge, so that it is within the same IP address subnet of your network, please refer to III-5. -
Page 35: Iv-1-1-2. Windows Vista
2. Select “Obtain an IP address automatically” and “Obtain DNS server address automatically”, then click “OK”. IV-1-1-2. Windows Vista 1. Click the “Start” button (it should be located in the lower-left corner of your computer), then click “Control Panel”. Click “View Network Status and Tasks”, then click “Manage Network Connections”. - Page 36 2. Select “Obtain an IP address automatically” and “Obtain DNS server address automatically”, then click “OK”.
-
Page 37: Iv-1-1-3. Windows 7
IV-1-1-3. Windows 7 1. Click the “Start” button (it should be located in the lower-left corner of your computer), then click “Control Panel”. 2. Under “Network and Internet” click “View network status and tasks”. 3. Click “Local Area Connection”. - Page 38 4. Click “Properties”. 5. Select “Internet Protocol Version 4 (TCP/IPv6) and then click “Properties”.
- Page 39 3. Select “Obtain an IP address automatically” and “Obtain DNS server address automatically”, then click “OK”.
-
Page 40: Iv-1-1-4. Mac Os
IV-1-1-4. Mac OS Note: Please ensure that your wireless bridge is switched on and connected to your Macintosh via Ethernet cable before you begin. 1. Have your Macintosh computer operate as usual, and click on “System Preferences”. 2. In System Preferences, click on “Network”. 3. -
Page 41: Iv-1-2. How To Modify The Ip Address Of Your Pc Or Macintosh
4. Click on “Ethernet” in the left panel and then click the drop down arrow for the menu labeled “Configure IPv4” in the right panel. From the drop down menu, select “Using DHCP” and then click “Apply”. IV-1-2. How to modify the IP address of your PC or Macintosh Please follow the instructions appropriate for your operating system. - Page 42 2. Select “Use the following IP address”, then input the following values: Note: Your existing static IP address will be displayed in the “IP address” field before you replace it. Please make a note of this IP address, subnet mask, default gateway and DNS server addresses.
-
Page 43: Iv-1-2-2. Windows Vista
< IV-1-2-2. Windows Vista 1. Click the “Start” button (it should be located in the lower-left corner of your computer), then click “Control Panel”. Click “View Network Status and Tasks”, then click “Manage Network Connections”. Right-click “Local Area Network”, then select “Properties”. The “Local Area Connection Properties” window will then appear, select “Internet Protocol Version 4 (TCP / IPv4)”, and then click “Properties”. - Page 44 2. Select “Use the following IP address”, then input the following values: Note: Your existing static IP address will be displayed in the “IP address” field before you replace it. Please make a note of this IP address, subnet mask, default gateway and DNS server addresses.
-
Page 45: Iv-1-2-3. Windows 7
IV-1-2-3. Windows 7 1. Click the “Start” button (it should be located in the lower-left corner of your computer), then click “Control Panel”. - Page 46 2. Under “Network and Internet” click “View network status and tasks”. 3. Click “Local Area Connection”.
- Page 47 4. Click “Properties”. 5. Select “Internet Protocol Version 4 (TCP/IPv6) and then click “Properties”.
- Page 48 6. Select “Use the following IP address”, then input the following values: Note: Your existing static IP address will be displayed in the “IP address” field before you replace it. Please make a note of this IP address, subnet mask, default gateway and DNS server addresses.
-
Page 49: Iv-1-2-4. Mac Os
IV-1-2-4. Mac OS Note: Please ensure that your wireless bridge is switched on and connected to your Macintosh via Ethernet cable before you begin. 1. Have your Macintosh computer operate as usual, and click on “System Preferences” 2. In System Preferences, click on “Network”. - Page 50 3. Here you will see all of your network connections. Network Preferences will now display an Ethernet adapter, as shown below. The status of “Ethernet” should be “Connected”. 4. Click on “Ethernet” in the left panel and then click the drop down arrow for the menu labeled “Configure IPv4”...
- Page 51 5. In the panel on the right side, enter IP address 192.168.9.20 and subnet mask 255.255.255.0. Click on “Apply”. Note: Your existing static IP address will be displayed in the “IP address” field before you replace it. Please make a note of this IP address, subnet mask, router IP and DNS server address.
-
Page 52: Iv-1-3. How To Find Your Network Security Key
IV-1-3. How to Find your Network Security Key To find your network security key, please follow the instructions appropriate for your operating system. Note: If you are using Windows XP or earlier, please contact your ISP or router manufacturer to find your network security key. - Page 53 3. Click on “Manage wireless networks” in the left menu. 4. You should see the profile of your Wi-Fi network in the list. Right click on your Wi-Fi network and then click on “Properties”. 5. Click on the “Security” tab, and then check the box labeled “Show characters”.
-
Page 55: Iv-1-3-2. Mac
IV-1-3-2. 1. Open a new Finder window, and select “Applications” from the menu on the left side. Open the folder labeled “Utilities” and then open the application “Keychain Access”. 2. Select “Passwords” from the sub-menu labeled “Category” on the left side, as shown below. - Page 56 3. Double click the SSID of your network and you will see the following window. 4. Check the box labeled “Show password” and you will be asked to enter your administrative password, which you use to log into your Mac. Enter your password and click “Allow”.
- Page 57 Your network security password will now be displayed in the field next to the box labeled “Show password”. In the example below, the network security password is “edimax1234”. Please make a note of your network security password.
-
Page 58: Iv-1-4. How To Find Your Router's Ip Address
IV-1-4. How to Find your Router’s IP Address To find your router’s IP address, please follow the instructions appropriate for your operating system. IV-1-4-1. Windows XP, Vista & 7 1. Go to “Start”, select “Run” and type “cmd”, then press Enter or click “OK”. 2. -
Page 59: Iv-1-4-2. Mac
3. Your router’s IP address will be displayed next to “Default Gateway”. IV-1-4-2. 1. Launch “System Preferences” and click on “Network”. 2. If you are using an Ethernet cable to connect to your network, your router’s IP address will be displayed next to “Router”. - Page 60 3. If you are using Wi-Fi, click “Wi-Fi” in the left panel, and then “Advanced” in the bottom right corner. 4. Click the “TCP/IP” tab and your router’s IP address will be displayed next to “Router”.
-
Page 61: Iv-2. Troubleshooting
IV-2. Troubleshooting If you are experiencing problems with your wireless bridge, please refer to this troubleshooting guide before contacting your dealer of purchase for help. Scenario Solution I can’t log onto a. Please check the connection of the power cord and network cable. - Page 62 extremely hot. wireless bridge, the temperature of the device is at a normal level. b. If you smell burning or see smoke coming from wireless bridge or A/C power adapter, then disconnect the wireless bridge and A/C power adapter immediately, as far as it is safely possible to do so.
-
Page 63: Iv-3. Glossary
but buffering times. During peak usage times i.e. weekends and times are still evenings, Internet connection speeds can fluctuate too long and I significantly depending on your ISP’s total available only see bandwidth. If you are experiencing significant reductions standard in your download speeds during peak times, contact your definition ISP to solve this issue. - Page 64 the packet to its default gateway, which will then send it out towards the destination. DHCP: Dynamic Host Configuration Protocol. This protocol automatically gives every computer on your home network an IP address. DNS Server IP Address: DNS stands for Domain Name System, which allows Internet servers to have a domain name (such as www.Broadbandaccess point.com) and one or more IP addresses (such as 192.34.45.8).
- Page 65 For example, if the IP address for a device is, in its binary form, 11011001.10110000.10010000.00000111, and if its network mask is, 11111111.11111111.11110000.00000000 It means the device’s network address is 11011001.10110000.10010000.00000000, and its host ID is, 00000000.00000000.00000000.00000111. This is a convenient and efficient method for access points to route IP packets to their destination.
- Page 66 H.323 1720 SNMP SNMP Trap HTTP PPTP 1723 PC Anywhere TCP 5631 PC Anywhere UDP 5632 Access point: A access point is an intelligent network device that forwards packets between different networks based on network layer address information such as IP addresses. Subnet Mask: A subnet mask, which may be a part of the TCP/IP information provided by your ISP, is a set of four numbers (e.g.