Samsung DVD-V2000 Instruction Manual
Hide thumbs
Also See for DVD-V2000:
- Instruction manual (34 pages) ,
- Instruction manual (35 pages) ,
- Instruction manual (29 pages)
Table of Contents
Advertisement
Advertisement
Table of Contents

Related Manuals for Samsung DVD-V2000


Summary of Contents for Samsung DVD-V2000
- Page 1 DVD-V2000 Instruction Manual Hi-Fi V_DEO www.samsungasc.com...
- Page 2 WARNING: Copy Notification TO PREVENT DAMAGE WHICH MAY RESULT IN Federal law provides severe CiVil and ¢rlmtnal FIRE OR ELECTRIC SHOCK HAZARD, DO NOT penalties for the unauthorpzed reproduction EXPOSE THIS APPLIANCE TO RAIN OR d_strlbutJon or exhlbltlOrl Of copyrighted motion MOISTURE pictures...
- Page 3 Important Safety Instructions ......Read these instructions Keep these mstructlom Heed all warnings Follow all instructions DO not use this apparltus near water CJean only With dry cloth Do no( block any ventdat_on opemngs Install in accordance with the manufacturer's ths_JCtiOnS.
- Page 4 f Table of Contents Safety ..• Important Safety Instructions • Welcome ..• Feature Summary ..• Unpacking m Disc Type end Characteristics . . . • 1 - System Overview ..... • Front Panel Overview • Rear Panel Front Panel Dnsplay ..
-
Page 5: Table Of Contents
Table of Contents i!!ii!i! i!i i 5- DVD Setup ..........• Disc Menu Language ..........• Audio Language ..........• Subtitle Language ..........• Parental ............• Digital Output ........... • DTS ............• Dynamic Compression ..........• TV Aspect Ratio ..........•... - Page 6 Table of Contents 8 - VCR PZayback ..........• Special VGR Playback Features ........• Tracking ............• Auto Play/Rewind ..........• S-VHS Playback ..........• Vadable Search System ........... 9 - VCR Recording ........... • Basic Recording ..........• Special Recording Features ........
-
Page 7: Feature Summary
I Feature Summary System Features • Complete versatilityto play DVD, VCDs, audio CDs, MP3 discsor VHS Tapes. • Watch a DVD while recordinga TV show to the VCR. • Aulo Setup automaticallysets clockand searches for channels• , Remote controlsboth DVD and VCR decks. •... - Page 8 Disc Type Characteristics This DVD player ascapable of playing the following [ypes of discs with the correspondmg Iogos: Single-sided • DVD con_ain$axcellent s ound 5" 240 rnin, and videodueto DolbyDigital Double-sided and MPEG-2 system. 480 rain Audio • VBdou$ screen and audio lunctions can be easily Single-sided Video...
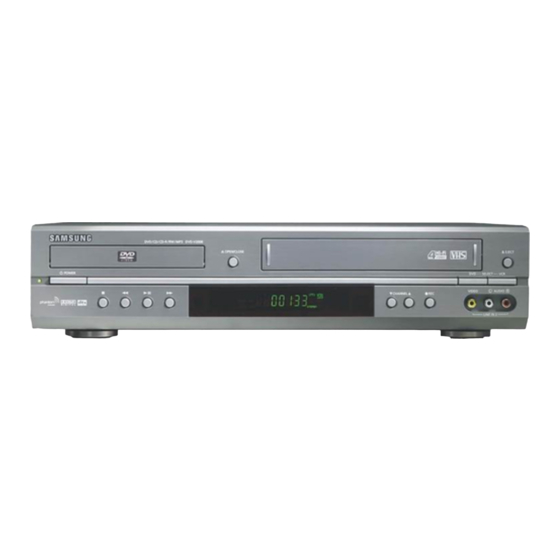
- Page 9 Front Panel Overview 9 10 11 12 14 15 16 DVD DECK (p.14) PLAY/PAUSE (p.14, 15, 33,44) DVD OPEN/CLOSE (p.14) FAST-FORWARD/FWD (p.33, 44) VCR DECK (p.15) FRONT PANEL DISPLAY (p.10) CHANNEL &/y (p.16) LINE IN 2 COMPOSITE VIDEO JACK UNE IN 2 LEFT AUDIO JACK RECORD (p.46) LINE IN 2 RIGHTAUDIO JACK DVD-VCR SELECT (p.14)
- Page 10 Rear Panel VIOEo _ AUDbD "_ RF ANTENNA INPUT COMPONENT VIDEO OUT RF OUT TO TV DIGITAL AUDIO OUT(COAXIAL) LINE OUT TO TV (COMPOSITE) DIG|TAL AUDIO OUT(OPTICAL) LiNE IN 1 S-VIDEO OUT AUDIO LiNE OUT TO "iV -S-VIDEO OR COMPONENT) I Front Panel Display The DVD Deck is active A DVD with a DTS soundtrackis loaded...
-
Page 11: Remote Control Overview
Remote Control Overview POWER (p.14) SCREEN FIT (p. 34) SHUTTLE <<1>> (p.44) MODE (p.41,42) REPEAT (p.38, 39, 44) ZOOM (p.36), TV MUTE (p.12) © 3D SOUND (p.43), 100+ (p.16) DVD(p.14) DIGEST (p.37) F.ADV/SKIP (p.33, 44) VOLUME +/- (p.12) 10 REWIND (p.33.44) ®... - Page 12 Using the TV Buttons on the Remote Control Your VCR remote control will work with Samsung televisions and compatible brands. To determinewhether your television is compatible,follow theinstructions below, Switch your televisionon. Pointthe remote controltowards the television. Hold down the TV button and enter the two-figure...
- Page 13 I Basic Connections/Auto Setup in this section, you will connect the D VD-VCR to your television and run Auto Setup, which automatically searches for channels and sets the player's internal clock. NOTES: • Advanced Connections are covered in Appendix A. •...
-
Page 14: Deck Control Buttons
Deck Control Buttons The DVD-VCR uses one set of controls to operate both decks. The following buttons are helpful in successfully controlling each deck. POWER Button Press the POWER button on the remote controlor front panel to turn on the DVD-VCR. DVD Button Press the DVD buttonon Ihe remote controlor front panel when you want to controlthe DVD deck. - Page 15 Basic VHS Playback To play a videotape, simply insert it in the VHS deck and press the Play button. Tapes without Record Safety Tabs can be set to play automatically when inserted; see page 45. Insert VHS Tape Insert a standard VHS videotape into the VHS Deck. •...
- Page 16 Basic TV Tuner Operations The following buttons are used when watching television via the DVD.VCR's built-in TV tuner. TVNCR Press to switch between your TV's tuner and the VCRIs internal tuner. Channel Up/Down Press tochange to the nextor previous channel. 0-9 Buttons Press to select channels directly.
-
Page 17: Menu Language
l Menu Language Follow these steps to change the on-screen menu language to English, French or Spanish. Open "SETUP MENU" With the DVD in stop mode, press the SETUP button. Set "Language" Usingthe Up[Down andLeftJRight buttons, m ovetheselection arrow to "LanguagelldiomalLangue," thenp,'essENTERbutton. - Page 18 Manual Clock Set If Auto Setup was unable to find a local TV station to set the DVD- VCR'$ internal clock, follow these instructions to set the date/time ITlanually. NOTE: It is important to set the clock for accurate Timer Recording, Open "SETUP MENU"...
- Page 19 I Tuner Band Setting This feature allows to manually set the DVD. VCR's tuner band to Antenna or Cable, whichever you connected to the Antenna jack during initial setup. • Use this setting only if Auto Setup detected the incorrect tuner band, i,e.
-
Page 20: Auto Channel Memory
Auto Channel Memory Auto Channel Search will automatically seek and store all active channels in ),our area. Open "SETUP MENU" With the DVD in stop mode, press the SETUP button. Select "Channel" Using the up/down and leWdghtbuttons, move the selectioncursor to "Channel Setup', then press ENTER to select. -
Page 21: Channel Add/Delete
Channel Add/Delete Use this feature if Auto Channel Search missed a channel that you would like to add, or added a channel you wish to remove. Open "SETUP MENU" With the DVD in stop mode, press the SETUP button. Select "Channel" Using the up/down and left/right buttons, move the selectioncursor to "Channel Setup', then press ENTER to select. -
Page 22: Rf Output Channel
RF Output Channel Open "SETUP MENU" With the DVD in stop mode, press the SETUP button. Select "Option" Using the up/down and leWright buttons, move the selection cursor to "OpUoo Setup," then press ENTER to select. Select "RF Output Channel" Move the selectionbar to "RF Output Channel", then press right to change. -
Page 23: Auto Power Off
l Auto Power Open "SETUP MENU" With the DVD in stop mode, press the SETUP button. Select "Option" Using the up/down and leWdght buttons, move the selection cursor [][]rid to "Option Setup," then press ENTER to select. Select "Auto Power Off" Move the selection bar to "Option Setup", then press rightto select from following options: •... -
Page 24: T 5- Dvd Setup
Disc Menu Language Follow these steps to choose your preferred language for DVD disc menus. The DVD-VCR will automatically default to the language you choose if it is available on a given DVD. Open "SETUP MENU" With the DVD in stop mode, press the SETUP button, Select "DMD"... -
Page 25: Subtitle Language
Subtitle Language Follow these steps to choose your preferred language for DVD subtitles. The DVD.VCR will automatically default to the language you choose if it i5 available on a given DVD. Open "SETUP MENU" With the DVO in stop mode, press the SETUP button. [][]mm Select "DMD"... -
Page 26: Parental
Parental Rating Control is a password protected system that allows you to MAIN MENU block playback of DVDs based on their content, The system uses an eight level rating system• • If you try to play a DVD that exceeds the selected rating, an error Qmlll message will appear•... -
Page 27: Digital Output
Digital Output If your A/V receiver is equipped with a Dolby Digital decoder, your DVD.VCR can output Dolby Digital 5.1 sound, but you MUST enable this feature in the menu system to prevent damage to your speakers. [][]mm NOTE: Select "Bitstream " ONLY if you have connected a Dolby Digital-equipped A/V receiver to the Digital Output (optical or coaxial) on the DVD-VCR back panel. -
Page 28: Dts
If your A/V receiver is equipped with a DTS decoder, your DVD- VCR can output DTS digital sound, but you MUST enable this feature in the menu system. NOTE: Select "Yes" ONLY if you have connected a DTS-equipped receiver to the DIGITAL AUDIO (optical or coaxial) -
Page 29: Dynamic Compression
Dynamic Compression Dynamic Compression constrains the dynamic range, Le, the difference between the quietest and loudest passages of a DVD soundtrack, This enables you to limit loud noises, such as explosions, or raise the volume of quiet passages, such as whispering, while watching... -
Page 30: Tv Aspect Ratio
TV Aspect Ratio Set the aspect ratio (length x width) of your TV screen so the DVD player will display movies at the appropriate size for your television. Choose from standard, letterbox, or widescreen format. Open "SETUP MENU" With the DVD in stop mode. press the SETUP button. Select "DVD"... -
Page 31: Black Level
Black Level The Black Level feature adjusts the reference level of black in the video signal to one of two choices: • Low. Standard NTSC black level. Yields consistent contrast through all sources, • High. Enhanced black level, for increased contrast during DVD playback. -
Page 32: Dvd•Sound Setup
A/V Receiver Connections To take full advantage of the movie theater experience that DVD offers, you may want to connect your DVD.VCR to a complete Surround Sound system, including an A/V Receiver and six Surround Sound speakers. Before You Begin... •... -
Page 33: Dvd Operations
I Special Playback Features During DVD/CD playback you can select from the following special playb#ck options. To resume normal playback, press the b,-n (Play/Pause) button, Still Press the I_11(Play/Pause) button on the remote contr01dottng playback. • The picture will pause and the audiowill mute. •... -
Page 34: Disc Menu Navigation
Disc Menu Navigation Many DVDs feature their own menu systems, where you can select Titles, Chapters, Audio Tracks, Subtitles, and special disc features, such as movie trailers, and information on the cast. Use these buttons to make selections in the Disc menus. DISC MENU Button Press to access the DVD's Disc menu, if applicable. -
Page 35: Title/Chapter/Time Selection
Title/Chapter/Time Selection If you press the DlSPLA Y button during playback, you can view the current Title, Chapter/Track, and counter position. can also use this screen as shortcut to select any Title, Chapter[Track, or counter position on the disc. View DVD/CD Display Press the DISPLAY button on the remote controlduring DVD/CD playback. -
Page 36: Zoom
Zoom You can zoom in at 2 or 4 times the normal magnification while watching a DVD. Open Zoom Magnifying Glass During Playback or STILL mode, press the ZOOM button to display the "Magnifying Glass icon" on the screen. Position Magnifying Glass Use the .. -
Page 37: Subtitle
I Subtitle Many DVDs provide subtitles in one or more languages. The SUBTITLE button provides a shortcut to view and select these options. Open Subtitle Menu During playback, press the SUBTITLE button. Set Subtitle Language Press the up/down buttons to select among all available subtitle languages. -
Page 38: A-B Repeat
A-B Repeat The A.B Repeat function allows you to repeat any segment of a or CD. Simply mark the beginning point (A) and the ending point (B) of the segment want to review. Select A-B Repeat Function tn Play mode, pressthe REPEAT button, then press left#ight to select A-B Repeat. -
Page 39: Repeat Chapter/Title
Repeat Chapter/Title You can repeat a single chapter, or repeat a complete title. Open Repeat Menu In Play mode, press the REPEAT button to open the Repeat menu. , The current Repeat Mode will highlighted. Select "Chapter" Press the left/right buttonsto select "Chapter" •... -
Page 40: Bookmarks
Bookmarks You can insert up to three Bookmarks on your DVDs, so you can jump quickly to your favorite scene or song, Open Bookmark Menu Ouri_ playback, press the _ARK button _,_ the remote Control The "Mark" header will appear on the screen. Select Bookmark Placeholder Press the iefVdghtbuttons to move to one of the three bookmark... -
Page 41: Programmed Playback
l Programmed Playback Programmed Playback lets you set a custom order for playback of chapters/tracks on a DVD or CD. Open Playback Mode Menu While in Stop mode, press the MODE button. Select "PROGRAM" Using the lefUdght buttons, move the selection bar to "PROGRAM" then press ENTER to select. -
Page 42: Random Playback
Random Playback DVD Random Playback lets the DVD-VCR set a random order for playback of chapters/tracks on a DVD or CD. Open Playback Mode Menu In Stop mode. press the MODE button. Select "RANDOM" Using the leftJright buttons,move the selectionarrow to "Random Play,"... -
Page 43: Sound
Sound Audio is an enhanced audio mode that creates the illusion Surround 5ound with only two speakers. Open 3D Sound Menu During playback of a DVD, pressthe 3D SOUND buttonon the remote control. Set 3D Sound Press the up/down buttonsto set "3D Sound"On or Off, then press the 3D SOUND button to confirmyour selection. -
Page 44: Vcr Pzayback
While a videotape is playing, you can enjoy a variety of special playback features, including Still, Frame Advance, Skip, Repeat, and more. Press the Play button again to resume normal playback. PLAY Still FromPlaymode,pressPlay/Pause to stillasingle frame, Frame Advance From s_t$ m ode, press SKiP/F.ADV to advance to the next frame. Cue/Revlew From Ray mode, press F.Forward (=c) or Rewind (-) cue/review at two speeds:... -
Page 45: Auto Play/Rewind
I AutoPlay If you want your videotapes to play automatically when you insert them, turn on Auto Play, NOTE: Only tapes that are missing the Record Safety Tab wifl play automatically when inserted. Open the "SETUP MENU" With the DVD in stop mode. press the SETUP button. Select "VCR"... -
Page 46: Vadable Search System
Variable Search System Press the SEARCH button to display the search screen in the stop mode. When a program is recorded, the starting point is given an Index mark for easy location. However, the VHS Index Search System (VISS) cannot recognize index marks made by old VCRs. If the VCR has trouble finding a mark, it isprobably because the cassette was recorded on a VCR without VISS. -
Page 47: Vcr Recording
Basic Recording You can record a TV show in progress by inserting a blank tape and pressing the REC button. You can even add time in 30ominute increments up to 4 hours by pressing the REC button repeatedly; see page 49. NOTE: Be sure you videotape... -
Page 48: Special Recording Features
Special Recording Features While a recording is in progress, you can watch a different channel, watch a DVD, or add recording time in 30.minute increments. PauselResume Recording Press _heb,,-II(PlaylPause) button. Press REC again to resume. Stop Recording Pressthe STOP button. Watch a Different Channel Press the TV/VCR button on the remote to switch to your TV tunel then select a different channel on your television. -
Page 49: One-Touch Recording (Otr)
lone-Touch Recording (OTR) One-Touch Recording (OTR) allows you to add recording time in 30-minute increments up to 4 hours at the touch of a button. RECORD Start Recording Follow the instructionson page 47 to begin recording. Activate OTR While in Record mode, press the REC button again to activate One-Touch Recording (OTR) •... -
Page 50: Timer Recording
How to Set a Timer Recording Insert a blank tape with a Record Safety Tab into the VCR deck. The Timer Recording Feature allows you to program up to 8 events at a time to record up to a month in advance. -
Page 51: Appendix A - Advanced Connections
I S-Video/Component Video Connections (for DVD) The S-Video or Component Video connection is only for the DVD player. The tuner and VCR will still be viewed through the RF or line inputs. You must follow the "Air Video Out" instructions on page 31 to activate your alternative... -
Page 52: Stereo Connections
Stereo Connections You can enjoy stereo sound when watching movies and TV shows by connecting your D VD. VCR to your home stereo system or stereo Connect DVD.VCR to Stereo Connect RCA cables from the Line Out Left & Right Audio jacks on the back panel of the DVD-VCR to lhe Auxiliary Inputs on your stereo receiver. -
Page 53: Monitor Tv Connections
I Monitor TV Connections Monitor.style televisions offer improved sound and picture over regular televisions because they receive the audio and video signals directly from the DVD-VCR through the line inputs, NOTE: A monitor television is not the same as a computer monitor. -
Page 54: Connecting Other Video Equipment
Connecting Other Video Equipment You can connect a wide variety of audio/video equipment to your DVD.VCR, including: An additional VCR Laser Disc Player DVD Player Carncorder Satellite Receiver Video Game Since aft of these devices use essentially the same connections, they will be described together. -
Page 55: Appendix B - Help
Technical Specifications AUDIO 2 Stereo audio inputs, RCA Connector, -8dbm, 47K0. front and rear Inputs VIDEO 2 Composite video inputs, RCA Connector, 75_, 1VI>p Antenna or CATV Input, F-Connector, 75_ AUDIO 1 Stereo audio outputs,RCA Connector, -8dbm, 1.5K_ AUDIO (DVD only) 2 Digital audio outputs (1 optical 1 coaxial) I Stereo audio outputs VIDEO... - Page 56 ThisSAMSUNG brand product, as supplied and distributed by SAMSUNG ELECTRONICS AMERICA, INC. (SAMSUNG) and delivered new, in the original carton to the original consumer purchaser, is warranted by SAMSUNG against manufacturing defects in materials and workmanship for the following limited warranty...
- Page 57 SAMSUNG ELECTRONICS AMERICA, INC. HEADQUARTERS 105 Challenger Road, Ridgefield Park, N.J. 07660-0511 TEL: 1-800-SAMSUNG SERVICE DIVISION 400 Valley Road, Suite 201, Mount Arlington, NJ 07856 1-800-SAMSUNG (1-800-726-7864) ELECTRONICS AC68-01816A...