Panasonic Lumix DMC-ZS5 Operating Instructions Manual
Hide thumbs
Also See for Lumix DMC-ZS5:
- Basic operating instructions manual (222 pages) ,
- Operating instructions manual (178 pages) ,
- Operating instructions for advanced features (62 pages)

Related Manuals for Panasonic Lumix DMC-ZS5


Summary of Contents for Panasonic Lumix DMC-ZS5
- Page 1 Operating instructions for advanced features Digital Camera DMC-ZS7 Model No. DMC-ZS6 DMC-ZS5 Before connecting, operating or adjusting this product, please read the instructions completely. VQT2R20...
-
Page 2: Quick Sta Guide
Quick guide The battery is not charged Charge the battery when the camera shipped. Charge battery set the Clock before use. When do not use the card (optional), you can record or play back pictures on the built-in memory (416). Insert the battery the card... - Page 3 Before u se ..........Basic shooting operation .... Read first ............Taking still pictures ........To prevent damage, malfunctions, Recording motion pictures ......and f aults ............Holding the camera ........About GPS _ ..........Mode dial ............. Standard Accessories ......
- Page 4 m [FIREWORKS]/_ [BEACH]/IE_ ]SNOW]/ [AERIAL PHOTO]_ [PIN HOLE] ..68 [FILM GRAIN]/_ [HIGH DYNAMIC] ..69 Changing recording information [PHOTO FRAME]/ display ..........L_ [UNDERWATER] ........Taking pictures with flash ....Registering commonly used scenes Taking close-up pictures ....MODEl/ 'Tele macro' function ......
- Page 5 [DIGITAL ZOOM]/ [ASPECT CONV.]/ C-AF [CONTINUOUS I_A [ROTATE DISP.] ........_:_ [ COLOR EFFECT] ......[FAVORITE] ........[PICT.ADJ.]/{(_)/[STABILIZER] ... '_,_ [PRINT SET] ........[AUDIO REC.]/ O_ [PROTECT] ......... AFt- [AF ASSIST LAMP]/ [FACE REC EDIT] ....... [RED-EYE REMOVAL] ....... [COPY] ..........[CLOCK SET] ........
-
Page 6: Before Use
Panasonic will not provide compensation [] Software on the CD-ROM supplied even if damage is caused by faults with camera or card. - Page 7 [] Avoid shocks, vibration, and pressure. [] Lens • Avoid exposing the camera to strong • If lens is dirty: vibration or shock; e.g. dropping or Images may appear slightly white if lens hitting the camera, or sitting down with is dirty (fingerprints, etc.).
- Page 8 • If any accessories are lost, customers [] Positioning in the USA and Puerto Rico Because the positions of the GPS should contact Panasonic's parts satellites are constantly changing, department at 1-800-833-9626 depending on the recording location customers in Canada...
-
Page 9: Cursor Button
Camera ON/OFF switch Card/Battery door (414) (417) Tripod receptacle Shutter button (434) Mode dial (431) Flash (447) DC coupler cover Self=timer indicator (-_52)/ (415) AF Assist Lamp (4106) Release lever (414) Lens barrel (439) Lens (47) Microphone (472, 106) -- GPS antenna Speaker (422, 11 socket... - Page 10 @ames of parts Camera ON/OFF switch Card/Battery door (414) (419) Tripod Shutter button (434) Mode dial (433) Flash (447) DO coupler cover Self-timer indicator (452)/ (415) AF Assist Lamp (4106) Release lever (414) Zoo "nlever Lens barrel Hand strap eyelet Lens (47) (439) Microphone .1 (476,...
-
Page 11: Connect Electrical
Panasonic. (Batteries which do not support this function cannot be used). Panasonic cannot in any way guarantee the quality, performance or safety of batteries which have been manufactured by other companies... - Page 12 LCD monitor is on. .1 • Rotating the zoom lever from Tele to Wide or , Using a Panasonic SD Memory Card vice versa in every recording, (32 MB). • Turning the camera off every 10 recordings , Using the supplied battery.
-
Page 13: Charging Battery
®The time required for charging varies depending on conditions of battery usage. Charging takes longer at high or low temperatures and when the battery has not been used in some time. ®,Battery will be warm during charging and for some time thereafter. _ Battery will run out if not used for long periods of time, even after being charged. - Page 14 • To remove card: • To remove battery: move lever in Lever press down direction of arrow. center. @Always use genuine Panasonic batteries. @ If you use other batteries, we cannot guarantee the quality of this product. @ Remove battery from camera after use.
- Page 15 AC adaptor connect _AIways use a genuine Panasonic AC adaptor (optional). _Use the AC adaptor and DC coupler specifically for this camera. Using other adaptors or couplers could cause camera failure. _lt may not be possible to install camera on a tripod or unipod when the DC coupler is connected, depending on the type of tripod or unipod.
- Page 16 [REC QUALITY] can only be available to record motion pictures in the built- in memory. [] Compatible memory cards (optional) The following SD standard-based cards (Panasonic brand recommended) Type of Card Capacity Notes SD memory 8 MB - 2 GB •...
-
Page 17: Turn On The Power
Set REC/PLAY switch to _ before turning on the power. Turn on the power :)q:: ON i_ ..The power is turned If the language select screen is not displayed, proceed to step _. Press [MENU/SET] while the message is displayed Press A T to select the language, and press [MENU/SET] •... - Page 18 Setting the Clock (Continued) [f automatically correcting time of day, select [YES] @®d_ !i:_ • To manually set date and time _select [NO]. • To return to the previous screen, press _. When [PLEASE SET THE HOME AREA[ is displayed, press [MENU/SET[ The current time and home area are set.
- Page 19 Set REC/PLAY switch to !_ before turning on the power. Turn on the power 0/_: ON The power is turned If the language select screen is not displayed, proceed to step _. Press [MENU/SET] while the message is displayed Press A T to select the language, and press [MENU/SET] •...
- Page 20 Setting the menu Refer to the following procedures to operate menus such as the [SETUP] menu, [REC] menu, [TRAVEL MODE] menu and [PLAYBACK] menu. (Example) While in [PROGRAM AE] Mode (_37), change [LOB MODE] on the [SETUP] menu. (REC/PLAY switch: set to _; mode dial: set to P ) Bring up the menu...
- Page 21 I_ [REC] menu (REC/PLAY switch: _) [MOTION PICTURE] menu (REC/PLAY switch: O) Changing picture preferences (495 - 109) • Displays settings such as White Balance, Sensitivity, Aspect Ratio, and Picture Size. [TRAVEL MODE] menu (REC/PLAY switch: O (_) Categorize your travel pictures (490 - 94) •...
-
Page 22: Using The Setup Menu
Using the [SETUP] menu For details about the setting procedure in the [SETUP] menu (420) Make general camera settings such as adjusting the Clock, extending the battery life, and changing the Beep sounds. [CLOCK SET], [ECONOMY] and [AUTO REVIEW] are important for Clock setting and battery life. - Page 23 Settings, notes [OFF]: Normal (cancel setting) [AUTO POWER LCD]: The brightness is adjusted automatically depending on how bright it is around the camera. _[POWER LCD]: Makes screen brighter than normal (for outdoor use). [AUTO POWER LCD] does not work in the following cases: During playback, during menu display, when connected computer/printer.
- Page 24 Using the [gETUP] menu (cont .o÷d) For details about the settinc procedure in the [SETUP] menu (420) Settings, notes This section is not [OFF]/[ON] recorded. , Recordable area displayed for motion pictures should be interpreted as a Guideline. ° When using Extended Optical Zoom, the recordable area may not always be displayed...
- Page 25 Settings, notes [OFF]: No auto review [1 SEC.]/[2 SEC.]: Automatically display for 1 or 2 seconds. [HOLD]: Auto review screen remains until a button (other than the [DISPLAY] button) is pressed • Fixed to [2 SEC.] in [INTELLIGENTAUTO] Mode. • in [SELF PORTRAIT], [PANORAMAASSIST], [HI- SPEED BURST], [FLASH BURST], and [PHOTO FRAME] Scene Modes, [AUTO BRACKET],...
- Page 26 _' Using the [gETUP] menu (cont_.o÷d) For details about the setting procedure in the [SETUP] menu (420) Settings, notes [RESET REC. SETTINGS?] [YES]/[NO] [RESET SETUP PARAMETERS?] [YES]/[NO] • Information registered in [FACE RECOG.] is reset if recording settings are reset. •...
- Page 27 Settings, notes [AUTO]:The output resolution is automatically determined based on information from the connected TV. [1080i]: Outputs 1080 effective scanning lines in interlaced format. [720p]: Outputs 720 effective scanning lines in progressive format. [480p]: Outputs 480 effective scanning lines in progressive format.
- Page 28 Using the [gETUP] menu (cont_.o÷d) For details about the setting procedure in the [SETUP] menu (420) Settings, notes Current version is displayed. [YES]/[NO] • This requires a sufficiently charged battery ( 11), or an AC adaptor (optional) and DC coupler (optional). When formatting the built-in memory, remove the cards.
- Page 29 Settings, notes [STABILIZER DEMO,]: (Only during recording) Extent of jitter is shown on graph (estimate) Large _ Small _ Large Extent of jitter Extent of jitter after correction • During demo screen display, the Optical Image Stabilizer switches ON and OFF every time [MENU/SET] pressed.
- Page 30 Basic shooting operation Turn on the power < _ ON Shutter button Set to I_1 : Still pictures and motion pictures can be taken. : The captured still pictures and motion pictures can be played back. Set to the desired Recording Mode Motion picture button...
-
Page 31: Shutter=Priority] Mode
• Stand with your arms close to your body and with AF Assist Lamp your legs apart. Flash • Do not touch the lens. • Do not block the microphone when recording audio. (-_9) • Do not block the flash or the lamp, Do not look at it from close range, •... -
Page 32: Basic Shooting
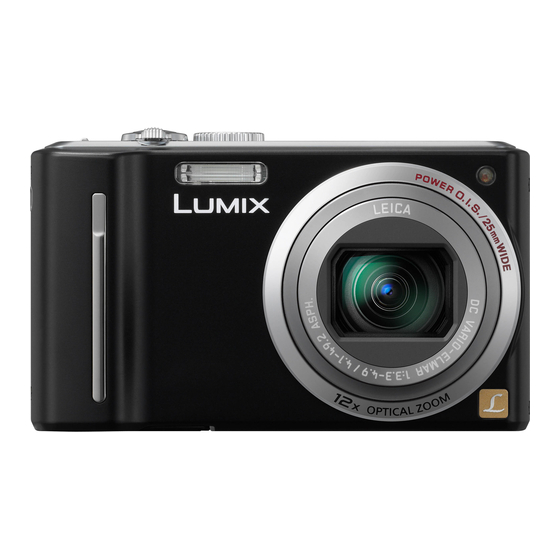
Basic shooting operation Turn on the power Shutter button Set to I_1 I1_ : Still pictures and motion pictures can be taken. I_} : The captured still pictures and motion pictures can be played back. to the desired Recording Mode The illustration shows the DMC-ZS5. -
Page 33: Scn [Scene Mode]
• Stand with your arms close to your body and with AF Assist Lamp your legs apart. Flash • Do not touch the lens. • Do not block the microphone when recording audio. (-40) • Do not block the flash or the lamp. Do not look at it from close range. -
Page 34: Taking Pictures With Automatic
Taking pictures with automatic settings ]INTELLIGENT AUTO] Mode Recording Mode: Optimum settings are made automatically from information such as 'face', 'movement', 'brightness', and 'distance'just by pointing the camera at the subject, meaning that clear pictures can be taken without the need to make settings manually. -
Page 35: Stabilizer Demo.]
==To use flash Select either _ (Auto) or [] (Forced Flash Off). • When _ is used, _, (Auto/Red-Eye Reduction), (Slow Sync./Red-Eye Reduction) and _ (Slow Sync.) are selected automatically according to the subject type and brightness. For details (447). •... -
Page 36: Taking Pictures With Automatic Settings
Taking pictures with automatic settings [INTELUGENT AUTO] Mode (Continued:} Recording Mode: If [COLOR EFFECT] is set to]Happy], both still and motion pictures are clearer, with more vivid coloring. • [Happy] can only be set in i_ [INTELLIGENT AUTO] Mode. -When setting [Happy] If the camera automatically... -
Page 37: Take A Picture
Using the [REC] menu to change settings and set up your own recording environment. Turn on the power Zoom lever Shutter o_:_ ON Set to 0 Set to ([PROGRAM AE] Mode) Take a picture ==To take motion pictures (472) into use zoom Press halfway Press fully... -
Page 38: Taking Pictures With Your Own Settings
Taking pictures with your own settings [PROGRAM AE] Mode (Continued) Recording Mode: [_ Useful when subject is not in center of picture. First adjust focus according to subject Align the AF area ®Subjects/environments which may with the make focusing difficult: subject •... - Page 39 You can zoom in up to 12 times with 'Optical Zoom', and up to 23.4 times with 'Extended Optical Zoom' (pictures only) with lower picture quality. To zoom further, you can use [i.ZOOM] or [DIGITAL ZOOM]. Zoom In/Out Do not block the lens barrel movement Capture a Enlarge while zoom_g...
- Page 40 Taking pictures with zoom (Co t nu÷d) R o di,,gMode: ®Maximum zoom ratios by picture size 8M[] 5M[] 3M[_ 0.3 M i-;_ 11.5M 7.5 M [_ 4.5 M [_ 2.5 M[_ 0.3 M 13_ 10.5M 4.5M_ 0.2M[] 12 x 14.7 x_ 18.8 x•...
- Page 41 The camera uses super resolution technology to increase the zoom ratio. Using super resolution technology, the zoom ratio can be increased up to about 1.3 times higher than the odginal zoom ratio with almost no deterioration of picture quality. Display the [REC] menu Select [i.ZOOM] ....
-
Page 42: Recording Motion Pictures
Taking pictures with zoom (Cont_nu÷d) R_o_di,,g M ode: N N _ !_ N I_ I_ N Zoom to max. T in one touch. Press to change zoom ratio E.Z00M Each time you press, the ratio changes The illustration shows the DMC-ZS5. ==Change o1[ zoom ratio... - Page 43 Zoom 4 times further than Optical/Extended Optical Zoom. (Note that, with Digital Zoom, enlarging will decrease picture quality.) Display the [REC] menu Select [DiGiTAL ZOOM] Close the menu VQT2R20...
- Page 44 Viewing yOUF piCtUFeS [NORMAL PLAYJ Playback Mode: When a card is in the camera, pictures are played back from the card, and without a card, pictures are played back from the built-in memory. (Clipboard pictures can only be played back in [CLIPBOARD] Mode (4110).) Zoom lever __ to 1_...
-
Page 45: Mode Dial
Pictures deleted will b efrom the card if the card is inserted, or from the built-in memory if the card is not inserted. (Deleted pictures cannot be recovered.) Set to (j_) Press to delete displayed picture MENU Select [YES] • Do not turn off the power during deletion. - Page 46 Change between different LCD monitor displays, such as Histograms. Press to change display DISPLAY *_ln Recording Mode Recording Motion picture recording Guide linesSl, _3 information _1 information'S1, _z No display *_In Playback Mode • 1Set [HISTOGRAM] to [ON] to display Histogram (--_23).
- Page 47 Display [FLASH] Select the desired type Can also be selected with _. (Example displayed about 5 ®Stand at least 1 m (3.28 feet) seconds, [PROGRAM AE] Mode (O)) away when using flash to take pictures of infants. Type, operations " Uses [AUTO] , Automatically...
-
Page 48: Recording Mode
Taking pictures with flash (Cont no÷d) Recording Mode- @@ IIIAvailable types in each mode (o: Available, -: Not available, Default setting) ..¢_, • Set to 1_ (Auto), _ (Auto/Red-Eye Reduction), (Slow Sync./Red-Eye Reduction) or (Slow Sync.) depending on the subject and brightness. •... -
Page 49: Af Tracking
When you want to enlarge the subject, setting to [AF MACRO] (AFt) enables you to take pictures at an even closer distance than the normal focus range (up to 3 cm (0.10 feet) for max. W). Display [MACRO MODE] Select [AF MACRO] Displayed for approx. -
Page 50: I.zoom]
Takin 9 c[oseoup pictures(Co t o÷d) R o dingMode: To take even larger images of the subject, setting to [MACRO ZOOM] enables the subject to appear even larger than when using [AF MACRO]. Display [MACRO MODE] Zoom lever [MACRO ZOOM] Displayed for approx. - Page 51 wAvailabie recording range in ([PROGRAM AE'I Mode) [Focus range I Distance between the lens 3 cm 50 cm and the subject (0.10 feet) (1.64 feet) (3.28 feet) (6.56 feet) (max.W) ÷,,- When a subject is too close to - 8x the camera, the picture may not be properly focused.
- Page 52 Taking pictures with se[fotimer Recordiog Mode: _ I_ _ _ I_1 I_ t_1 _1 We recommend using a tripod. This is also effective for correcting jitter when pressing the shutter button, by setting the self-timer to 2 seconds. Display [SELFTIMER] Select time duration...
- Page 53 Corrects exposure when adequate exposure cannot be obtained (if difference between brightness of object and background, etc.). Depending on the brightness, this may not be possible in some cases. Under-exposed Optimum exposure Over-exposed Plus direction Minus direction Display [EXPOSURE] Press A a value [0] (no compensation) _ii_Select...
- Page 54 Records 3 pictures in continuous succession while exposure is changed automatically. After exposure adjustment, the adjustment value is set as the standard. First picture Second picture Third picture 0EV (Standard) -1EV (Darker) +1EV (Brighter) Display ]AUTO BRACKET] Press A several times to switch [EXPOSURE] to [AUTO BRACKET] Select...
- Page 55 In this mode, pressing the shutter button once automatically takes 3 still pictures in each of 3 Aspect Ratios: 4:3, 3:2, and 16:9. (The shutter sound is made only once.) [] Picture Size combinations Display [AUTO BRACKET] _/_{"_1_ Press, severaltimes to switch 12 M 11.5 M 10.5 M...
- Page 56 Determine ape_ure and record [APERTUREopR[OR[TY] Mode Recording Mode: When recording, can control the range of focus (depth of field) to meet your recording purposes. Shutter speed is automatically adjusted to be appropriate for the set aperture value. tO _ (recording) to A([APERTURE-PRIORITY] Mode) Determine...
- Page 57 When recording, you can control the shutter speed to meet your recording purposes. Aperture is automatically adjusted to be appropriate for the set shutter speed. Set to O (recording) Set to S ([SHUTTER-PRIORITY] Mode) Determine shutter speed EXPOSURE • At faster shutter speeds, movements by the subject show as if they are still.
- Page 58 This mode of recording lets you set any aperture value and shutter speed when exposure adjustment prevents you from recording at the desired exposure (brightness/darkness). Also, long-exposure recording of up to 60 seconds is possible. to [[_ (recording) to M (]MANUAL EXPOSURE] Mode) •...
- Page 59 Registering your preferred Recording Mode, [REC] menu settings, etc. to [CUST.SET MEM.] and setting the mode dial to CUSTallows you to switch quickly to those settings. Up to 3 current camera settings can be registered. I Recording Mode: {_ _} elect the Recording Mode Select [YES]...
-
Page 60: Register Your Own Settings And Record
Register your settings and record [CUSTOM] Mode (continued} Recording Mode: Settings registered in [CUST.SET MEM.] can be quickly called up by setting the mode dial to CUST. to I_1 (recording) CUST (Custom Mode) Select custom registered settings content. • Press [DISPLAY] to display the Use 4 I_ to switch between screens. - Page 61 Corporation. ['1"! DOLBY "AVCHD", "AVCHD Lite" and "AVCHD", "AVCHD Lite" DIGITAL ] STEREO C REATOR logo are trademarks of Panasonic Corporation and Sony Corporation. Manufactured under license from Dolby Laboratories. Dolby and the double-D symbol are trademarks of Dolby Laboratories.