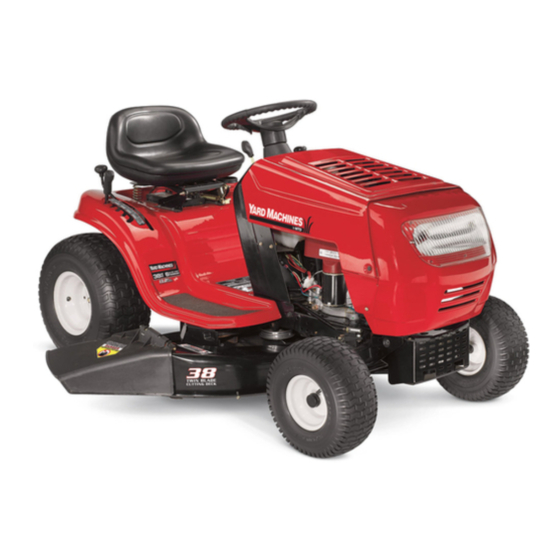
MTD 760 Operator's Manual
Transmatic lawn tractor
Hide thumbs
Also See for 760:
- Operator's manual (69 pages) ,
- Illustrated parts manual (24 pages) ,
- Owner's manual (68 pages)
Table of Contents
Advertisement
Available languages
Available languages
Quick Links
Operator's Manual
Transmatic
Lawn Tractor
MODELS
760,770
761,771
762,772
IMPORTANT:
Read safety rules and instructions
carefully
before operating
equipment.
Warning:
This unit is equipped with an internal combustion engine and should not be used on or near any unimproved
forest-covered,
brush-
covered or grass-covered
land unless the engine's exhaust system is equipped with a spark arrester meeting applicable local or state laws (if
any). If a spark arrester is used, it should be maintained in effective working order by the operator. In the State of California the above is required
by law (Section 4442 of the California Public Resources Code). Other states may have similar laws. Federal laws apply on federal lands. A spark
arrester for the muffler is available through your nearest engine authorized service dealer or contact the service department,
P.O. Box 361131
Cleveland, Ohio 44136-9722.
MTB LLC, P.O. BOX361131CLEVELAND,OHIO44136-9722
PRINTED IN U.S.A.
FORM NO. 769-01603.
(12/9/2004)
Advertisement
Table of Contents

Related Manuals for MTD 760


Summary of Contents for MTD 760
- Page 1 Operator's Manual Transmatic Lawn Tractor MODELS 760,770 761,771 762,772 IMPORTANT: Read safety rules and instructions carefully before operating equipment. Warning: This unit is equipped with an internal combustion engine and should not be used on or near any unimproved forest-covered, brush- covered or grass-covered land unless the engine's exhaust system is equipped with a spark arrester meeting applicable local or state laws (if...
-
Page 2: Table Of Contents
TABLEOFCONTENTS Content Page Content Page Maintenance Customer Support Service Important Safe Operation Practices Tractor Set-up Off-season Storage Controls Attachments & Accessories Operation Warranty Back Cover FINDINGMODELNUMBER This Operator's Manual is an important part of your new lawn tractor. It will help you assemble, prepare and maintain the unit for best performance. -
Page 3: Important Safe Operation Practices
SECTION 1: IMPORTANT SAFEOPERATION P RACTICES WARNING: This symbol points out important safety instructions which, if not followed, could endanger the personal safety and/or property of yourself and others. Read and follow all instructions in this manual before attempting to operate this machine. Failure to comply with these instructions may result in personal injury. - Page 4 23. Muffler a ndengine become hotandcancause a Follow the manufacturer's recommendations burn. D onottouch. wheel weights or counterweights to improve 24. Check overhead c learances c arefully b efore driving stability. under lowhanging treebranches, wires, d oor Use extra care with grass catchers or other openings e tc.,where theoperator m aybestruck or attachments.
- Page 5 Serious personal injury can occur when gasoline is by an authorized MTD Service Dealer. spilled on yourself or your clothes which can ignite. Check brake operation frequently as it is subjected Wash your skin and change clothes immediately.
- Page 6 8. Never t amper w iththesafety interlock s ystem or Forsafety protection, frequently c heckcomponents othersafety devices. Check theirproper o peration andreplace immediately withoriginal e quipment regularly. manufacturer's (O.E.M.) parts only,listedinthis 9. Afterstriking a foreign object, s toptheengine, manual. "Useofpartswhich donotmeet t he disconnect thesparkplugwire(s) a ndground original e quipment specifications maylead to against theengine.
- Page 7 Sight and hold this level with a vertical tree... I.LI I.LI 15° I.LI...
-
Page 8: Tractor Set-Up
SECTION 3: TRACTOR SET-UP IMPORTANT:Your tractor is shipped with motor oil in the engine. However, you MUST check the oil level before starting the engine and operating the tractor. Refer to the separate engine manufacturer's Operator/Owner Manual packed w th your tractor. Read nstruct ons carefu y. Loose Parts Figure Packaged with this Operator's Manual you'll find:... - Page 9 Attaching theBatteryCables GasandOilFill-up The gasoline tank is located under the hood and has a NOTE: Some models are shipped with the battery capacity of 1-1/2 gallons. Do not overfill. cables already connected. WARNING: extreme care when NOTE: The positive battery terminal is marked Pos. handling gasoline.
- Page 10 Attaching TheSeat Standard Adjustment Seat styles vary by tractor model and there are three HexScrews different styles available: • Standard Adjustment • Quick Adjustment & • Knob Adjustment Shoulder Refer to Figure 4, Figure 5 and Figure 6 to identify your Screws tractor's seat style and follow applicable instructions below.
-
Page 11: Controls
SECTION 4: KNOW YOUR LAWNTRACTOR Figure 7 Throttle Control Lever Speed Control Lever/Parking Brake Clutch-brake Pedal Ignition Switch Module Shift Lever Deck Lift Lever Choke Control (on models so equipped) PTO (Blade Engage) Lever NOTE: Any reference in this manual to the RIGHT or LEFT side of the tractor is observed from operator's position. - Page 12 ThrottleControl L ever Speed Control L ever The throttle control lever is located on the right side of The speed control lever, located on the left side of the tractor's dash the tractor's dash panel. This lever controls the speed of the engine and, on most models, when pushed all the console, allows you to regulate the way forward, the choke control also.
- Page 13 Clutch-Brake Pedal IgnitionSwitch Module The clutch-brake pedal is located on the left side of the WARNING: Never leave a running machine lawn tractor, along the running board. Depress the unattended. Always disengage PTO, move clutch-brake pedal part way down when slowing the shift lever into neutral position, set parking tractor by changing speeds (Refer to Speed Control L ever).
-
Page 14: Operation
ON while should ever malfunction, do not operate the tractor. activated. See Figure 11. Contact an authorized MTD service dealer. Once activated (indicator light ON), the tractor can • The safety interlock system prevents the engine... - Page 15 IMPORTANT: Do NOT hold the key in the START position for longer than ten seconds at a time. Doing so WARNING may cause damage to your engine's electric starter. AVOID SERIOUS INJURY ORDEATH • After the engine starts, deactivate the choke control and place the throttle control in the FAST position.
- Page 16 IMPORTANT: First-time operators should use speed DrivingOnSlopes positions 1 or 2. Become completely familiar with the Refer to the SLOPE GAUGE on page 7 to help determine tractor's operation and controls before operating the slopes where you may operate the tractor safely. tractor in higher speed positions.
- Page 17 Mowing • Do not cut the grass too short. Short grass invites weed growth and yellows quickly in dry weather. • Mowing should always be done with the engine at WARNING: To help avoid blade contact or full throttle. a thrown object injury, keep...
- Page 18 SECTION 6: MAKING ADJUSTMENTS • Retighten the jam nut loosened earlier after proper adjustment is achieved. adjustments while engine is running, WARNING: Never attempt to make any except where specified in the operator's Sideto Side manual. If the cutting deck appears to be mowing unevenly, a side to side adjustment can be performed.
- Page 19 If the tractor does not come to a complete stop when the brake pedal is completely depressed, or if the tractor's rear wheels can roll with the parking brake HexScrews applied, the brake is in need of adjustment. The brake disc can be found on the right side of the transmission in the rear of the tractor.
-
Page 20: Maintenance
SECTION 7: MAINTAINING YOUR LAWNTRACTOR • Service the oil filter (if so equipped) as instructed WARNING: Before performing in the separate engine manufacturer's Operator/ maintenance or repairs, disengage PTO, Owner Manual packed with your unit. move shift lever into neutral position, Perform the above steps in the opposite order after oil parking brake, stop engine and remove key to... - Page 21 Cleaning theEngine AndDeck Any fuel or oil spilled on the machine should be wiped off promptly. Do NOT allow debris to accumulate around the cooling fins of the engine or on any other part of the machine. IMPORTANT:The use of a pressure washer to clean your tractor is NOT recommended.
-
Page 22: Service
See an authorized the way. MTD Service Dealer to have your drive belts replaced • Carefully remove the PTO cable from the rear of or phone Customer Support as instructed on page 2 for... - Page 23 Battery Cleaning Clean the battery by removing it from the tractor and The battery is sealed and is maintenance-free. Acid washing with a baking soda and water solution. If levels cannot be checked. necessary, scrape the battery terminals with a wire •...
- Page 24 IMPORTANT:Use a torque wrench to tighten the blade Hex F lange Nut spindle hex flange nut to between 70 foot-pounds and 90 foot-po unds. Changing theDeckBelt WARNING: Be sure to shut the engine off, remove ignition key, disconnect the spark plug wire(s) and ground against the engine to prevent unintended starting before removing the belt(s).
- Page 25 Idler Bracket 42-Inch Deck Engine Pulley Right Hand Pulley (beneath belt guard) © Left Hand Pulley (beneath belt guard) Deck Idler Pulleys 38-Inch Deck Idler Bracket Engine Pulley Right Hand Pulley (beneath belt guard) Left Hand Pulley (beneath belt guard) Deck Idler Pulley...
-
Page 26: Off-Season Storage
SECTION 10: ATTACHMENTS & ACCESSORIES The following attachments and accessories are compatible for 700-Series Lawn Tractors. See the retailer from which you purchased your tractor, an authorized MTD Service Dealer or phone 1-800-800-7310 for information regarding price and availability. NOTE:... - Page 27 SECTION 11: TROUBLESHOOTING Trouble Corrective Action Possible Cause(s) Engine fails to start PTO engaged. Place PTO lever in disengaged (OFF) position. Parking brake not engaged. Engage parking brake. Spark plug wire(s) disconnected. Connect wire(s) to spark plug(s). Throttle control lever not in correct Place throttle control in FAST position or CHOKE posi- starting position.
-
Page 28: Warranty
MANUFACTURER'S LIMITED WARRANTY FOR: The limited warranty set forth below is given by MTD LLC with MTD does not extend any warranty for products sold or respect to new merchandise purchased and used in the exported outside of the United States, its possessions United States, its possessions and territories. - Page 29 P,O, Box 361131 Cleveland, Ohio 44136-9722, MTD LLC.APARTADO POSTAL361131CLEVELAND, O HIO44136-9722 IMPRESO EN ESTADOS UNIDOS DE AME_RICA FORMATO NOM. 769-01603_ (12/9/2004)
- Page 30 JNDICE Jndice P_gina Jndice P_gina Asistencia al cliente Servicio Pra.cticas de seguridad en la operaci6n Almacenamiento fuera de temporada Montaje del tractor Aditamentos y accesorios Garanta Cubierta Conozca su tractor corta cesped Opere su tractor corta cesped posterior Mantenimiento BUSQUEDA DEL NUMERODE MODELO Este Manual del Operador es una parte importante de su nuevo tractor corta cesped.
- Page 31 SECCION 1: PRACTICAS DESEGURIDAD ENLAOPERACION ADVERTENCIA: La presencia de este simbolo indica que se trata de instrucciones importantes de seguridad que debe respetar para evitar poner en riesgo su seguridad personal y / o material y de otras personas. Lea y siga todas las instrucciones en este manual antes de iniciar la operaci6n de esta m_tquina.En caso de no seguir estas instrucciones podria provocar lesiones personales.
- Page 32 Contacte al centro autorizado de servicio lesiones graves e incluso la muerte. MTD para obtener ayuda. No arrastre cargas pesadas detr_tsde los aditamentos (carrito de basura cargado, podadora de rodillos, etc.) en...
- Page 33 marcha atr_s, desenganche las cuchillas agregue combustible mientras el motor esta. antes de colocar reversa. El "Modo de caliente o en marcha. Deje que el motor se Precauci6n en Reversa" no debe enfrie pot Io menos dos minutos antes de utilizarse cuando est_n presentes nihos u volver a cargar combustible.
- Page 34 ajustados para asegurarse que la ma.quina se Para proteger su seguridad, verifique encuentra en condiciones seguras de operaci6n. frecuentemente todos los componentes y Nunca intente violar el sistema de bloqueo de reempla.celos s61o con partes de los fabricantes de seguridad u otros mecanismos de seguridad. equipos originales listadas en este manual.
- Page 35 Sight and hold this levelwith a vertical tree... or a fence post I,IJ I,IJ I.IJ I.IJ 15° I.iJ...
- Page 36 SECCION 3: MONTAJE DELTRACTOR IMPORTANTE: Su tractor corta cesped se envia con aceite en el motor. Sin embargo, DEBE verificar el nivel de aceite antes de encender el motor y operar el tractor. Consulte el manual del Propietario/Operador entregado por el fabricante del motor, que se envia, en un paquete por separado, junto con su tractor corta cesped.
- Page 37 Instalaci6n de loscablesde la bateria Llenadodegasolina y aceite El tanque de gasolina esta. ubicado debajo del cap6, y NOTA: El terminal positivo de la baterfa esta marcado posee una capacidad de 1-1/2 galones. No Io Ilene en como Pos (+). El terminal negativo de la baterfa esta exceso.
- Page 38 Montajedelasiento Ajusteest_ndar El estilo del asiento del tractor varia segt_n el modelo de que se trate. Hay tres estilos diferentes disponibles: Tornillosde cabeza hexagol • Ajuste estandar • Ajuste r_tpidoy • Ajuste por perilla Consulte las Figura 4, Figura 5 y Figura 6 para Tornillo identificar el estilo de asiento de su tractor, y siga las conreborde...
- Page 39 SECCION 4: CONOZCA S UTRACTOR CORTA ClaSPED Figura 7 Palanca de control de velocidad / Freno de mano Palanca de control del regulador Pedaldel embrague-freno M6dulo del interruptorde encendido Palancadecambios Palanca de elevaci6n de la cubierta Control de obturaci6n (en modelos equipados Palanca de corte de energia (enganche de cuchilla) de esa manera) NOTA:...
- Page 40 Palanca de control d e Palancadecontroldelreoulador velocidad La palanca de control del regulador esta.ubicada en el lado derecho del tablero de instrumentos del tractor. Esta palanca La palanca de control de velocidad, controla la velocidad del motor y, en la mayoria de los modelos -cuando se la Ileva totalmente hacia delante- ubicada en el lado izquierdo del tablero tambien el control de obturaci6n.
- Page 41 Pedaldel embrague-freno M6dulodel interrupter deencendido El pedal del embrague-freno esterubicado en el lado ADVERTENCIA: Nunca deje la m_tquinaen izquierdo del tractor corta cesped, a Io largo del estribo. funcionamiento sin vigilancia. Corte siempre la Presione el pedal del embrague-freno parcialmente hacia energia, mueva la palanca de cambios a la abajo cuando disminuya la velocidad del tractor cambiando posici6n neutral, coloque el freno de mano, apague...
- Page 42 Ilave de bloqueo funcionara mal, no debe operarse el tractor. contacto. La luz indicadora roja en la esquina Contacte a un distribuidor MTD autorizado para el superior izquierda del m6dulo de la Ilave de mantenimiento.
- Page 43 • Suelte el pedal del embrague-freno para permitir para que queden a una distancia de entrel_de pulgada que el freno de mano engrane. y Y2pulgada por encima del terreno, cuando el tractor Para soltar el freno de mano: se encuentre en una superficie lisa y plana, como por •...
- Page 44 IMPORTANTE: NO sostenga la Ilave en la posici6n cambiar la direcci6n de desplazamiento mientras el START (encendido) por ma.s de diez segundos por vez. tractor este en movimiento. Utilice siempre el pedal del Si Io hace, puede ocasionar daSos al arrancador freno para detener por completo el tractor antes de electrico del motor.
- Page 45 Operaci6n en pendientes dePODA NORMAL. Consulte la secci6nlnterruptores del dispositivo d ebloqueo en la pagina 42. Oonsulte la secci6n INDICADOR D EPENDIENTE en la pAgina 35 para determinar en que pendientes puede Poda operar el tractor de manera segura. contacto con las cuchillas o una lesi6n por algQn mayores a 15 grados (elevaci6n aproximada de 2 ADVERTENClA: Para ayudar a evitar el...
- Page 46 SECCION 6: REALIZACION D EAJUSTES Nivelaci6n lade a lade alg_n tipo de ajuste mientras el motor ester Si la cubierta de corte estuviera realizando la poda de ADVERTENClA: Nunca intente realizar encendido, excepto los ajustes especificados en el forma despareja, puede realizarse un ajuste lado a manual del operador.
- Page 47 Si el tractor no se detiene por completo cuando se presiona totalmente el pedal, o si las ruedas traseras T0rnill0s de del tractor siguen rodando con el freno de mano cabezahexac colocado, el freno necesita ajustes. El disco del freno se encuentra en el lado derecho de la transmisi6n, en la parte posterior del tractor.
- Page 48 SECCION 7: MANTENIMIENTO DESUTRACTOR CORTA C laSPED • Realice el mantenimiento del filtro de aceite (si la unidad esta. equipada con uno), tal como se indica mantenimiento o reparaciones, corte siempre la ADVERTENClA: Antes de realizar tareas de en el manual del Propietario/Operador entregado energia, mueva la palanca de cambios a la por el fabricante del motor, que viene embalado...
- Page 49 Limpiezadelmotor y delacubierta Este conector puede reemplazarse con un paso de agua, para utilizar como parte de un sistema de lavado Si se derrama gasolina o aceite sobre la ma.quina, debe disponible por separado. limpiarse de inmediato. NO permita que se acumulen Utilice el Deck Wash System (Sistema de lavado de desechos alrededor de las aletas de enfriamiento del...
- Page 50 MTD que efectEle el reemplazo de las correas de la transmisiSn, o contactese con el Departamento Soporteintermedio Asistencia al Cliente tal como se indica en la pagina 30 para obtener informaciSn sobre cSmo solicitar Manual de Mantenimiento MTD. Bateria La bateria esta. sellada, y no necesita mantenimiento.
- Page 51 Tuerca de brida hexagonal procedimiento, podrian generarse chispas, y ADVERTENClA: Si no se utiliza dicho podria explotar el gas de alguna de las dos baterias. Limpieza Limpie la bater_a extrayendola del tractor y lava.ndola con una soluci6n de bicarbonato y agua. De ser necesario, restriegue los terminales de la bateria con un cepillo de alambre, para eliminar dep6sitos.
- Page 52 IMPORTANTE: Utilice una Ilave de torsi6n para ajustar la Inserte una Ilave de apriete de trinquete de 3/8" tuerca de brida hexagonal del husillo de la cuchilla (configurada para aflojaf) dentro del orificio cuadrado hasta entre 70 pies-libras y 90 pies-libras. que se encuentra en el soporte intermedio, del lado izquierdo de la superficie de la cubierta.
- Page 53 Cubierta de42 pulgadas Soporte intermedio Poleadel motor Poleaderecha ebajo de la guarda de la correa) © Poleaizquierda (debajo de la guardade la correa) Poleas Iocas en la cubierta Cubiertade 38 pulgadas Soporte intermedio Poleadel motor Poleaderecha (debajo de la guarda de la correa) Poleaizquierda (debajo de la guardade la correa) Polea Ioca en la cubierta...
- Page 54 SECCION 10: ADITAMENTOS Y ACCESORIOS Los siguientes aditamentos y accesorios son compatibles con los Tractores Corta Cesped Serie 700. Consulte al minorista a quien le adquiri6 su tractor, a un distribuidor autorizado MTD o al telefono 1-800-800-7310 para obtener informaci6n sobre precios y disponibilidad.
- Page 55 SECCION 11: SOLUCION D EPROBLEMAS Problema Acciones correctivas Causa(s) posibles El motor no arranca El sistema de corte de energia esta en Coloque la palanca de corte de energia en la posici6n posici6n de suministro de energia de corte de energia (OFF). No esta colocado el freno de mano Coloque el freno de mano.
- Page 56 El daSo resultante por la instalaci6n o el uso personas juridicas, incluidos los distribuidores o los de piezas, accesorios o uniones no aprobados por MTD para minoristas con respecto a los productos obligara a MTD. su uso con el(los) producto(s) incluido(s) en este manual Durante el plazo de la garantia el dnico recurso es la anulara la garanfia en Io que respecta a esos daSos.