Table of Contents
Advertisement
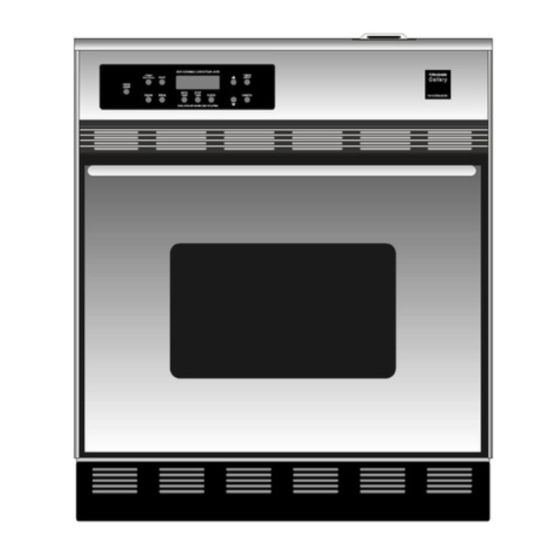
Electric
Wall
Ove n
Ser
Electronic
Oven Controls
Convection
Bake with
Self-Cleaning
Oven
Owner's
Guide
Spanish Version................................................ 2
Important SafetyInstructions ......................... 3 -4
Oven Controls(featureinformation).................5
Settingthe Clock and Minute Timer.................6
BeforeSettingOvenControls ............................ 7
SettingOven Controls .................................. 8-11
Oven Light(somemodels).............................. 1 2
AdjustingOvenTemperature . .......................... 1 2
Oven Cleaning(self-cleaning
instructions) . .............................................. 13-14
GeneralCleaning....................................... 15-16
Avoid Service Checklist . ............................. 1 7-18
Notes.............................................................. 19
Service Information & Warranty......................20
P/N 318008811 (9712) Rev. C
Advertisement
Table of Contents

Related Manuals for Frigidaire FEB789ECCE


Summary of Contents for Frigidaire FEB789ECCE
-
Page 1: Table Of Contents
Electric Wall Ove n Electronic Oven Controls Convection Bake with Self-Cleaning Oven Owner's Guide Spanish Version..........2 Important SafetyInstructions ......3 -4 Oven Controls(featureinformation)....5 Settingthe Clock and Minute Timer....6 BeforeSettingOvenControls ......7 SettingOven Controls ........8-11 Oven Light(somemodels)......1 2 AdjustingOvenTemperature . -
Page 2: Spanish Version
Record Your ModeJ Serial Numbers Frigidaire Company. Record in the space provided below the model and serial numbers found on the serial plate located along the side of the oven door in the open position. Model Number:... - Page 3 iMPORTANT SAFETY iNSTRUCTiONS Read all instructions before using this appliance. Save these instructions for future reference. This guide contains important safety symbols and instructions. Please pay special attention to these symbols and follow instructions given. Here is a brief explanation of the use of these symbols.
- Page 4 iMPORTANT SAFETY iNSTRUCTiONS t ootioue t o Keep Oven Vent Ducts Unobstructed. The wall oven IMPORTANT INSTRUCTIONS vented at the upper control panel trim. Touching CLEANING YOUR OVEN surfaces in this area when the wall oven is operating Clean the wall oven regularly to keep all parts free of grease cause severe burns.
-
Page 5: Oven Controls(Featureinformation)
Oven Controls (feature information) The push pad control panel provides precise control of all oven functions plus a For a Silent Control Panel lighted display window. For satisfactory use of your oven, become familiar with the When choosing a function, a beep various functions of the oven as described below, the location of the push pads will sound each time a pad is pushed. -
Page 6: Settingthe Clock And Minute Timer
Setting the Clock and Minute Timer To Set the Clock You must set the clock when the oven is first plugged in or each time the power supply to the oven has been disconnected or interrupted. The clock must always be set to the correct time of day, as the automatic start and stop time operations (used to set the timed bake and self-clean modes) work directly with the clock. -
Page 7: Beforesettingovencontrols
Oven Vent Location Before Setting Oven The oven is vented at the upper control panel grille. When the oven is on, warm Controls air is released through the vent. This venting is necessary for proper air circulation in the oven and good baking results. DO NOT block the vent. Doing so may cause cooking failures, fire or damage to the wall oven. -
Page 8: Settingoven Controls
To Bake Setting Oven Controls The oven can be programmed to bake at any temperature from 135°F/57°C to 550°F/288°C. Preheating the oven is recommended when baking, but is not necessary when roasting or cooking casseroles. Follow the recommendations in the recipe. 1. - Page 9 Setting Oven Controls To Set the Oven for a Delayed Starting Time and an Automatic Turn-Off To set the controls for this type of operation, follow steps 1-6 on previous page (continued) and then steps 7-8 below: Push the STOP TIME pad. " "...
- Page 10 Setting Oven Controls (continued) To Start the Oven to Begin Convection Baking and Turn Automatically Besureclockis set to the correcttime of day,asthis controlsthe automatictiming. Arrangeovenrackswhilethe ovenisstill cool. Preheat t he ovenif necessary a ndplacethe food in the oven. Pushthe BAKE TIME pad. " "...
-
Page 11: Settingoven Controls
To Broil Setting Oven Controls Broilingisa quickmethodof cookingfoodsbydirectradiantheatunderthe upperbroilingelement (continued) of the oven. Results and cookingtimes will dependon the distancebetweenthe food and the element.Tobroil,follow the stepsbelow. Preheating Preheatingis suggestedwhen searingrare steaks.Removethe broiler pan and grid before preheating.Foods placedon the hot metal will stick.Set the oven control.Wait for the upper elementto becomeredhot, usuallyabout2-3 minutes.Preheating isnot necessary w henbroiling meatswell done. -
Page 12: Oven Light(Somemodels)
The oven light automatically turns on when the door is opened (some models). To Oven Light turn the oven light on and off when the door is closed, use the OVEN LIGHT pad (some models) located on the control panel. sure the oven is un- Changing the Oven Light Bulb The oven light bulb is located at the rear of the oven. - Page 13 Oven Cleaning Self-Cleaning Ovens--A General Description A self-cleaning oven cleans itself with high temperatures (well above cooking (self-cleaning instructions) temperatures) which eliminate soil completely or reduce it to a fine powdered ash you can whisk away with a damp cloth. Adhere to the following cleaning...
- Page 14 The oven can be programmed to begin cleaning immediately and stop at a later Oven Cleaning time automatically, or to start at a delayed time and stop automatically. (self-cleaning instructions, continued) To Begin Cleaning Immediately and Stop Automatically To assure satisfactory results, we recommend a 2 hour self-clean cycle for light Note: The door cannot be opened until soils, a 3 hour cycle for average soils, and a 4 hour cycle for heavy soils.
-
Page 15: Generalcleaning
General Cleaning Cleaning Various Parts of Your WalJ Oven Before cleaning any part of the wall oven, be sure all controls are turned OFF and the oven is COOL. REMOVE SPILLOVERS AND HEAVY SOILING AS SOON AS POS- SIBLE.REGULARCLEANINGS WILL REDUCETHE NUMBER OF MAJOR CLEANINGS I[ :xw'-_'j'L'J_' Before cleaning... - Page 16 General Cleaning To Remove and Replace Oven Door Open the door to the fully opened position. (continued) Pull up the lock located on each hinge support and engage it in the hook of the hinge lever. You may have to apply a little downward pressure on the door to pull the locks fully over the hooks.
-
Page 17: Avoid Service Checklist
Avoid Service Checklist Before you call for service, review this list. It may save you time and expense. The list includes common occurrences that are not the result of defective workman- ship or materials in this appliance. This oven is equipped with an electronic oven controller. Among its many features is a full time oven circuit diagnostics system. - Page 18 Ovensmokes excessively d uring Ovendoor is closed. D oorshouldbe opento broilerstop position during broiling, broiling. Meattooclose tothebroilburner. Reposition therack to provide moreclearance between t he meat a ndthe broiler. Meatnotproperly p repared. Remove excess fat frommeat. S lash r emaining f atty edges a t rightangles t o prevent curling, b utdonotcutintothelean.
-
Page 19: Notes
Notes... - Page 20 FRiGiDAiRE GALLERY WALL OVEN WARRANTY Your Frigidaire product is protected by this warranty WARRANTY FRIGIDAIRE, THROUGH ITS AUTHORIZED THE CONSUMER WILL BE PERIOD SERVICERS, WILL: RESPONSIBLE FOR: FULL TWO-YEAR Two years from original Pay all costs for repairing or replacing...