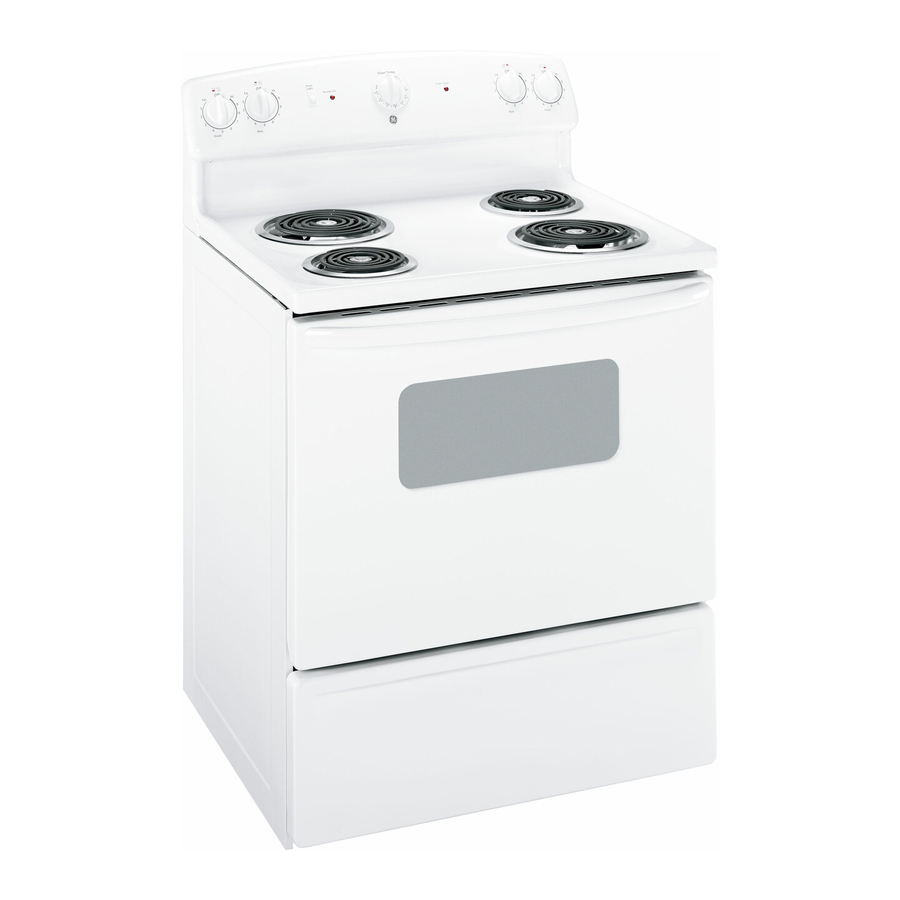
GE JBS03 Owner's Manual And Installation Instructions
Coil & radiant
Hide thumbs
Also See for JBS03:
- Owner's manual and installation ins (52 pages) ,
- Owner's manual and installation instructions (52 pages) ,
- Owner's manual (40 pages)
Table of Contents
Advertisement
ge.com
OIIIIIJl
0_
0
U
U
OIIIIIJl
IJJ
Safety Information .......... 2-6
Operating Instructions
Adjust the Oven
Thermostat ........................
21
Clock and Timer ................
15, 16
Oven ..........................
12-14
Oven Controls ..................
10, 11
Sabbath Feature ...............
19, 20
Selecting Tgpes of Cookware ........
9
Self-Cleaning ...................
24, 25
Special Features ...................
18
Surface Units ....................
7, 8
Timed Baking and Roasting ........
17
Warming Drawer ..............
22, 25
Care and Cleaning ........ 24-33
.................
32, 33
Self-Cleaning Oven .............
24, 25
Installation Instructions
Anti-Tip Device .................
34, 40
Before You Begin ..................
34
Electrical Connections ..........
36-39
Leveling .......................
Tips ..... 42-46
....................
47
Consumer Support
Consumer Support ........
Back Cover
Product Registration ...........
49, S0
Warrantg .........................
Col/Top and
Rodiont Top Models
Set_ean
C_an Hode_
Hode_
JBS03
JBP15
JBS07
JBP22
JBS15
JBP27
JBS27
JBP60
JBS56
JBP62
Write the model and serial
numbers
here:
Model #
Serial #
You can find them on a label,
behind the storage drawer or
warming drawer on the oven frame.
183D6379P043
49-88054
05-07 JR
Advertisement
Table of Contents

Related Manuals for GE JBS03


Summary of Contents for GE JBS03
-
Page 1: Table Of Contents
Safety Information ..2-6 Operating Instructions Col/Top and Adjust the Oven Thermostat ......Rodiont Top Models OIIIIIJl Clock and Timer ....15, 16 S_ndard Set_ean Oven ......12-14 C_an Hode_ Hode_ Oven Controls ....10, 11 Sabbath Feature .... - Page 2 IHPORTANT SAFETYINFORNATION. READALL INSTRUCTIONSBEFOREUSING. iiiiiiiiiiiii_ _, ,,,_t_t_t_t_t_t_t_t_t_t_t_t_ti_!_i_ WARNING! iiiiiiiiiiii_]i! _i_i_i,;_i_!_!i!!i!!i!!i!!i!!i!!i!!i!!i!!i!!i!!i!!i!!i iiiiiiiii_!_!,!!!!,_/q,_Liiii!!ii_ii_iiii_!i_ij_i_i' For your safety, the information in this manual must be followed to minimize the risk of t}re or iiiiiiii_i_:_]_iii_iii_ii_!!!ii_!_!!_!!;_i_i_i_iiiii_ii!_!_!!iiiiiiii explosion, electric shock, or to prevent property damage, personal injury, or loss of life. WARNING ANTI-TIPDEVICE iiiiiiiiiiiiiiiiiiiiiiiiii_i_iii_i_i_i_i_i_i_i_i_i_i_i_i_i_i_i_i_i_i_ All ranges can tip and injury could result.
- Page 3 COOKMEATAND POULTRYTHOROUGHLY... iiiiiiiiii:iiiiiiii_5111!! !!i!i!i!i!i!i!i!i!i!i!i!i!i ¸ i_i_i_i_i_i_i_i_'_ii _ T""""Y Cook meat and poultry thoroughly-meat to at least an INTERNAL temperature of l 60°F and poultry to at least an INTERNAL temperature of l80°E Cooking to these temperatures usually protects against iiiiiiiiiiiiiiiiiiiiiiiiiii foodbome illness.
-
Page 4: Safety Information
IMPORTANT SAFETY INFORMATION. READ ALL INSTRUCTIONS BEFORE USING. iiiiiiiiiiiii_ iiiiiiiiiiiib_ iiiiiiiiiiii_ OVEN iiiiiiii_i_(_iii_iii_ii_!!!ii_!_!!_!!;_(_i_iiiii_ii!_!_!!iiiiiiii Stand away from the range when opening the Pulling out the shelf to the stop-lock is a oven door. Hot air or steam which escapes convenience in lifting heavy foods. It is also can cause burns to hands,face and/or eyes. - Page 5 WARMING DRAWER Con s ome models) iiiiiiiiii:iiii;;;i_Oiiii!! !!i!i!i!i!i!i!i!i!i!i!i!i!i ¸ The purpose of the warming drawer is to hold Do not touch the heating element or the i_i_i_i_i_i?;'_;ii _ 'T'',',',',',',',',','Y, hot cooked foods at serving temperature. interior surface of the warming drawer.
- Page 6 IMPORTANT SAFETY INFORMATION. READ ALL INSTRUCTIONS BEFORE USING. iiiiiiiiiiii_ii! :_:i_;i_i,;_i_!_!i!!i!!i!!i!!i!!i!!i!!i!!i!!i!!i!!i!!i!!i WARNING! iiiiiiii_i_(_iii_iii_ii_!!!ii_!_!!_!!;_(_i_iiiii_ii!_!_!!iiiiiiii RADIANT SURFACE UNITS (on models) some Use core when touching the cooktop. The gloss surface of the cooktop will retain heat after the controls hove been turned off iiiiiiiiiiiiiiiiiiiiiiiiii_i@;ii_ii_ii_ii_ii_ii_ii_ii_ii_ii_ii_ii_iiiill Avoid scratching the glass cooktop.
- Page 7 Using the surface units, ge.com Throughout this manual, features and appearance may vary from your model. How to Set Indicator Lights ¢b (on radiant glass models only) Pushthe knob in and turn in either direction O" A HOTSURFACE or HOTCOOKTOP...
- Page 8 ¢n Using the radiant surface units. (on models) some About the radiant surface units... The radiant cooktop features heating units Water stains (mineral deposits)are removable using the cleaning cream or beneath a smooth glass surface. full-strength white vinegan NOTE:A slight odor is normal when a new Useof window cleaner mag leave an cooktop is used for the first time.
- Page 9 Selecting types of cookware, go.+om The following intormation wilt help you choose cookware which will give good performance on glass cooktops. Stainless Steel: Glass-ceramic: recommended usable,but not recommended O" Poor performance. Hag scratch the surface. Aluminum: heavy weight recommended Stoneware: usable,but not recommended Good conductivitg.
-
Page 10: Oven Controls
¢tl .£ Using the oven controls. Con some m ode s; Throughout this manual, features and appearance may vary from your model. ¢tl :J L°° j en Contr LTim°rJL LJ Tamp Rec_l[ On / Off k Time_L Time _ ¢-o on q ¢ oo ,o qF to l oo,Io,, oolo,, L ughtJ... - Page 11 Oven Control, Clock and Timer Features and Settings Automatic Oven Light (on some models) Indicator Lights (on some pads) O" EDITmode lasts severalsecondsafter the last This lights anytime the oven has been programmed using the Cooking Time or Start pad press.Start Time On/Off and Cooking Time...
- Page 12 Using the oven. Oven Temperature Knob (onsomemodels) Turn this knob to the setting gou want. i, The oven cycling light comes on during cooking. (On some models- (On some models- appearance will vary) appearance will vary) Before you begin... Toavoid possible burns, place the shelves To remove a shelf, pull it toward gou, tilt the in the desiredposition before_lOU turn the front end up and pull it out.
- Page 13 Type of Margarine Will Affect Baking Performance! Federal standards require products labeled Most recipes for baking have been "margarine" to contain at least 80% fat by developed using high fat products such weight. Low-fat spreads,on the other hand, as butter or margarine (80% fat).
-
Page 14: Oven
Using the oven. .£ Broiling Guide The size, weight, thickness, Second Side Shelf* First Side Ouantitg and/ starting temperature Time (min.) Food or Thickness Position Time (rain.) Comments and gour preference of Ground Beef 7-10 1 lb. (4 patties} Space evenlg. doneness will affect broiling V2to 3/4"thick times. -
Page 15: Clock And Timer
Usingthe clockand timer, con sam+ ge.com Not oil featuresore on oil models To Set the Clock The clock must be set to the correct time of Touch the Start/On pad until the time of O" day for the automatic oven timing functions day shows in the display This enters the time and starts the clock. - Page 16 Usingthe clock and timer. Nat all features are an all madds. To Reset the Timer If the displag is still showing the time If the remaining time is not in the displag remaining, gou mag change it bg touching (clock, delag start or cooking time are in the the Kitchen Timer On/Off pad, then touch displag),recall the remaining time bg the + or - pads until the time gou want...
- Page 17 Usingthe timed baking and roasting features,con +ome mode + ge.eam Do not lock the oven door with the latch during timed cooking. The latch is used tar self-cleaning only. NOTE: Foods that spoil easily-such as milk, eggs, fish, stuffings, poultry and pork-should not be allowed to sit for cooking.
- Page 18 Special features of your oven control. Your new touch pad control has additional features that you may choose to use. The following are the features and how you may activate them. The special feature modes can only be activated while the display is showing the time of day. They remain in the steps are repeated.
-
Page 19: Sabbath Feature
- " -usung the Sabbath Feature. (on s ome mode s; (Designed for use on the Jewish Sabbath and Holidays) ge,com The Sabbath feature can be used for baking/roasting only. It cannot be used for broiling, self-cleaning or Delay Start cooking. - Page 20 - " -usung the Sabbath Feature. (on s o e ode sJ (Designed for use on the Jewish Sabbath and Holidays) How to Exit the Sabbath Feature Touch the Clear/Offpad. Tap the Clock pad until ON or OFF appears in the displag. ON indicates that Lo j the oven will automaticallg turn off after If the oven is cooking,wait for a random...
-
Page 21: Thermostat
A ust the oven thermostat--Easy to do gourselfl ge.com You mag find that gour new oven cooks differentlg than the one it replaced. Use gout new oven for a few weeks to become more familiar with it, tf gou still think your new oven is too hot or too cola',gou can adjust the thermostat gourseE Do not use thermometers, such as those found in grocerg stores, to check the temperature setting of gout oven. - Page 22 Using the warming drawer. Control Knob (on models equipped with a knob) Pushand turn the control knob to any desired ON Signal Light setting. The ON signal light is located above the NOTE"The warming drawer should not be control knob and glows when the knob is in used during a self-clean cycle.
- Page 23 Rack (on somemodels) ¢n For use in the warming drawer only. Do not use in the oven. Preheatwith the rack in place. Using the rack allows for double stacking ¢n of items. Temperature Selection Chart To keep several different foods hot, set the control to the food needing the highest setting.
-
Page 24: Self-Cleaning
¢tl Using the seifodeaning oven. con ode/ j Never force the latch handle,Forcing the handle will damage the door lock mechanism. Theoven door must be closed and all controls set correctfbtfor the cycle to work properly. Before a Clean Cycle Forthe first self-clean cycle, we recommend Do not clean the gasket. - Page 25 The oven door must be closed and oil controls set correctly for the cycle to work properly. How to Delay the Start of Cleaning Youcan set the oven control to delay-start the Changethe Start Time by touching the + or - K +oil q pads.
- Page 26 Care and cleaning of the range. Be sure electricalpower is off and all surfacesare cool beforecleaning any part of the range. If gour ronge is removed for cleaning, when the ronge is reploced. Foilure anti-tip device is re-engaged properly tipping of the range and cause injury. servicing or onbl reason, be sure the to take this precaution could result in Oven Interior...
- Page 27 Oven Heating Elements Do not clean the bake element or the broil To clean the oven floor, gently lift the bake element. Any soil will burn off when the element. Cleanwith warm soapy wateE elements are heated. Oven Shelves...
- Page 28 Care and cleaning of the range. Storage Drawer Removal Ionsomemodels) To remove the storage drawer: To replace the storage drawer: Pull the drawer out all the wag. [7] Insert glides at the back of the drawer begond the stop on range glides. Tilt up the front and remove it.
- Page 29 Warming Drawer Rack fan some models) Clean the rack with detergent and water After cleaning, rinse the rack with clean water and drg with a clean cloth. Removable Warming Drawer Ionsome models) To replace the warming drawer: NOTE: For models with an electric...
- Page 30 Care and cleaning of the range. Porcelain Enamel Cool_op (onsomemodels) The porcelain enamel finish is sturdy but If acids spill on the cooktop while it is hot, use breakable if misused.This finish is acid- a dry paper towel or cloth to wipe it up fight resistant.
-
Page 31: Surface Units
Notional Parts Center 800.626.2002 cleaner or polish.Alwags wipe the surface in the direction of the grain. Follow the ge.com cleaner instructions for cleaning the stainless steel surface. Gloss Window (on some models) To clean the outside glass finish, use a glass... -
Page 32: Glass Cooktop
Cleaning the glass cooktop, rot, some modes Normal Daily Use Cleaning ONLYuse CEBAMABBYTE ® Ceramic Cooktop Shakethe cleaning cream well. Applg a Cleaner on the glass cooktop. Other creams few drops of CERAHABRYTE ¢ Ceramic mag not be as effective. Cooktop Cleaner directlg to the cooktop, To maintain and protect the surface of gour Use a paper towel or CERAHABRYTE ®... - Page 33 Metal Marks and Scratches Be careful not to slide pots and pans If pots with a thin overlag of aluminum or copper are allowed to across gour cooktop. It will leave boil drg, the overlag mag leave black metal markings on the cooktop surface.
-
Page 34: Anti-Tip Device
Installation Free-Standing Instructions Electric Ranges I r_ Questions? Call 800.GE.CARES (800.432.2737) or Visit our Website at: ge.com BEFORE YOU BEGIN FOR YOUR SAFETY: Read these instructions completely All rough-in and spacing dimensions must be met and carefully. for safe use of your range. Electricity to the range... - Page 35 Installation instructions PREPARETO INSTALL THE RANGE MATERIALS YOU MAY NEED PREPARE THE OPENING Allow 1W' spacing from the range to adjacent vertical walls above the cooktop surface. Allow 30" minimum clearance between the Tin Snips Lag Bolts Anchor Sleeves surface units and the bottom of unprotected (For Anti-Tip Bracket Mounted...
-
Page 36: Electrical Connections
Installation Instructions ELECTRICAL CONNECTIONS ELECTRICAL REQUIREMENTS ALL NEW CONSTRUCTIONS, MOBILE HOMES AND CAUTION: For personol sofetg, do INSTALLATIONS WHERE LOCAL not use Gn extensioncord with thisappliance. CODES DO NOT ALLOW Remove house fuse or open circuit breaker before beginning installation. GROUNDING THROUGH NEUTRAL This appliance... - Page 37 Installation Instructions For power cord installations onlg (see the E_] POWER CORD AND STRAIN RELIEF next step if using conduit), assemble the strain relief in the hole. Insert the power cord through the strain relief and tighten. Allow Remove the wire cover the lower back of enough slack to easilg attach the cord using...
- Page 38 Installation Instructions ELECTRICAL CONNECTIONS (CONT.) 3-WIRE POWER CORD INSTALLATION 4-WIRE POWER CORD INSTALLATION WAR NING: The neutral wire WAR NING: The n eutral wire o fthe or ground of the power cord must be connected to the supplg circuit must be connected to the neutral neutral terminal located in the center of the terminal located in the lower center of the...
- Page 39 Installation Instructions 3oWIRE CONDUIT INSTALLATION 4-WIRE CONDUIT INSTALLATION Loosen the 3 lower terminal screws from the Loosen the three lower terminal screws from terminal block. Insert the center bore wire the terminal block. Remove the ground screw (white/neutral) tip through the bottom center and ground plate and retain them, Cut and terminal block opening.
- Page 40 Installation instructions INSTALL THE RANGE REPLACE THE WIRE COVER LEVEL THE RANGE Replace the wire cover on the range back bg Install the oven shelves in the oven and position sliding its right edge under the retaining tab and the range where it will be installed. replacing the two screws removed earlier.
-
Page 41: Leveling
Installation Instructions ITOI LEVEL THE RANGE {CONT.} OPERATION CHECKLIST Turn on one of the surface units to observe that On all warming drawer models, the rear leveling legs must be adjusted prior to moving the element glows within 60 seconds. Turn the the range into position. -
Page 42: Troubleshooting Tips
¢t} Before you call for service..l.,a Troubleshooting Tips Save time and money! Review the charts on the following pages first and Sou meg not need to call for service. Possible Causes What To Do Radiant Cooktops Surface units will not Improper cookware •... - Page 43 ge_com Possible Causes What To Do Coil Cooktops Surface units The surface units are not • With the controls off, check to make sure the surface not functioning plugged in solidlg, unit is plugged completelu into the receptacle. properly TheimproperlgSUrfaCeset.Unit controls •...
- Page 44 ¢t} Before gou call for service... Troubleshooting Tips Possible Causes What To Do Food does not Oven is not set to BROIL. • On models with a temperature knob, make sure gou turn broil properlg it all the wag to the Broilposition. On models with a Broil Hi/Lo pad, make sure it is turned on.
- Page 45 ge_com Possible Causes What To Do Oven temperature too Oven thermostat * See the Adjust the oven thermostat-Easy to do hot or too cold needs adjustment, yourself! section. Clock and timer do Plug on range is not completely * Hake sure electrical plug is plugged into a live, properlu not work inserted in the electrical outlet, grounded outlet.
- Page 46 ¢t} Before you call for service... Troubleshooting Tips Possible Causes What To Do ',Burning; or "oily" This is normal in a new oven • To speed the process, set a self-clean cgcle for a odor emitting from the and will disappear in time. minimum of 3 hours.
-
Page 47: Accessories
Accessories. Looking For Something More? You can find these accessories and many more at ge.com, or call 800.626.2002 (during normal business hours). Have your model number ready. Surface Elements & Drip Pans Oven Racks Broiler Pan ..Oven Elements... - Page 48 •_ Notes. 1.a l _._'_...
-
Page 49: Warrantg
You can rest easg knowing that all gour valuable household products are protected against expensive repairs. 800.626.2224 Place gout confidence in GE and call us in the U.S.toll4ree at for more information. *All b_onds covered, up to 20 gears old, in the continental US... - Page 50 [l Check here if you do not want to receive communications from GEA'scarefully selected General Electric Company partners. Louisville, KY 40225 FAILURETOCOMPLETEAND RETURNTHIS CARDDOESNOT DIMINISH YOUR ge.com WARRANTYRIGHTS. For information about GEA's privacy and data usage policy, go to ge.com and click on "Privacy Policy" or call 800.626.2224.
- Page 51 USA. If the product is located in an area where service bg a GE Authorized Servicer is not available, Sou may be responsible for a trip charge or Sou mag be required to bring the product to on Authorized GE Service location for service.
- Page 52 Contact Us ge.com If you are not satisfied with the service you receive from GE, contact us on our Website with all the details including gour phone number, or write to: General Manager, Customer Relations GE Appliances, Appliance Pork Louisville, KY 40225 ge.com...