Table of Contents
Advertisement
Quick Links
Advertisement
Table of Contents

Related Manuals for Oregon Scientific ATC-1000


Summary of Contents for Oregon Scientific ATC-1000
- Page 1 HC18_manual_1_sep 9/2/05 16:50 Page 1...
-
Page 2: Table Of Contents
A TC - 10 0 0 and its software. • Importing Files into My Library from ATC-1000 • Editing Videos Your use of the Oregon Scientific Action Lab 1.0 CD-ROM is subject to a License Agreement contained inside the CD. • Exporting Videos XI . -
Page 3: Camera Precautions
You should also avoid dropping it, as the camera is not ‘shock-proof’. If you want to use • Movie images your ATC-1000 for watersports, check with your Oregon Scientific dealer about the availability of • File format of Interface USB (1.1) -
Page 4: Computer System Requirements (Action Lab 1.0)
HC18_manual_1_sep 9/2/05 16:50 Page 4 10. LCD display III) Computer System Requirements (Action Lab 1.0) 11. Menu button Minimum System Requirements • Pentium III 800 MHz or higher 12. Enter & ON/OFF button ® • 256 MB RAM 13. Picture shutter release button •... -
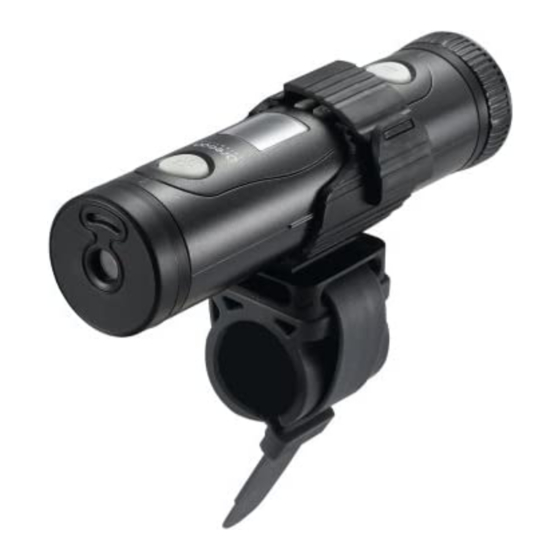
Page 5: Camera Mounting Description
HC18_manual_1_sep 9/2/05 16:50 Page 5 V) Camera Mounting Description To mount ATC-1000 using Velcro straps: 1. Attach the rubberized patch to the underside of The A TC -1 0 00 can be mounted in a variety of the dual-locking grip. different ways using the straps and Velcro patch provided. -
Page 6: Battery Installation
HC18_manual_1_sep 9/2/05 16:50 Page 6 VI) Quick Start Turning the Camera On For your safety, do not press any buttons on the camera during sports Battery Installation activities. 1. Turn and pull to release the cover at the end of the unit. Method 1 2. -
Page 7: Taking Photos
HC18_manual_1_sep 9/2/05 16:50 Page 7 Taking Photos Taking Video Footage Once the A T C- 10 0 0 is turned on: 1. Aim at the subject you want to shoot. 2. Press the ‘Movie shutter button’ to start The frame number shown on the LCD display will recording. -
Page 8: Camera Mode Selection
HC18_manual_1_sep 9/2/05 16:50 Page 8 VII) Camera Mode Selection a) Default 640 x 480 pixels resolution To change the resolution, press the ‘Menu’ button until 1. You can cycle through different shooting modes by pressing the ‘Menu’ button repeatedly. The LCD will display each mode as you press the desired resolution icon shows on the LCD display. -
Page 9: Downloading Images And Video Clips
HC18_manual_1_sep 9/2/05 16:50 Page 9 e) Delete All Photos/Movie Clips The remaining number of photos will also be displayed on the LCD. All the To delete all photos/movie clips stored in your camera, press the ‘Menu’ but- new captured images and video footage will be saved onto the SD card. ton until the LCD displays . -
Page 10: Tv Mode
16:50 Page 10 IX) TV Mode X) Welcome to Oregon Scientific Action Lab 1.0 After you’ve taken photos and video footage, Action Lab 1.0 is an easy-to-use video editing program. This program is a connect your camera to your TV using the AV comprehensive application ideal for organizing, viewing, enhancing, editing cable to view them with your family and friends. -
Page 11: Working With Action Lab
1. Click ‘Start’. Trim – Trim the video clip you want. 2. Select Programs > Oregon Scientific Action Lab 1.0 > Action Lab 1.0. The Tools – There are 5 tools including drawing tool, text tool, Action Lab 1.0 main screen will appear on your desktop.* selection tool, filter effect and image tool. - Page 12 HC18_manual_1_sep 9/2/05 16:50 Page 12 Importing files into Action Lab 1.0 from A T C- 1 0 0 0 4. Click the ‘Close’ button to close My Library. In Action Lab 1.0: 1. Click on the ‘My Library’ button. Note: The maximum duration of storyboard is 1 hour. 2.
- Page 13 HC18_manual_1_sep 9/2/05 16:50 Page 13 Adding and Deleting Transition Effect between Scenes Draw in your Video Clips Adding the transition effect between scenes can make your movie look more You can draw on your video clips using different colors and styles to make professional.
- Page 14 HC18_manual_1_sep 9/2/05 16:50 Page 14 Adding Background Music Create a New Storyboard 1. Click the Sound Editing button in the Main Command Panel. This will 1. Click the New Storyboard button to open a new storyboard file in the open the Sound Editing panel. Film Line.
- Page 15 HC18_manual_1_sep 9/2/05 16:50 Page 15 Troubleshooting (continued) Troubleshooting The remaining time is not accurate -The remaining time is not always accurate because it is only an estimate. Before contacting an authorized service center at 1-800-853-8883 or sending The remaining time depends not only on the time recorded, but on the an email to support@safe-site.net, carry out the following simple checks.
- Page 16 HC18_manual_1_sep 9/2/05 16:50 Page 16 Oregon Scientific, Inc. 19861 SW 95th Place Tualatin, OR 97062, USA Hotline: 1-800-853-8883 Website: www.oregonscientific.com This device complies with Part 15 of the FCC Rules. Operation is subject to the following two conditions: (1) this device may not cause harmful interference, and (2) this device must accept any interference received, including interference that may cause undesired operation.