Table of Contents
Advertisement
Quick Links
0
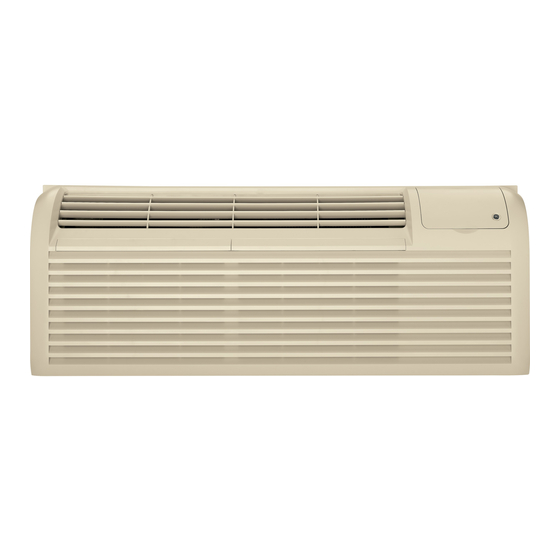
Zoneline Heat Pump Model
5200 Series
Zoneline
Owner's Manual
Important Safety information
Operating Instructions
The ControL_ on Yo_r ZoneH_m
Ca_
o{ Predator
Installation Instructions
Helpful Information
Thi_gs Tha_ _ Are
If SomethingGoes Wrong
BeZoye
Yow
......
_oywce
GE Serdce
_w_mness
GEAnswer Center ®
800.626.2000
GEAppliances
49-7367
Advertisement
Table of Contents

Related Manuals for GE Zoneline 5200 Series


Summary of Contents for GE Zoneline 5200 Series
- Page 1 5200 Series Zoneline Owner's Manual Important Safety information Operating Instructions The ControL_ on Yo_r ZoneH_m o{ Predator Installation Instructions Helpful Information Thi_gs Tha_ _ Are If SomethingGoes Wrong BeZoye .._oywce GE Serdce _w_mness GEAnswer Center ® 800.626.2000 GEAppliances 49-7367...
-
Page 2: Before Using
Toll-free customer service Hglp numbers are included in the back of this manual. Or call the GE Read this manual It contains help you Answer Center ® at 800.626.2000, instructions to help use and 24 hours a day, 7 days a week. -
Page 3: The Se Ins Tr U C Ti Ons
READ ALL SAFE TY INFORMA TION BEFORE USING • This Zoneline must be properly • Unplug or disconnect installed in accordance with the Zoneline at the fhse box or Installation Instructions befbre circuit breaker before making is used. any repairs. •... -
Page 4: Fan, Mode & Operation
HIGH COOL controls AUTO HEAT On yO!_T Zoneline TEMP MODE OPERATION TempControl Fan, Mode & Operation FAN-sets the fan operation fi_r HIGH, LOWer temp control is used to maintain AUTO speed. When set at AUTO, it automatically room temperature. compressor will cycle switches between/.OWand HIGH as room... -
Page 5: Ventilation Control
EnergyTips Louver screws Louver screws Removethe room cabinet and flip the louvers to change the air direction. control Air Direction Ventilation Control lever is located at the The ventilation control To adjust the air direction, remove the room cabinet. Remove the 7 louver screws that lower left side of the Zoneline unit, behind... - Page 6 Other Zoneline features There is a three minute minimum Heat pumps save money removing heat from the outside compressor time at any setting air-even when the outside to prevent short cycling. temperature is below freezing- indoor fan motor starts before releasing that heat...
- Page 7 The auxilia[ T controls are located behind the room cabinet on the front of the unit control box. The factory settings will be in the DOWN position. The owner is responsible for checking switches and ensuring they are in the desired position.
-
Page 8: Care And Cleaning
GE service outlet. You will need remove the chassis to inspect coils because the dirt build-up Clean the outside coils occurs on the inside. regularly. - Page 9 W of the unit. Replacement filters are available from your salesperson, GE dealer, GE Se_vice and Parts Center or authorized Customer Care ® servicers.
-
Page 10: Read Carefully
• Replacing 230/208 volt units. deflector kit, RAK40, may be used with grilles See page 12. that were not designed for your new GE • Replacing 265 volt units. Zonelines. The RAK40 contains air deflectors See page 13. and gaskets... - Page 11 Important Electrical Safety-Read Carefully Installer: Leave these instructions with the Zoneline. Owner: Keep these instructions for future use. • Follow the National Electrical C( _ )de (NEC) or CAUTION: local codes and ordinances. • Do not use an extension cord with this uniL •...
- Page 12 1 Remove the room cabinet. 3 See the special instructions below for applicable supply voltages. 2 Install the power supply kit per the instructions in the kit. 4 Reinstall the room cabinet. A power supply kit must be used to supply power to the Zoneline unit.
- Page 13 Tab on _h_,_i_ I,-""'_ .,..3 These models must be installed using the Junction box cover appropriate GE power supply kit for the branch ,ot,n circuit amperage and the electrical resistance heater wattage desired. See page 14. One of the following...
- Page 14 Use the round knockout at the bottom of the Reinstall the junction box by engaging the tab junction box to attach conduit coming from at the lower rear, aligning the screw hole at the the branch circuit. Remove the knockout, top and driving the one screw until secure.
- Page 15 The RAB71 or RAB77 wall case must be properly installed per instructions packed This chassis is designed to be installed in a with the case. GE plastic or an insulated steel wall case. This minimizes condensation from forming on the 2 Remove the corrugated stiffener and the room side of the case.
- Page 16 Slide the unit into the wall case and secure with four screws through the unit flange holes. If an insulated wall case is needed, see Install the Wall Case and Exterior Grille section on the previous page. Reinstall the room cabinet by hooking the top...
-
Page 17: Auxiliary Controls
Low Voltage Connectors & Auxiliary Controls The Boost Heat Option increases the Zoneline If the Zoneline is controlled by a wall thermostat and Boost switch #8 is set to the UP (on) air temperature by adding electric heat to supplement the heat pump. - Page 18 To operate the Remote Control/Wall Thermostat ((;lass 2) switch A, you must use 123456789A BCDE an Optional Interface Module kit. See the BBBBI.%N BBBBBBBBBI Installation Instructions with accesso_ T kit RAKOIM. Auxiliary Controls To operate Central Desk Control switch C, you must have an Optional Interface 123456789A BCDE...
- Page 19 Temperature limiting reduce energ T costs COOLING LIMITS by limiting the lowest temperature that can be Limit Switch Temp Range set for cooling the highest temperature that UP/On can be set for heating. Temperature limiting controlled by setting the first six auxiliat None 60 to 85...
- Page 20 Things That Are Normal You may hear a pinging or popping noise caused by water being PING! POP! picked up and thrown against the condenser on rainy days or when the humidity is high. This design feature helps remove moisture and improve efficiency. You may hear relays click when the controls...
- Page 21 Before You CaU For Service Problem Possible Causes What to Do The unit is unplugged • Make sure the Zoneline plug is pushed completely into the outlet. The fuse is blown/circuit • Check the house fuse/circuit breaker breaker is tripped box and replace fuse or reset the breaker.
-
Page 22: Before You Call For Service
Before You Call For Service Possible Causes Problem What to Do Dust is on the surface • This can cause a "burning" odor at the beginning of the heating operation. This the heating element odor should quickly fade. • Move the control to STOP and then The compressor may have failed... - Page 23 Consumer Action Program Next, if you are still not pleased, 20 North Wacker Drive are three steps to follow write all the details-including for fllrther help. your phone number-to: Chicago, IL 60606 Consumer Relations GE Appliances, Louisville, KY 40225...
- Page 24 For service in the U.S., call Staple sales slip or cancdled check here. 800-GE-CARES. Proof of original purchase date is needed to obtain service under warranty. For service in Canada, call 1-800-361-3400. All warranty service will be provided by our Factory Service (;enters,...