Table of Contents
Advertisement
Available languages
Available languages
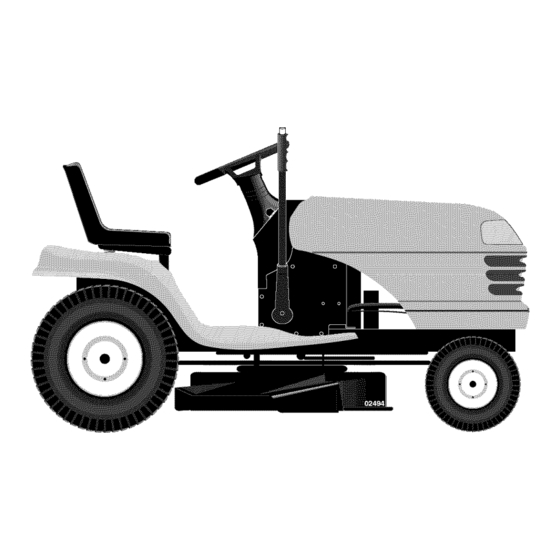
Operator's Manual
CRRFTSMI:IN °
LAWN TRACTOR
16.0 HE 38" Mower
Electric Start
6 Speed Transaxle
Model No.
917.275350
• Espahol, p. 33
_]]
his product has a low emission engine which operates
differently
from previously
built engines. Before you start the
engine, read and understand
this Owner's Manual.
IMPORTANT:
Read and follow all Safety
Rules and Instructions before
operating this equipment.
For answers to your questions about
this product, Call:
1-800-659-5917
Sears Craftsman Help Line
5 am - 5 pm, Mon - Sat
Sears, Roebuck and Co., Hoffman Estates, IL 60179 U.S.A.
Visit our Craftsman
website:www.sears.com/craftsman
Advertisement
Table of Contents

Related Manuals for Craftsman 917.275350


Summary of Contents for Craftsman 917.275350
- Page 1 Read and follow all Safety this product, Call: 1-800-659-5917 Rules and Instructions before Sears Craftsman Help Line operating this equipment. 5 am - 5 pm, Mon - Sat Sears, Roebuck and Co., Hoffman Estates, IL 60179 U.S.A. Visit our Craftsman...
- Page 2 Service andAdjustments...... 2 2 ProductSpecifications......6 Storage..........28 Assembly/Pre-Operation ......8 Troubleshooting ........29 Sears Service......B ack Cover Operation..........11 MaintenanceSchedule......1 7 LIMITED WARRANTY ON CRAFTSMAN TRACTOR AND BATTERY 2-YEAR ON TRACTOR When used and maintained according to the operator's manual...
- Page 3 DANGER:This cutting machine is capable of amputating hands and feet and throwing objects. Failure to observe the following safety instructions could result in serious injury or death. • Never direct discharged material toward ,_WARNING: In order to prevent ac- anyone. Avoid discharging material cidental...
- Page 4 I1. SLOPE OPERATION • Never carry children, even with the blades shut off. They may fall off and Slopes are a major factor related to loss of be seriously injured or interfere with control and tip-over accidents, which can safe machine operation.
- Page 5 • Keep machine free of grass, leaves, • Remove gas-powered equipment from other debris build-up. Clean oil or fuel the truck or trailer and refuel it on the spillage and remove any fuel-soaked ground. If this is not possible, then debris.
- Page 6 (Gap: .030") AGREEMENTS Ground Speed Forward: Congratulations on making a smart pur- (MPH): chase. Your new Craftsman® product is designed and manufactured for years of dependable operation. But like all products, it may require repair from time to time. That's...
- Page 7 Steering Wheel Steering (1) Large Flat Washer Wheel Insert © (1) 5/16 Lock Washer (1) Hex Bolt 5/16-18 x 4 Steering Extension Steering Wheel Adapter Shaft Boot Seat (1) Washer 17/32 x1-3/16 x12 Gauge ) Knob (1) Oil Drain Tube For Future Use Slope Sheet Keys...
- Page 8 Your new tractor has been assembled at the factory with the exception of those parts left unassembled for shipping purposes. To ensure safe and proper operation of your tractor all parts and hardware you assemble must be tightened securely. Use the correct tools as necessary to insure...
- Page 9 6. Lower seat into operatingpositionand NOTE: You may now roll or drive your sit in seat. tractor off the skid. Follow the appropriate 7. Slide seat until a comfortableposition instruction below to remove the tractor is reachedwhich allowsyou to press from the skid.
- Page 10 CHECK TIRE PRESSURE #" CHECKLIST The tires on your tractor were overin- Before you operate and enjoy your new flated at the factory for shipping purposes. tractor, we wish to assure that you receive Correct tire pressure is important for best the best performance and satisfaction cutting...
- Page 11 These symbols may appear on your tractor or in literature supplied with the product. Learn and understand their meaning. REVERSE NEUTRAL HIGH CHOKE FAST SLOW IGNITION SWITCH ENGINE OFF REVERSE ENGINE ON ENGINE START PARKING BRAKE PARKING BRAKE PARKING BRAKE OPERATION LOCKED UNLOCKEB...
- Page 12 KNOW YOUR TRACTOR READ THIS OWNER'S MANUAL AND SAFETY RULES BEFORE OPERATING YOUR TRACTOR Compare the illustrations with your tractor to familiarize yourself with the locations various controls and adjustments. Save this manual for future reference. Attachment "ON" Position Ignition Switch Clutch Lever Throttle/Choke Control...
- Page 13 The operation of any tractor result in foreign objects thrown into the eyes, which can result in severe eye damage. Always wear safety glasses or eye shields while operating your tractor or performing adjustments or repairs. We recommend a wide vision safety mask over spectacles...
- Page 14 USING THE REVERSE OPERATION • The average lawn should be cut to ap- SYSTEM proximately 2-1/2 inches during the cool season and to over 3 inches during 1. Depress clutch/brake pedal all the way months. For healthier and better looking down and hold.
- Page 15 TOWING CARTS AND OTHER ATTACH- CAUTION: Alcohol blended fuels (called MENTS gasohol or using ethanol or methanol) attract moisture which leads to separa- Tow only the attachments that are recom- tion and formation of acids during storage. mended by and comply with specifications Acidic gas can damage the fuel system...
- Page 16 6. When engine starts, leave throttle control in choke position until engine warms up and begins to run roughly. Once rough running begins, imme- diately move the throttle control to the fast position. Engine warm-up take from several seconds to several minutes (the colder the temperature,...
- Page 17 MAINTENANCE BEFORE EVERY EVERY EVERY EVERY EVERY BEFORE EACH SEASON STORAGE SCHEDULE HOURS HOURS HOURS HOURS iCheck Brake Operation 3heck Tire Pressure Dheck Operator Presence & ROS System_ v" Dheck for Loose Fasteners C iOhecWReplace Mower Blades _ubrication Chart Dheck Battery Level Dlean...
- Page 18 ROS "ON" Position TRACTOR Engine "ON" Position (Normal Operating) Alwaysobserve safety ruleswhen per- forming any maintenance. BRAKE OPERATION If tractor requiresmore than five (5) feet to stop at highest speed in highest gear on a level,dry concreteor paved surface,then brakemust be checked and adjusted.(See "TOADJUST BRAKE"in the Serviceand •...
- Page 19 V-BELTS • The blade can be sharpened with a file or on a grinding wheel. Do not attempt Check V-belts for deterioration and wear to sharpen while on the mower. after 100 hours of operation and replace • To check blade balance, you will need a if necessary.
- Page 20 Unlock drain valve by pushing inward slightly and turning counterclockwise. To open, pull out on the drain valve. Handle After oil has drained completely, close and lock the drain valve by pushing inward and turning clockwise until the pin is in the locked position as shown.
- Page 21 MUFFLER CLEANING Inspect and replace corroded muffler • Clean engine, battery, seat, finish, etc. spark arrester (if equipped) as it could cre- of all foreign matter. ate a fire hazard and/or damage. • Keep finished surfaces and wheels free SPARK PLUG(S) of all gasoline, oil, etc.
- Page 22 WARNING: SERVICE OR ADJUSTMENTS: TO AVOID SERIOUS INJURY, BEFORE PERFORMING Depress clutch/brake pedal fully and set parking brake. Place gearshift lever in neutral (N) position. Place attachment clutch in "DISENGAGED" position. Turn ignition key to "STOP" and remove key. Make sure the blades and all moving parts have completely stopped.
- Page 23 Push clutch cable housing guide into Check adjustment on right side of trac- bracket, slide collar onto guide and tor. Measure distance "D" directly in front secure with large retainer spring. and behind the mandrel at bottom edge of Place flat washer and clutch spring mower housing...
- Page 24 Move attachment lift lever forward If distance is other than 1-1/2", loosen lower mower to its lowest position. jam nut and turn nut "A" until distance Roll belt off engine pulley. becomes 1-1/2". Retighten jam nut Work belt off both mandrel pulleys against nut "A".
- Page 25 TO REMOVE WHEEL FOR REPAIRS Engine Pulle Block up axle securely. Remove axle cover, retaining ring and Center washers to allow wheel removal (rear Clutching wheels have a square key - Do not Keeper lose). Repair tire and reassemble. NOTE: On rear wheels only: align...
- Page 26 TO REPLACE HEADLIGHT BULB TO REMOVE CABLES, REVERSE ORDER 1. Raise hood. Pull bulb holder out of the hole in the BLACK cable first from chassis then from the fully charged battery. backside of the grill. RED cable last from both batteries. Replace bulb in holder and push bulb holder...
- Page 27 ENGINE IMPORTANT: Damage to the needle valve and the seat in carburetor may result Maintenance, repair, or replacement of the if screw is turned in too tight. emission control devices and systems, which are being done at the customers expense, PRELIMINARY SETTING may be performed...
- Page 28 Immediately prepare your tractor for stor- blended fuels (called gasohol or using age at the end of the season or if the trac- ethanol or methanol) can attract moisture tor will not be used for 30 days or more. which leads to separation and formation acids during...
- Page 29 TROUBLESHOOTING CHART: See appropriate section in manual unless directed to Sears service center PROBLEM CAUSE CORRECTION Will not start 1. Out of fuel. Fill fuel tank. See "TO START ENGINE" Engine not "CHOKED" properly. in Operation section. Wait several minutes Engine flooded.
- Page 30 TROUBLESHOOTING CHART: See appropriate section in manual unless directed to Sears service center PROBLEM CAUSE CORRECTION Loss of power Cutting too much grass/too Raise cutting height/reduce fast. speed. Throttle in "CHOKE" position. Adjust throttle control. Clean underside of mower Build-up of grass, leaves and trash under...
- Page 31 TROUBLESHOOTING CHART: See appropriate section in manual unless directed to Sears service center PROBLEM CAUSE CORRECTION Mower blades will 1. Remove obstruction. 1. Obstruction in clutch not rotate mechanism. Worn/damaged mower drive Replace mower drive belt. belt. Frozen idler pulley. Replace idler pulley.
- Page 32 SUGGESTED GUIDE FOR SIGHTING SLOPES FOR SAFE OPERATION ONLY RIDE UP AND DOWN HILL, NOT ACROSS HILL 15 DEGREES MAX. down the face of slopes, never across the face. Do not mow ARNING: To avoid serious injury, operate your tractor up and slopes greater than 15 degrees.
- Page 33 Usted podr_, evi- tarse el costo del vi_.tico si Ileva la bateria a un Centro de Servicios autorizado de Craftsman. Para saber cu_.l le queda m_.s cerca, Ilame al 1-800-4-MY-HOME®.
- Page 34 PELIGRO: Esta Maquina cortadora es capaz de amputar las manosy los pies y de lanzar objetos, si no se observan las instrucciones de seguridad siguientes se pueden producir lesiones graves o la muerte. A_,ADVERTENCIA: Siempre desconecte el • No hacer funcionar la m_.quina sin el alambre de la bujfa y p6ngalo donde no pueda captador de hierba entera, la protecci6n de entrar en contacto con la bujfa, para evitar el...
- Page 35 • Escoger u navelocidad demarcha bajade • Nunca permitir que ni_os u otras personas modoquenoseanecesario pararse o cam- esten dentro del equipo por remolcar. biarestando enunapendiente. • En pendientes, el peso del equipo remolcado • Nocortarla hierbamojada. Lasruedas puede causar la p6rdida de tracci6n y la pueden perder tracci6n.
- Page 36 • Las cuchillas del cortac_sped son afiladas. • Mantener la m_.quina libre de hierba, hojas Envolver la cuchilla, ponerse guantes y poner u otros residuos acumulados. Limpiar las la m_.xima atenci6n cuando se hacen opera- salpicaduras de aceite o carburante y quitar ciones en elias.
- Page 37 REPARACION Velocidad de Marcha Hacia Adelante: Congratulaciones por su buena compra. Recarrido(MPH): Su nuevo producto Craftsman® est,. diseSado 2 n_ y fabricado para funcionar de modo fiable por 3 rd 4 th muchos aSos. Pero como todos los productos, puede necesitar alguna reparaci6n de tanto 5 th en tanto.
- Page 38 Volante de direccion Inserto (1) Arandela volante direccion © (1) Arandela (1) Perno hexagonal seguridad 5/16 5/16-18 Eje de Extenci6n _,ccesorio de Adaptador transcion de la direccion Asiento (_(1) Arandela de calibre Manilla _,_ 17/32 x 1-3/16 x 12 Hoja de pendiente Llaves (2) Llaves...
- Page 39 Su tractor nuevo ha side montado en la f_tbrica con la excepci6n de aquellas partes que no se han montado per razones de envio. Para asegurarse que su tractor funcione en forma adecuada y segura todas las partes y los articulos de ferreteria que se monten tienen que ser apretados en forma segura.
- Page 40 Baje el asiento a la posici6n de operaci6n y AVISO: Ahora puede rodar o conducir su trac- sientese en el asiento. tor fuera de la corredera. Siga las siguientes Deslice el asiento hasta que Ilegue a una instrucciones para remover el tractor de la corredera.
- Page 41 REVISION PRESION DE LA DE LAS ,/LISTA DE REVISION ANTES DE OPERAR Y DE DISFRUTAR DE SU LLANTAS Las Ilantas en su tractor fueron infladas de- TRACTOR NUEVO, LE DESEAMOS QUE RE- CIBA EL MEJOR RENDIMIENTOY LA MAYOR masiado en la f_.brica por razones de envio. La SATISFACCION DE ESTE PRODUCTO DE presi6n de las Ilantas correctas es importante...
- Page 42 Estos simbolos pueden aparecer sobre su tractor o en la literatura proporcionada con el producto. Aprenda y comprenda sus significados. MARCHA ATRAS NEUTRO ALTO BAJO ESTRANGU- R/_PIDO LENTO LACION IGNICION FRENO ABIERTA MOTOR MOTOR MOTOR FRENO ESTACIONAMIENTO APAGADO SISTEMA ENCENDIDO EN MARCHA ESTACIONAMIENTO CERRADO...
- Page 43 FAMILIARICESE CON SU TRACTOR LEA ESTE MANUAL DEL DUEI_IO Y LAS REGLAS DE SEGURIDAD ANTES DE OPERAR SU TRACTOR Compare las ilustraciones con su tractor para familiarizarse con las ubicaciones de los diversos controles y ajustes. Guarde este manual para referencia en el futuro. Palanca del embrague ROS "ON"...
- Page 44 La operaci6n de cualquier tractor puede hacer que salten objetos extrahos dentro de sus ojos, Io que puede producir daSos graves en _stos. Siempre use anteojos de seguridad o protecciones para los ojos mientras opere su tractor o cuando haga ajustes o reparaciones. Recomendamos el uso de la mascara de segu- ridad de visidn amplia, para uso sobre los espejuelos o anteojos de seguridad est_.ndar.
- Page 45 USAR EL SISTEMA DE FUNCIONAMIENTO • El c6sped promedio debe cortarse aproximada- ATRAS - mente a 2-1/2 pulgadas durante la temporada fria y sobre 3 pulgadas durante los meses • Presionar el pedal embrague/freno hasta el calurosos. Para obtener un cesped m_.s salu- rondo y mantenerlo apretado.
- Page 46 PRECAUClON: Combustibles mezclados con REMOLQUE DE CARRETILLAS O OTROS ACCESORIOS alcohol (conocidos como gasohol, o el uso de etanol o metanol) pueden atraer la humedad, Remolque solamente los accesorios reco- la que conduce a la separaci6n y formaci6n de mendados y especificados por el fabricante del tractor.
- Page 47 ARRANQUE CON TIEMPO FR[O (50°Y MENOS) AI hacer arrancar el motor, mantenga el control de la aceleraci6n a la posici6n de estrangulaci6n hasta que el motor se caliente y empieze funcionar mal. Una vez que empieze a funcionar mal, mueva inme- diatamente el control de la aceleraci6n a la •...
- Page 48 PROGRAMA DE ANTES CADA CADA CADA CADA CADA ALMACENAMIENTO MANTENIMIENTO TEMPORADA CADA USO HORAS HORAS HORAS HORAS , Revisar ,a operaci6n del f ..Revisar la presi6n de las Ilantas V_rifiez la commande de presence d'op_rateur et le sistema d ROS Revisar si hay sujetadores sueltos Afilar/cambiar...
- Page 49 • Cuando el motor ester en marcha con TRACTOR el interruptor de Ilave del sistema de Siempre observe las reglas de seguridad cu- ando de mantenimiento. funcionamiento atr_ts (ROS) en la posici6n "ON" y el embrague del accesorio conectado, OPERAClON DEL FRENO cualquier tentativa del operador de viajar Si el tractor exige m_.s de cinco (5) pies para...
- Page 50 AVISO: No use un elavo para balancear la CALIDADES DE VISCOSIDAD DE SAE cuchilla. Los 16bulos del agujero central pueden aparecer como centrados, pero no Io est_tn. • Deslice la cuchilla en una parte no roscada del perno de acero o clavija y sujete el perno o la clavija paralelo al suelo.
- Page 51 LIMPIEZA DE LA REJILLA DE AIRE Use un medidor en la tapa/varilla indicadora del nivel para relleno del aceite para revisar La rejilla de aire debe mantenerse sin mugre el nivel. Mantenga el aceite en la Ifnea de y paja para evitar el daho al motor debido al Ileno (FULL) en la varilla indicadora de sobrecalentamiento.
- Page 52 ADVERTENCIA:PARA EVITAR LESIONES SERIAS, ANTES DE DAR CUALQUIER SERVICIO O DE HACER AJUSTES: Presione el pedal del embrague/freno completamente y aplique el freno de estacionamiento. Ponga la palanca de cambios en la posici6n de neutro (N). Ponga el embrague del accesorio en la posici6n desenganchado (DISENGAGED).
- Page 53 AJUSTE DESDE ADELANTE HACIA ATR,_,S Empuje la guia de la cubierta del cable del embrague en el soporte, deslice el collar IMPORTANTE: El conjunto tiene que ser nive- sobre la guia y asegt3rela con el resorte lado de lado a lado. Si el ajuste desde adelante grande de retenci6n.
- Page 54 AJUSTE DEL FRENO PARA CAMBIAR LA CORREA DE IMPUL- SION DE LA CUCHILLA SEGADORA Presionar el pedal del embrague/freno La correa de impulsi6n de la cuchilla segadora hasta el rondo y accionar el freno de estac- se puede cambiar sin herramientas. Estacione ionamiento.
- Page 55 REEMPLAZAR LA BATERIA Deslice la correa dentro del fijador central del tramo. _IbADVERTENCIA: No haga cortocircuito Tire la correa hacia la parte delantera del los terminales de la bateria al permitir que una tractor y deslicela alrededor de la ramura Ilave de tuerca o cualquier otro objeto entre superior de la polea del motor.
- Page 56 • Revise elalambrado. Veael diagrama d el Revise que los agujeros "A" en la palanca alambrado e lectrico enla secci6n de Partes de control del regulador y el agujero en deRepuesto. la plancha del regulador esten alineados. Si los agujeros "A" no Io est,.n, suelte el PARA CAMBIAR EL FUSIBLE tornillo de sujeci6n y mueva el cable de la C_.mbielo por un fusible tipo enchufable de 20...
- Page 57 A la misma vez que este teniendo el mango de control de la aceleraci6n en contra del tornillo de corriente reactiva, gire la v_tlvula de mezcla en vacio completamente en la direcci6n de las agujas de un reloj yen seguida de la otra direcci6n hasta que el motor empiece a funcionar mal.
- Page 58 Inmediatamente prepare su tractor para el etanol o metanol) pueden atraer humedad, Io almacenamiento al final de la temporada o si el que conduce a la separaci6n y a la formaci6n de acudos durante elalmacenamiento. tractor no se va a usar por 30 dias o m_.s. gasolina acidica puede dahar el sistema de _ADVERTENClA: Nunca almacene el trac-...
- Page 59 IDENTIFICACION DE PROBLEMAS: Vea la seccion apropiada en el manual a menos que este dirigido a un centro de servicio Sears. PROBLEMA CAUSA CORRECCION No arranca 1. Sin combustible. Llene el estanque de combustible. 2. Motor sin la Vea "PARA ARRANCAR MOTOR"...
- Page 60 IDENTIFICACION DE PROBLEMAS: Vea la seccion apropiada en el manual a menos que este dirigido a un centro de servicio Sears. CORRECCION PROBLEMA CAUSA Perdida de fuerza 3. Acumulaci6n de c_sped, hojas y 3. Limpie la parte inferior de la caja (continuado) basura debajo de la segadora.
- Page 61 IDENTIFICACION DE PROBLEMAS: Vea la seccion apropiada en el manual a menos que este dirigido a un centro de servicio Sears. CAUSA PROBLEMA CORRECCION Las cuchillas 1. Obstrucci6n en el mecanismo 1. Remueva la obstrucci6n. segadoras no rotan del embrague. 2.
- Page 63 GUJA SUGERIDA PARA IVIEDIR LAS PENDIENTES CON LA VISTA PARA UNA OPERACION SEGURA SOLAiVlENTEANDE CUESTA ARRIBA O CUESTA ABAJO Y NO ATRAVIESE EL CERRO 15 GRADOS MAX. y abajo de [as pendientes, nunca transversaimente con respecto a [as DVERTENCIA: Para evitar daffos graves, haga funcionar su tractor arriba pendientes.
- Page 64 Your Home For repair - in your home - of all major brand appliances, lawn and garden equipment, or heating and cooling systems, no matter made it, no matter sold For the replacement parts, accessories owner's manuals that you need to do-it-yourself. For Sears professional installation...