Advertisement
Quick Links
2
_!... 2 -4
.... 6-7
ce Controls
............ 7-8
Questions?
1-800-944-9044
(UnitedStates)
1-800-668-4606
(Canada)
Visit the Frigidaire
Web Site at:
http://www.frigidaire.com
Oven Control
Functions
................
9
Setting
Oven Controls
..............
9=12
Self Cleaning
...........................
12=14
Genera{
Care
& Cleaning
.......
14=16
Warranty
.........................
Back
Page
READ AND
SAVE THESE
INSTRUCTIONS
p/n 316417018
rev C (0512)
Adjusting
Oven Temperature
....... 17
Before
You Call
Solutions
to Common
Problems
........................
18
Advertisement

Related Manuals for Frigidaire CFEF355FCG


Summary of Contents for Frigidaire CFEF355FCG
- Page 1 14=16 Adjusting Oven Temperature ..17 Before You Call Solutions to Common Problems ......Questions? 1-800-944-9044 (UnitedStates) 1-800-668-4606 (Canada) Warranty ......Back Page Visit the Frigidaire Web Site at: http://www.frigidaire.com READ AND SAVE THESE INSTRUCTIONS p/n 316417018 rev C (0512)
- Page 2 Welcome& congratulations Congratulations on your purchase of a new range! At Electrolux Home Products, we are very proud of our product and are completely committed to providing you with the best service possible. Your satisfaction is our number one priority. We know you'll enjoy your new range and Thank You for choosing our product.
- Page 3 • DO NOTTOUCH SURFACE UNITS, AREAS NEAR THESE UNITS, HEATING ELEMENTS OR INTERIOR SURFACES OFTH E OVEN. Both surface units and oven heating elements All ranges can tip. may be hot even though they are dark in color. Areas near Injury to persons could result.
- Page 4 IMPORTANT INSTRUCTIONS FOR USING YOUR IMPORTANT INSTRUCTIONS FOR USING YOUR COOKTOP OVEN Use Care When Opening Oven Door or Warmer Drawer (if • Know which knob controls each surface heating unit. Place a pan of food on the unit before turning it on, and turn the unit off equipped)--Stand to the side of the range when opening the door before removing the pan.
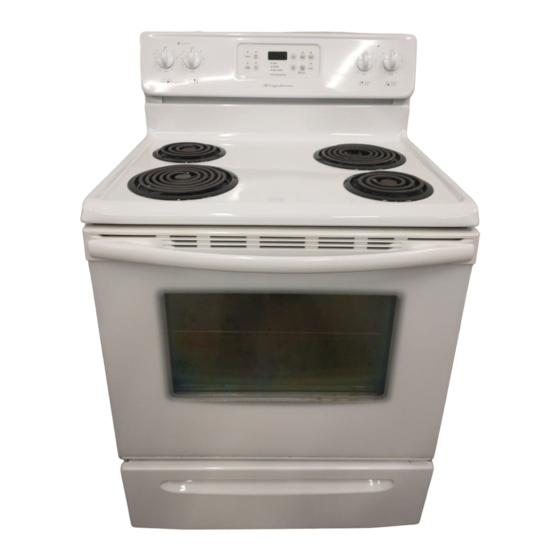
- Page 5 Your Electric Range Features Include: Electronic Oven Control with Kitchen Timer. Left Front Single Element Control. Left Rear Single Element Control. Right Rear Single Element Control. Right Front Single Element Control. Element ON Indicator Light(s). :(::_:_¸ Oven Interior Light Switch (some models). Oven Interior Light with removable Cover (some models).
- Page 6 Oven Vent Location OVEN VENT LOCATED UNDER LEFT REAR ELEMENT The oven vent is located under the left rear surface element (See Fig. 1). When the oven is on, warm air passes through the vent. This venting is necessary for proper air circulation in the oven and good baking results.
- Page 7 Before Setting Oven Controls (cont'd) ELEMENT ON indicator Light Your range is equipped with a surface control indicator lights that will glow on your Element range--the ELEMENTON indicatorlight (See Fig. 1). The ELEMENT ON located on the control panel and will glow when a surface element is turned ON.
- Page 8 Setting Surface Controls (cont'd) Operating the Surface Elements (all models) To Operate Surface Elements: Element Place cooking utensil on the surface element. Push in and turn the surface control knob either direction to the desired setting. Start most cooking operations on a higher setting and then turn to a lower setting to finish cooking.
- Page 9 Note:Thetimeofdaymustfirstbesetinorder t ooperate theoven. READTHEINSTRUCTIONS CAREFULLY B EFORE U SING THE OVEN. F or s atisfactory useofyouroven, b ecome f amiliar with thevarious padfunctions o ftheovenasdescribed b elow. BAKETIME FEATURE INDICATOR LIGHTS-- UP and DOWN ARROW PADS-- Used along PAD-- Used to with the function pads to select oven...
- Page 10 Setting Oven Controls (cont'd) the ,/_ or V, the temperature can then be adjusted To Set the Clock in 5°F increments (1 °C if the control is set to display Celsius). When the range is first plugged in or when the power supply to the appliance has been interrupted, the display will flash As soon as the/_ or V...
- Page 11 Setting Oven Controls (cont'd) To Change the Oven Temperature or Bake Time after To Set Timed Bake with Delay Start Baking has Started: Press the function pad you want to change. The _,_ BAKE TIME and _'_ START TIME pads operate Pressthe/_ or v to adjust the setting.
-
Page 12: Self-Cleaning
Setting Oven Controls (cont'd) place the food on the insert. For Roasting: Place the broiler pan & insert on the oven rack (some Preheating is not necessary when roasting foods with models). Open the oven door to the broil stop Speed Bake Cooking System. - Page 13 Self-Cleaning (cont'd) Preparing for a Self=Clean Cycle A Self-Cleaning oven cleans itself with high temperatures using your hand from the front of the bake element. This will (well above cooking temperatures) which eliminate soils allow easier access to the oven bottom for cleaning. completely or reduces them to a fine powdered ash you can Remove the bottom oven rack before raising the element.
-
Page 14: Care And Cleaning
Self-Cleaning (co nt'd) Stopping or interrupting a Self-Cleaning Cycle To avoid possible bums use care when opening If it becomes necessary to stop or interrupt a Self-Cleaning the oven door after the Self-Cleaning cycle. Stand to the side cycle: of the oven when opening the door to allow hot air or steam to escape. - Page 15 General Care & Cleaning_ (cont'd) Surface Elements Drip Bowls Surface elements can be unplugged and removed to make cleaning the drip pans easier. The surface elements clean themselves when they are turned on. Food spilled on a hot element will burn off. Food spilled on a cool element may be cleaned with a damp cloth--any remaining soil will burn off the next time the element is used.
- Page 16 General Care & Cleaning_ (cont'd) Removing & Replacing Lift-Off Oven Door The door is heavy. For safe, temporary storage, lay the door flat with the inside of the door facing down. Door Hinge locations with oven door To Remove Oven Door: fully open Open oven door completely (horizontal with floor- See Fig.
- Page 17 Youroven control hasbeen precisely s etatthefactory. Thissetting may differ fromyourprevious o ven however, soyourrecipe timesmaynotgiveyoutheresults youexpect. I f youthinkthattheoveniscooking toohotor toocoolforyourrecipe times, youcanadjust t hecontrol s othattheovencookshotter orcooler thanthetemperature d isplayed. ToAdjustOvenTemperature: 1. Press_. 2. Setthetemperature t o550°F(287°C) b ypressing andholding the i_k.
- Page 18 Solutions to Common Problems Before you call for service, review the following list. It may save you time & expense. The list includes common occurrences (shown in bold) that are not the result of defective workmanship or materials in this appliance. The possible corrections to these problems are provided with the problem listed:...
- Page 20 Your appliance is covered by a one year limited warranty. For one year from your original date of purchase, Electrolux will pay all costs for repairing or replacing any parts of this appliance that prove to be defective in materials or workmanship when such appliance is installed,...