Table of Contents
Advertisement
Available languages
Available languages
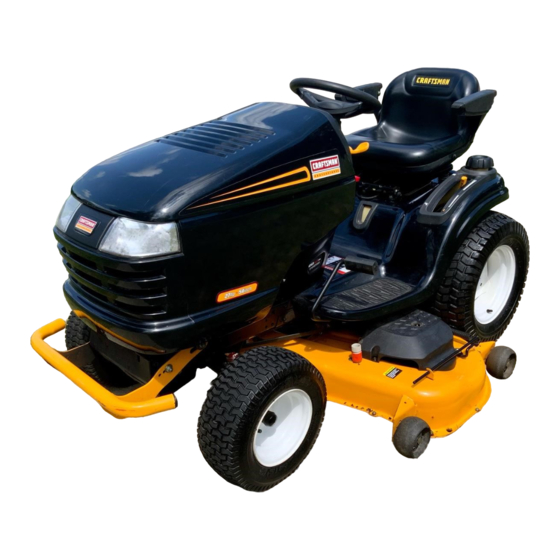
Operator's
Manual
®
GAR
27 HR*
TRACTO
54" Mower
Electric Start
Automatic
Transmission
Model No.
917.28874
• Espahol,
p. 35
03090
This product has a low emission
engine
which
operates
[[[_
differently
from
previously
built
engines.
Before
start the
you
engine, read and understand
this Owner's
Manual.
IMPORTANT:
Read and follow all Safety
Rules and Instructions
before
operating
this equipment,
For answers to your questions
about this product, Call:
t -800-659-5917
Sears
Craftsman
Help
Line
5 am - 5 pm, Mon-
Sat
SEARS,
ROEBUCK
AND CO., HOFFMAN
ESTATES,
IL 60179
U.S.A.
Visit our Craftsman
website:www.sears.com/craftsman
*As rated by the engine manufacturer
Advertisement
Table of Contents

Related Manuals for Craftsman 917.28874


Summary of Contents for Craftsman 917.28874
- Page 1 Read and follow all Safety t -800-659-5917 Rules and Instructions before Sears Craftsman Help Line operating this equipment, 5 am - 5 pm, Mon- SEARS, ROEBUCK AND CO., HOFFMAN ESTATES, IL 60179 U.S.A. Visit our Craftsman website:www.sears.com/craftsman *As rated by the engine manufacturer...
-
Page 2: Limited Warranty
Assembly/Pre-Operation ......Troubleshooting ........Sears Service ......Back Cover Operation ..........Maintenance Schedule ......CRAFTSMAN LIMITED WARRANTY TWO YEARS ON TRACTOR When operated and maintained according to all supplied instructions, if this tractor fails due to a defect in material... -
Page 3: General Operation
_,DANGER: This cutting machine is capable of amputating hands and feet throwing objects. Failure to observe following safety instructions could result in serious injury or death. Never carry passengers. _IbWARNING: In order to prevent acciden- Do not mow in reverse unless absolutely tal starting... - Page 4 II. SLOPE OPERATION Never carry children, even with the blades shut off. They may fall off and be seriously Slopes are a major factor related to loss of injured or interfere with safe machine control and tip-over accidents, which operation. Children who have been given result...
-
Page 5: General Service
Keepthe nozzle in contact with the rim of • Keep machinefree of grass, leaves, orother the fuel tank or container opening at all debris build-up. Clean oil or fuel spillage times untilfueling is complete.Do not use remove fuel-soaked debris. a nozzle lock-open device. Allow machine cool... - Page 6 REPAIR PROTECTION AGREEMENTS Gasoline Capacity 4 Gallons Congratulations on making a smart purchase. and Type: Unleaded Regular Your new Craftsman® product is designed Oil Type SAE 10W30 (above 32°F) and manufactured for years of dependable API-SG-SL) SAE 5W30 (below 32°F ' operation.
- Page 7 Mower Front Wheel (1) Wheel (_ (1) Locknut 3/8-16 (1) 1-1/40.D. Washer Mower ront Link (5) Large Retainer Springs - 7/16 sembly (1) 3/40.D. Washers (1) Anti-Swar (2) Small Retainer (2) Rear Lift Link Springs - 5/16 Assemblies (5) 1-3/16 O.D.
-
Page 8: Tools Required
Your new tractor has been assembled at the factory with the exception of those parts left unassembled for shipping purposes. TOOLS REQUIRED ADJUST SEAT ASSEMBLY 1. Sit in seat. A socket wrench set will make assembly easier. Standard wrench sizes you need Lift up adjustment lever (A) and slide seat... -
Page 9: Drive Belt
Slide mower under tractor until it is cen- ASSEMBLE FRONT WHEEL tered under tractor. MOWER 1. Using shoulder bolt, washer and Iocknut FIRST INSTALL ANTI-SWAY BAR (S). from parts bag, assemble front wheel to - From right side of mower, insert anti-sway mower as shown. - Page 10 ATTACH REAR LIFT LINKS (C) - Insert rod end of link assembly into hole in tractor lift shaft suspension arm (L) and pivot link down to mower. Lift rear corner of mower and position slot in link assembly over pin on rear mower bracket (D) and secure...
-
Page 11: Check Brake
CHECK TIRE PRESSURE _CHECKLIST Thetireson your tractorwere overinflated atthe factory for shipping purposes, Correcttire pres- Before operate your tractor, sure is important for best cutting performance, wish to assure that receive best + Reduce tire pressure to PSI shown on tires, performance satisfaction from... - Page 12 These symbols may appear on your tractor or in literature supplied with the product. Learn and understand their meaning. I'.,I REVERSE NEUTRAL HIGH CHOKE FAST SLOW IGNITION SWITCH ENGINE OFF REVERSE ENGINE ON ENGINE START PARKING BRAKE MOWER HEIGHT MOWER LiFT OPERATION SYSTEM...
-
Page 13: Operation
KNOW YOUR TRACTOR READ THIS OWNER'S MANUAL SAFETY RULES BEFORE OPERATING YOUR TRACTOR Compare the illustrations with your tractor to familiarize yourself with the locations of vari- ous controls and adjustments. Save this manual for future reference. Our tractors conform to the applicable safety standards... - Page 14 The operation of any tractor result in foreign objects thrown into the eyes, which can result in severe eye damage. Always wear safety glasses or eye shields while operating your tractor or performing any adjustments or repairs. We recommend standard safety glasses or a wide vision...
- Page 15 CAUTION: Continuing to press the electric lift switch after the mower deck has reached the minimum or maximum position may result in damage to the electric lift mechanism .The electric lift mechanism is equipped with thermal protection system. If the system overheats or fails to operate, allow the system...
- Page 16 TO OPERATE MOWER USING REVERSE OPERATION SYSTEM Your tractor is equipped with an operator presence sensing switch. Any attempt by the Only use if you are certain no children or other operator to leave the seat with the engine bystanders will enter the mowing area.
-
Page 17: Towing Carts Andother Attachments
TOWING CARTS ANDOTHER ATTACHMENTS START ENGINE Tow only the attachments that are recom- When starting the engine for the first time or mended by and comply with specifications if the engine has run out of fuel, it will take of the manufacturer of your tractor. Use extra cranking time... - Page 18 Allow one minute for transmission to warm Drive tractor forward for approximately five feet then backwards five feet. up. This can be done during the engine warm up period. Repeat this driving procedure three times. • The attachments can be used during Your transmission is now purged and now...
- Page 19 MAINTENANCE BEFORE EVERY EVERY EVERY EVERY EVERY BEFORE SCHEDULE EACR SEASON STORAGE HOURS HOURS HOURS HOURS Check Brake Operation Check Tire Pressure F_ Check Operator Presence & ROS Systems Check for Loose Fasteners O ChecWReplace Mower Blades T Lubrication Chart 0 Check Battery Level Clean Battery...
- Page 20 TRACTOR Always observe safety rules when performing any maintenance. BRAKE OPERATION If tractor requires more than five (5) feet to ENGINE "ON" POSITION stop at highest speed in highest gear on a (NORMAL OPERATING) level, dry concrete or paved surface, then BLADE CARE...
- Page 21 BATTERY Make sure the PTO (Blade Engage) not engaged, set the parking brake, and Your tractor has a battery charging system stop the engine. which is sufficient for normal use. However, Thread the nozzle adapter (packaged periodic charging of the battery with an au- with your tractor's Operator's...
- Page 22 ENGINE Unlock drain valve by pushing inward slightly and turning counterclockwise. LUBRICATION To open, pull out on the drain valve. Only use high quality detergent oil rated with Afteroil hasdrained completely, close and API service classification SG-SL. Select the lock the drain valve by pushing inward...
-
Page 23: Spark Plugs
MUFFLER FILTER Inspect and replace corroded muffler and Your engine will not run properly using spark arrester (if equipped) as it could create dirty air filter. Service paper cartridge every a fire hazard and/or damage. two months or every 25 hours of operation, whichever occurs first. - Page 24 WARNING: SERVICE OR ADJUSTMENTS: TO AVOID SERIOUS INJURY, BEFORE PERFORMING Depress brake pedal fully and set parking brake. Place attachment clutch in "DISENGAGED" position. Turn ignition key to "STOP" and remove key. Make sure the blades and all moving parts have completely stopped.
- Page 25 TO LEVEL MOWER If adjustment is necessary, see steps Make sure tires are properly inflated to the and 3 in Visual Adjustment instructions PSI shown on tires. If tires are over or under above. inflated, it may affect the appearance of your Recheck measurements,...
- Page 26 REPLACE MOWER DRIVE BELT Remove belt from electric clutch pulley (M), both mandrel pulleys (R) and all idler MOWER DRIVE BELT REMOVAL pulleys (V). Park tractor on a level surface. Engage MOWER DRIVE BELT INSTALLATION parking brake. Lower attachment lift to its lowest position. Install belt around both mandrel...
-
Page 27: Belt Removal
TO REPLACE MOTION DRIVE BELT 4. Install belt on centerspan idler (E). 5. Install belt through stationary idler (C) Parkthetractoronlevel s urface.Engagepark- and clutching idler (D). ingbrake. Foreaseofservicethereis abeltin- 6. Reinstall anti-rotation link (B) on right stallationguidedecalonbottomofleftfootrest. side of tractor.Tighten securely. BELT REMOVAL- 7. -
Page 28: Replacing Battery
REPLACING BATTERY INTERLOCKS RELAYS _WARNING: Donotshortbatteryterminals Loose or damaged wiring may cause your by allowing a wrench or any other object to tractor to run poorly, stop running, or prevent contact both terminals at the same time. it from starting. Before connecting battery, remove metal •... - Page 29 system of an engine while in storage. Immediately prepare your tractor for storage at the end of the season or if the tractor will • Empty the fuel tank by starting the engine and letting it run until the fuel lines not be used for 30 days or more.
-
Page 30: Troubleshooting
TROUBLESHOOTING CHART: See appropriate section in manual unless directed to Sears service center PROBLEM CAUSE CORRECTION Out of fuel. Fill fuel tank. Will not start See "TO START ENGINE" in Engine not "CHOKED" properly. Operation section. Wait several minutes before Engine flooded. - Page 31 TROUBLESHOOTING CHART: See appropriate section in manual unless directed to Sears service center CAUSE PROBLEM CORRECTION Weak or dead battery. Recharge or replace battery. Engine clicks will not start Corroded battery terminals. Clean battery terminals. Loose or damaged wiring. Check all wiring. Faulty solenoid or starter.
- Page 32 TROUBLESHOOTING CHART: See appropriate section in manual unless directed to Sears service center PROBLEM CAUSE CORRECTION Poor cut - uneven Worn, bent or loose blade. Replace blade. Tighten blade bolt. cutting Mower deck not level. Level mower deck. Clean underside of mower Buildup of grass, leaves, and trash under mower.
- Page 33 TROUBLESHOOTING CHART: See appropriate section in manual unless directed to Sears service center PROBLEM CAUSE CORRECTION Battery will Bad battery cell(s). Replace battery. charge Poor cable connections. Check/clean all connections. Faulty regulator (if so equipped). Replace regulator. Faulty alternator. Replace alternator.
-
Page 34: Suggested Guide For Sighting Slopes For Safe Operation
SUGGESTED GUIDE FOR SIGHTING SLOPES FOR SAFE OPERATION ONLY RIDE UP AND DOWN HILL, NOT ACROSS HILL 15 DEGREES MAX. WARNING: To avoid serious injury, operate your tractor up and down the face of slopes, never across the face. Do not mow slopes greater than 15 degrees. - Page 35 Identificaci6n de Problemas ......Servicio Sears ......... Contratapa GARANTiA LIMITADA DE CRAFTSMAN DOS A_IOS PARA TRACTORES Si opera y mantiene este tractor segOn todas las instrucciones provistas, y este deja de funcionar debido a defectos del material o de la mano de obra dentro de los dos aflos posteriores...
- Page 36 _PELIGRO: Esta Maquina cortadora es capaz de arnputar las rnanosy los pies y de lanzar objetos, si no se observan las instrucciones de seguridad siguientes se pueden producir lesiones graves o la muerte. • No hacer funcionar la m&quina sin el captador _a_DVERTEN ClA: Siempre desconecte el alam- de hierba entera, la protecci6n de descarga u...
- Page 37 Escoger una velocidad de marcha baja de • Seguir las recomendaciones del productor con modo que no sea necesario pararse o cambiar respecto a los limites del equipo por remolcar estando en una pendiente. y el remolque en pendientes. No cortar la hierba mojada. Las ruedas pueden Nunca permitir que niflos u otras personas perder tracci6n.
- Page 38 • Mantener la m@.quina libre de hierba, hojas • Las cuchillas del cortac@sped son afiladas. u otros residuos acumulados. Limpiar Envolver la cuchilla, ponerse guantes y poner salpicaduras de aceite o carburante y quitar la m_.xima atenci6n cuando se hacen opera- clones en elias.
- Page 39 Capacidad y Tipo 4 Galones de gasolina: Regular Sin PIomo Congratulaciones pot su buena compra. Su nuevo producto Craftsman<R_est& diseflado y fabricado Tipo de Aceite: SAE 10W30 (Sobre 32°F) para funcionar de modo fiable por muchos aflos. API-SG-SL) SAE 5W30 (Debajo 32°F)
- Page 40 Rueda delantera de la segadore (1) Rueda (1) Tuerca Seguridad 3/8-16 (1) 1-1/40.D. Arandela (5) Resorte de Retenci6n Antioscilaci6n ) Barra (1) 3/40.D. Arandela 1) Montaje de la pieza (2) Resorte de Retenci6n de uni6n deantera (2) Rear Lift Link Assemblies (5) 1-3/16 O.D.
- Page 41 Su tractor nuevo ha sido montado en la f&brica con la excepci6n de aquellas partes que no se han montado por razones de envio. Cuando en este manual se mencionan los terminos AJUSTE EL ASIENTO "mano derecha" o "mano izquierda" se refiere a Sientese sobre el asiento.
- Page 42 RUEDA DELANTERA COR- Desiice la SEGADORA por debajo del tractor TADORA hasta que quede bien centrada debajo de este. INSTALE PRIMERO LA BARRA ANTI-BAL- Utilizando un bul6n curvo, una arandela ANCEO (S). una tuerca de sujeci6n, fije la rueda delantera Pot el lado derecho de la cortadora de la cortadora,...
- Page 43 FIJE LAS PIEZAS DE PROPULSION POS- TERIORES (C) - Levante la parte posterior de la cortadora, ubique la ranura de la pieza de uni6n por encima de la clavija que hay en la barra posterior de la cortadora (D) y fijela con una arandela y un resorte de contenci6n.
- Page 44 REVISION DE LA PRESION DE LAS LLANTAS I#fLISTA DE REVISION Las Ilantas en su unidad fueron infladas masiado en la f&brica por razones de envio. La Antes de operar y de disfrutar de su tractor nuevo, le deseamos que reciba el mejor rendimiento y la presi6n de las Ilantas correctas es importante...
- Page 45 Estos simbolos pueden aparecer sobre su tractor o en la literatura proporcionada con el producto. Aprenda y comprenda sus significados. ESTRANGU- MARCHA ATRAS NEUTRO ALTO BAJO RAPIDO LENTO LACION (®) MOTOR FRENO DE ALTURA DE LA LEVANTAMIENTO MOTOR MOTOR APAGADO SISTEMA ESTACIONAMIENTO SEGADORA...
- Page 46 FAMIMARICESE CON SU TRACTOR LEA ESTE MANUAL DEL DUENO Y LAS REGLAS DE SEGURIDAD ANTES DE OPERAR TRACTOR Compare las ilustraciones con su tractor para familiarizarse con las ubicaciones de los diversos controles y ajustes. Guarde este manual para referencia en el futuro. Nuestros tractores cumplen con los est&ndares de seguridad del American National Standard Institute.
- Page 47 La operaci6n de cualquier tractor puede hacer que salten objetos extrahos dentro de sus ojos, Io que puede producir dahos graves en estos. Siempre use anteojos de seguridad o protecciones para los ojos mientras opere su tractor o cuando haga ajustes o reparaciones.
- Page 48 MOVERSE HACIA ADELANTE Y HACIA PARA AJUSTAR LA ALTURA ATR._,S CORTE DE LA SEGADORA La direcci6n y la velocidad de movimientos est&n La posici6n de la indicador de altura(W) determina controlados por los pedales de marcha adelante a que altura se cortar& el c6sped. y atr&s, Poner en marcha el tractor y quitar el freno de mano.
- Page 49 PARA AJUSTAR RUEDAS PARA PARAR CUCHILLAS DE LA CALIBRADORAS SEGADORA Las ruedas calibradoras est&n bien ajustadas • desenganche el control del embrague cuando se encuentran un poco a distancia accesorio. terreno al mismo tiempo que la segadora este a _PREOAUOI6N: No opere la segadora sin, la altura de corte deseada.
- Page 50 PARA TRANSPORTAR PARA OPERAR EN CERROS Cuando empuje o arrastre su tractor aseg0rese _ADVERTENClA: No maneje hacia arriba o ha- de desenganchar la transmisi6n poniendo cia abajo en cerros con pendientes superiores a control de la rueda libre en la posici6n de marcha 15 °...
- Page 51 AGREGUE GASOLINA AVISO: Antes de arrancar, lea las instrucciones siguientes para el arranque en clima frio y templado. • Llene el estanque de combustible. Llene Inserte la Ilave en la ignici6n y gire la Ilave en hasta la parte inferior del cuello de relleno del el sentido que giran las manillas del reloj a la estanque de gasolina.
- Page 52 RGAR LA TRANSMISION CONSEJOS PARA SEGAR PRECAUCl6N: Nunca enganche o desen- • No se pueden usar las cadenas para las Ilantas ganche la palanca del control de rueda libre cuando la caja de la segadora est& adjunta al cuando el motor esta funcionando. tractor.
-
Page 53: Antes De Cada Uso
PROGRAMA DE ANTES DE CADA CADA CADA CADA CADA ALMACENAMIENTO TEMPORADA MANTENIMIENTO CADA USO HORAS HORAS HORAS HORAS i Revisar la operaci6n del freno Revisar la presion de las llantas V@ifi_z ia commande de presence d'op@ateur et le sistema d ROS i Revisar si hay sujetadores sueltos Afiiar/cambiar... - Page 54 CUiDADO DE LA CUCHILLA TRACTOR Para obtener resultados 6ptimos, las cuchillas Siempre observe las reglas de seguridad cuando de mantenimiento. de la cortadora deben estar afiladas. Reemplace las cuchillas que esten gastadas, dobladas OPERACION DEL FRENO dafladas. Si el tractor necesita m&s de cinco (5) pies para detenerse a la m&xima velocidad al cambio m&s _PRECAUCI6N: Usar solamente...
- Page 55 BATERiA Enrosque el adaptador de la boquilla (empa- quetado con el manual del operador del trac- Su tractor cuenta con un sistema de carga de la tor) en el extremo de la manguera del jardin. bateria que es suficiente para el uso normal. Sin Eche hacia atr&s la abrazadera de cierre del embargo, si se carga la bateria peri6dicamente,...
- Page 56 CORREAS Abra la v&lvula de desagQe empujando hacia dentro y dando vuelta a la izquierda. Revise las correas V para verificar si existe Para abrirse, tire hacia fuera la v&lvula de deterioro y desgaste despues de 100 horas de desagQe. operaci6n y c&mbielas si es necesario.
- Page 57 FILTRO DE COMBUSTIBLE EN LINEA Libere el cierre (C) y remueva el elemento. Golpee ligeramente el elemento de papel para El filtro de combustible debe cambiarse una vez desalojar la suciedad. cada temporada. Si el filtro de combustible Limpie todos las partes del filtro de aire de tapona, obstruyendo el flujo del combustible hacia cualquier suciedad o material acumulada.
- Page 58 ADVERTENClA:PARA EVITAR LESI6NES SERIAS, ANTES DE DAR CUALQUIER SERVIClO O DE HACER AJUSTES: • Presione el pedal de freno completamente y aplique el freno de estacionamiento, 2. Ponga el embrague del accesorio en la posici6n desenganchado (DISENGAGED). 3. Ponga la Ilave de ignici6n en la posici6n de apagado (STOP) y remuevala. 4.
- Page 59 PARA NIVELAR LA SEGADORA En case que sea necesario realizar un ajuste, lea los pasos 2 y 3 de las instrucciones AsegOrese de que los neum&ticos esten inflados Regulaci6n visual que aparecen m&s arriba. a la PSI que se indica en estos. Si est&n demasi- Vuelva a verificar las medidas y ajuste nueva- ado inflados o poco inflados, el cesped no le que- mente, en caso necesario,...
- Page 60 PARA REEMPLAZAR CORREA Retire la correa de la polea del embrague TRANSMISION DE LA CUCHILLA DE LA electrico (M), las dos poleas de los disposi- SEGADORA tivos de recolecci6n (R) y las poleas de los pihones (V). DESMONTAJE DE LA CORREA DETRANSMIS- MONTAJE DE LA CORREA DE TRANSMISION 10N DE LA SEGADORA DE LA SEGADORA...
- Page 61 PARA VERIFICAR EL FRENO Desconecte etarnes det cable det embrague (A). Quite la pieza de uni6n anti-rotaci6n (B) que \Si el tractor necesita m&s de cinco (5) pies para est& det Iado derecho det tractor. detenerse a la m&xima velocidad y al cambio m&s Retire Ia correa det pifl6n estacionario (C) y alto en una superficie nivelada, de hormig6n o pavi-...
- Page 62 PARAAJUSTAR EL AMNEAMIENTO DEL PARA CAMBIAR EL FUSIBLE VOLANTE DE DIRECCK_N C&mbielo pot un fusible tipo enchufable de 30 Si las barras transversales del volante de amps, tipo automotriz. El sujetador del fusible est& ubicado detr&s del tablero. direcci6nno est&n horizontales(izquierdaa derecha),cuando las ruedas esten derecho PARA CAMBIAR...
- Page 63 Inmediatamente prepare su tractor para el alma- • Vaciar el dep6sito del carburante poniendo en cenamiento al final de la temporada o si el tractor marcha el motor y dej&ndolo funcionar hasta que el carburante termine el carburador este vacfo. no se va a usar pot 30 dias o m&s.
- Page 64 IDENTIFICACION DE PROBLEMAS: Yea la secci6n apropiada en el manual a menos que est6 dirigido a un centro de servicio Sears. PROBLEMA CAUSA CORRECCK_N Sin combustible. NO arranca 1. Llene el estanque de combustible. Motor sin la "ESTRANGULACION' 2. Vea "PARA ARRANCAR EL MOTOR (CHOKE) adecuada.
- Page 65 IDENTIFICACI6N DE PROBLEMAS: Yea la secci6n apropiada en el manual a menos que est6 dirigido a un centro de servicio Sears. CAUSA PROBLEMA CORRECClON P_rdida de fuerza 3. Acumulaci6n de cesped, hojas y 3. Limpie la parte inferior de la caja (continuado) basura debajo de la segadora.
- Page 66 IDENTIFICACI6N DE PROBLEMAS: Yea la secci6n apropiada en el manual a menos que est6 dirigido a un centro de servicio Sears. PROBLEMA CAUSA CORRECClON Las cuchillas 3. Polea de guia atascada. Cambie la polea de guia. 4. Mandril de la cuchilla atascado. segadoras no rotan Pongase en contacto con un...
- Page 67 GUiA SUGERIDA PARA MEDIR LAS PENDIENTES CON LA VISTA PARA UNA OPERACI()N SEGURA SOLAMENTE ANDE CUESTA ARRIBA O CUESTA ABAJO Y NO ATRAVIESE EL CERRO 15 GRADOS MAX. DVERTENCIA: Para evitar dafios graves, haga fancionar su tractor arriba y abajo de las pendientes, nunca transversaimente con respecto alas pendientes.
-
Page 68: Need More Help
NEED MORE HELP? You'[[ iii1d them sweY and mo e<m managemyhomeo{Om - forh ee[ Find this anda[[ yourother product m anuals o nline. 6etanswers f romourteamofhome experts. Geta personalized maintenance plan for yourhome. Your Home For repair - in your home - of all major brand appliances, lawn and garden equipment, or heating and cooling systems, no matter who made it, no matter who sold it!