Table of Contents
Advertisement
Available languages
Available languages
Owner's Manual
CRIIFTSMRN°
I'l'l*l
ROTARY LAWN MOWER
6.5 Horsepower
Power-Propelled
21" Rear Discharge
Model No.
917.377661
• EspaSol, p. 19
CAUTION'.
Read and follow all
Safety Rules and Instructions
before operating this equipment
Sears, Roebuck and Co., Hoffman Estates, IL 60179
Visit our Craftsman website: www.sears.com/craftsman
U.S.A.
Advertisement
Table of Contents

Related Manuals for Craftsman 917.377661


Summary of Contents for Craftsman 917.377661
- Page 1 6.5 Horsepower Power-Propelled 21" Rear Discharge Model No. 917.377661 • EspaSol, p. 19 CAUTION'. Read and follow all Safety Rules and Instructions before operating this equipment U.S.A. Sears, Roebuck and Co., Hoffman Estates, IL 60179 Visit our Craftsman website: www.sears.com/craftsman...
- Page 2 Warranty service is available by returning the Craftsman power mower to the nearest Sears Parts & Repair Center in the United States. This warranty applies only while this product is used in the United States.
- Page 3 I. GENERAL OPERATION Ii. SLOPE OPERATION ,, Read, understand, and follow all Slopes are a major factor related to slip instructions on the machine and in the and fall accidents which can result in manual(s) before starting. Be thoroughly severe injury. All slopes require extra cau- familiar with the controls and the proper tion.
- Page 4 Record both serial number and date of purchase in space provided above. Repair Protection Agreements Congratulations on making a smart pur- Fast help by phone - phone support chase. Your new Craftsman® product is from a Sears technician on products designed and manufactured for years of requiring in-home repair, plus conve- dependable operation.
- Page 5 These accessories were available when this lawn mower was produced. They are not shipped with your mower. They are also available at most Sears retail outlets and service centers. Some of these accessories may not apply to your lawn mower. LAWN MOWER PERFORMANCE CLIPPING...
- Page 6 Read these instructions and this manual in Operator presence its entirety before you attempt to assemble control bar or operate your new lawn mower. Upper handle IMPORTANT: This lawn mower is shipped WITHOUT OIL OR GASOLINE in the engine. Your new lawn mower has been as- LIFT sembled at the factory with the excep- tion of those parts left unassembled...
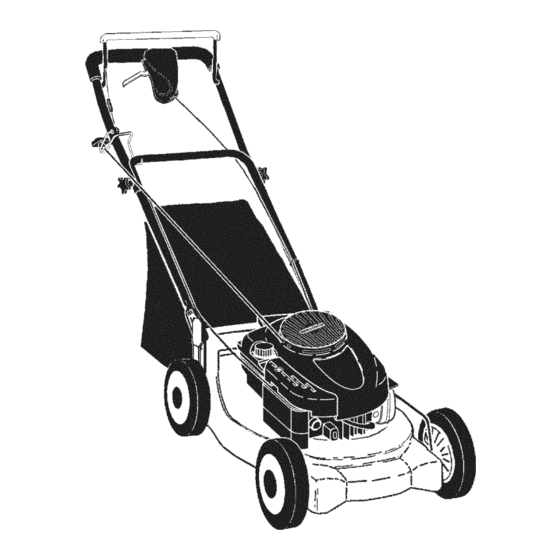
- Page 7 KNOW YOUR LAWN MOWER READ THIS OWNER'S MANUAL AND ALL SAFETY RULES BEFORE OPERATING YOUR LAWN MOWER. Compare the illustrations with your lawn mower to familiarize yourself with the location of various controls and adjustments. Save this manual for future reference. These symbols may appear on your lawn mower or in literature supplied with the...
- Page 8 DRIVE CONTROL ADJUSTMENT The operationof any lawn SAFETVG'ASSES mowercan result in foreign Over time, the drive control system may be- come "loose", resulting in decreased speed. objects thrown into the There is a button on the underside of the drive eyes, which can result in control housing to increase tension on the severe eye damage.
- Page 9 Rear door slots BEFORE STARTING ENGINE Grass ADD OIL catcher Your lawnmower is shipped without oil in handle the engine. For type and grade of oil to use, see "ENGINE" in the Maintenance section of this manual. CAUTION: DO NOT overfill engine with oil, or it will smoke heavily from the muffler on startup.
- Page 10 TO STOP ENGINE • Keep top of engine around starter clear and clean of grass clippings and chaff. • To stop engine, release operator pres- This will help engine air flow and extend ence control bar. engine life. TO START ENGINE MULCHING MOWING TIPS...
- Page 11 AS YOU COMPLETE _/,_£0_ SEr.RV/C E REGULAR SERVICE /_r/,_/_,._ _)£:_¢._/'_.._y_ J f" DATES Lubrication Check Tires Check Drive Wheels (Power-Propelled Mowers) Check for Loose Fasteners Clean/Inspect Grass Catcher (If Equipped) Clean Lawn Mower Clean Under Drive Cover (Power-Propelled Mowers) Check drive belt/pulleys (Power-Propelled Mowers) Check/Sharpen/Replace...
- Page 12 LAWN MOWER Blade adapter Crankshaft Always observe safety rules when per- Key _ keyway forming any maintenance. TIRES Blade Lo_kwasher . Keep tires free of gasoline, oil, or insect control chemicals which can harm rub- ber. . Avoid stumps, stones, deep ruts, sharp objects and other hazards that may cause tire damage.
- Page 13 AIR FILTER NOTE: Although multi-viscosity oils (5W30, 10W30 etc.)improve starting in Your engine will not run properly and may cold weather, these multi-viscosity oils will be damaged by using a dirty air filter. result in increased oil consumption when Replace the air filter cartridge every 100 hours of operation or every season, which- used above 32°F.
- Page 14 CLEAN UNDER DRIVE COVER • Keepfinished surfaces and wheels free of all gasoline,oil, etc. Clean under drive cover at least twice a • We do not recommend using a garden season. Scrape underside of cover with hose to clean lawn mower unless the putty knife or similar tool to remove any electrical system, muffler,air filter and build-up of trash or grass on underside of...
- Page 15 9. Be sure the trailing edge of blade (op- posite sharp edge)is up toward the engine as shown. 10. Installthe blade bolt with the lock washer and hardened washer into blade adapter and crankshaft. 11.Use block of wood between blade and Handle lawn mower housing and tighten the bracket...
- Page 16 HANDLE gum deposits from forming in essential fuel system parts such as carburetor, fuel You can fold your lawn mower handle for storage. filter, fuel hose, or tank during storage. NOTE: The upper handle has an "anti-fold" Also, alcohol blended fuels (called gasohol bracket located on the right side of the or using ethanol or methanol) can attract handle.
-
Page 17: Troubleshooting
TROUBLESHOOTING =See appropriate section in manual unless directed to a Sears Service Center. PROBLEM CAUSE CORRECTION Does not start 1. Dirty air filter. 1. Clean/replace air filter. 2. Out of fue!. 2. Fill fuel tank. 3. Stale fuel. 3. Empty fuel tank and refill tank with fresh, clean gasoline. - Page 18 TROUBLESHOOTING - See appropriate section in manual unless directed to a Sears Service Center. PROBLEM CAUSE CORRECTION Poor cut- 1. Worn, bent or loose blade. 1. Replace blade. Tighten uneven blade bolt. 2. Set all wheels at same 2. Wheel heights uneven. height.
- Page 19 El servicio de garantia esta disponible al devolver la segadora a motor Craftsman al Centro de Servicio Sears mas cercano en los Estados Unidos. Esta garantia se aplica solamente mientras el producto este en uso en los Estados Unidos.
- Page 20 I. OPERAClON HACER: • Puede recortar a traves de la superficie de • Antes de empezar, debe familiarizarse comple- tamente con los controles y el uso correcto de la cuesta, nunca hacia arriba y hacia abajo. la maquina. Para esto, debe leer y comprender Proceda con extrema precauci6n cuando todas las instrucciones que aparecen en la ma- cambie de direcci6n en las cuestas.
- Page 21 Congratulaciones por su buena compra. Ayuda rapida por telefono - soporte tele= nuevo producto Craftsman® esta dise_ado f6nico por parte de un tecnico Sears sobre y fabricado para funcionar de modo liable pot productos que requieren un arreglo en casa, muchos afios.
- Page 22 Estos accesorios estaban disponibles cuando se produjo la segadora. No son facilitados junto cortacesped. Tambien estan disponibles en la mayoria de las tiendas de Sears yen los centros de servicio. Algunos de estos accesorios tal vez no se apliquen a su segadora. RENDIMIENTO DE LA SEGADORA DESVIADOR...
- Page 23 Lea estas instrucciones y este manual comple- Barra de control que sxic la presencia det operador tamente antes de tratar de montar u operar su Mango superior segadora nueva. IMPORTANTE: Este cortacesped viene SIN ACEITE O GASOLINA en el motor. Mango Inferior Su segadora nueva ha sido montada en la LEVANTAR...
- Page 24 FAMILIARICESE CON SU SEGADORA LEA ESTE MANUAL DEL DUENO Y LAS REGLAS DE SEGURIDAD ANTES DE OPARAR SU SEGADORA. Compare las ilustraciones con su segadora para familiarizarse con la ubicaci6n de los diversos controles y ajustes. Guarde este manual para referencia en el futuro. Estos simbolos pueden apareser sobre su segadora...
- Page 25 Tirar la palanca de accionamiento TODO La operaci6n de cualquier ATRAS HACIA el mango. segadora puede hacer que SEGURIDAD Empujar el bot6n en la parte trasera del salten objetos extrafios dentro de mando. Con el bot6n apretado, revuelva la sus ojos, Io que puede producir palanca de controles del mecanismo impul- dafios graves en estos.
- Page 26 PARA VAClAR EL RECOGEDOR DE ClaSPED 1. AsegQrese que la segadora este nivelada. Remueva la varila medidora de aceite del tubo Levante el recogedor de cesped usando el mango del bastidor. de desarga de aceite. Usted recibe un envase de aceite con la Remueva el recogedor de cesped,...
- Page 27 PARA PARAR EL MOTOR • Mantenga la parte superior del motor, alred- • Para parar el motor, suelte la barra de con- edor del arrancador, despejada y sin recortes troles que exigen la presencia del operador. de cesped y paja. Esto ayudara el flujo del aire del motor y extendera su duraci6n.
- Page 28 COMPLETE SU SERV,C,O REGULAR oE s E.v,c,oS Lubricaci6n Controlar los neumaticos Controlar las ruedas motrices (segadoras con poder propulsor) I #4 Revisar si hay sujetadores sueltos Limpiar/inspeccionar el recogedor de c_sped (si viene equipado) Limpiar la segadora I# # Limpiar debajo de la cubierta de la trans- misi6n (segadoras con poder propulsor) I# # sadas (segadoras con poder propulsor)
- Page 29 SEGADORA Adaptador de ta / ciguenal Siempre observe las reglas de seguridad cu- Ranura _ ando haga el mantenimiento. Arandeta de seguridad LLANTAS Cuchitla • Mantenga las Ilantas sin gasolina, aceite o substancias quimicas para control de Jnsec- tos que pueden daSar la goma. •...
- Page 30 Cambieel aceitedespues de 25horasde A_PRECAUCI6N: Los solventes de petrdleo, operaci6n o porIomenosunavezal afiosi la tales como el keroseno, no se deben usar para segadora seutilizamenos25 horasel afio. limpiar el cartucho. Pueden producir el deterioro Revise elnivel d elaceite delcarter antesdearran- de este.
- Page 31 _:_I, ADVERTENClA: Para evitar lesi6nes serias, Ciguefial .._ '_i i Adaptador Orificio en de ta antes de dar calquier servico o de hacer ajustes: et bastidor cuchitla Suelte la barra de control y pare el motor. AsegOrese q ue la cuchilla y que todas las partes movibles se hayan detenido completamente.
- Page 32 PARA AJUSTAR EL MANGO MOTOR EImangodesusegadoracuentacontres(3)posicio- VELOCIDAD DEL MOTOR nesdealtura-ajQstelo a laaltura queleacomode. La velocidad del motor ha sido ajustada en la fa- • Presione lasextremidades inferiores delmando brica. No trate de aumentar la velocidad del motor inferior unaencontraunadela otrahastaque pues se pueden producir lesiones personales.
- Page 33 ACEITE DEL MOTOR MOTOR SISTEMA DE COMBUSTIBLE Drene el aceite (con el motor caliente) y cambielo con aceite de motor limpio. (Vea "MOTOR" en la IMPORTANTE: Es importante evitar que secci6n de Mantenimento de este manual). se formen depositos de coma en partes fundamentales del sistemade combustible tales como el carburador, el filtro del combustible,...
- Page 34 SOLUCION DE PROBLEMAS - Vea la secci6n apropiada en el manual amenos est_ dirigido a un centro de servico Sears. CAUSA PROBLEMA CORRECCION Falta de Eleve la altura de corte. 1. Cuchilla desgastada, doblada fuerza o suelta. Eleve la altura de corte. Altura de las ruedas dispareja.
- Page 35 CRAFTSMAN ROTARY LAWN MOWER - - MODEL NUMBER 917.377661 GEAR CASE ASSEMBLY - PART NUMBER 187213 PART DESCRIPTION 187530 Case, Lower 187531 Case, Upper 187532 Gear, 24Teeth 187533 Shaft, Input 183505 Wi_,Formed 183506 Bearing, Ball 183508 Seal, Output Shaft 183509...
- Page 36 CRAFTSMAN ROTARY LAWN MOWER - - MODEL NUMBER 917.377661...
- Page 37 CRAFTSMAN ROTARY LAWN MOWER - - MODEL NUMBER 917.377661 PART PART DESCRIPTION DESCRIPTION 182724 Handle, Upper, with Grip 85463 Danger Decal 161105X479 Handle, Lower 179783X004 Idler Bracket Assembly 182748 Grip, Foam 57808 Screw 186079 Rope Guide /Anti-Fold Bracket 166042 V-Groove Pulley...
- Page 38 CRAFTSMAN ROTARY LAWN MOWER - - MODEL NUMBER 917.377661 28 27...
- Page 39 CRAFTSMAN ROTARY LAWN MOWER - - MODEL NUMBER 917.377661 PART PART DESCRIPTION DESCRIPTION 181232 Decal, Drive Control 83923 Nut, Hex, Flangelock 3/8-16 181233 Decal, Drive Control Operation 180626 Hubcap, Mag, Platinum 180612 Cable, Drive 160785X004 Shaft Assembly, Rear 182494 Decal, Drive Control Adjustment...
- Page 40 BRIGGS & STRATTON 4-CYCLE ENGINE MODEL NUMBER 123K02=0258-E1 8471 I 1019 LABEL KI'I] 383_ 718_ 281_...
- Page 41 BRIGGS & STRATTON 4-CYCLE ENGINE MODEL NUMBER 123K02=0258-E1 443_ 163_ 358 ENGINE GASKET SET 3© 20 _ 842_ 163 "_ 58.= 977 CARBURETOR GASKET SET 633 O 7_633 276(_ 121 CARBURETOR OVERHAUL KIT 276_ 127_ 130 95 1341 _ 633 G 118 I...
- Page 42 BRIGGS & STRATTON 4-CYCLE ENGINE MODEL NUMBER 123K02=0258-E1 615 O 505 ° 616_ 334_ 3331 4,9 1 1036 EMISSIONS LABEL PART PART DESCRIPTION DESCRIPTION 697322 690912 Cylinder Assembly Screw (Cylinder Head) 399269 691680 Kit-Bushing/Seal Plug-Oil Drain 299819 691450 Crankshaft • Seal-Oil (Magneto Side) 493279 399781 Sump-Engine...
- Page 43 BRIGGS & STRATTON 4-CYCLE ENGINE MODEL NUMBER 123K02=0258-E1 PART PART DESCRIPTION DESCRIPTION 499425 Ring Set-Piston (Standard) 692523 Screw (Air Cleaner Primer Base) 499426 Ring Set-Piston (.010" Oversize) 491588 Fitter-Air Cleaner Cartridge 499427 Ring Set-Piston (.020" Oversize) 691219 Cup-Flywheel Plate-Pawt Friction 499428 Ring Set-Piston (.030"...
- Page 44 Your Home For repair - in your home - of all major brand appliances lawn and garden equipment, or heating and cooling systems, no matter who made it, no matter who sold it! For the replacement parts, accessories owner's manuals that you need to do-it-yourself. For Sears professional installation of home appliances...