Table of Contents
Advertisement
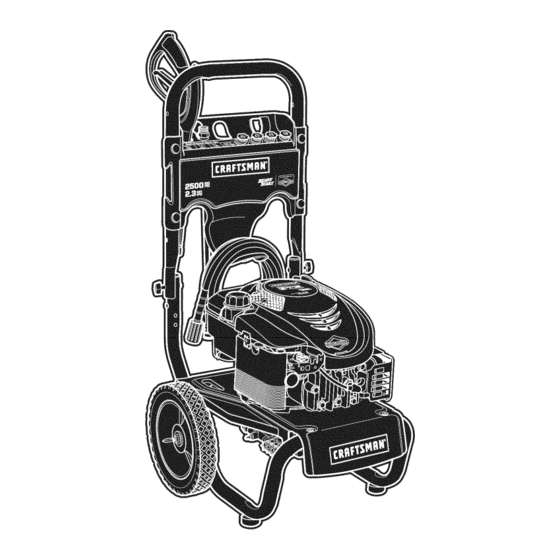
Operator's IVianual
®
2500 PSi iViAX
2.3 GPiVi M AX
iViodelNo. 580.752500
HOURS: IVlon. - Fri. B a.m. to 5 p.m. (CT)
WARNING
Before using this product, read this
manual and follow all Safety Rules
and Operating instructions.
ADVERTENCIA
Antes de utilizar el producto, lea este
manual y siga todas las Reglas de
Seguridad e Instrucciones de Uso.
,, Safety
,, Assembly
,, Operation
,, iVlaintenance
,, Parts
,, Espafiol,p. 28
This pressure washer is rated in accordance to the Pressure Washer Manufacturers Association
(PWMA) standard PWl01 (Testing and Rating Performance of Pressure Washers).
Esta limpiadora a presiOnest_ clasificada conforme a la norrna PWl01 (comprobaciOn y clasificaciOn de rendimiento de limpiadoras
a presiOn) de la AsociaciOn de fabricantes de bombas a presiOn (Pressure Washer Manufacturers Association, PWMA).
Sears, Roebuck and Co., HoffrnanEstates,IL 60179 U.S.A.
Visit our Craftsman website: www.craftsman.com
Part No. 311098GS Draft - (10/07/2009)
Advertisement
Table of Contents

Related Manuals for Craftsman 580.752500


Summary of Contents for Craftsman 580.752500
- Page 1 Esta limpiadora a presiOnest_ clasificada conforme a la norrna PWl01 (comprobaciOn y clasificaciOn de rendimiento de limpiadoras a presiOn) de la AsociaciOn de fabricantes de bombas a presiOn (Pressure Washer Manufacturers Association, PWMA). Sears, Roebuck and Co., HoffrnanEstates,IL 60179 U.S.A. Visit our Craftsman website: www.craftsman.com Part No. 311098GS Draft - (10/07/2009)
- Page 2 CRAFTSMAN LIMITEDWARRANTY If this Craftsman product fails due to a defect in material or workmanship within two years from the date of purchase, return it to any Sears store, Sears Parts & RepairService Center, or other Craftsman outlet in the United Statesfor free repair (or replacement if repair proves impossible).
- Page 3 Read this manual carefully and becomefamiliar _i, WARNING The engine exhaust from this product with your pressurewasher. Knowits applications, contains chemicals known to the State of California to its limitations, and any hazards involved. cause cancer, birth defects, or other reproductive harm. important Safety I.formation _i, WARNING This product contains lead and lead...
- Page 4 A. WARNING Starter cord kickback (rapid retraction) can A. WARNING Fuel and its vapors are extremely flammable and explosive. result in bodily injury. Kickback will pull hand and ,_arm toward engine faster than you can let go. Fire or explosion can cause severe burns or death.
- Page 5 A, WARNING Risk of eye injury. _i, WARNING Use of pressure washer can create Spray can splash back or propel objects. Kickback from spray gun can cause you puddles and slippery surfaces. to fall. • Always wear indirect vented (chemical splash) safety goggles •...
- Page 6 KNOWYOURPRESSURE WASHER Read the Operator's Manual and safety rules before operating your pressure washer. Comparethe illustrations with your pressure washer to familiarize yourself with the locations of various controls and adjustments. Savethis manual for future reference. A - Spray Gun-- Controls the application of water onto L =AutomaticCool DownSystem -- Cycles water through cleaning surface with trigger device, includes trigger lock.
- Page 7 6. if any parts are missing or damaged, call the pressure washer helpline at 1-800-222-3136. ASSEMBLING PRESSURE WASHER Your Craftsman pressure washer will need assembly before operation: insert multi-colored Quick Connect spray tips and other Fill out and send in registration card.
- Page 8 AddEn!tine(Ill Cleanarea around fuel fill cap, remove cap. Place pressure washer on a flat, level surface. Slowly add regular unleaded fuel (A) to fuel tank (B). Be careful not to overfill. Allow about 1.5" (4 cm) (O) of tank Cleanarea around oil fill and remove yellow oil fill space for fuel expansion.
- Page 9 NOTICE Fresh Start® fuel preserver cartridge is available as an optional accessory, retail item7133386. It is not included with the pressure washer. Contact the original equipment manufacturer, retailer, or dealer to obtain a cartridge designed for the Fresh Start® fuel cap installed on this engine.
- Page 10 HOWTO USEYOURPRESSURE WASHER To Start YourPressureWasher To start your engine-powered pressure washer for the first If you have any problems operating your pressure washer, time, follow these instructions step-by-step. This information please call the pressure washer helpline at 1-800-222-3136. also applies whenever you start the engine after you have let PressureWasher Location the pressure washer sit idle for at least a day.
- Page 11 NOTICE Before starting the pressure washer, be sure you _i, WARNING The high pressure stream of water that are wearing safety goggles as described below. this equipment produces can cut through skin _i, WARNING Risk of eye injury. and its underlying tissues, leading to serious injury and possible amputation.
- Page 12 NOTICE Spray gun traps high water pressure, even when Select desired spray tip: engine is stopped and water is disconnected. How to Use Accessory Tray Low Pressure The unit is equipped with an accessory tray with places to Black store your spray gun, spray tip extension and quick connect Use to apply spray tips.
- Page 13 Cleaningand ApplyingDetergent Keep the spray gun a safe distance from the area you plan to spray. A WARNING Chemical Burn Hazard. A WARNING Kickback from spray gun can cause you to Chemicals could cause bodily injury, property damage or death. fall.
- Page 14 ENGINE TECHNICAL iNFORMATiON PRODUCT SPECIFICATIONS This is a single cylinder, L-head, air cooled engine, it is a low PressureWasherSpecifications emissions engine. Max Outlet Pressure ....... 2,500 PSi In the State of California, Model 120000 engines are certified Max Flow Rate......2.3 GPM by the California Air Resources Board to meet emissions Detergent Mix ......
- Page 15 OWNER'SRESPONSiBiLiTiES Emissions Control Maintenance, replacement, or repair of the emissions Follow the hourly or calendar intervals, whichever occurs controldevices and systemsmay be performedby any non- first. More frequent service is required when operating in adverse conditions noted below. road engine repair establishment or individual. However, to obtain "no charge"...
- Page 16 Check Spray Gun and Spray Tip Extension O-Bino Maintenance Purchasean O-Ring RepairKit, item 7175116, at your local Examinehoseconnectionto spraygun and makesure it is Searsor by calling 1-888-4-1VlY-NOME ( 469-4663) or online at secure.Testtrigger by pressingit and makingsure it springs back into placewhenyou releaseit. Do not depress red button www.sears.com, it is not includedwith the pressurewasher.
- Page 17 CheckingOil Level Tip your pressure washer to drain oil from oil fill into a suitable container making sure you tip your unit away Oil level should be checked prior to each use or at least every from spark plug. When crankcase is empty, return 8 hours of operation.
- Page 18 AFTEREACHUSE Checkelectrode gap with wire feeler gauge and reset spark plug gap to recommended gap if necessary (see Water should not remain in the unit for long periods of time. Specifications). Sediments or minerals can deposit on pump parts and "freeze"...
- Page 19 WINTERSTORAGE Change O il While engine is still warm, drain oil from crankcase. Refill with recommended grade. See ChangingEngine Oil. NOTICE You must protect your unit from freezing Protect Pump temperatures. = Failure to do so will permanently damage your pump and render To protect the pump from damage caused by mineral your unit inoperable.
- Page 20 Problem Cause Correction Water inlet is blocked. Clear inlet. inadequatewater supply. Provide adequatewater flow. inlet hose is kinked or leaking. Straighten inlet hose, patch leak. Checkand clean inlet hose strainer. Clogged inlet hose strainer. Pump has following problems: Water supply is over IO0°F. Provide cooler water supply.
- Page 21 CRAFTSMAN2500 PSi Pressure Washer 580.752500 Main Unit m Exploded View and Parts List item Part # PartsNot Illustrated Description 206033GS BASE Part # Description R204650GS HANDLE 311098GS MANUAL-OPERATOR'S 311094GS BILLBOARD AB3061BGS OIL BOTTLE B1797GS CLIP 205411GS AXLE B2203GS KIT-HARDWAREHANDLE 794693 DECAL-Warning 202274GS PUMP...
- Page 22 ENGINE, Briggs & Stratton, 126T02 - ExpJodedView 1329 [sos SHORT BLOCK 615 0 404 _ 241_...
- Page 23 ENGINE, Briggs & Stratton, 126T02 - ExpJodedView 1095 VALVE GASKET 36 4o_ 27(__ ENGINE GASKET 51 _...
- Page 24 ENGINE, Briggs & Stratton, 126T02 - ExpJodedView 1211 1210 689 0 CARBURETOR OVERHAUL 1341 @ 163# 276_ 633A...
- Page 25 ENGIHE, Briggs & Stratton, t26T82 - Parts List Item Part# Description Item Part # Description 690940 Screw (Dipstick Tube) 697322 Cylinder Assembly 790830 Thermostat 399269 Kit-Bushing/Seal (Magneto Side) Muffler 790828 299819s Seal-Oil (Magneto Side) 791291 Housing-Blower 493279 Sump-Engine 691108 Screw (Blower Housing) 691160 Head-Cylinder 790836...
- Page 26 California, U.S. EPA,and Sears Emissions Sears EmissionsControl Warranty Provisions ControlWarranty Statement The following are specific provisions relative to your Emissions Control Warranty Coverage. it is in addition to the YourWarranty RightsAnd Obligations Searsengine warranty for non-regulated engines found in the Operator's Manual. The California Air Resources Board, U.S.
- Page 27 The warranty onemissions-related parts isasfollows: LookFor ReJevantEmissionsDurability Period and Air Index Information On Your Engine EmissionsLabeJ • Any warranted part that is not scheduled for replacementas required maintenancein the owner's Enginesthat are certified to meet the California Air Resources manual supplied, is warranted for the warranty period Board (CARB) Emissions Standard must display information stated above.
- Page 28 GARANTJA L llVliTADA DECRAFTSMAN Si este producto de Craftsman falla debido a defectos de materiales o mane de obra en el plazo de dos a_os a partir de la fecha de compra, devu_lvalo a cualquier aimac_n Sears, centre de reparaci6n y repuestos Sears, u otro punto de venta de Craftsman de los Estados Unidos para su reparaci6n gratuita o, en case de que _sta no sea posible, para su sustituci6n.
- Page 29 A. ADVERTENCIA El escape dei motor de este producto Leaestemanualminuciosamente y conozca a fondo las partes y el luncionamientodesurn_quina limpiadoraa contiene eiementos quimicos reconocidos en el Estado de presi6n.Conozca susaplicaciones, suslimitacionesy los California por producir c_.ncer,defectos de nacimiento u peligros involucrados, otros da_os de tipo reproductivo.
- Page 30 A AI:IVERTENCIALa gasolina y sus vapores son A ADVERTENCIA El retroceso (repliegue r_.pido) del extremadamenteinfiamables y cable del arrancador puede producir lesiones. El explosivos. retroceso impedir_, que el usuario suelte ei cable a El fuego o una explosi6n pueden causar tiempo y tirar_ de su mano y brazo hacia el motor.
- Page 31 AV/SO El rociado de alta presi6n puede da_ar elementos A. ABVERTENCIA El chorro de agua a alta presi6n que fr_.giles, incluyendo el vidrio. * NO dirija la pistola rociadora hacia un cristai cuando utiNcela los tejidos subcut_.neos, provocando iesiones de este equipo produce, puede atravesar ia piei y punta de rocio de roja de 0°.
- Page 32 CONOZCA SU iViAQUINA SISTEIViA DE LllViPIEZA Lea el IVlanuaidei Operario y las regias de seguridadantes de porter en marcha su sistema de iimpieza. Compare las ilustraciones con su sistema de limpieza para familiarizarse con las ubicaciones de los diferentes controles y ajustes. Guarde este manual para referencbs futuras.
- Page 33 Su sistema defimpieza requiere decierto e nsamble yestarA fista CO_SCte el Manubrio y Bandeja de Accesorios paraser usado_nicamente despu_s de haberdepositado el Coloque el manubrio (A) sobre los soportes del mismo (B) que combustible y el aceiterecomendado. ya est_n adheridos a la unidad principal. Aseg_rese de que los Si tiene problemas c oneJensambledesum_quina limpiadoraa orificios en el manubrio est_n alineados con los orificios en los presi6n,llamea Jalineadeayudade Jam_quina Jimpiadora a...
- Page 34 Limpie el _rea alrededor de la tapa de llenadodel combustible, Agregue Aceite de Motor retire latapa. Coioque la limpiadoraa presi6n en una superficie plana y nivelada. A_ada lentamente gasolina sin plomo (A) al dep6sito de combustible (B). NO a_adacombustible en exceso. Deje Limpie la zona de alrededor del orificio de Ilenadode aceite y aproximadamente 4 cm (1,5") de espacio (C) en el dep6sito quite el tap6n amarillo.
- Page 35 AVISO El cartucho de aditivo para combustible Fresh Start® est_ disponible como un accesorio opcional, n_mero de cat,logo 7174403. No est_ inciuido en la limpiadora a presi6n. P6ngase en contacto con el fabricante del equipo original, el vendedor o el distribuidor para obtener un cartucho diseSadopara el tap6n de combustible Fresh Start®...
- Page 36 COIViO USARSU SISTEIViA DELliViPIEZA Para Porter en Marcha el Sistema de Limpieza Para darle arranque a su sistema de limpieza movido a motor por Si tiene problemas con el funcionamiento de su m_quina limpiadora primera vez, siga estas instrucciones paso a paso. Esta informaci6n a presi6n, por favor liame a la linea de ayuda de la m_quina acerca de la puesta en marcha inicial tambi_n es v_lida para cuando limpiadora a presi6n al 1-800-222-3136,...
- Page 37 AVISO Antesde arrancarla limpiadora a presi6n,aseg_rese de 11. Jale la cuerda de arranque lentamente.NO permita que la cuerda regrese bruscamenteen contra del arrancador. ponersegafasde seguridadcomose describe a continuaci6n. AVISO Siempre mantenga la control de v_lvula de regulaci6n en el A. ADVERTENCIA Riesgo de lesiones oculares. "Rdpido"...
- Page 38 C6moDetenersu Sistemade Limpieza C6mousar las puntasde rocio Suelte el gatillo de la pistola rociadora y deje funcionar el La conexi6n r_pida de la extensi6n para boquillas le permite usar motor al ralenti durante dos minutos. tres puntas de rocio diferentes. Siempre que est6 activado el seguro del gatillo de la pistola rociadora, se pueden cambiar las puntas de Mueva el acelerador a la posici6n "Slow"...
- Page 39 • Para aplicar productos detergentes o limpiadores Marcha el motor siguiendo las instrucciones de la secci6n especificos que ayuden a descomponer la suciedad C6mo poner en funcionamiento la limpiadora a presi6n. rebelde en distintas superficies, seleccione la punta de Aplique el detergente sobre la superficie seca, comenzando en rociado de detergente negra.
- Page 40 Limpieza del tubo de inyecci6n de detergente A ADVERTENCIA El chorro de agua a alta presi6n que Si us6 el tubo, debe lavaflocon agua limpiaantes de parar el motor. este equipo produce, puede atravesar ia piei y Coloque el filtro y la inyecci6n de detergente en un balde Ileno los tejidos subcut_.neos,provocando iesiones de gravedad que podrian dar lugar a la amputaci6n de agua limpia.
- Page 41 INFORMACION TECNICA SOBREEL ESPECIFICACIONES DELPRODUCTO MOTOR Especificacionesde la M quina Limpiadoraa PresBn El motor es de uno cilindros, de L-cabeza, refrigerado por aire y de baja emisi6n. Presi6n de salida m_xima ......2,550 PSi En el Estado de California, los motores de la sefie 120000 han Caudalm_ximo ........
- Page 42 RECOIViENDACIONES GENERALES Bembade Aceite NO realice ninguna operaci6n de mantenimiento con el aceite de la Plan de mantenimiento bomba. La bomba se suministra preiubricada y sellada en f_brica, y no requiere lubricaci6n adicional durante su vida 0til. Siga los intervaios de horas o de calendario, los que sucedan antes.
- Page 43 Remuevala punta de rocio del extremo de la extensi6n de la Revise la Manguera de AIta Presi6n boquilla. Las mangueras de alta presi6n pueden desarrollar fugas debido al Use el peque_o sujeta papeles para liberarcualquier material desgaste, dobleces o abuso. Revise la manguera antes de cada uso. extra_o que est_ tapando la punta de rocio (A).
- Page 44 MANTENIMIENTO DELMOTOR Comprobacibndel nivel de aceite Compruebe el nivel de aceite antes de cada uso o cada 8 horas de _k ADVERTENCIA Chispear involuntario puede tener funcionamiento, como minimo. Rellene si es necesario. "_lh. como resultado el fuego o el golpe Coloque el limpiadora a presi6n sobre una superficie nivelada.
- Page 45 Remplace la Bujia Cambie el aceite cuandoeJmotor siga estando caJientedespu_s de haber funcionado: Cambie la bujia ayudarA a su motor a arrancar mAs fAcilmente y Drene eltanque del combustible haciendofuncionar la funcionar mejor. mAquina limpiadora a presi6n hasta que el tanque est_ vacio. Limpie el Area alrededor de la bujb y retirela.
- Page 46 Sistemade Refrigeraci6nde Aire A ADVERTENCIA El chorro de agua a alta presi6n que Con eltiempo, se pueden acumular residuos en las aletas de este equipo produce, puede atravesar ia piei y refrigeraci6n del cilindro y pasar inadvertidos mientras no se los tejidos subcut_.neos, provocando iesiones de desmonte parcialmente el motor.
- Page 47 ALIViACENAIVilENTO PARAINVIERNO Cambio de aceite Con el motor todavia caliente, drene el aceite de la caja del cig_Je_ai. Vuelva a Ilenarlo con ei grado de aceite recomendado. Vea Cambio AI/ISO Usted deber_, proteger su unidad de las de Aceite del Motor en la secci6n Mantenimiento del Motor. temperaturas de congelamiento.
- Page 48 Problema CagSa Soluci6n 1. EstAusando la puntas de rocio de baja 1. Gamble la puntas de rocio a una de las puntas presi6n (negra). de rocio de alta presi6n. 2. La entrada de agua estA Noqueada. 2. Limpie la entrada. 3.
- Page 50 Garantiade controlde ernisionesde California, Disposicionesde la garantia contradefectos deJ sistema de control de emisiones de Sears U.S. EPAy Sears A continuaci6n se detaiian las disposiciones concretas Berechosy obliga¢iones de la garantia reiativas a la Cobertura de ia garantia contra defectos dei sistema de control de emisiones.
- Page 51 Lagaranfia deloscomponentes relacionados conlas Sears.Sears no ser_.responsable de la cobertura de la emisiones eslasiguiente: garantia de fallos de componentes relacionados con el sistema de emisiones cubiertos por ia garanfia • Los failos de todo componente cubierto por ia garanfia provocados por el uso de componentes que no se deba sustituir como parte dei plan de complementarios o modificados.
- Page 52 Your Home For expert troubleshooting and home solutions advice: www.managemyhome.com For repair - in your home - of all major brand appliances, lawn and garden equipment, or heating and cooling systems, no matter made it, no matter who sold For the replacement parts, accessories owner's manuals that you need to do-it-yourself.
- Page 53 Esta limpiadora a presiOnest_ clasificada conforme a la norrna PWl01 (comprobaciOn y clasificaciOn de rendimiento de limpiadoras a presiOn) de la AsociaciOn de fabricantes de bombas a presiOn (Pressure Washer Manufacturers Association, PWMA). Sears, Roebuck and Co., HoffrnanEstates,IL 60179 U.S.A. Visit our Craftsman website: www.craftsman.com Part No. 311098GS Draft - (10/07/2009)
- Page 54 CRAFTSMAN LIMITEDWARRANTY If this Craftsman product fails due to a defect in material or workmanship within two years from the date of purchase, return it to any Sears store, Sears Parts & RepairService Center, or other Craftsman outlet in the United Statesfor free repair (or replacement if repair proves impossible).
- Page 55 Read this manual carefully and becomefamiliar _i, WARNING The engine exhaust from this product with your pressurewasher. Knowits applications, contains chemicals known to the State of California to its limitations, and any hazards involved. cause cancer, birth defects, or other reproductive harm. important Safety I.formation _i, WARNING This product contains lead and lead...
- Page 56 A. WARNING Starter cord kickback (rapid retraction) can A. WARNING Fuel and its vapors are extremely flammable and explosive. result in bodily injury. Kickback will pull hand and ,_arm toward engine faster than you can let go. Fire or explosion can cause severe burns or death.
- Page 57 A, WARNING Risk of eye injury. _i, WARNING Use of pressure washer can create Spray can splash back or propel objects. Kickback from spray gun can cause you puddles and slippery surfaces. to fall. • Always wear indirect vented (chemical splash) safety goggles •...
- Page 58 KNOWYOURPRESSURE WASHER Read the Operator's Manual and safety rules before operating your pressure washer. Comparethe illustrations with your pressure washer to familiarize yourself with the locations of various controls and adjustments. Savethis manual for future reference. A - Spray Gun-- Controls the application of water onto L =AutomaticCool DownSystem -- Cycles water through cleaning surface with trigger device, includes trigger lock.
- Page 59 6. if any parts are missing or damaged, call the pressure washer helpline at 1-800-222-3136. ASSEMBLING PRESSURE WASHER Your Craftsman pressure washer will need assembly before operation: insert multi-colored Quick Connect spray tips and other Fill out and send in registration card.
- Page 60 AddEn!tine(Ill Cleanarea around fuel fill cap, remove cap. Place pressure washer on a flat, level surface. Slowly add regular unleaded fuel (A) to fuel tank (B). Be careful not to overfill. Allow about 1.5" (4 cm) (O) of tank Cleanarea around oil fill and remove yellow oil fill space for fuel expansion.
- Page 61 NOTICE Fresh Start® fuel preserver cartridge is available as an optional accessory, retail item7133386. It is not included with the pressure washer. Contact the original equipment manufacturer, retailer, or dealer to obtain a cartridge designed for the Fresh Start® fuel cap installed on this engine.
- Page 62 HOWTO USEYOURPRESSURE WASHER To Start YourPressureWasher To start your engine-powered pressure washer for the first If you have any problems operating your pressure washer, time, follow these instructions step-by-step. This information please call the pressure washer helpline at 1-800-222-3136. also applies whenever you start the engine after you have let PressureWasher Location the pressure washer sit idle for at least a day.
- Page 63 NOTICE Before starting the pressure washer, be sure you _i, WARNING The high pressure stream of water that are wearing safety goggles as described below. this equipment produces can cut through skin _i, WARNING Risk of eye injury. and its underlying tissues, leading to serious injury and possible amputation.
- Page 64 NOTICE Spray gun traps high water pressure, even when Select desired spray tip: engine is stopped and water is disconnected. How to Use Accessory Tray Low Pressure The unit is equipped with an accessory tray with places to Black store your spray gun, spray tip extension and quick connect Use to apply spray tips.
- Page 65 Cleaningand ApplyingDetergent Keep the spray gun a safe distance from the area you plan to spray. A WARNING Chemical Burn Hazard. A WARNING Kickback from spray gun can cause you to Chemicals could cause bodily injury, property damage or death. fall.
- Page 66 ENGINE TECHNICAL iNFORMATiON PRODUCT SPECIFICATIONS This is a single cylinder, L-head, air cooled engine, it is a low PressureWasherSpecifications emissions engine. Max Outlet Pressure ....... 2,500 PSi In the State of California, Model 120000 engines are certified Max Flow Rate......2.3 GPM by the California Air Resources Board to meet emissions Detergent Mix ......
- Page 67 OWNER'SRESPONSiBiLiTiES Emissions Control Maintenance, replacement, or repair of the emissions Follow the hourly or calendar intervals, whichever occurs controldevices and systemsmay be performedby any non- first. More frequent service is required when operating in adverse conditions noted below. road engine repair establishment or individual. However, to obtain "no charge"...
- Page 68 Check Spray Gun and Spray Tip Extension O-Bino Maintenance Purchasean O-Ring RepairKit, item 7175116, at your local Examinehoseconnectionto spraygun and makesure it is Searsor by calling 1-888-4-1VlY-NOME ( 469-4663) or online at secure.Testtrigger by pressingit and makingsure it springs back into placewhenyou releaseit. Do not depress red button www.sears.com, it is not includedwith the pressurewasher.
- Page 69 CheckingOil Level Tip your pressure washer to drain oil from oil fill into a suitable container making sure you tip your unit away Oil level should be checked prior to each use or at least every from spark plug. When crankcase is empty, return 8 hours of operation.
- Page 70 AFTEREACHUSE Checkelectrode gap with wire feeler gauge and reset spark plug gap to recommended gap if necessary (see Water should not remain in the unit for long periods of time. Specifications). Sediments or minerals can deposit on pump parts and "freeze"...
- Page 71 WINTERSTORAGE Change O il While engine is still warm, drain oil from crankcase. Refill with recommended grade. See ChangingEngine Oil. NOTICE You must protect your unit from freezing Protect Pump temperatures. = Failure to do so will permanently damage your pump and render To protect the pump from damage caused by mineral your unit inoperable.
- Page 72 Problem Cause Correction Water inlet is blocked. Clear inlet. inadequatewater supply. Provide adequatewater flow. inlet hose is kinked or leaking. Straighten inlet hose, patch leak. Checkand clean inlet hose strainer. Clogged inlet hose strainer. Pump has following problems: Water supply is over IO0°F. Provide cooler water supply.
- Page 73 CRAFTSMAN2500 PSi Pressure Washer 580.752500 Main Unit m Exploded View and Parts List item Part # PartsNot Illustrated Description 206033GS BASE Part # Description R204650GS HANDLE 311098GS MANUAL-OPERATOR'S 311094GS BILLBOARD AB3061BGS OIL BOTTLE B1797GS CLIP 205411GS AXLE B2203GS KIT-HARDWAREHANDLE 794693 DECAL-Warning 202274GS PUMP...
- Page 74 ENGINE, Briggs & Stratton, 126T02 - ExpJodedView 1329 [sos SHORT BLOCK 615 0 404 _ 241_...
- Page 75 ENGINE, Briggs & Stratton, 126T02 - ExpJodedView 1095 VALVE GASKET 36 4o_ 27(__ ENGINE GASKET 51 _...
- Page 76 ENGINE, Briggs & Stratton, 126T02 - ExpJodedView 1211 1210 689 0 CARBURETOR OVERHAUL 1341 @ 163# 276_ 633A...
- Page 77 ENGIHE, Briggs & Stratton, t26T82 - Parts List Item Part# Description Item Part # Description 690940 Screw (Dipstick Tube) 697322 Cylinder Assembly 790830 Thermostat 399269 Kit-Bushing/Seal (Magneto Side) Muffler 790828 299819s Seal-Oil (Magneto Side) 791291 Housing-Blower 493279 Sump-Engine 691108 Screw (Blower Housing) 691160 Head-Cylinder 790836...
- Page 78 California, U.S. EPA,and Sears Emissions Sears EmissionsControl Warranty Provisions ControlWarranty Statement The following are specific provisions relative to your Emissions Control Warranty Coverage. it is in addition to the YourWarranty RightsAnd Obligations Searsengine warranty for non-regulated engines found in the Operator's Manual. The California Air Resources Board, U.S.
- Page 79 The warranty onemissions-related parts isasfollows: LookFor ReJevantEmissionsDurability Period and Air Index Information On Your Engine EmissionsLabeJ • Any warranted part that is not scheduled for replacementas required maintenancein the owner's Enginesthat are certified to meet the California Air Resources manual supplied, is warranted for the warranty period Board (CARB) Emissions Standard must display information stated above.
- Page 80 GARANTJA L llVliTADA DECRAFTSMAN Si este producto de Craftsman falla debido a defectos de materiales o mane de obra en el plazo de dos a_os a partir de la fecha de compra, devu_lvalo a cualquier aimac_n Sears, centre de reparaci6n y repuestos Sears, u otro punto de venta de Craftsman de los Estados Unidos para su reparaci6n gratuita o, en case de que _sta no sea posible, para su sustituci6n.
- Page 81 A. ADVERTENCIA El escape dei motor de este producto Leaestemanualminuciosamente y conozca a fondo las partes y el luncionamientodesurn_quina limpiadoraa contiene eiementos quimicos reconocidos en el Estado de presi6n.Conozca susaplicaciones, suslimitacionesy los California por producir c_.ncer,defectos de nacimiento u peligros involucrados, otros da_os de tipo reproductivo.
- Page 82 A AI:IVERTENCIALa gasolina y sus vapores son A ADVERTENCIA El retroceso (repliegue r_.pido) del extremadamenteinfiamables y cable del arrancador puede producir lesiones. El explosivos. retroceso impedir_, que el usuario suelte ei cable a El fuego o una explosi6n pueden causar tiempo y tirar_ de su mano y brazo hacia el motor.
- Page 83 AV/SO El rociado de alta presi6n puede da_ar elementos A. ABVERTENCIA El chorro de agua a alta presi6n que fr_.giles, incluyendo el vidrio. * NO dirija la pistola rociadora hacia un cristai cuando utiNcela los tejidos subcut_.neos, provocando iesiones de este equipo produce, puede atravesar ia piei y punta de rocio de roja de 0°.
- Page 84 CONOZCA SU iViAQUINA SISTEIViA DE LllViPIEZA Lea el IVlanuaidei Operario y las regias de seguridadantes de porter en marcha su sistema de iimpieza. Compare las ilustraciones con su sistema de limpieza para familiarizarse con las ubicaciones de los diferentes controles y ajustes. Guarde este manual para referencbs futuras.
- Page 85 Su sistema defimpieza requiere decierto e nsamble yestarA fista CO_SCte el Manubrio y Bandeja de Accesorios paraser usado_nicamente despu_s de haberdepositado el Coloque el manubrio (A) sobre los soportes del mismo (B) que combustible y el aceiterecomendado. ya est_n adheridos a la unidad principal. Aseg_rese de que los Si tiene problemas c oneJensambledesum_quina limpiadoraa orificios en el manubrio est_n alineados con los orificios en los presi6n,llamea Jalineadeayudade Jam_quina Jimpiadora a...
- Page 86 Limpie el _rea alrededor de la tapa de llenadodel combustible, Agregue Aceite de Motor retire latapa. Coioque la limpiadoraa presi6n en una superficie plana y nivelada. A_ada lentamente gasolina sin plomo (A) al dep6sito de combustible (B). NO a_adacombustible en exceso. Deje Limpie la zona de alrededor del orificio de Ilenadode aceite y aproximadamente 4 cm (1,5") de espacio (C) en el dep6sito quite el tap6n amarillo.
- Page 87 AVISO El cartucho de aditivo para combustible Fresh Start® est_ disponible como un accesorio opcional, n_mero de cat,logo 7174403. No est_ inciuido en la limpiadora a presi6n. P6ngase en contacto con el fabricante del equipo original, el vendedor o el distribuidor para obtener un cartucho diseSadopara el tap6n de combustible Fresh Start®...
- Page 88 COIViO USARSU SISTEIViA DELliViPIEZA Para Porter en Marcha el Sistema de Limpieza Para darle arranque a su sistema de limpieza movido a motor por Si tiene problemas con el funcionamiento de su m_quina limpiadora primera vez, siga estas instrucciones paso a paso. Esta informaci6n a presi6n, por favor liame a la linea de ayuda de la m_quina acerca de la puesta en marcha inicial tambi_n es v_lida para cuando limpiadora a presi6n al 1-800-222-3136,...
- Page 89 AVISO Antesde arrancarla limpiadora a presi6n,aseg_rese de 11. Jale la cuerda de arranque lentamente.NO permita que la cuerda regrese bruscamenteen contra del arrancador. ponersegafasde seguridadcomose describe a continuaci6n. AVISO Siempre mantenga la control de v_lvula de regulaci6n en el A. ADVERTENCIA Riesgo de lesiones oculares. "Rdpido"...
- Page 90 C6moDetenersu Sistemade Limpieza C6mousar las puntasde rocio Suelte el gatillo de la pistola rociadora y deje funcionar el La conexi6n r_pida de la extensi6n para boquillas le permite usar motor al ralenti durante dos minutos. tres puntas de rocio diferentes. Siempre que est6 activado el seguro del gatillo de la pistola rociadora, se pueden cambiar las puntas de Mueva el acelerador a la posici6n "Slow"...
- Page 91 • Para aplicar productos detergentes o limpiadores Marcha el motor siguiendo las instrucciones de la secci6n especificos que ayuden a descomponer la suciedad C6mo poner en funcionamiento la limpiadora a presi6n. rebelde en distintas superficies, seleccione la punta de Aplique el detergente sobre la superficie seca, comenzando en rociado de detergente negra.
- Page 92 Limpieza del tubo de inyecci6n de detergente A ADVERTENCIA El chorro de agua a alta presi6n que Si us6 el tubo, debe lavaflocon agua limpiaantes de parar el motor. este equipo produce, puede atravesar ia piei y Coloque el filtro y la inyecci6n de detergente en un balde Ileno los tejidos subcut_.neos,provocando iesiones de gravedad que podrian dar lugar a la amputaci6n de agua limpia.
- Page 93 INFORMACION TECNICA SOBREEL ESPECIFICACIONES DELPRODUCTO MOTOR Especificacionesde la M quina Limpiadoraa PresBn El motor es de uno cilindros, de L-cabeza, refrigerado por aire y de baja emisi6n. Presi6n de salida m_xima ......2,550 PSi En el Estado de California, los motores de la sefie 120000 han Caudalm_ximo ........
- Page 94 RECOIViENDACIONES GENERALES Bembade Aceite NO realice ninguna operaci6n de mantenimiento con el aceite de la Plan de mantenimiento bomba. La bomba se suministra preiubricada y sellada en f_brica, y no requiere lubricaci6n adicional durante su vida 0til. Siga los intervaios de horas o de calendario, los que sucedan antes.
- Page 95 Remuevala punta de rocio del extremo de la extensi6n de la Revise la Manguera de AIta Presi6n boquilla. Las mangueras de alta presi6n pueden desarrollar fugas debido al Use el peque_o sujeta papeles para liberarcualquier material desgaste, dobleces o abuso. Revise la manguera antes de cada uso. extra_o que est_ tapando la punta de rocio (A).
- Page 96 MANTENIMIENTO DELMOTOR Comprobacibndel nivel de aceite Compruebe el nivel de aceite antes de cada uso o cada 8 horas de _k ADVERTENCIA Chispear involuntario puede tener funcionamiento, como minimo. Rellene si es necesario. "_lh. como resultado el fuego o el golpe Coloque el limpiadora a presi6n sobre una superficie nivelada.
- Page 97 Remplace la Bujia Cambie el aceite cuandoeJmotor siga estando caJientedespu_s de haber funcionado: Cambie la bujia ayudarA a su motor a arrancar mAs fAcilmente y Drene eltanque del combustible haciendofuncionar la funcionar mejor. mAquina limpiadora a presi6n hasta que el tanque est_ vacio. Limpie el Area alrededor de la bujb y retirela.
- Page 98 Sistemade Refrigeraci6nde Aire A ADVERTENCIA El chorro de agua a alta presi6n que Con eltiempo, se pueden acumular residuos en las aletas de este equipo produce, puede atravesar ia piei y refrigeraci6n del cilindro y pasar inadvertidos mientras no se los tejidos subcut_.neos, provocando iesiones de desmonte parcialmente el motor.
- Page 99 ALIViACENAIVilENTO PARAINVIERNO Cambio de aceite Con el motor todavia caliente, drene el aceite de la caja del cig_Je_ai. Vuelva a Ilenarlo con ei grado de aceite recomendado. Vea Cambio AI/ISO Usted deber_, proteger su unidad de las de Aceite del Motor en la secci6n Mantenimiento del Motor. temperaturas de congelamiento.
- Page 100 Problema CagSa Soluci6n 1. EstAusando la puntas de rocio de baja 1. Gamble la puntas de rocio a una de las puntas presi6n (negra). de rocio de alta presi6n. 2. La entrada de agua estA Noqueada. 2. Limpie la entrada. 3.
- Page 102 Garantiade controlde ernisionesde California, Disposicionesde la garantia contradefectos deJ sistema de control de emisiones de Sears U.S. EPAy Sears A continuaci6n se detaiian las disposiciones concretas Berechosy obliga¢iones de la garantia reiativas a la Cobertura de ia garantia contra defectos dei sistema de control de emisiones.
- Page 103 Lagaranfia deloscomponentes relacionados conlas Sears.Sears no ser_.responsable de la cobertura de la emisiones eslasiguiente: garantia de fallos de componentes relacionados con el sistema de emisiones cubiertos por ia garanfia • Los failos de todo componente cubierto por ia garanfia provocados por el uso de componentes que no se deba sustituir como parte dei plan de complementarios o modificados.
- Page 104 Your Home For expert troubleshooting and home solutions advice: www.managemyhome.com For repair - in your home - of all major brand appliances, lawn and garden equipment, or heating and cooling systems, no matter made it, no matter who sold For the replacement parts, accessories owner's manuals that you need to do-it-yourself.