
Related Manuals for Numark TT200


Summary of Contents for Numark TT200
-
Page 1: Table Of Contents
OPERATING INSTRUCTIONS CONTENTS Setup & Installation Platter Setup Cartridge Setup Interchanging Tonearm Tubes Tone Arm Setup Controls Cable Setup Specifications Trouble Shooting... -
Page 2: Setup & Installation
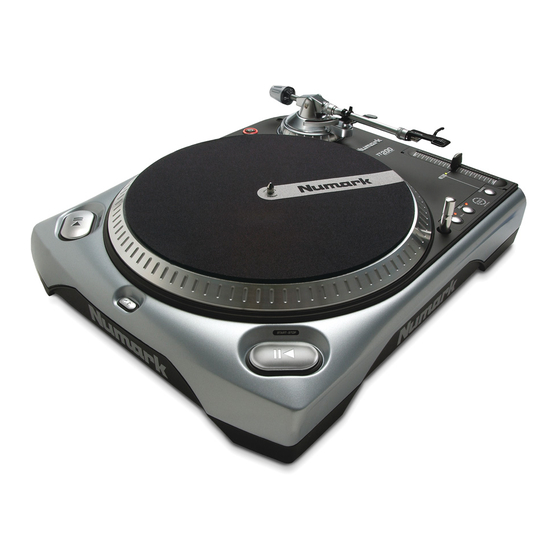
SETUP & INSTALLATION This turntable has been designed exclusively for DJ use and can be setup in a variety of different ways depending on your mixing style. The turntable should rest on a level and stable surface that is clear of obstructions. -
Page 3: Platter Setup
2. Next, rotate the top of the motor assembly (brass in color) so that two holes are aligned parallel with the front of the turntable. 3. Install the platter onto the center spindle and motor assembly making sure that the Numark logo and the two holes are aligned parallel with the front of the turntable. -
Page 4: Cartridge Setup
5. Once temporarily fastened, position the cartridge so that both screws are aligned with the optimum position mark on the Head shell (Numark HS 1 Head shell and Numark Cartridges only.) Moving the both screws to a mark away from the optimum position indicated on the head shell may increase or decrease performance depending on the cartridge used. -
Page 5: Interchanging Tonearm Tubes
INTERCHANGING TONEARM TUBES (sold seperately) WARNING: An incomplete understanding of this procedure could lead to permanent damage to the headshell, your records, or the tonearm assembly. NOTICE: Interchanging tonearm tubes unnecessarily may shorten the life of the tonearm tubes and/or tonearm components. -
Page 6: Tone Arm Setup
TONE ARM SETUP A properly adjusted tone arm and cartridge setup will minimize vinyl record wear and optimize the performance of the turntable. Follow these simple steps for setting the tone arm on the turntable: NOTE: In most cases, when using the S-Shaped tonearm tube, the additional S-Weight must be fastened to the tonearm to achieve proper stylus pressure.Balancing the Tone Arm 1. -
Page 7: Controls
CONTROLS General Controls 1. Power Button Pushing this button down turns on the turntable. It illuminates red when the turntable is switched on. 2. Start/Stop Buttons These buttons start and stop the turntable motor. Both buttons have the same function. 3. - Page 8 DO NOT OVERTIGHTEN THIS LOCK COLLAR! WARNING: CONNECTING HEADSHELLS TO THIS COLLAR MAY DAMAGE THE INTERNAL PIN HEIGHTS OF THE CONTACTS! ONLY CONNECT NUMARK TUBES TO THE SECONDARY TUBE LOCK COLLAR. 15. Arm Clip This specially designed arm clip secures the tone arm while it is being transported or not in use.
- Page 9 CONTROLS continued Bottom Parts 18. Adjustable Rubber Dampening Feet When all of the feet of the turntable are completely tightened, the top flat surface of the turntable will be at 85mm. Unscrewing these feet raises the turntable up to compensate for unleveled surfaces. 19.
-
Page 10: Cable Setup
CABLE SETUP This turntable is shipped with two sets of special cables: (1) Right Angle IEC Power Cord (1) Right Angle RCA cord w/ground wire NOTE: Before connecting any cables, make sure that the voltage selector switch is set to the proper setting! Making the power and audio connections: 1. -
Page 11: Specifications
SPECIFICATIONS Turntable Section: Tonearm Section: Type: 3 speed, fully manual Type: Locking collar based interchangeable tube system Motor: Direct Drive- 8 Pole, 3 Phase Diecast Aluminum 3-bearing construction Starting Torque: 1.6 kg/cm Height Range: 0-6 mm Start Time: 0-33.33 RPM in 0.8 sec Cue System: Dampened Lift Lever, Braking System:... -
Page 12: Trouble Shooting
Static electricity and/or other external interference may cause this unit to malfunction. To reset the unit to its normal condition, turn the power off and then on again. If the problem continues to persist, refer to the connected component's troubleshooting guides. If the problem is not resolved after checking these items, contact the nearest authorized Numark dealer. - Page 13 (1) Aluminum Platter (1) Slipmat Tonearm (1) Counter Weight (1) 2.5 Gram Headshell (1) Headshell (1) 45 RPM Adapter Weight (1) Service Tool (1) IEC Power Cable (1) RCA Cord w/ Ground Wire TT-200 Manual /English, R3.1 Copyright Numark Industries, LLC 2003...