Electrolux E23CS78ESS1 Use & Care Manual
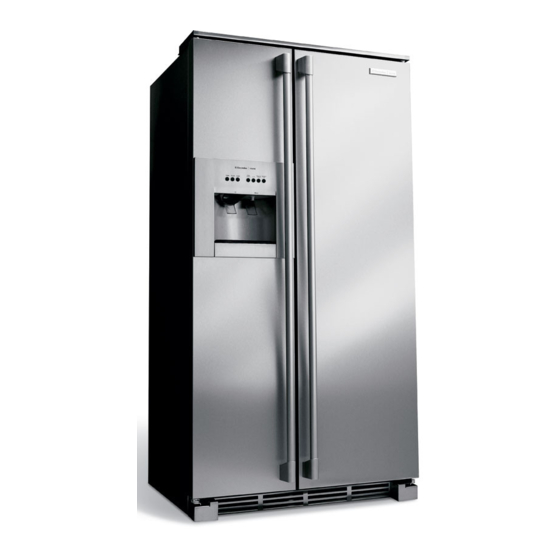
Side-by-side refrigerator
Hide thumbs
Also See for E23CS78ESS1:
- Factory parts catalog (22 pages) ,
- Installation instructions (3 pages)

Related Manuals for Electrolux E23CS78ESS1

Summary of Contents for Electrolux E23CS78ESS1
- Page 1 _ Care Guide Ouia de Uso y Cuidado R_i_fri_:_e_ador d_i _ do_ _t;_:_r_a_ Ouide d'utilisation et d'entretien...
-
Page 2: Makea Record Forquick Reference
?LEASE READAND SAVETHISGUIDE Thank you for choosing Electrolux, the new premium brand in home appliances. This Use & Care Guide is part of our commitment to customer satisfaction product quality throughout the service life of your new refrigerator. We view your purchase as the beginning of a relationship. - Page 3 TABLEOF CONTENT8 Finding information..........2 Storing Food & Saving Energy......2 9 PleaseReadAnd SaveThis Guide ....2 Ideas ForStoringFoods......... 29 MakeA Record ForQuick Reference....2 Ideas For SavingEnergy........ 30 Questions?............Normal Operating Sounds & Sights ....3t TableOf Contents ..........3 Understanding The SoundsYouMay Hear..31 Safety ..............
-
Page 4: Safety
IMPORTANT SAFETYINSTRUCTIONS GeneralSafety Do not store or use gasoline, or other flammable liquids, near this or any other appliance. Read product labels for warnings regarding flammability other hazards. Do not operate the refrigerator in the presence of explosive fumes. o Avoid contact with any moving parts of the automatic ice maker. - Page 5 EIIII,,,,,,,,,,ECTRICAI,,,,,,,,,, INFORMATION The refrigerator must be plugged into its own dedicated 115 Volt, 60 Hz., AC-only e_ectric out_et. The power cord of the appliance is equipped with a three-prong grounding plug for your protection against electrical shock hazards. It must be plugged directly into a properly grounded...
- Page 6 The Doors GEEING THROUGHNARROW SPACES If your refrigerator will not fit through an entrance area, you can reduce its size by removing the doors. Check first by measuring the entrance. RequiredTools You will need the following tools: Tools Necessary: Socket 3/8"...
- Page 7 To removethe top hinge cover: Remove the three screws from the cover over the top door hinges. Pull the cover forward about a halfqnch and lift it off. To removethe refrigeratordoor: Trace lightly around the door's top hinge with a pencil. This makes reinstallation easier.
- Page 8 The Doors To removethe freezerdoor: Detach the multi-wire cable connector located above the top hinge, Grasp both sides of the connector firmly and pull apart. Trace lightly around the hinge with a pencil, This makes reinstallation easier. "_Pt'eSS outelt S_eV_ _oward Connecto[ Detach the water tube from the connector located below the freezer...
- Page 9 ABOUTYOURRE IGE TOR S WATERSU IIII,,,,,,,Y The automatic ice & water dispenser on your refrigerator requires a permanent water supply to function correctly. During installation, you (or a service professional) establish this water supply by connecting a copper tube from your household water system to a valve at the rear of the refrigerator.
- Page 10 Supply Toconnect the water supply to the rearof your refrigerator: Ensure that the refrigerator is not plugged Flush the supply line until water is clear by placing the end of the copper tube in a sink or bucket and opening the shut-off valve.
- Page 11 UNDERSTANDING F TURES AND TERMS Your Electrolux refrigerator is designed for optimal convenience and storage flexibility. Use the illustration below to familiarize yourself with product features terminology. Freezer and Refrigerator SpiliProof Controls ice Cream Door Bin Tilt Out Door Small...
- Page 12 & TIME BEFORE USE ALLOWING CO01IIIIIIIII, To ensure reliable food storage, allow your refrigerator and freezer to operate with the doors closed for 8 to 12 hours before placing food inside. During this cooling period, you do not need to adjust the controls, which are preset at the factory.
- Page 13 Up Arrow button. WhatTo Doif TheTemperature DisplaysFlash If ever you you see both temperature displays continuously flashing, it may indicate that the control system has detected a performance problem. Call your Electrolux service representative, who can interpret the flashing message.
- Page 14 & The electronic control system continuously monitors your refngeratorifreezer for temperature consistency, doors left ajar, and power failures. Variances from normal operating conditions communicated by audible tones and a set of four status indicator lights. Indicator Lights Alarm Reset Button Respondingto Narms (AudibleTones&...
- Page 15 UsingTheAlarmResetButton You can disable or activate the alarm system by pressing and holding the Alarm Reset button for three seconds. Use it, for example, to turn off audible tones and/ or flashing indicator lights. Once you disable the alarm system, you must again press and hold the Alarm Reset button for three more seconds to reset (activate)
- Page 16 Storage You can easily adjust shelf positions in the freezer and fresh food compartments suit your needs. The shelves have mounting brackets, which attach to slotted supports at the rear of each compartment. To changethe position of a shelf: Glass Shelf Before adjusting a shelf, remove all food.
-
Page 17: Drawers
Your refrigerator includes a variety of storage drawers. These drawers usually are located in fixed positions at the bottom of the fresh food compartment. Crispers Crisper drawers are designed for storing fruits, vegetables, and other fresh produce. Before storing items in a crisper: Wash items in clear water and remove excess water. -
Page 18: Doors
Storage Storage Bins The doors to your freezer and fresh food compartments use a system of modular storage bins. All of these bins are removable for easy cleaning. Some of them have fixed positions, while others can be adjusted to your needs. Door bins are ideal for storing jars, bottles, cans, and large drink containers. - Page 19 Fall Bottle Retainer Tall Bottle The tall bottle retainer keeps tall containers in the bin from falling forward when opening or closing the refrigerator door. To install, snap the ends of the retainer over the edge of the retainer wall as shown in the illustration. SpecialStems Rack The innovative design...
- Page 20 ice & Your automatic ice & water dispenser includes a control panel, a drinking glass bay, and two push-paddles for turning on the ice and 0 oo° water supplies. Using the dispenser control panel is necessary for the ice dispenser but not the water dispenser.
-
Page 21: Usingthe Dispenser
USINGTHE DISPENSER CONTROl,PANEIIII ..Press button to get cubed ice. Light displays blue. Cube Button Press glass against ice dispensing paddle, holding high up to catch all ice. & indicator Light Press button to get crushed ice. Light displays blue. Crush Button Press glass against... - Page 22 ice & PRIMING THEWATERSU IIII,,,,,,,IY SYSTEM Your refrigerator's water supply system includes several tubing lines, an advanced water filter, a distribution valve bank, and a reserve tank to ensure ample supply to the ice and water dispenser at all times. This system needs to be completely filled with water when first connected...
- Page 23 ICEDISPENSER OPE TION & CARE The ice maker, ice bin, and dispenser feeding mechanism are located in the top of the freezer compartment. After the refrigerator is installed properly and has cooled for several hours, the ice maker can produce ice within 24 hours.
- Page 24 ice & DispenserTips Ice cubes stored too long may develop an odd flavor. Empty the ice container as explained on the next page. Occasionally shake the ice container to keep ice separated. If your refrigerator is not connected to a water supply or the water supply is turned off, turn off the ice maker by pressing the On/Off switch.
- Page 25 To cleanthe ice dispenser: Turn off ice production by pressing the ice maker's Off/On switch, Remove the ice bin by lifting up and out. Empty and carefully clean the ice bin with mild detergent. Rinse with clear water. Do not use harsh or abrasive cleaners.
- Page 26 Your refrigerator is equipped with a water filtering system. The water filter, which uses Electrolux pure advantage technology, filters all dispensed drinking water as well as the water used to produce ice. WaterFilter Location The water filter is located at the top of the fresh food...
- Page 27 "rig The Filter REPIIII ACINGTHEWATERFHZER In general, you should change the water filter every six to nine months to ensure highest possible water quality. The Filter Status light on the dispenser control panel (see page 20) prompts you to replace the filter after 400 gallons of water has flowed...
- Page 28 To replaceyour pure advantage waterfilter: It is not necessary to turn the water supply off to change the filter. Be ready to wipe up any small amounts of water released during the filter replacement. The bottom of the filter housing includes two small water drainage holes, so be sure to remove...
- Page 29 IDEASFORSTORING FOODS FreshFood Storage Keep the fresh food compartment between 34 ° F and 40 ° F with an optimum temperature of 37 ° F (see page 13 for more about temperature settings). • Avoid overcrowding the refrigerator shelves, which reduces air circulation causes uneven...
- Page 30 Loadingthe Freezer Avoid adding too much warm food to the freezer at one time. This overloads the freezer, slows the rate of freezing, and can raise the temperature frozen foods. Leave a space between packages, so cold air can circulate freely, allowing food to freeze as quickly as possible.
- Page 31 & UNDERSTANDING T HESOUNDSYOUMAYHEAR Your new high-efficiency refrigerator may introduce unfamiliar sounds. These sounds normally indicate your refrigerator is operating correctly. Some surfaces floors, wails, and kitchen cabinets may make these sounds more noticeable. Following is a list of major components in your refrigerator the sounds they can cause:...
- Page 32 & Keeping your refrigerator clean maintains appearance and prevents odor build=up. Wipe up any spills immediately and clean the freezer and fresh food compartments at least twice a year. When cleaning, take the following precautions: Never use metallic scouring pads, brushes, abrasive cleaners or strong...
- Page 33 CARE& Cl,,,,,,,,,,EANING TIPS Part CleaningAgents Tipsand Precautions Interior& Door • Soapand water • Use 2 tablespoonsof bakingsoda in 1 quart of warm water. Liners • Bakingsoda and • Be sureto wringexcesswater out of sponge or clothbefore cieaningaround water controls,light bulb or any electricalpart. Door Gaskets •...
-
Page 34: Replacinglight Bulbs
& REPLACINGLIGHTBULBS Both the freezer and fresh food compartments of your refrigerator include light bulbs that will need replacing from time to time. Some lights have covers that you will need to remove before replacing the bulbs. Always use bulbs that are designed for appliance lighting. - Page 35 y lnform REFRIGERATOR WARRANTY Yourrefrigerator is protected by this warranty WARRANTY THROUGH OUR AUTHORIZED SERVICERS, THE CONSUMER WILL BE PERIOD WE WILL: RESPONSIBLE FOR: FULL ONE-YEAR One year from Pay all costs for repairing or replacing any parts of this Costs of service calls that are listed under WARRANTY original purchase...
- Page 36 To Common BEFOREYOUCAIIII,,,,,,,,,Looo If you experience a problem with your refrigerator or notice a product behavior condition you do not understand, you can usually avoid a call to your service representative by referring to this section for an answer. Beginning with the following table, this information...
- Page 37 To Common Temperatures Are Too Cold Problem Cause Correction Freezertemperaturetoo cold. • Freezer control is settoo • Setfreezer controlto a warmersetting.Allow 24 hoursfor Refrigeratortemperatureis cold. temperatureto stabilize. satisfactory. Refrigeratortemperaturetoo • Refrigeratorcontrol is set • Setrefrigeratorcontroltoawarmersetting. AIIow24 hours cold. Freezertemperatureis too cold. for temperatureto stabilize.
- Page 38 To Common Water/Moisture/Frost Outside Refrigerator Problem Cause Correction Moisture collects on outside • Weather is humid. • This is normal in humid weather. When humidity is of refrigerator or between lower, the moisture should disappear. doors. • Door is slightly open, causing cold air * See Problem section Opening/Closing Of Doors/Drawers.
- Page 39 Ice Dispenser Cause Correction Problem • Watersupply is not connected. • Connect water supply (seepage 9). Dispenser will not dispense ice. • Icestoragecontainer is empty. • When the first supplyof ice is droppedinto the container, the dispensershouldoperate. • Turn freezercontrol to a highersettingso that ice cubes •...
- Page 40 To Common Odors In Refrigerator Problem Cause Correction Interior is dirty • Interior needs to be cleaned • See Care & Cleaning Tips. • Food with strong odors is in refrigerator • Cover food tightly. Opening/Closing Of Doors/Drawers Problem Cause Correction Door(s) will not close •...