Table of Contents
Advertisement
Quick Links
perator's
nual
T
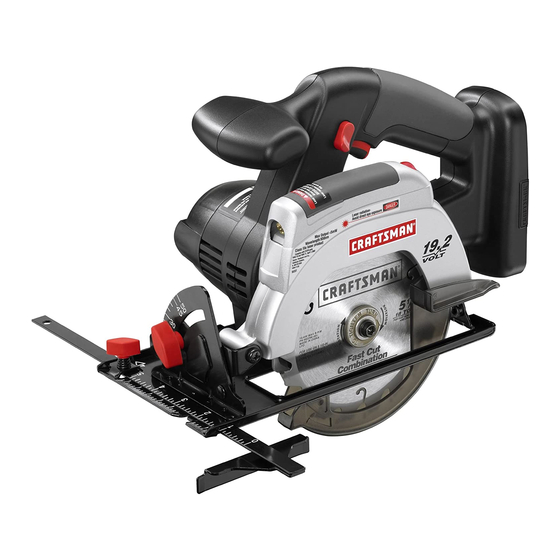
5-1/2 in, 19.2 VOLT
CORDLESS
TRiM SAW
Model No.
315.114261
®
_
WARNING:
To reduce the risk of injury,
the user must read and understand the
operator's manual before using this
product.
BATTERIES
AND CHARGERS
SOLD SEPARATELY
Customer
Help Line: 1-800-932-3188
Sears Roebuck
and Co., 3333 Beverly
Rd. Hoffman
Estates,
IL 60179 USA
Visit the Craftsman
web page: www.sears.com/craftsman
983000-91 5
03-26-08 (REV:02)
Save this manual
for future
reference
C
US
Advertisement
Table of Contents

Related Manuals for Craftsman 315.114261


Summary of Contents for Craftsman 315.114261
- Page 1 Customer Help Line: 1-800-932-3188 Sears Roebuck and Co., 3333 Beverly Rd. Hoffman Estates, IL 60179 USA Visit the Craftsman web page: www.sears.com/craftsman 983000-91 5 Save this manual for future reference 03-26-08 (REV:02)
- Page 2 NEAREST SEARS STORE OR SEARS PARTS & REPAIR CENTER IN THE UNITED STATES, and Sears will repair it, free of charge. If this Craftsman tool is used for commercial or rental purposes, this warranty applies for only 90 days from the date of purchase.
- Page 3 Carrying tools with your finger on the switch or insert- WARNING! READ AND UNDERSTAND ALL IN- ing the battery pack into a tool with the switch on STRUCTIONS. Failure to follow all instructions listed invites accidents. below, may result in electric shock, fire and/or seri- [] Remove adjusting keys or wrenches before turning...
- Page 4 [] Keepthe tool and its handle dry, clean and free When servicing a tool, use only identical replace- from oil and grease. Always use a clean cloth when merit parts. Follow instructions in the Maintenance cleaning. Never use brake fluids, gasoline, petroleum- section of this manual.
- Page 5 Maintain a firm grip on the saw and position your [] Battery tools do not have to be plugged into an body and arm in a way that allows you to resist electrical outlet; therefore, they are always in KICKBACK forces.
- Page 6 Someofthe following symbols maybeusedonthisproduct. P lease studythemandlearn theirmeaning. Proper interpretation ofthesesymbols will allowyouto operate theproductbetterandsafer. SYMBOL NAME DESIGNATION/EXPLANATION Volts Voltage Current Amperes Hertz Frequency (cycles per second) Watt Power Minutes Time Alternating Current Type of current Direct Current Type or a characteristic of current No Load Speed Rotational speed, at no load...
- Page 7 If you do not understand the warnings and to your nearest SEARS PARTS AND REPAIR SERVICE instructions in the operator's manual, do not use this CENTER for repair. When servicing, use only identical product. Call the Craftsman Consumer Helpline at replacement parts. 1-800-932-3188 for assistance. WARNING: The operation of any power tool can result in foreign objects being thrown into your eyes, which can result in severe eye damage.
- Page 8 PRODUCT SPECIFICATIONS Motor ................................... 19.2 Volt DC Blade diameter ................................5-1/2 in. Blade Arbor ..................................3/8 in. Cutting Depth at 0°..............................1-9/16 in. Cutting Depth at 45 °..............................1-1/8 in. No Load Speed ............................4500 r/rain. (RPM) SPINDLELOCK LOCK-OFF BUTTON BUTTON BATTERY PACK...
- Page 9 KNOW DEPTH YOUR TRIM SAW See Figure 1. Adjusts the depth of cut from 0 in. to 1-9/16 in. The safe use of this product requires an understanding LOCK=OFF BUTTON the information on the tool and in this operator's manual Your saw is equipped with a lock-off button which reduces as well as a knowledge of the project you are attempt- the possibility of accidental starting.
- Page 10 ATTACHING THE BLADE [] Depress spindle lock button, then replace blade screw. See Figure 2. Tighten blade screw securely. NOTE: Turn blade screw counterclockwise to tighten. WARNING: A 5-1/2 in. blade is the maximum blade [] Return blade wrench to storage area. capacity of your saw.
- Page 11 REMOV(NGBLADE DEPRESS SPINDLE LOCKBUTTON See Figure 3. [] Remove battery pack from saw. [] Remove blade wrench from storage area. [] Position saw as shown in figure 3, depress spindle lock button, and remove blade screw. NOTE: Turn blade screw clockwise to remove. [] Remove outer blade washer.
- Page 12 This product will accept DieHardo 19.2 V lithium-ion bat- inside saw and latches snap into place properly. tery packs and Craftsman 19.2 V nickel-cadmium battery Improper assembly can cause damage to saw and packs.
- Page 13 KICKBACK See Figures 7- 10, Kickback occurs when the blade stalls rapidly and the saw is driven back toward you. Blade stalling is caused by any action which pinches the blade in the wood. DANGER: Release switch immediately if blade binds or saw stalls.
- Page 14 SAW BLADES STARTING/STOPPING THE SAW See Figure 12. The best of saw blades will not cut efficiently if they are not kept clean, sharp, and properly set. Using a dull blade To start the saw: Depress the switch trigger. will place a heavy load on the saw and increase the dan- Always let the blade reach full speed, then guide the saw ger of kickback.
- Page 15 WIDTHOF CUT SCALE See Figure 13. BASE A width of cut scale has been provided on the base of ASSEMBLY the saw. When making straight cross cuts or rip cuts, the scale can be used to measure up to four inches to the right side of the blade.
- Page 16 OPERATING THE SAW See Figures 15- 17, It is important to understand the correct method for oper- ating the saw. Refer to the figures in this section to learn the correct and incorrect ways for handling the saw. DANGER: When lifting the saw from the workpiece, the blade is exposed on the underside of the saw until the lower blade guard closes.
- Page 17 CROSSCUTTING/RIPCUTTING ALTERNATIVE METHODFORRiP CUTTING See Figure 18. WORKPIECE When making a cross cut or rip cut, align the line of cut with the outer blade guide notch on the base as shown in the figure. Since blade thicknesses vary, always make a trial cut in scrap material along a guideline to determine how much, if any, you must offset the guideline to produce an STRAIGHT...
- Page 18 BEVELCUTTING BEVEL ADJUSTMENTKNOB See Figure 21. To make the best possible cut, follow these helpful hints: [] Align the line of cut with the inner blade guide notch on the base when making 45 ° bevel cuts. [] Make a trial cut in scrap material along a guideline to determine how much you should offset the guideline on the cutting material.
- Page 19 POS(T(VE 0° BEVELSTOP POCKET CUTTING See Figure 24. See Figure 23. The saw has a positive 0 ° bevel stop that has been factory adjusted to assure 0 ° angle of the saw blade when making ARN(NG: Always adjust bevel setting to zero 90 °...
- Page 20 _hb WARNING:Whenservicing, useonlyidentical WARNING: Do not at any time let brake fluids, Craftsman r eplacement parts.Useofanyotherpart gasoline, petroleum-based products, penetrating maycreatea hazard or causeproduct d amage. oils, etc. come in contact with plastic parts. Chemi- cals can damage, weaken or destroy plastic which may result in serious personal injury.
- Page 21 REMOVAL AND PREPARATION FOR RECYCLING This product will accept DieHardo 19.2 V lithium-ion bat- To preserve natural resources, please tery packs and Craftsman 19.2 V nickel-cadmium battery recycle or dispose of batteries packs. properly. The batteries for this product have been designed to provide maximum trouble-free life.
- Page 22 CRAFTSMAN 19.2 VOLT CORDLESS TRiM SAW- MODEL NUMBER 315.114261...
- Page 23 CRAFTSMAN 19.2 VOLT CORDLESS TRiM SAW- MODEL NUMBER 315.114261 The model number will be found on a plate attached to the motor housing. Always mention the model number in all correspondence regarding your CORDLESS TRiM SAW or when ordering repair parts.
- Page 24 Your Home For expert troubleshooting and home solutions advice @:anag@ www.managemyhome.com For repair - in your home - of all major brand appliances, lawn and garden equipment, or heating and cooling systems, no matter who made it, no matter who sold it! For the replacement parts, accessories owner's manuals that you need to do-it-yourself.