
Related Manuals for Ericsson SATELLITE R290


Summary of Contents for Ericsson SATELLITE R290
- Page 1 Ericsson R290 Satellite Mobile Phone for the Globalstar/GSM Network 8VHU·V *XLGH EN/LZT 123 4717 PA4...
- Page 2 This manual describes Ericsson R290 Satellite Fourth draft (September 1999) This manual is published by Ericsson Mobile Communications (UK) Limited , without any warranty. Improvements and changes to this manual necessitated by typographical errors, inaccuracies of current information, or improvements to programs and/ or equipment, may be made by Ericsson Mobile Communications (UK) Limited at any time and without notice.
-
Page 3: Product Care And Maintenance
Service should only be performed by Certified Service Partners. • Only use Ericsson original accessories. Failure to do so may result in loss of performance, damage to the phone, fire, electric shock or injury, and will void the warranty. - Page 4 If you are going to use your phone while driving, please: • Give full attention to driving. • Use an Ericsson Vehicle Handsfree Solution, if available. Law in many countries requires vehicle Handsfree Solution. Read the installation instructions carefully before installing a vehicle Handsfree Solution.
-
Page 5: Battery Information
• Use only Ericcson original batteries and the AC/DC adapter supplied with your battery charger. Using non original Ericsson accessories could be dangerous and will void your phone warranty. • Do not expose your battery to extreme temperatures, never above + 140 degrees F (+60 degrees C). - Page 6 • The battery can only be charged when the temperature is between 41 degrees F (+5 degrees C) and + 113 degrees F (+ 45 degrees C). • Turn off your phone before removing the battery. • Do not attempt to take a battery apart. •...
-
Page 7: Table Of Contents
Contents Introduction ... 1 About Your Phone ... 2 Globalstar/GSM 900 ...2 Operators & Subscriptions ...2 SIM Card ...2 Your PIN ...2 The Phone ...3 Preparing Your Phone for Use ... 4 The SIM Card ...4 The Battery ...5 Charging the Battery ...5 The Antenna ...7 Turning On the Phone ...8 Navigating the Menu System ... - Page 8 Pause Dialling ...25 Sending DTMF Tones During a Call ...26 One-Touch Dialling ...26 Call Duration and Cost ...26 Personalizing Your Phone ...30 Busy Numbers ...30 Ring Tone ...31 Ring Volume ...31 Escalating Ring Volume ...32 Caller ID ...32 Connect ID ...32 Automatic Display of Call Time ...33 Auto Answer ...33 Greetings ...33...
-
Page 9: Introduction
Introduction Thank you for choosing the R290 satellite/cellular phone, the revolutionary mobile phone that helps you keep in touch with the rest of the world. Read this handbook thoroughly to use your phone safely and correctly. The R290 hand-held satellite/cellular phone, hereafter throughout this manual referred to as “your phone”, literally puts the world at your fingertips. -
Page 10: About Your Phone
R290 User’s Guide About Your Phone Globalstar/GSM 900 The R290 phone operates in either Globalstar satellite or GSM 900 cellular mode. Operators & Subscriptions Before you can use your phone you must obtain a dual-mode subscription to a network. The services included in your dual mode subscription depend on your choice of operator and/or subscription. -
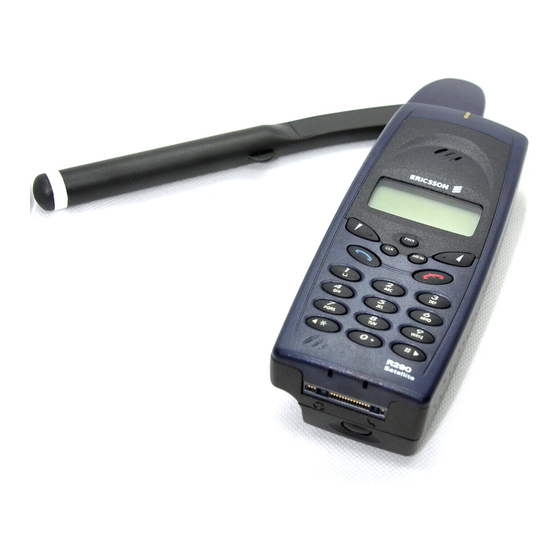
Page 11: The Phone
R290 User’s Guide The Phone... -
Page 12: Preparing Your Phone For Use
R290 User’s Guide Preparing Your Phone for Use Before you can use your phone for the first time you must install the SIM card (if it is not already installed), install and charge the battery, and set default parameters for the phone and networks. The SIM Card When you register as a subscriber with a network service, you receive a dual-mode SIM card. -
Page 13: The Battery
Operating with a GSM Standard SIM Card Your phone will operate in GSM mode with a standard GSM SIM card. You can change parameters to override the default satellite parameters. This allows you to set your personal preferences for use in GSM networks. - Page 14 R290 User’s Guide 1. Assemble the mains plug, charger and lead. The box may contain more than one mains plug. In this case use the one that fits the wall socket. 2. Connect the charger to the power outlet. A green indicator on the charger lights up.
-
Page 15: The Antenna
When the battery is fully charged, the battery meter in the display shows full and the indicator on top of the phone show a steady green light. It is possible to use the phone while the battery is being charged; however, the charging time is increased. -
Page 16: Turning On The Phone
R290 User’s Guide Use with Portable Hands Free (Globalstar Mode) Connect the Portable Hands Free unit to the phone. Rotate the antenna to the 90 degrees position. Place the phone on a flat level surface with the antenna vertical as shown below. The phone may be held in the hand if required but the antenna must always be vertical when used in Globalstar mode. -
Page 17: Navigating The Menu System
Navigating the Menu System The menus are arranged in a continuous loop that you move through with the YES, NO, CLR and Navigation keys. Name and Function Navigation Keys (Soft Left & Soft Right): Press right or left to activate menu mode and scroll through menus. -
Page 18: Indicators In The Display
R290 User’s Guide Indicators in the Display Icon Function Phone is in satellite mode. When not illuminated, the phone is in GSM mode. Flashes for incoming call, steady when call in progress. Flashes for unread message, steady when message read. Voice mail in box. -
Page 19: Initial Phone Settings
Initial Phone Settings You will need to set certain parameters before using your phone for the first time. You will need to set other parameters before using some of the features. You can also personalize your phone by changing settings such as the ring tone or melody, ring level, or display light. - Page 20 R290 User’s Guide The Mode Menu allows you to configure the phone to cellular only mode, satellite only mode or to set the preferential mode of operation to cellular preferred or satellite preferred. • The phone will only attempt to register on a cellular network when it is in cellular only mode.
- Page 21 is complete and a network will be displayed for selection. An example of the display for GSM mode will be: If there is more than one network, up/down arrow symbols will appear at the bottom of the screen and the SOFT KEYS can be used to view them. When the desired network is displayed, press YES to select it.
-
Page 22: Making And Receiving Calls
R290 User’s Guide Making and Receiving Calls This chapter describes how to make and receive calls, in both Globalstar and GSM mode, how to make international and emergency calls, how to show or hide your phone number when calling, and how to handle two calls simultaneously. -
Page 23: Receiving A Call
Receiving a Call When you receive a call, the phone rings and the indicator light on the top of the phone blinks green rapidly. The display appears similar to: Answering a Call Press YES to answer the call. When the call is finished, press NO. Rejecting a Call Press NO when the phone rings. -
Page 24: Handling Two Calls
R290 User’s Guide Handling Two Calls Your phone can handle two calls simultaneously. This allows you to hold one call and make or receive another, then you can switch between the two calls. To be able to receive a second call, you must activate the Call Wait function, see “Personalizing Your Phone”... -
Page 25: Useful Information While Talking
Useful Information while Talking During a call, you can: change the volume of the ear piece; mute the microphone; use the display as a scratch pad; send DTMF tones; check the duration of the current call. Changing Volume while Talking During a call, you can use the volume keys to increase or decrease the ear piece volume. -
Page 26: To Change The Ring Volume
R290 User’s Guide For the call duration and cost, the display will show: For the total call duration and cost, the display will show: The bottom line shows the call cost, and the duration is shown above it. To Change the Ring Volume Press the up or down key on the side of the phone while the phone is ringing before accepting an incoming call. -
Page 27: Missed Calls
return to stand-by. If a supplementary service request is made, including call hold and call wait, auto-redialling will be terminated. If you reject an incoming call by pressing NO, the auto-redial will not be terminated. It will be terminated only if the call is connected or the maximum number of retries is exceeded, whereby the number will be blacklisted so that auto-redial attempts to it are prevented. -
Page 28: Using The Phone Book
R290 User’s Guide The phone to which the call is diverted will display the message Diverted Incom’g Call (and the caller’s phone number if the CLIP information is present). Making a Call with Call Divert Set If you have set a call divert option and you make a call, the message Call Divert Active may be displayed briefly while the call is being placed. -
Page 29: To Store A Name And A Number Into A Selected Memory Store
É Ñ Ö Ø Ü For example, to enter the name Ericsson, press the following keys: E (33), SOFT RIGHT, r (777), i (444), c (222), s (7777), s (7777), o (666) AND n (66). R290 User’s Guide ‘ Ç... - Page 30 R290 User’s Guide Table 2: Lower Case Mode Number of Key presses ä å à é è ì ñ ö ø ß ü ù Table 3: Numeric Mode Number of Key presses ‘ æ ò The display will show: To move through the name, hold the <* and #> keys down for at least half a second.
-
Page 31: To Store Your Own Telephone Number
To Store Your Own Telephone Number The phone can store up to 5 of your own numbers. Normally only 1 is required, which is the number used to make speech calls with the phone. However, you may also have different numbers for other services such as data and fax. -
Page 32: To Display Your Own Telephone Number
R290 User’s Guide To return to stand-by and retain and recall the number for dialling or editing, press NO. To leave the number recall screen and enter a new number, enter the numeric digits. The number can be scrolled through in order to clear or insert digits. Press <* or #>... -
Page 33: Last Number Redial
When the Dialled store is active, the last number can be recalled by pressing SOFT RIGHT in stand-by. The display will be: If there is a name associated with this number, this will be recalled from the phone book stores. Press SOFT RIGHT to scroll through the list of dialled numbers. -
Page 34: Sending Dtmf Tones During A Call
R290 User’s Guide character space. The digits that you add after the PAUSE will be transmitted as DTMF tones across the network. For example: You can send the number in the usual manner, or store, dial or edit it, or clear the number from the display. -
Page 35: All Calls
All Calls 1. Press SOFT LEFT, 2, to enter the Call Time Menu. 2. Press 2 to display the duration and cost of all calls made. The time is displayed in hours, minutes and seconds. The cost is displayed in the chosen currency. - Page 36 R290 User’s Guide 4. Enter the unit cost. An example of how this should be entered is 2, 5, 0, 0 for the unit charge of £2.50. 5. Press SOFT LEFT to move the cursor to the Currency field and select a currency using the <* or #>...
- Page 37 3. Press 2 to display the Unit Time screen. 4. Enter the unit time in minutes and seconds. Press YES to enter the values that you have typed in. The time will be checked to determine whether it is valid; if it is not, the display will show Unit Time Invalid, before reverting back to the Unit Time display.
-
Page 38: Personalizing Your Phone
R290 User’s Guide If using a Phase 1 SIM, any attempt to access the Cost results in the message ‘Request Rejected’ being displayed. If you enter the SUPER PIN incorrectly three times, the SUPER PIN will be blocked and you will be unable to use the SUPER PIN protected features. -
Page 39: Ring Tone
NOTE: If the network indicates to the phone that CCBS is possible then the following screen will appear. If the number matches a number stored in the phonebook then the name is displayed on line 2. Press YES to make a CCBS request for this call. There is usually a delay while the network responds so the phone will display ‘Please Wait’: The network may respond with a confirmation that the request has been made successfully or that the request has been rejected. -
Page 40: Escalating Ring Volume
R290 User’s Guide 3. Press 2 for Ring Volume. 4. Adjust the volume level by using the up and down volume keys or the SOFT keys. The squares that are filled in indicate the volume level currently set. When the volume level is at its lowest, i.e. silent, none of the squares will be filled in. -
Page 41: Automatic Display Of Call Time
Automatic Display of Call Time To access the Auto Time menu. 1. Press SOFT LEFT, 1, 1 to enter Call Setup menu. 2. Press 6 to show Auto Time menu. 3. To enable Auto Time, press 1 or YES. To disable it, press 2. A confirmation message will be displayed before the phone returns to the ‘Call Setup’... -
Page 42: Clock Mode
R290 User’s Guide Set Time 1. Press SOFT LEFT, 1, 4 to enter the Clock Menu. 2. Press 1 or YES to set clock, current time is shown in brackets. 3. Enter digits for new time and press YES. Use * key to toggle am/pm. A confirmation message ‘Clock updated’... -
Page 43: Language
2. Press 4 to set Date Mode, current mode is shown with asterix. 3. The current date is presented in the currently selected date mode. Press SOFT LEFT and SOFT RIGHT to toggle round the options. The possible options are: Day-Month–Year e.g. -
Page 44: Power Save
R290 User’s Guide The following languages (in their native form) shall be displayed as the user scrolls through the options:- English Deutsch Francais Español Italiano Nederlands Portugues Dansk Norsk Svenska Polski Èeština Press YES to select the chosen language. The unit will then return to the Setup display with all message prompts in the new language. -
Page 45: Handsfree Automatic Shutdown Timer
2. Press 6 to show Power Save menu. 3. Press 2 to select the Indicator operation. 4. Press 1 to enable the Visual Indicators, press 2 to disable them. Handsfree Automatic Shutdown Timer Allows you to specify a time period (in minutes) when the phone will stay on after the vehicle ignition is switched off. -
Page 46: Protecting Your Phone
R290 User’s Guide New voice mail causes the alert tone to be played and the voice mail icon will flash until you call the voice mail centre. NOTE: Once you call the voice mail centre to retrieve mail, the flashing icon is extinguished, even if you have not heard all the messages. -
Page 47: Phone Lock (Pin)
1. Press SOFT LEFT, 7. The display will show: While the keypad lock is on, emergency calls can be made by pressing 1, 1, 2. If an incoming call is received, the backlight operation will be enabled and the YES, NO and 0 keys will become operational. You can answer the call using YES or reject it using NO, or 0 and YES for User Determined User Busy (which allows the diversion of an incoming call to be forced to the number that has been registered with the network for call... -
Page 48: Unblocking With Personal Unblocking Key (Puk)
R290 User’s Guide 3. Press 2 to select Enable. 4. Enter the 4 digit phone PIN and press YES. The message ‘Phone PIN Enabled’ will be shown on the screen and the phone will return to the Setup menu. To Disable the Phone PIN 1. -
Page 49: Card Lock (Sim Pin)
(and PUK 2) is a code that helps you unlock your phone when you have forgotten the PIN (PIN 2). If you have entered the PIN incorrectly three times in a row enter the following from stand-by: <* <* 0 5 <* SIM PIN1 Unblocking Key Then enter the new number. -
Page 50: Controlling Your Calls
R290 User’s Guide To Disable the SIM PIN Lock 1. Press SOFT LEFT, 1, 2 and press 3. If the SIM PIN has already been disabled, you will not be prompted to enter the SIM PIN, otherwise the display will be: 2. - Page 51 Data Call Divert If Busy To Fax Call Divert If Busy To Divert All Voice Calls To Divert All Data Calls To Divert All Fax Calls To Divert All Calls To The network may respond with a notification message for an unsupported service.
-
Page 52: Call Waiting
R290 User’s Guide accompanied by the RADIO PATH ACKNOWLEDGEMENT TONE in the earpiece. The phone will then return to the stand-by display. It is possible to have more than one call diversion option set at any one time, i.e. each option can be set and cancelled individually (including Divert All Calls). - Page 53 Only a voice call or voice calls may be placed on hold. To Check the Call Wait Status 1. Press SOFT LEFT, 5 to enter Advanced menu. 2. Press 2 for Call Wait menu. 3. Press 1 for Status. One of the following messages will appear: All Call Wait Services Activated Data Call Wait Activated All Call Wait Services Inactive...
-
Page 54: Call Waiting In-Call Menu
R290 User’s Guide you are not available, 4 to cancel call wait incoming calls when the phone is switched off. 5. Select the basic service group for which the call wait is to be cancelled. The display will show: 6. Press 1 for All Calls, 2 for Voice Only, 3 for Data Only or 4 for Fax Only. -
Page 55: Conference Calls
1. Press SOFT LEFT from within the current call and the Call Hold In- Call Menu will appear: 2. Press 2 to Switch calls. NOTE: The network always gives privacy between held and active calls. Placing a Call when the Called Party is Engaged If you make an outgoing call to a party that does not have call waiting activated and is already engaged in a call, your call will be cleared down. - Page 56 R290 User’s Guide The network will notify you that the conference call has been created and the phone will return to the In-Call display, with the message. You can repeat the procedure described above to add up to a total of five remote parties to the conference call.
- Page 57 The extraction operation also cannot be performed if a call has already been put on hold, the message ‘Call Already On Hold’ will be displayed before returning to the Normal In-Call display. If you have extracted a call from a conference call, it can be added to the conference call again by selecting 1 or YES from the Conference Menu.
-
Page 58: Call Barring
R290 User’s Guide 2 YES This accepts the waiting call and puts the active call on hold. 2X YES This puts all active calls on hold except call X with which communication shall be supported (used in conference calls). 3 YES Adds a held call to the conversation (i.e. - Page 59 Incoming Voice Calls Barred Incoming Voice Calls Barred When Roaming Incoming Messages Barred Incoming Messages Barred When Roaming Incoming Data Calls Barred Incoming Data Calls Barred When Roaming Incoming Fax Calls Barred Incoming Fax Calls Barred When Roaming The message(s) will remain on the screen until you press NO. To Set Outgoing Call Barring 1.
- Page 60 R290 User’s Guide 4. Press 2 to set Incoming Call Bar, the display will show the options. 5. Press a number to select the Call Bar option required. The display will show: 6. Press 1 for All Calls, 2 for Voice Only, 3 for Data Only, 4 for Fax Only or 5 for Messages.
- Page 61 3. Press 3 for Cancel, the display will show the options. 4. Press 2 to Cancel Incoming Call Bar. The display will show: 5. Press 1 for All Calls, 2 for Voice Only, 3 for Data Only, 4 for Fax Only or 5 for Messages.
-
Page 62: Sending And Receiving Text Messages
R290 User’s Guide Sending And Receiving Text Messages The Short Message Service (SMS) function allows you to send and receive text messages that contain up to 160 characters. Text messages can be received when the phone is in stand-by mode, when you are engaged in a call, or when incoming calls are diverted to another phone number. -
Page 63: To Read A Message
To Read a Message 1. Press SOFT LEFT, 3 to enter Messages menu. 2. Press 1 or YES to read messages. The display will show a chronological list of all stored messages, for example: The * indicates any unread messages. Use the SOFT keys to select the message you wish to read and press YES. -
Page 64: To Select Message Tones
R290 User’s Guide Scroll to the message you wish to delete using the SOFT keys and press long CLR. ‘Delete Message?’ is displayed. Press YES to delete this message and your phone will return to the store. If you delete the last message, your phone will display ‘No Messages’... -
Page 65: Displaying Priority Messages Immediately
Displaying Priority Messages Immediately Your Service Provider or Network Operator can send priority messages directly to your phone’s display rather than to be stored on your SIM. This Immediate Message Display feature can be disabled so the priority message is treated as a normal message and is stored on your SIM. If your phone is busy, a priority message will be stored in the same way as any ordinary message you may receive. - Page 66 R290 User’s Guide NOTE: You can now enter up to 160 alphanumeric characters (or spaces) to create a message. Additional characters will result in a warning tone and the message ‘Message too long’ being produced. To move through the text, hold the <* #> keys down for at least half a second.
- Page 67 To Enter the Validity Period You can enter a period of time which tells the service centre how long to retain the message and keep trying to send it when the destination cannot be reached. To help you when you first use this function, we have preset the validity period to 2 days.
- Page 68 R290 User’s Guide To Send the Completed Message 1. Press YES to send message. 2. You will now be asked to confirm the destination address of your message. If you are not happy with it, then you can edit the number. Otherwise press YES again to confirm the destination address.
- Page 69 4. Use the SOFT keys to choose a message and press YES to select it. The first three lines of the message are displayed. 5. You can use the <* and #> keys to scroll through the other messages and the SOFT keys to scroll through the message text. 6.
-
Page 70: Warranty
R290 User’s Guide Warranty Thank you for purchasing this Ericsson Product. To get maximum use of the features of your new product we recommend that you follow a few simple steps: • Read the Guidelines for safe and efficient use. - Page 71 LIMITED TO LOST PROFITS OR COMMERCIAL LOSS. TO THE FULL EXTENT THOSE DAMAGES CAN BE DISCLAIMED BY LAW. Some countries do not allow the exclusion or limitation of incidental or consequential damage, or limitation of the duration of implied warranties, so the preceding limitations or exclusions may not apply to you.
- Page 72 The Ericsson Policy is one of continuous development and consequently the information contained within this publication may vary in detail. All specifications and accessories are subject to change without prior notice.
- Page 73 Index Alarm ... 7 Antenna ... 7 Auto ... 18 Auto Answer ... 33 Backlight ... 36 Battery ... 5 Busy Numbers ...30 Call Barring ... 50 Call Cost ... 27 Call Divert ...42 Call Duration ...26 Call Waiting ... 44 Caller ID ...
- Page 74 Mode ... 11 Multiple Calls ...46 Mute ... 17 Network ... 11 NO ... 9 One-Touch Dialling ... 26 Outgoing Call Barring ... 51 Patents ...63 Pause Dialling ... 25 Personalizing Your Phone ... 30 Phone Book ... 20 Phone Lock (PIN) ...39 PIN ...