Table of Contents
Advertisement
Quick Links
owner's manual
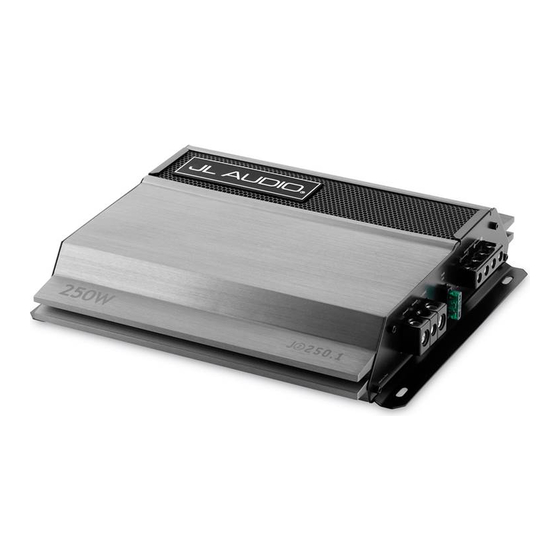
250W Monoblock Subwoofer Amplifier
Thank you for purchasing a JL Audio amplifier for
your automotive sound system.
Your amplifier has been designed and manufactured to exacting
standards in order to ensure years of musical enjoyment in your vehicle.
For maximum performance, we highly recommend that you have
your new amplifier installed by an authorized JL Audio dealer. Your
authorized dealer has the training, expertise and installation equipment
to ensure optimum performance from this product. Should you
decide to install the amplifier yourself, please take the time
to read this manual thoroughly so as to familiarize yourself
with its installation requirements and setup procedures.
If you have any questions regarding the instructions in this
manual or any aspect of your amplifier's operation, please contact your
authorized JL Audio dealer for assistance. If you need further assistance,
please call our Technical Support Department
at (954) 443-1100 during business hours.
Advertisement
Table of Contents

Related Manuals for JL Audio J2250.1


Summary of Contents for JL Audio J2250.1
- Page 1 For maximum performance, we highly recommend that you have your new amplifier installed by an authorized JL Audio dealer. Your authorized dealer has the training, expertise and installation equipment to ensure optimum performance from this product.
-
Page 2: Protect Your Hearing
+12 V Power Connector Connector (pg. 5) (pg. 5) Ground Remote Bass Boost Protection Status Control Indicator (pg. 9) (pg. 11) Filter Remote Level Port (pg. 8) (pg. 9) Protect Remote Level Port +9dB Bass Boost JL Audio Fuse (pg. 5) FUSE... -
Page 3: Planning Your Installation
The outer shell of your JL Audio amplifier is designed to remove heat from the amplifier circuitry. For optimum cooling performance, this outer shell should be exposed to as large a volume of air as possible. -
Page 4: Typical Installation Sequence
Additional steps and different procedures may be required in some applications. If you have any questions, please contact your authorized JL Audio dealer for assistance. 1) Disconnect the negative battery post connection and secure the disconnected cable to prevent accidental re-connection during installation. -
Page 5: Power Connections
Power connections Before installing the amplifier, disconnect the negative (ground) wire from the vehicle’s battery. This will prevent accidental damage to the system, the vehicle and your person during installation. Ground Remote Made in China The J2-250.1’s “+12 VDC” (positive) and “Ground”... - Page 6 “High-Level Inputs” connector on the amplifier. The J2-250.1 will attenuate the high-level signal to make it compatible with its input stage. Preamp Amplifier Outputs Speaker Output (Mono) LEFT High-Level Inputs RIGHT Inputs LEFT Input Sens RIGHT JL Audio...
- Page 7 IMPORTANT Make sure you observe correct polarity in making the “High-Level Input” connections. Failure to do so will result in a complete loss of signal (no bass). The connections for the “High-Level Inputs” plug wires are as follows from left to right on the plug: White: Left Positive (+) White/Black: Left Negative (–) Black: Common Ground (rarely used)*...
- Page 8 FIlter processing selected for the amplifier. IMPORTANT The signal level of the preamp output is always low-level regardless of whether you are using the “High-Level Inputs” or the Low-Level (RCA-jack) Inputs. Preamp Amplifier Outputs Inputs LEFT LEFT Input Sens. RIGHT RIGHT JL Audio...
-
Page 9: Remote Level Control
“bass boost” control The J2-250.1 includes a single band, boost- only bass equalizer controlled by a rotary knob marked “Bass Boost”. This control has a boost range of 0dB (full-counterclockwise) to +9dB (full-clockwise) and is centered at 45 Hz. Preamp Amplifier Outputs Inputs... -
Page 10: Speaker Output
Do not chassis ground any speakers connected to this or any other JL Audio amplifier. Doing so will cause the amplifier to go into protection. To connect the speaker wires to the amplifier,... -
Page 11: Protection Circuitry
If your amplifier fails or malfunctions, please return it to your authorized JL Audio dealer so that it may be sent in to JL Audio for service. There are no user serviceable parts or fuses inside the amplifier. The unique nature of the circuitry in the JL Audio amplifiers requires specifically trained service personnel. - Page 12 “Input Sens.” with this procedure. This applies to any EQ boost circuit, including source unit tone controls or EQ circuits. EQ cuts will not require re-adjustment. nom. impedance target ac Voltage 4Ω 3Ω 2Ω 26.5 V 25 V 22.5 V JL Audio...
-
Page 13: Input Section
aPPendix b: J2-250.1 specifications general specifications: Recommended Fuse Value: 30A Recommended Fuse Type: ANL at battery, 1x 30A ATC fuses on amplifier chassis. input section: Low-Level Input: Single-ended with RCA jacks Low-Level Input Range: 200mV - 4V RMS High-Level Input: Single-ended with molded connector High-Level Input Range: 630mV - 20.5V RMS amplifier section: Amplifier Topology: Class A/B Monaural with... -
Page 14: Appendix C: Troubleshooting
Check the input connectors to ensure that they all are making good contact with the input jacks on the amplifier. JL Audio... - Page 15 “my amplifier turns on, but there is no output” Check the input signal using an AC voltmeter to measure the voltage from the source unit while an appropriate test tone is played through the source unit (disconnect the input cables from the amplifier prior to this test).
- Page 16 Use this diagram to document your amplifier’s switch and control positions. Preamp Outputs High-Level Inputs Power Amplifier Inputs LEFT LEFT RIGHT RIGHT JL Audio...
- Page 17 Protect Remote Level Port +9dB put Sens. LP Filter Frequency (Hz) Bass Boost...
- Page 18 JL Audio...
- Page 19 installation notes:...
- Page 20 - amPliFiers (usa) JL Audio warrants this product to be free of defects in materials and workmanship for a period of one (1) year from the original date of purchase. This warranty is not transferrable and applies only to the original purchaser from an authorized JL Audio dealer.