Advertisement
Quick Links
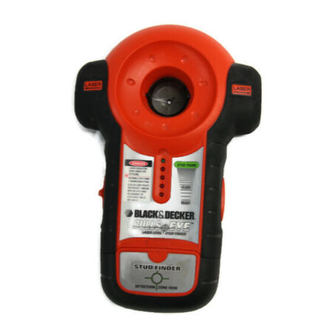
0 BIACK ,DECKERo
INSTRUCTION
MANUAL
Catalog No. BDL100S
IFYOU SHOULD EXPERIENCE A PROBLEM
WITH YOUR BLACK & DECKER PRODUC'I.,
CALL 1-800-54-HOW-TO (544-6986)
B_=ORE _R_LI CALL. H AVE IHE FOLLOWING INF_
AVSt L ABLE, CATALOG NO., T YPE NO., AND
DATE CODE (e.g.2_ooc_ 3 0M).iN MOSTCASES,A BLACK & DECKI_ REPRESENT, KnVECAN
RESO--VE 'tOL_ _
OV_:I THE _E.
IFYOUPIAVE A SUGGESTION OR (_,
GNE US
A CALLYOUR FEEDBACK ISVITAL TO BLAL;K & DEQ_L
SAVE THIS
MANUAL
FOR FUTURE
REFERENCE
VEA EL ESPA_IOLEN LA CONTRAPORTADA.
INSTRUCTIVe DE OPERACI(_N CENTROS DE SERVICIOY PeUZA DE GARANT)A,
ADVERTENC A: L_.ABE ESTE INSTRUCTIVe ANTES DE USAR EL PRODUC3"O,
Cat NO BDL100S
Form # 611195-00
(NOV02-CD-1)
Copyright
O 2002
Black & Decker
Printed
in LISA
_.WARNING; Read and understand aLL instructions. Failureto fellowall iostructtons fi_e ff
belowmay result in electric shock,tire and/orseriouspersenalinjury.
SAVE THESE INSTRUCTIONS
Safety Instructions
• Do not operatethe laser in explosive atmospheres,such as in the presenceof flammable
liquids, g ases, or dust.
• Usethe laseronlywiththe specif_altydesignatedbatteries. U se ef anyotherbatteriesmay
createa riskof fill.
• Storeidle faser out of reach ofchildrenand utheruntrained persons.Lasersare dangerous
in the handsef untrained users.
• Use only accesseries that are recommended by the manufacturer forry_our m odel.
Accessories that may be suifabJe for ene laser,may create a riskof injurywhen used on
anotherlaser
• De not use opticaltoolssuchas
a
tslaSCOp_ or transitto viewthe laserbeam. Sedouseye
in/ury couldresult,
• De not
place
the laser in a position which may cause enlyone to intentionally
er
unintentionally s tareinto the laser beam.Seriouseye injury oeuldresuti
• Turnthe laseroff when ifis netin use.Leaving the laseron increasesthe riskof staringinte
the laser beam.
• Repairs and servicingMUST be performedby a qualifiedrepairfacility. R epairsperformed
I_ ungualified personnel c ouldresultin serious injury.
•
WARNING: DO NOT DISASSEMBLE THE LASER, There are no user serviceable
parts inside.Disassembling the Laserwill voidall warrantiesen the product,Do not modify
the product in any way Modifyingthe tool may result in Hazardous Laser Radiation
Exposure.
• Do not operatethe laser aroundchildrenor allowchildrento operatethe faser,Seriouseye
injurymayresult.
• De not removeor defacewarninglabels.Removinglabelsincreases the riskofexposureto
radiation.
• Positionthe laser securely.Damage to the laser or serious injurycouldresultif the laser
fRIl_
• _-CAUTION: Use cautionwhen drilling,nailingor cutting intowalls floors and ceilings
whichmay containelectricalwiringor pipes.These itemsmay be detectedby the Bullseye
Stud Finderin thesame mannerin whichstudsare detected. Because studsare normally
spaced16 inchesor 24 inches apart and are 1-1/2 incheswide,beware of anythingcloser
tegetber or ef a differentwidth. A Jwayaturn off the power when working near electrical
_r_.
CAUTION: Use of controlsor adjustmentsor performanceef procedures other than
thosespecifiedinthis manual may resultin hazardouslaser radiation exposure.
The labelon yourtoolmay includethe following symbols.
V ..........................volts
mW ......................milliwaffs
nm ........................wavelengthin nanometers Ilia ......................Class Ilia Laser
Foryourconvenience and safety,thefollowing labels are on yourlaser.
manual.
To reduce the risk ut injury, user must read and understand thstructien
1.) Marking/Hangidg
Insert
la.) I-fangk_Inset t _ayhde)
lb.) SpacerIneed
lc.) Dryv_l Rn
2.) Laser On/Off Button
3.1Stud Finder On/Off
Button
4.) Red LED's (UghtEmfftlng
Dlode_}
4A.) Green LED
5.) Battery Compartment
Cover
6.) Serf-Leveling Laser
Unes
O
•
i
•
=_
1
:•
i
!
•
:: •
•
O
O
o
%tt
Antes
Wet
Mur
Pared
A"er I
Apr_s
Spacer/
--
--
Despu_s
Piece dlaspacement
Plaza espacladera
Installing
the Battery
Ensure laser on/off switch is in the full elf position. Remove the battery compartment cover (5)
bypress_ngdownlathecentarofthecoverasshowninFig.2aedpulfingbeck
nsert a f esh 9
volt battery making sure to match (+) and (-) terminals correcfiy.Repface
the battery
oempartment cover.
Operating
Instructions
STUD FINDER
Stu(I Scan Mode: (Finds metal er woodstuds throughup to 3/4" drywa ) P ace unit :at
againstwall as shownin Figure3. Pressin on the stud finderON/OFF button(3) and bed for
normalStudScanmede.ThebettomredLED 4 wiIHightaedtheuaitwillbeeponeewh e
s
calibrstdeg.Slideualtslowly, Figure4 horizoctallyacrosssurfaoeofwaHwtihoutligin or lung
When the firstred LED lights, slow down and keep slidinguntil the top green LE_la lit and
beep soundsas shownfoFi ure5.Thisisthestuded
e.Markthiss
t throu hthecenra
holeof the marking insert. _eep movingpastmark untl_lights g o out._e_nlinue_orldiogbutton
and reversedirec_on.Mark otherstudedge.Centerof stud isbetween two marks.
LASER
Place unit flat against wall as shown in Figure3. Push up on the laser on/off button (2) to
activatethesalf-lavefing laser lines.To bengthe uniton thewail,push p n (tc) hroughmarkng
insertintodrywallas shownin Figure6.When pressingpinintodrywall, make sure_ isstraight
and seatedfirmlyinthe marking insert and that the un_m secureon the wall.
• CAUTION: Pin is sharpand shouldbe handledwithcare. NOllE: The drywallpincan only
be used with the marking insert (1 and is onlyfor drywall NOT other surfaces inclad ng
plaster.Forsurfacesother than drywall,the (keyhole) haeginginsert(1a) can be used witha
standardscrewer nailin a predrilled hole.Makesure tiis straight and seatedfirmlyin the inse
and thatthe unitis secureon thewall.The drywall p inshouldalwaysbe pushedinby handand
neverdrivenby a hammer• T o removethe insert,pushitoutfrom the front side oftbe unit.
Figure7 illustrates a typicalapplication forthe Bullseye Laser Levelwhen itis wall mounted.
When visibi[dyis poor or when usinglaser outdoors,use the mark nQcone o enhance he
laser lineas shownin Figure8. Toextendthe line,usethe spacerloser[(1 b) whichisshownin
Figure 9. NOTE: Because the spacer insert keeps the unitfarther from the wall, the stud
sensorcan not be used when usingthespacer insert.
DANGER: Laser Radiation,avoid direct eye exposure.
Helpful
Hints
• ff the laser light becomes dim or is no longer visiblewhen the switchis in the on position
checkor changethe battery.
• The laserlinesare onlylevelon thewall againstwhichthe unitis heldor hung The short ne
visibleon any adjacentwall is notlevel.
• The laser unit is a wall use tool only and only generates levst lineswhen held againsta
verticalsurface.
• The laser unitis equipped with a self levelingpendulum lockthat stopspendulummotion
when the laser on/offswifch is moved to the off posifion.
• If the laser on/off switch ispusbed part way to the on position,the laser linesmay be on
whilethe pendulumlock is stillengeged.
Problem
Possible
Cause
• LEDs do notfight.
• Weak battery,
• Nuththgto detectinthat
area.
• The laser on/eff switch
must be pushed to the
full on position.
• Check mode.May have
been calibrated over a
stud.
• LED lights and sound
- Wall thickness is over
• Thickness must be lessthan 3/4
stayan.
3/4 inchthick,
inchto calibrate and work properly,
• LEDs tight in too many
• Detects other objects
• Because studs are normally
places,
besidesstuds,
spaced 16 inches or 24 inches
• ElectricaJ wiring and
apart and are 1-1/2 inches wide,
metal or plastic pipes
beware of anythingcloser together
may be near or touching or of a diberentwidth.
backsudace ef wall,
• Laser doesnot pre euton ofthe unitis+/.5 _qegrees
wall.
• The self favelin range • Be sure thatthe unitis as straight
the un t s not held
up and downas possible.
within 5 degrees
of
vertical, the laser lines
willnot projeston wall.
• Laser projects on wall
• Wall on whichthe unitis • Use the unit againstverticalwalls
but linesare notlevel,
mountedor held must be only,lineswit not be levelon sleped
within +/- 5 de_rees ot wallsor otber non-verfisai s urfeces.
vertical
tar
t[_e self
leveling mechanism to
function correctly. I t this is
exceeded, the lines will
still rojestbut may notbe
Solution
• Replacewithfreshbattery.
• Start againmoving fartherto either
side.
• Be sure laser odioffswitchis in the
full on position.
Storage
Alwaysstorethe BullseyeLaserLeveland StudFinderindoors and in itsprotective case.
Maintenance
Use only mild soap and damp clothto clean the tool. Never letany liquidget insidethe tool;
never immerseanypart of thetoolintoa liquid.
IMPORTANT: To assure product SAFETY and RELIABILITY repairs maintenance and
adjustment otherthan those listedin this manual shouldbe performed by authorized service
centersor sther qua ed servce organzatons.stwaye usingidenticahegfacement parts.
Accessories
Recommended
accessories for use with your tool are available from y_eurlecal dealer or
authohzed service center. If you need assistance regarding accessories, p[ease call:
_00-S4-NOW-TO
544-6_6).
WARN NG:
The use of any accessory not recommended for use with this tool could be
hazardous.
Service
Information
All Black& Decker Service Centers are staffedwith trained persennaite providecustomers
with efficient and reliablepowertool service.Whether you need technical advice,repair,or
genuinefactory replacementparts,centactthe Black& Decker locationnearest you.TOfind
yourfocal servicelocation,referto theyellowpage directoryunder"Tools--Electric" o r call:
_-eO0-S4-HOW T O.(S44-S_S)
Full Two-Year
Home Use Warranty
Black&Decker U,S.) Inc.warrantsthisproduct f or two years against any dehtotsin msterial or
workmansh p.The defectiveproductwillbe replacedor repairedat no changeIn eitherof two
ways.
The first, whichwillresultin exchanges only,is to returntheproductto the retailer from whomit
was purchased providedthat the store is a participating retailer. Returns shouldbe made
withinthe time periodof the retailer'spolicyfor exchanges (usually30 to 90 days after the
sale). Proofofpurchasemay be required.Pleasecheckw_th the retailer for theirspecificreturn
policyregardingreturnsthatam beyondthe time set forexchanges.
The secondoption is to take or send the product(prepaid to a Black & Decker owned or
autherizedService Center for repairor replacement at eur eop_tien.
Prootof pumbesemay be
required•Black & Decker owned and authorized Service Centers ere listed under "Tools-
Electric"inthe yellowpagesof thephonedirectory.
Thiswarrantydoes not applyto accessodes. T his warrantygivesyou specificlegaldghfaand
you may have other rightswhichvarLry from state to state.Should you have any questions
cohtast he managere yournearestBlack& DeckerServiceCenter.
This productisnut intendedfor commercial u se.
Impo_edby
_lack&DeCker(U.S)lnc.,
701EJopp_
Rd
TOWSOn,MD 2_286 U.S.A
See 'T_ole-Ell_'k:'
[]
- Yellow Page_ -
for SeP4ce & _du
GUIDE D'UTILISATION
No de catalogue
BDL100S
D'A
P LER, VEUILLEZVOU
A
UR
D'AV
IR
I'INFORMATION
SUIVANTE
,_ PORTEE
DE LA MAIN : LE NUM#RO
DE CATALOGUE,
LE NUM_RO
DE PRODUIT
ET LE CODE DE
DATATION (p. ex., 20000130M).
DANS LA MAJORITY
DES CAS, LE
REPR¢SENTANT
DE BLACK & DECKER
SERA EN MESURE
DE
R_SOUDRE
LE PROBL_ME
PAR TEL.=:PHONE. VEUILLEZ
NOUS
FAIRE PART DE VOS QUESTIONS
OU DE VOS COMMENTAIRES
EN
COMPOSANT
LE M[_ME NUMERO;
CEUX-CI
AIDENT
_ ASSURER
LA QUALITE_ DE NOTRE
SERVICE.
_ AVERll,_dEMENT : lira,comprendreet suivretoutes:as directh/es pr_cla_esci_essous,
y corn rla :as consignesde st_.urite, afin d'eviterles risquesde cbec_lectrique, d'incendie
ou de _essure grave.
CONSERVER CES DIRECTIVES
Conldgnu
de m_urlt6 concernant
• Nepas utltiser la laser dam; une atmoegh(_m explosive, comma en presence de liquide, de
gaz ou de pousal_m inflammable
• N Lr_llaerqua dampiles speciaiement congues pour les lasers rusage de tout autre type de
pile pourrati entraTner des risques dlincendla
• Larsquon
nfafillae pesle laser, la ranger hers de fa pattie
des enfants ou des personnes
non qu_llflees; lee lasers sent dengemux entre lee mains de petsonnes inexp_riment_es
• Nfaifllaer qua las accessoires recomrnandes par le fabdcant pour fa modele concernS; un
accessoim destio_, _ un outil parficulier peut devenir dangereux ioregu'il eat ufilisd avec un
autte
• Nepas utillaer un dispasifif opt!_vtierUe,
tel qu'un t_les_scop_e ou une lunette de passage, pour
examiner la lalaceau laser afln d
de causer des btsssure_; graves aux yeux.
• Nepas meffre le laser dens une position qui beurrait encourager une bersonne & regarder
directernent fa talaceau laser, volontaimment ou involontairement, car cela pourraif causer
des btessures grave_ aux yeux.
• Meffre la laser hers tension aprt_s cheque utillaation, car un laser laiss_ sous tension
encourage une personne t=regarder directement le taisceau laser.
• La r_parafion st I'entrstien DOIVENT t_treeffectuate dens un centre de service autods_ ou
par du personnel c[uaiifi_; route op_redon d'entrotfan ou de r_paration effectuab par une
personne non paaliflae pourraif entrafner des blassures gra. y es.
• _ AVL_qrT18815_EN11NE PAS DI_MONTER LIE LASER. I_outil ne comprend aucune piede
interne destth_e _ _tre entrstenue par rufilissteur. Le fati de demonter la laser annulara touta
garanfie couvrant ce predult; on ne doti jamais modifier ce dernlar de quelque maalere qua
ce soit afln d'evifer d'entrafner des degues d'exposifion aux rayonnemeuts.
• Nepas utiliser fa laser en presence d'un enfant, ni autodser les enfants & utiliserle laser afin
d _vber de causer des bfassures graves aux yeux.
MISE EN GARDE : on dolt talre parficufi_rement
attention iorsqalon perce un trou, qu'on
enfonce
un alog
ou qu on effeutue
une
coupe
dana
un mur, un
lancher ou url plafond
pouvant camoufler des ills _lactriques ou des tuyaux. Eoutil paut d_er
ces 61dmeuts tout
comma il d_ecfa lea montanta, ti fact tanir compta du _dt qua Ilaspace entre les montants
varla g_neralement an!re 40 et 60 cm (16 ut 24 pc), st que ceux-ci mesurent pros de 4 cm (1
1/2 pc de la_geur; si I outil d_tecta des 61_ments dent les mesures sent differentas, ti ne
s'agti peut_t_e pas de montants. On dolt touJoum coupar le courant Iorsqu'on travallle
proxlrnlt_ de flla itlactrlque_,
• Ne paa retirer ni abimer fas 6fiquettes
d'avertlasement;
le tait de retirer :as _fiquettes
augmentera kis dsques d'exposition aux rayonnements laser.
• B'assumr de blan ddpeser la laser sur une surface de alveau afin de I'emp_.-her de tomber
et de s'mdommager ou de blaeser r ultlissteur.
MISE EN GARDE : le fatid ufiliserdes commandes, d'effeutuer des r_gleges ou de suivre
des procedures autres qua caries decrifas aux prdsentes pourrait entrafner des riegues
dlaxpokition aux rayonnemenfa.
Uetiquelte apposee sur routil peut afflcber les aymbeles sue:ants :
V ......................................
volts
mW ...................... milliwatts
nm .................................. iongueur d'onde expdm_e en nanometres
Ilfa .................................. laser de classe Ilta
Pour vutte commedit_ et votre st_cudt_, :as 6gqueffes suivantes sent appos_es sur le laser.
directives et consignes
conte_u_s darls ]e
present guide afln de
r_duire lea risques de
bio88ut_.
COMPOSANTS
1)
Piece de marquage/suspension
le.)
Piece de suspension (trou de repbre)
lb.)
Pierce d'espacement
1c.)
Tige de fixation rnurale
2.)
Bouton marche-atr_t du laser
3.)
Bouton marche-arr_t
du Iocaliseteur
de montants
4.)
Tdrnoins _ DEL rouges
4a.)
T_moin _ DEL (diode 61ectrolumines
cents) vert
5.)
Couvercle du compartiment de la pile
6.)
Traits laser autoniveleurs
INSTALLATION DE LA PILE
Rstirer is couvercle du compartiment de la pile (5) en appuyant sur la centre, tel qu'fllustr_
la figure 2, st en la ltrant vers I'arri_m InsUrer une pile compl_tament charg_e de 9 volts en
s assura_t d'aligner las aymbolas des homes positives _ + _ et nt_jstives (_
_) Remettre
fa couvercfa sur la comparfiment de a p e
Advertisement

Related Manuals for Black & Decker Bullseye BDL100S


Summary of Contents for Black & Decker Bullseye BDL100S
- Page 1 Installing the Battery 0 BIACK ,DECKERo Ensure laser on/off switch is in the full elf position. Remove the battery compartment cover (5) bypress_ngdownlathecentarofthecoverasshowninFig.2aedpulfingbeck nsert a f esh 9 1.) Marking/Hangidg Insert volt battery making sure to match (+) and (-) terminals correcfiy.Repface the battery oempartment cover.
- Page 2 GARANTIE COMPL_rE DE DEUX ANS POUR UTIUSATION DOMESTIQUE ALMACENAMIENTO Mode d'emploi CARACTER|STICAS Black & Decker garantfi le predufi pour une I_dede de deux ans centre les vices de moti0re Guarde siempre el nivel y detector de entramado las_rieo Bullseye bajo techo yen su LOCALISATEUR DE MONTANTS 1.) Plaza insertable para marcar/colgar estucheprotector.