Sony Cyber-shot DSC-P92 Operating Instructions Manual
Digital still camera
Hide thumbs
Also See for Cyber-shot DSC-P92:
- Operating instructions manual (116 pages) ,
- Service manual (45 pages) ,
- Specifications (2 pages)
Table of Contents
Advertisement
Quick Links
Advertisement
Table of Contents

Related Manuals for Sony Cyber-shot DSC-P92


Summary of Contents for Sony Cyber-shot DSC-P92
- Page 1 3-082-719-11(1) Getting started Shooting still images Viewing still images Deleting still images Before advanced operations A dva nced still image sh ooti ng Advanced still image viewing Still image editing Enjoying movies Enjoying images on your computer_ Troubleshooting Additional information Index ×...
- Page 2 Model No.: DSC-P92 pa:ticular installation If this equipment does Responsible Pmty: Sony Electronics CAUTI_ TO _EDUCE TF_E RI_K OFEL,eThiCS_K. cause hannfid interference to radio or Address: 680 Kinderkamack television reception, which ca:: be determined...
- Page 3 If you 1-800-822-8837, Canada should lose the filse cover, please contact your visit htlp: '/www.rbrc orgi nearest Sony smvice station THIS ('LASS B DIGITAL DEVICE COMPLIES WITH PART 15 OF THE FCC Caution:...
- Page 4 using your camera Remove dirt from the surface of the Do not shake or strike the camera Trial recording flash Before you :ecord one-time events, you may In addition to malfunctions and inability to If the di:_ changes colo: o: sticks to the want to make a trial recording to make sure record...
- Page 5 Colporation. • "Memo_ W Stick PRO" and MEMIIRY 5TIgK PRO ale tradelnarks of Sony Colporation. • "MagicGate" and MZ_G|CGZ_TE trademarks of Sony Co_oration. • Microsoft and Windows are registaed trademarks of the U S. Microsoft Colpomtion in the United States and other cotllltlies.
-
Page 6: Table Of Contents
Table of contents Before using your camera ......Actiusting color tones "_\q_ite Balance...48 Identifying the parts ........Actiusting the flash level Flash Level...49 Viewing images on the LCD screen of your Shooting multiple frames camera ..........Clip Motion ......... Viewing images on a TV screen ..... - Page 7 Playing back images shot inMulti Burst mode ..........Playing back continuously ....The number of images that can be saved/ Playing back frame by frame shooting time ........Copying images to yore- COlnputer Jog p layback ........ Menu items ..........For Windows users ......
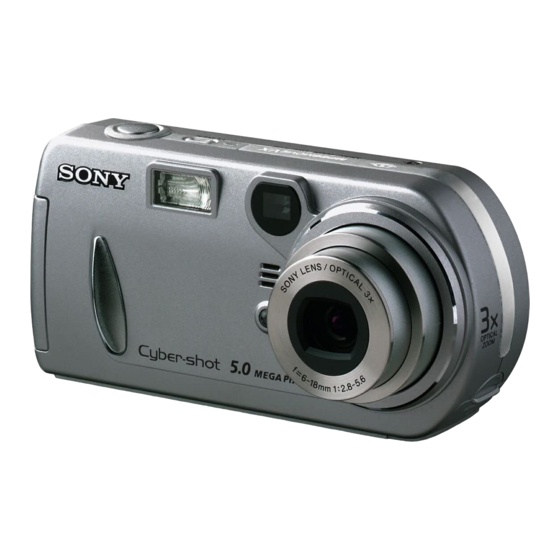
- Page 8 parts POWER button (16) Access lamp (19) Shutter button (22) "Memory Stick" cover (19) Flash (28) Microphone • Use a tripod with a screw length of less than 55111111(7/32 inch) You will be unable to Self-timer lamp (27)/ firmly secure the camera to tripods having AF illuminator (29) longer screws, and may damage the camera Tripod receptacle (bottom...
- Page 9 RESET button (87) DC IN jack (15) _ (USB) jack (78) A/V OUT (MONO) jack (34) Battery cover OPEN button (12) Wrist strap hook Attaching the wrist strap Jack cover Zoom buttons (during shooting) Finder (30) (25)/Index buttons (during Self-timer/recording playback) (33) lamp (red) (27/23)
- Page 10 Charging batteries batteries Use the ±\_llowing batteries in this camera. CHARGE lamp toawa outet Acceptable batteries (wa!t socket) HR 15/51 :HR6 (size AA) Nickel-Metal Hydride batteries (2) - NH-.%_-DA (2) (supplied) - NH-.%_-2DAtwin-pack (not supplied) R6 (size AA) alkaline batteries (2) (mains lead) Batteries that cannot...
- Page 11 Notes on the Nickel-Metal • To use tip the batter:es completely, pm the Charging time camera m the slide show mode [page 59) and Hydride batteries leave It *hat way ,mill the baneries are used up Nickel-Metal Hydride Charging time •...
- Page 12 Inserting batteries iiii _1_ Insert batteries. _1_ Close the battery cover. _1_ Open battery cover. Slide it in the direction of the alxo_ with the Close the battery cover while holding the Match the + poles of the batteries to the + batteries in.
- Page 13 Battery remaining indicator The Power Save function (When using the Nickel-Metal When thePowerSavef_non :__e::o On. Hyd ride batteries) you can shoot for a longer period of time. As the battery- power decreases w:th use. the Turn the mode selector to SET Lnp. and set batte_ remaimng lnd:cator...
- Page 14 • The battely life and the nmnber of images mtmber of images that can be recorded ol played recmdable decrease under the following When usmg Sony alkahne baUenes back allow for changing the supplied "Memory condlllOnS. Stick" as necessary. Actual results may differ - At low temperanu'es.
- Page 15 Using an external power source Using your camera abroad Power sources @ To a wail outlet You can use your camera in an?" country area _ith the supplied batteLv charger or AC Adaptor (not supplied) within 100 V to 240 V AC, 50,60 Hz.
- Page 16 to use your camera on/off control button The Auto Power Off function POWER lamp If no tasks are performed for a while* when shootmg, viewing images, or semng up the camera while using the ba_terles, power aummancally shut off to preserve battery power However.
- Page 17 Setting date time =1_ Press POWER to turn on the =1_ Select the desired date format =1_ Set the mode selector to a. camera. with A/V on the control button, then press 0. • You can can T out this operation even when the The POWER lamp lights in green and the mode selector is set to _...
- Page 18 =1_ Set the desired numerical =1_ Select the year, month, day, =1_ Select [OK] with I_ on the value with •IV on the control control button, then press hour, or minute item you want to set with _1/1_on the control button, then press 0.
- Page 19 Inserting removing a "Memory Stick" --I_ Open the "Memory Stick" --I_ Insert the "Memory Stick." --I_ Close the "Memory Stick" cover. cover. Insert the "Memory Stick" all the way in until it clicks as sho_n in the illustration. Slide the coxer in the direction of the arro_.
- Page 20 Setting still image size ii);iii _ ii!s! ;) !!iii!i? ¸..ii_iiiiii_i ii _ --I, Select the desired image size Press :_-=/_ (image Size). --I, Set the mode selector to I_, with &IV on the control button. and turn on the camera. The hnage Size setup item appears.
- Page 21 Image size quality You can choose image size (number The number of images that can be saved in a "Memory Stick ''2) plxels) and m:age quahty (compression The nmnber of images that can be saved In Free _Standard_ 3) mode are shown below.
- Page 22 still image shooting - using auto mode AE/AF lock indicator I Flashes in green Remains on =1_ Set the mode selector to a, =1_ Press hold the shutter =1_ Hold the camera steadily with and turn on the camera. both hands and position button...
- Page 23 The a position on the mode Twilight mode [_,_ selector See page When the mode selector is set to a, Twilight portratit mode functions that can be selected change accordmg to the _ (Camera) setting m the See page menu semngs as follows: Landscape...
- Page 24 Checking the last image shot - Quick Review Basic still image shooting using (continued) auto mode About Auto Focus When you _y :o shoot a subject that is hard to focus on. the AE/AT lock md:cator w:ll change to flashing slowly The Auto Focus fimction...
- Page 25 Using the zoom feature Smart zoom • You cannot confirm the image using the finder W (wide-angle) T (telephoto) when using file Slllat_ zoom flmetion. can zoom m on the image using • When using the smal7 zoom. the nnage on the &gltal zoom process...
- Page 26 Shooting close.ups - Macro For close-ups of small subjects like flowers =1_ Set the mode selector to a, =1_ Center the subject in the frame, or insects, shoot using the macro feature. and press I_ (_) on the control press shutter button You can use this feature i\)r close-ups of...
- Page 27 Using the self.timer -!_ Center the subject in the frame, Set the mode selector to _, and press the shutter button and press • (<_.)) o n the control button. fully down. The Self-timer lamp (page 8) will flash in The _) (Self-timer) indicator appears on the orange, and you will hear a beeping som_d.
- Page 28 Selecting a flash mode @ (No flash): The flash will not be used. When shooting against a light source • If the menu is cttrremly displayed, press MENU In Auto mode. shooting against a hght first to make the menu disappear. source automancally flashes...
- Page 29 To reduce "red-eye" when Shooting with the AF • _u,e11 ® Foc,,_ i xset t o_,mi AT]or iIIUminator Center AT], t he AFrange finder i s not shooting live subjects displayed. [] o: [] flashes and the cent:ally- The flash pre-strobes before shooting This :s addmonal...
- Page 30 Shooting with the finder Atl of the indicators are turned off Finde_ The LCD screen is turned off. All of the available indicators are turned The finder is convenient when you want save batter>' power, or when it is difficult confirm the image using...
- Page 31 Inserting date time on a still image NovEng i mage: SmartZoom: OatefTin_: R_ Ey_ Red_di0_: AF Illuminator: Camera ¸¸¸¸2\ SELECT i>>> iiii_ iiiiiiiiii =1_ Set the mode selector to SET =1_ Select date and time setting =1_ Select (Camera) with •...
- Page 32 images on the LCD screen of your Viewing on single.image screen Single Index Index (single-image) screen (nine-image) screen (triple-image) screen • For details on the movies, see page 69. You can view images shot with the camera =1_ Set the mode selector to [_, •...
- Page 33 Viewing on the index (nine. or triple.image) screen * SI_LE 0_SPLA¥,_*.MOVE tara --I_ Select the desired still image --I_ Press the zoom W (index) --I_ Press the zoom W (index) with _1/1_ on the control button. button once. button once more. to the index (nine- to the Index...
- Page 34 images on a TV screen A/V Connecting Cable (supplied) (MONO) jack TVNideo switch =1) Set the mode selector to [_, =1) Connect the supplied =1) Turn on the TV, and set the TV/ Video switch to "Video." and turn on the camera. connecting cable to the A/V OUT (MONO) jack...
- Page 35 Watching images on a TV screen SECAM system If you want to view nnages on a TV, you Bulgarm, France. Gmana. Hungary-, Iran, need a TV having a video input jack and the Iraq, Monaco. PoIand. Russia. Ukraine. em A/V connecting cable (supphed). The color system of the TV must match as that of your &gltal snll camera Check the following hst:...
- Page 36 Deleting images --I_ Set the mode selector to [_, --I_ Press "U-"/_ (Delete). --I_ Select [Delete] with • on the and turn on the camera. control button, then press The image has not yet been deleted at this Select the image you want to point.
- Page 37 Deleting on the Index (nine.image) screen --I_ While an Index (nine-image) --I_ Select [Select] with _1/1_ on the --I_ Select the image want control button, then press screen (page 33) is displayed, delete with ,&IVI_III_ press ;_==/_ (Delete). control button, then press §...
- Page 38 Deleting on the Index (nine. Deleting on the Index (triple.image) screen image) screen (continued) -I_ Press iU--/-_ (Delete). --I_ Press "-"-"/'_ (Delete). --I_ While an Index (triple-image) Select [OK] with I_ on the screen (page 33) is displayed, The image has not yet been deleted at this control button, then...
- Page 39 =1_ Select [Delete] with • on the control button, then press "Memory Stick access' appears on the screen. When this message disappears, image has been deleted. To cancel the deletion Select [Exit] with • on the control buttom then press...
- Page 40 a "Memory Stick" All data witl be erased --I_ Insert the "Memory Stick" --I_ Select li (Memory Stick Tool) --I_ Select [OK] with • want to format into the camera. with A/V on the control button. control button, then press Set the mode selector to SET...
-
Page 41: Your Camera
Changing items in the SET Changing menu settings to setup UP screen Press MENU. operate your camera Set the mode selector to SET The menu appears. This section describes the most frequently used menus and the SET UP screen. The SET UP screen appears. - Page 42 Select _;. (P. Quality) with _1/1_, Deciding the still Creating or selecting then select desired image a folder image quality quality with A/V, FINE Mode selector: Mode selector: You can select the still image quality from Your camera can create muhiple folders [Fine] or [Standard].
- Page 43 Creating a new folder Selecting the recording folder Set the mode selector to SET Set the mode selector to SET Select i] (Memory Stick Tool) Select iil (Memory Stick Tool) with •IV, [Create REC. Folder] with •IV, [Change REC. with I_IAIV, and [OK] with I_/•, Folder] with I_/•/I',...
- Page 44 Before operation Multipoint Choosing a focus When shooting still images, set It_ method (Camera) to any mode other than [Amo] in the menu settings (page 23). Mode selector: finder Control button Multipoint MENU The camera calculates the distance in three Center AF areas to the left, and right and in the center...
- Page 45 Shooting techniques AE/AF lock indicator Setting distance Even if it is difficult to focus in AT shooting to the subject because the subject is not in the cemer ofll_e flame, you can focus in this sivuation using Focus preset Cemer AF For example, when you are shooting two subjects, and there is a gap range Mode...
- Page 46 Press MENU. Set the mode selector to a Adjusting The menu appears. exposure Press MENU. Select [] (EV) with *l/l_. The menu appears. EV adjustment The value of the exposure ac!iusUnent is displayed. Select EE_ (Focus) with *1/_, Mode selector: then select distance...
- Page 47 Before operation Shooting techniques Selecting a metering When shooting still images, set !_ In nol_nal shooting, the camera makes mode (Camera) to an}" mode other than [Auto] in automatic exposure adjustments Check the the menu settings (page 23). image to be shoL if it looks like the image Mode selector: below, you should nlake lnanuM adjustnlents Control button...
-
Page 48: \Q_Ite Balance
Auto (No indicator) • Under fluorescent lights that flicker, even if you choose _, the white balance may not be Adjusting color tones The white balance is actjusted properly adjusted automatically. • Vv_en the flash is triggered, the mmmal setting - White Balance of white balance is cancelled, and the shooting... -
Page 49: Flash Level
High: Makes the flash level higher Adjusting flash than normal. Shooting multiple level frames Normal: Normal setting. Low: Makes the flash level lower than nonnal. - Flash Level Clip Motion Mode selector: Mode selector: • _u can carry out this operation even when the mode selector is set to H ((lip Motion only) You can ac[iust the amour of flash light. - Page 50 Shoot one frame. • If you do not complete Step r_, all the images Before operation will not be saved in the "Memol T Stick" Set [Moving Imagel to [Clip Motion] in the • In (lip Motiom the date and time cannot be SET UP settings (pages 41, 102).
-
Page 51: Bttrst
Set the mode selector to N:H. Shooting in Multi Shooting three Press MENU. Burst mode images in succession The menu appears - Burst 3 - Multi Burst Select-=-=_ (Interval) with 41/1,_, Mode selector: Mode selector: then select the desired between-frame interval with Pressing the shutter button once records 16... -
Page 52: For E-Mail
Select [Mode] (REC Mode) with Select [Mode] (REC Mode) with Shooting still images _1/1_,then select [Burst 3] with _1/1_,then select [E-Mail] with for e-mail A/T. &IV. Shoot your image. E-Mail You can do the next shooting after Mode selector: "Recording" disappears from the LCD can shoot images... -
Page 53: With Audio Files
If you hold down the shutter Shooting still images button, sound is recorded until you with audio files release the shutter button for up to 40 seconds - Voice To return to normal mode Mode selector: a In Step [], select [Normal]. -
Page 54: To Scene Conditions
at ``) Twilight portrait mode Snow mode When the whole of the screen turns white. Shooting according Use this mode x_hen shooting people m the scene conditions foreground at night. This mode allows you such as when you are shooting a snowscape, to shoot images of people in the foreground use this mode. -
Page 55: Effect
NR slow shutter The NR slow shutter lllode removes noise Control button from recorded images, providing clear MENU images. When the shutter speed is slow. tbe camera automatically works tbe NR slmv shutter mode and "NR" is indicated next to the shutter speed indicator Press tbe shutter burion filly down... -
Page 56: Picture Effect
Before operation Adding special effects When shooting still images, set (Camera) to any mode other than [Amo] in - Picture Effect the menu settings (page 23). Mode selector: Control button You can add special effects to bring out the MENU contrast in your images. -
Page 57: And Playing Back
Select the desired folder with On the Index (nine-image) screen Selecting folder _1/1_, playing back images - Folder _ SINGLE D IS_LAY ,€, MOVE Mode selector: On the Index (triple-image) screen Select the folder that images you want to Select [OK] with •, then press play back are stored. -
Page 58: Of A Still Image
Adjust the zoom with the zoom Enlarging image Enlarging a portion WIT buttons. - Playback zoom a still image Set the mode selector to [J_. Mode selector: Display the image you want to You can enlaTge an image up to five times enlarge. -
Page 59: Trimming
Recording an enlarged Select [Slide] with _1/1_, then Playing back press image - Trimming successive images Set the following items with A V 41 _" After have viewed Interval settings image using playback - Slide show zoom, 3 sec5 secil0 seci30 secil lnin press MENU. -
Page 60: Rotate
Set the mode selector to [], To skip to the next/previous Rotating still images image during slide show and display the image you Press _" (next) or 4 (previous). want to rotate - Rotate Press MENU. • The inlel_-al settings are just guidelines Mode selector: actual intervals differ, based on factors like the The menu appears. -
Page 61: Playing Back Images Shot Inmulti Burst Mode
Playing back continuously Playing back frame by frame Playing back images - Jogpiayback the mode selector to []. shot in Multi Burst Set the mode selector to []. mode Select the Multi Burst image with _1/1_, Select the Multi Burst image Mode selector: with _1/1_,... - Page 62 delete shot images \\then using this mode you cannot delete only certain frames. When you delete images, all 16 of the frames are deleted the same time. Display the Multi Burst image you want to delete. Press "_I / IN (Delete). Select [Delete], then press...
-
Page 63: Protecting Images Protect
On the single screen On the Index (nine.image) Protecting images screen Set the mode selector to [_. - Protect Set the mode selector to [], Display the image you want to press the zoom W (index) Mode selector: protect with _1/1_, button once to switch to the... -
Page 64: On The Index (N-Iple-Ilnage) Screen
Select [OK] with I_, then press On the Index (triple.image) To release protection screen In Step [] select the image from which you want to release protection, and press O. mark turns white Set the mode selector to [j_, To release protection from all of your selected image is protected. -
Page 65: Changing Image Size Resize
Select [Resize] with _1/1_,then Changing image size press • - Resize Select the new size with A/,, then press Mode selector: The resized image is recorded m the You can change the image size of a recording i\_lder as the newest file. recorded image, and save it as a new file. -
Page 66: Choosing Images To Print
On the single screen On the Index (nine.image) Choosing images screen Set the mode selector to [_. print Set the mode selector to [] Display the image you want to and press the zoom W (index) (DPOF) - Print mark print with _1/1_. -
Page 67: On The Index (N-Iple-Ilnage) Screen
Press MENU. On the Index (triple.image) To delete the _ mark screen In Step [] press • again. Select [OK] with I_, then press The _ mark disappears. To delete the Set the mode selector to [_L], marks from all ofyotu- images, repeat The t_ mark turns white and the press the zoom W (index) -
Page 68: Shooting Movies
Indicators on the screen while Set the mode selector to H Shooting movies shooting movies :::m Press "I,/_I/ (Image Size). These indicators are not recorded. Mode selector: The hnage Size setup item appears. Each time you press F-11, the status of the You can shoot movies (MPEG lnovies). -
Page 69: Viewing Movies On The Lcd Screen
• The procedure %r viewing movies on a TV is screen. the same as that %r viewing still images Press (page 34) • A movie recorded using other Sony devices is The movie Rages and sound are displayed a size smaller than still images played back. -
Page 70: Deleting Movies
On the Index (nine.image) On the single screen Deleting movies screen Set the mode selector to [_. Mode selector: Set the mode selector to [_ Select the movie you want to You can delete unwanted mox ies. and press the zoom W (index) delete with _1/1_. -
Page 71: Screen
Select [OK] with I_, then press On the Index (triple.image) screen "Memoly Stick access" message Set the mode selector to [_ appears on the screen. When this and press the zoom W (index) message disappears, the movie button twice to switch to the been deleted. -
Page 72: Editing Movies
Cutting movies <Example> Cutting the movie numbered 101_0002 Editing movies Control button 101 0001 101_0003 Mode selector: MENU You can cut movies or delete unnecessa_- Mode selector portions of movies. This is the recon_nended mode to use when the 101_0002 1. -
Page 73: Deleting Unnecessa W Portions Of Movies
Decide on a cutting point. Deleting unnecessary • "_%ucalmot cut the following images - Clip Motion Press O at the desired cutting point. portions of movies - Multi Bmst - Still image an unnecessary portion - Movies not long enough to cut (page 72). -
Page 74: Users
High Color (16-bit color. 65 000 colors) copy images using an additional device. more appear. the Sony Website for details. http :/www. sony. net/ • If you connect two or more equipment a single... -
Page 75: Screen
Click [USB Driver] on the title Click [Yes, I want to restart my Installing the USB driver screen. computer now], then click When using Windows XP. you need not [Finish]. install the USB &iver. Once the USB &iver is installe& you need not install the USB driver. -
Page 76: Screen
Installing "Image Transfer" Click [Next]. When "License Select the folder to be Agreement" screen appears, installed, then click [Next]. You can use the "hnage Trans_r" so,ware click [Yes]. Select the program folder, then to co_ images to your computer automatically when you colmect the camera click [Next]. -
Page 77: Screen
Installing "lmageMixer" in your computer, the "Infol_nation" screen You can use the "hnageMixer Ver. 1.5 for appears Follow the procedure on the screen Sony" software to copy, view and edit Restart your computer images. For details, see the software's help according to the screen. -
Page 78: The Lcd Screen
• When using Windows XP. the AutoPlay I_1 Connect the supplied Connecting camera wizard mttomatically appears oll the cable to the _}' (USB) jack of your computer desktop Proceed to page 81 the camera. Insert the "Memory Stick" with the images you want to copy UBB MODE into the camera. -
Page 79: Screen
Wizard activates. 1 Double-chck _ on the task tray. When copying is complete, "ImageMixer" If you want to cancel the setting, follm_ the Chck _a* (Sony DSCk then chck [Stop[ automatically launches and images appear. procedure below. Confirm... -
Page 80: Settings
Changing "Image Transfer" Copying images without • \Kqien you t13,to copy an image to a folder in which an ilnage with the same file name is using "Image Transfer" settings stored the overwrite confirmation message appears _lq_en you overwrite the existing - Windows 98/98SE/2000/Me You can change... -
Page 81: Screen
The "Scanner and Camera \Vizard" Then, perform the procedure fxom step [] • Yc, u can use the "ImageMixer Ver 15 for Sony" software to view and edit images on your again screen appears. computer For details, see tbe software's help Click [Next]. -
Page 82: And File
Image file storage destinations file names The image files recorded with your camera are grouped as folders in the "Memo_ Stick." Example: when viewing folders Windows Desktop /_i .{_ My Documents [_;_ My Computer [4:1_ _ 3½ Floppy Folder containing image data which was Local Disk recorded... - Page 83 101MSDCF DscoFIFIF]F] • Still image files shot normally 999MSDCF Normal mode (page 22) Burst 3 mode (page 51) • Multi Bmst mode files (page 51) • Still image files shot in E-Mail mode (page 52) Voice mode (page 53) DscoFIFIF]F].JpE •...
-
Page 84: Users
• If you connect two or more USB equipment to copy images using an additional device. a single computer at the same time, some • SoW USB Driver the Sony Website for details. equipmem, including your camera, may not • SoWUSB Shim operate depending on the type of USB http :/www. -
Page 85: Screen
"DSC0r-IN r-Iv3 JpE. " • "x_u can use the "hnageMixe_ _'el 15 for Copying images Sony" software to copy images to your 2 Change [Recowanended Applications] computer and to view images on your 1 Double-click to JAil Applications]. -
Page 86: Screen
Click For the Macintosh edition Creating a Video • 'Toast" by Roxio (not supplied) is _equired to create a Video CD You can create a Video CD using yom • The playback time of a movie file on die compmer. The created Video CD can be... -
Page 87: Screen
Press the RESET button located inside 3 Consult your Sony' dealer or local Troubleshooting authorized Sony' service facilil3-. the jack cover, then turn on the camera again. (This s_ ill clear the date and time If you have trouble with your camera, try settings, etc.) -
Page 88: Screen
Shooting still images / movies ym; tom ..The LCD screen is not • The power was tinned offwith the LCD screen ÷ Turn on the LCD screen (page 30) turned on even when the turned off tl:e last time you used the camera _ower is turned The subject... -
Page 89: Screen
iiii i ii i! i iiiiiiiiiiiiiiiiiiiiiiiiiiiiiiiiiiiiiiiiiiiiiiiiiiii! i' N ii iii i iiiiiiiiiiiiiiiiiiiiiiiiiiiiiiiii The image is too bright. • You are shooting a spot lighted subject in a dark ÷ Adjust the exposure (page 46) location such as on a stage •... - Page 90 Viewing images Sym_! _aus, _)1_!_ ..The image cannot • The lnode selector is not set to [_. ÷ Set the mode selector to [_ (page 32) played back. • You cannot play back the image on the camera, if it is modified on a computer or its tblderifile name is changed.
-
Page 91: Screen
! ii! i! i! i! i! i! i! i! i! i! i ! i ! i L`` N ; ;i iiii iiiiiii iiiiiii iiiiiii iiiiiii iiiiiii iiiiiii iiiii The resizing function • Movie (MPEG movie)/Clip MotioniMulfi Burst does not work. files cannot be resized cannot attach... - Page 92 ÷ Follow the copy pwce&ne fo_ your OS (pages 79 80 84). ÷ If you are using the "ImageMixer 1 5 for Sony" software, click on HELP ÷ If you are using the '<Image Transfer" software, see page 79.
-
Page 93: Screen
! ii! i i i i i i i i i i i i iiiii ``` N ; ;i iiii iiiiiii iiiiiii iiiiiii iiiiiii iiiiiii iiiiiii i cannot format • The write-protect switch on the"Memo O, Stick" ÷ Set it to the recording position (page 105) "Memory... -
Page 94: Screen
Warnings messages The %llowing messages appear on the LCD screen. No Memory Stick • Inse_t a "Memo!), Stick" (page 19) System error • T:u:: the power offand on again (page Memory Stick error • The inserted "Memory Stick" cannot be used with your camera (page 105). •... - Page 95 '_" •Calnera shake may occur due t o insufficient light Use t he f lash, mount tt_e camera on alipod, or othe_-ise secure the c amera inplace. Turn t he power off a nd on •Aproblem wit_ the l ens caused an enor again ::3"...
-
Page 96: Code Starting Appears
If yotLr camera is not still functioning well after trying the cotmtenneasure a couple times, the camera may be repaired. Contact yottr Sony dealer or local autholized Sony sela:ice facility and inform them of the 5- digit code. Example: E:61:10... -
Page 97: Time
E-mail (Units: images) The number of images that be saved/ 5.0M 6(tl) 12(23) 25(47) 51(95) 91(170) 186(345) 380(705) 15M (3:2) 6(11) 12(23) 25(47) 51(95) 91(170) 186(345) 380(705) shooting time 3.1M 10 (t8) 20 (36) 40 (73) 8t (t46) 145 (255) 296 (5t8) 604 (1058) The nmnber... -
Page 98: Menu Items
Menu items Menu items that can be changed differ depending on the position of the mode selector. The LCD screen shows only the items you can operate based on the current position of the mode selector. FactoD' settings are indicated _ ith m When mode... - Page 99 Mode (REC Mode) Voice Records an audio file (with a still image) in addition to the JPEG file qgage 53) E-Mail Recozds a small-size (320x240) JPEG file in addition to fl_e selected image size (page 52). Burst 3 Records three images continuously (page 51) •...
- Page 100 When the mode selector is set to !z! (when [Moving Image] is set to [Clip Motion] in the SET UP settings) (EV) +2.0EV +1 7EV +1 3EV Adjusts the exposure (page 46). + 1.0EV / +0 7EV / +0 3EV / •0EV 0.3EVi 0.7EVi 1.0EV/...
- Page 101 When the mode selector is set to [] Folder OK'Cancel Select the foldei that contains the images you want to play back (page 57). Protect Protects images against accidental erasme (page 63) DPOF Selects still images you want to attach'cancel the print (DPOF) mark (page 66) Slide...
-
Page 102: Set Up Items
UP items get the mode selector to SET UP. The gET UP screen appears. Factory settings are indicated with II. (Camera) Moving Image Selects tile shooting mode (pages 49 51 68) • MPEG Movie / Clip Motion Multi Btust Smart Zoom liOn / Off... - Page 103 (Setup 1) Power Save • Oft" Selects whethe! to use the Power Save mode (page 13). Displayed only when you a_e using the camaa with tile batteries LCD Brightness Bright/•Normal/ Selects the LCD brightness. This has no effect on the recorded images.
-
Page 104: Precautions
Cleaning the camera surface Moisture condensation occurs easily Precautions Clean the camera sm-±'ace x_ith a soft cloth when: • The camera slightly moistened with water, then wipe the is brought from a cold Do not leave the camera in the sturface with a dry cloth. - Page 105 ** The camera cannot record or play back the internal rechargeable button data needed by, the MagieGate fimction. "Memory Stick" battery We cannot ensure all of the fimetions of each This camera has an internal rechargeable "Memo W Stick" "Memo W Stick"...
- Page 106 Battery • Do not strike, bend or drop a "Memo_ 3, Stick" life nickel-metal • Do not disassemble or modi_ a "Memory • The battery lif_ is limited. Battex_" Stick" hydride batteries capacity decreases little by little as you • Do not expose the "Memo W Stick" to water. use it more and more, and as time passes.
-
Page 107: Batteries
Flash Recommended distance 05 to 38 m (19 3' 4 inches to battery charger Specifications 12 feet 5 I9/32 inches) (W)i 06 to, 25 m (23 5/8 inches to • Do not charge any other batteries except • Camera 8 feet 2 7/i6 inches) the Son?"... - Page 108 • AC-LS5 AC Adaptor (not supplied) Mass Approx 2605 g (92 oz) (two batteries. "Memory Stick" and wrist Power le qltilelllent strap included) AC 100 t_ 240 V. 50"60 Hz Microphone Electlet condenser microphone 11 W0 16to0.09A Speaker Dynamic speaker Rated output voltage...
- Page 109 Low battery warning (94) screen AF range finder (44) Spot metering cross hair (47) For shooting still images Image quality indicator (21 42) Recording folder indicator (42) Remaining number of recordable images indicator (21)/ Self-diagnosis display (96) Remaining "Memory Stick" capacity indicator Center AF _/Multi...
- Page 110 Center AF _/Multi AFro Recording mode indicator (68) Battery remaining indicator (13) indicator (44)/ White balance indicator (48) Focus preset value (45) Picture effect indicator (56) EV adjustment indicator (46) Low battery warning (94) Macro (26) Spot metering cross hair (47) Self-timer indicator (27)
- Page 111 For still image playback For movie playback The page numbers in parentheses indicate the location of additional important in±\_nnation. Image size indicator (20, 21) I FolderI Proteotl DPOFI Slide III [] Recording mode indicator (49 Image size indicator (69) Volume indicator (53)/Protect Recording mode indicator (69)
-
Page 112: Index
Index Date and time ..........17.3I GIF ............. 49, 83 DC plug ............Deleting images ......... 36. 70 Divide .............. A_V connecting cable ........hnage Access lamp ............. Copying images to your computer ..74, 84 AEiAF lock ..........22, 45 File names ........... - Page 113 Men/i Self-timer ............Smart zoom ..........Changing menu ..........Setting Spot metering ..........Metering mode ..........(hanging menu ........... The number of images can be save_ Mode selector ............. Date and time ..........shooting time ......14_ 2 I, 97 Moisture condensation ........
- Page 114 Printed on 100% recycled paper using VOC (Volatile Organic asked questions can be found at our Customer Support Website. Compound)-free vegetable Additional information on this product and answers to frequent based ink. _m m http://www.sony.net/ Sony Corporation Printed in Japan...