Table of Contents
Advertisement
Quick Links
Advertisement
Table of Contents

Related Manuals for Epson QX-10


Summary of Contents for Epson QX-10
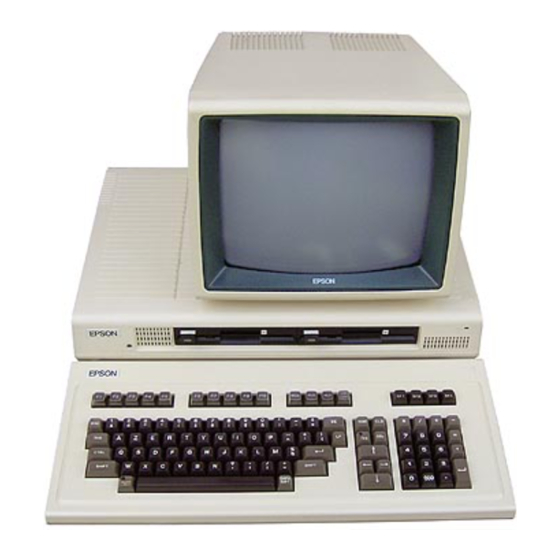
- Page 1 ® EPSON QX-10™ OPERATIONS MANUAL...
- Page 2 Epson America, Inc. No patent liability is assumed with respect to the use of the information contained herein.
-
Page 3: Table Of Contents
Bits and Bytes....... QX-10 Memory........ - Page 4 Removing the Option Cards Cover... . . QX-10 Interior: The Option Card Well..Removing the Shipping Brace....
-
Page 5: Getting Started
Air should not only be allowed to circulate under the system, but behind it as well. Clear a few inches behind the QX-10 for the ventilation system to work best. Chapter 1... - Page 6 Even your telephone can upset things if it’s kept too close to your equipment or diskettes. Once you’re sure you have the ideal place to set up your QX-10, carefully open the other three cartons. Use a small, sharp tool such as a pocketknife to cut the tape-carefully.
-
Page 7: Getting Hooked Up
LIGHT PEN PORT POWER CORD OUTLET To connect the components of the QX-10, you’ll use two of the outlets on the back of the main unit. The power cord connects to the large rectangular outlet on the left side, labelled CAUTION: DISCONNECT POWER BEFORE SERVICING. - Page 8 Important: Be sure the power switch is OFF before you hook up the QX-10. Plug the rectangular end of the power cord into the QX-10 power receptacle on the back of the main unit and the other end into a 3-prong, l20-volt grounded wall outlet.
- Page 9 The monitor cable is fairly short, with a cylindrical plug on either end. These are called DIN plugs. The monitor cable DIN plugs differ only in the number of pins inside: the end that connects to the back of the monitor has seven pins and the end that con- nects to back of the main unit has eight pins.
- Page 10 (Be sure to get it all the way in.) Then plug the other end into the round outlet at the lower left of the front of the main unit, under the Epson logo. CABLE...
- Page 11 KEYBOARD CABLE Some people like to use the QX-10 with the keyboard on their laps and others like to set it on a firm surface, but your options don’t end there. You can also adjust the angle of the keyboard.
-
Page 12: Power
Never try to open the disk drives while the disk is turning or while the red drive light is on. Never turn the QX-10 ON or OFF with diskettes in the drives. Never open the case with the power cable plugged in. - Page 13 (you can hear it). You may also notice that a number of small red lights on your keyboard blink on and off. This indicates that your QX-10 is performing an internal self- diagnostic test. The small red light to the right of drive A also comes on, and the message INSERT DISKETTE appears on the monitor screen.
-
Page 14: Booting
PUSH, and the red IN-USE light. You’ll be working with two kinds of diskettes: system diskettes and data diskettes. System diskettes carry the information that tells the QX-10 how to perform specific operations-for example, the Valdocs™ system diskette contains all of the information the... -
Page 15: Caring For Your Diskettes
40-track, soft-sectored diskettes. It sounds like a mouthful, but this is the only kind of diskette that func- tions properly with your QX-10. Looking at the top surface of the diskette, you’ll notice that the right edge has a small rectangular notch. When this notch is covered by the adhesive write-protect tabs that are included in the diskette package, the diskette will not accept new information. -
Page 16: Make Backup Copies Often
Use the second system backup as your day-to-day working diskette. If you’ll be using your QX-10 on a regular basis, you should make backup copies of your diskettes every day. Most professional com- puter users do. A little precaution now can save you a great deal of trouble later. -
Page 17: Don't Touch Those Diskettes
for that day and copy your data onto it. For specific backup in- structions, refer to the user’s guide for your system. If you’re still unconvinced, just remember Murphy’s Law: If anything can go wrong, it will. There are all sorts of ways to lose important data. -
Page 18: Beware Of The Magnetic Field
Beware of the Magnetic Field Remember that diskettes store their data magnetically, just like tapes. You probably won’t be running a horseshoe magnet over the surface of the diskette, but you should be aware that there are many sources of magnetism in and around your home or office. A paperclip from a magnetic paperclip holder, strategically dropped on the magnetic surface of a diskette, can do plenty of damage, as can the... - Page 19 When you’re sure that the drive is not reading or writing (when the red IN-USE light is off), remove the diskette by pressing the button marked PUSH and sliding the diskette out. That’s it! Your QX-10 is up and running!
-
Page 20: Qx-10 Components
QX-10. Relax, and rest assured that you do. In fact, it will be fun to look back in a week or so, after you’ve begun working on the QX-10, and amaze yourself with the pro- gress you’ve shown! -
Page 21: Qx-10 Memory
QX-10 Memory Unlike the human brain, the QX-10 has a limit to the amount of information it can store in memory. On the other hand, peo- ple sometimes have trouble recalling facts, but the QX-10’s stored data is always accessible on demand. -
Page 22: Programs
The QX-10 uses RAM-random access memory-which can be both written into and read. Normally RAM is lost when a com- puter is switched OFF, but the QX-10 has 2K of CMOS RAM, which enables it to retain some data when you turn OFF the power. (More about CMOS RAM later.) -
Page 23: The Video Monitor
DRAW The Video Monitor Your QX-10 has a special high-resolution green monochrome video monitor (also called a CRT, for cathode ray tube). The video monitor has what’s called dedicated RAM memory. This means that the l28K video memory (331,072 bytes) is dedicated to work only for the monitor. -
Page 24: Other Features
QX-10 is equipped with a long list of state-of-the- art features. Several of these are briefly described here. The QX-10 has 8K of ROM, or read-only memory. This is memory that cannot be altered and which contains instructions for start- ing up the computer. -
Page 25: Serial Port
Serial Port One serial port is available to connect external devices to the QX-10. The port is a standard RS-232C port; however, it can be changed under software control, by selecting the serial port op- tion from the SETUP program in either CP/M or Valdocs. Devices such as serial printers, single-line modems, additional monitors, and other computers can be connected to the available serial port. -
Page 26: Light Pen Interface
If this deluge of information seems a bit too much right now, don’t worry. You’ll have time to explore the capabilities and features of the QX-10 as you use it. The ease of operation and many useful features of the QX-10 are what make owning and using this finest... -
Page 27: Installing External Devices And Option Cards
And Option Cards External devices such as printers, modems (for computer-to- computer communication over telephone lines), and speech syn- thesizers are all connected to the QX-10 through ports (outlets) built into the back of the main unit. Installing External Devices... -
Page 28: External Device Ports
External Device Ports There are three external device ports on the back of the main unit: a light pen port, a Centronics-compatible parallel port (la- belled PRINTER), and an RS-232C serial port. The RS-232C port may also be used for a printer, but because it relays data at a slower rate than the parallel connection, it is generally not the preferred choice for printing. -
Page 29: Plugging In
Installing Option Cards Option cards, like external devices, are accessories that you add to increase the versatility of your QX-10. Unlike external devices, however, option cards are installed internally. Some option cards are equipped with outlets for external devices, while others are designed to work directly with the QX-l0 or to be used with built-in devices. -
Page 30: Powering Down
First, turn the power switch OFF. Then unplug the power cord from the wall outlet and turn the main unit around so that the back is facing you. WARNING: Never open the QX-10 while it is plugged into a wall outlet! Removing the Option Cards Cover Unscrew the Phillips screws on each side of the option access slots. - Page 31 the front end. After the top is raised as far as it will go, you can lift it off. Set the cover aside.
-
Page 32: Removing The Shipping Brace
The black metal plate is a shipping brace. It is easily removed by unscrewing the small Phillips screw on the inside. Store the screw and the brace in a safe place. You may want to use the brace later if you need to ship or transport your QX-10. -
Page 33: Selecting The Correct Slot
(which looks like a metal fringe on the bottom of the card) should also be avoided, because dirt or grease will impair proper contact with the QX-10. Even though they are designed to fit only one way, it’s a good idea to examine the card first. -
Page 34: Inserting The Option Card
Inserting the Option Card Slide the option card down into the proper slot, fitting the front end of the card into the corresponding notched guide on the front wall. Once the connector pins are seated in the connector slot, push a little more firmly to insert it fully. If the option card didn’t go in smoothly pull it out and try sliding it in again, being sure to keep it straight in the notched guide. -
Page 35: Replacing The Cover
main unit. Snap off the selected access slot while gripping the neighboring access slot(s) with your other hand. Now slide the remaining access slots back into place. Replacing the Cover With the cover in a vertical position, fit the two hinges into their holes on the front of the main unit, then lower the cover. -
Page 36: Powering Up
Powering Up Before you power up your QX-10, check to see that the power switch is OFF. Then plug the power cable into the wall outlet and turn the main unit around so that the front faces you. Now, unless your option card manual contains special instruc- tions, you’re ready to power up your QX-10. -
Page 37: Troubleshooting
Your QX-10 has been especially well-constructed, internally and externally, to be problem-free and damage-resistant. Occasionally though, even with the QX-10, things can go wrong. In many cases the problem is due to human factors-maybe you’re still mastering a new software package or option. Or, perhaps there is a bug in the software. -
Page 38: Booting Problems
Does the second one work correctly? If so, the first one was prob- ably bad; save it and take it back to the supplier for a refund. But if the second (and all the rest) give the same undesirable results, go troubleshooting somewhere else-the odds are that you'll never buy a box of diskettes with more than one lemon in it. -
Page 39: Crossed Wires
Crossed Wires? If you have just set up your QX-10 and it isn’t behaving, double- check the cables. Are the connections tight? And are they correct? Is the keyboard cable going into the front of the main unit? (It’s possible to plug the keyboard cable into the... -
Page 40: Dip Switch Problems
DIP Switch Problems? There is a bank of eight DIP switches on the back of the main unit, between the monitor outlet and the speaker volume knob. Some software (such as Valdocs) might not work at all if the DIP switches are set incorrectly, or the software might give you a message on the monitor as to which switch(es) should be changed. -
Page 41: Options
CMOS memory to lose data. Static electricity is rarely this powerful but if you were, for in- stance, to turn on a negative ion generator next to your QX-10, you could wipe out CMOS or diskette memory. Battery Low? Your CMOS battery can last several weeks with the QX-10 power OFF. - Page 42 WARNING: Never open the QX-l0 while it is plugged into a wall outlet! If you do have problems you can’t solve yourself, call your Epson dealer or authorized Epson service center. INSERT DISKETTE DIAGNOSTIC CODE 0001...
-
Page 43: Index
3 power switch, location of, 4 How to handle diskettes, 13 How to insert a diskette, 14-15 How to remove a diskette from the drive, 15 How to turn the QX-10 off, 8 How to turn the QX-10 on, 8... - Page 44 If option card doesn’t go in smoothly, 32 INSERT DISKETTE message, 9, 15, 40 Interface, light pen, 23 Internal self-diagnostic test, QX-10, 9 IN-USE light on disk drives, 10, 15 Joystick, installing, 23 Keyboard, 19-20 changing the angle of, 7-8...
- Page 45 CMOS, 19, 22 dedicated, 20 definition, 19 Random access memory, see RAM Read-only memory, see ROM Red lights on QX-10, 9, 40 Registration cards, 2 Repairs that should be done by trained QX-10 service specialist, 40 RESET button, 36 location of, 10...