Table of Contents
Advertisement
OWNER'S
MANUAL
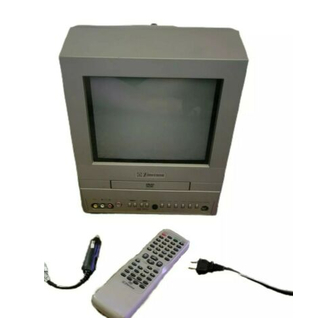
9-INCH COLOR TV/DVD
EWC09D5
EWC09D5 B
"EMERSON AND THE G-CLEF LOGO ARE REGISTERED TRADEMARKS
OF EMERSON RADIO CORP., PARSIPPANY, NEW JERSEY, U.S.A."
INSTRUCCIONES EN ESPAÑOL INCLUIDAS.
If you need additional assistance for set-up or operating after
reading owner's manual, please call TOLL FREE : 1-800-256-2487.
Or visit our WEB SITE at http://www.EmersonAudioVideo.com
Please read before using this equipment
Advertisement
Table of Contents

Related Manuals for Emerson EWC09D5 B


Summary of Contents for Emerson EWC09D5 B
- Page 1 MANUAL 9-INCH COLOR TV/DVD EWC09D5 EWC09D5 B “EMERSON AND THE G-CLEF LOGO ARE REGISTERED TRADEMARKS OF EMERSON RADIO CORP., PARSIPPANY, NEW JERSEY, U.S.A.” INSTRUCCIONES EN ESPAÑOL INCLUIDAS. If you need additional assistance for set-up or operating after reading owner’s manual, please call TOLL FREE : 1-800-256-2487.
-
Page 2: C Important Safeguards
WARNING: TO REDUCE THE RISK OF FIRE OR ELECTRIC SHOCK, DO NOT EXPOSE THIS APPLIANCE TO RAIN OR MOISTURE. CAUTION RISK OF ELECTRIC SHOCK DO NOT OPEN CAUTION: TO REDUCE THE RISK OF ELECTRIC SHOCK, DO NOT REMOVE COVER (OR BACK). NO USER SERVICEABLE PARTS INSIDE. - Page 3 EXAMPLE OF ANTENNA GROUNDING AS PER NATIONAL ELECT RICAL CODE NEC - NATI O NAL EL ECTRI CAL CO DE S2 8 9 8 A 12.Power-Cord Protection-Power-supply cords should be routed so that they are not likely to be walked on or pinched by items placed upon or against them, paying par- ticular attention to cords at plugs, convenience receptacles, and the point where they exit from the appliance.
-
Page 4: C Precautions
IMPORTANT COPYRIGHT INFORMATION Unauthorized copying, broadcasting, public perfor- mance and lending of discs are prohibited. This product incorporates copyright protection tech- nology that is protected by U.S. patents and other intellectual property rights. Use of this copyright protection technology must be authorized by Macrovision, and is intended for home and other limited viewing uses only unless otherwise autho- rized by Macrovision. -
Page 5: Location
: Description refers to the items to be set by the QUICK mode (in the DVD mode). Batteries 2 AA Batteries Matching Adapter Car Battery Cord (1813641 or 1780258 (WPC0202GA001 or WPC0202HHH01) – 5 – – 5 – WARNING Owner’s Manual Owner’s Manual (1EMN20217) Carrying Bag (1EMN20243) *Only EWC09D5 B... -
Page 6: Table Of Contents
C IMPORTANT SAFEGUARDS ... . .2 C PRECAUTIONS ......4 LOCATION . -
Page 7: C Features
TV Mode • 181 channel capability PLL frequency synthesiz- er tuner with direct station call (A converter may be necessary to view scrambled cable channels.) • Infrared remote control • Trilingual on screen menu display selectable in English, Spanish, or French ¡... -
Page 8: Operating Controls And Functions
OPERATING CONTROLS AND FUNCTIONS FRONT PANEL VIDEO AUDIO POWER VOLUME CHANNEL STOP 8 9 10 11 12 13 14 REMOTE CONTROL POWER PICTURE SELECT +100 SLEEP SKIP V.SURR PLAY STOP PAUSE SLOW DISPLAY ENTER SETUP TITLE CLEAR SEARCH MODE REPEAT AUDIO SUBTITLE MODE... -
Page 9: Installing The Batteries
17. SLEEP Button [page 15] Sets the sleep timer. 18. REV h Button [page 20] Hit to fast reverse the Disc. Hit [PAUSE F], then hit this button to begin slow motion playback. Hit this button repeatedly to change the reverse speed of slow motion. -
Page 10: C Preparation For Use
ANTENNA/CABLE CONNECTION Cables used here are commercially available. [ANTENNA CONNECTION] 75-ohm VHF/UHF Coaxial Cable VHF/UHF Combiner Adaptor Flat twin- lead cable Note to CATV system installer: This reminder is provided to call the CATV system installer’s attention to Article 820-40 of the NEC that provides guidelines for proper grounding and in particular, specifies that the cable ground shall be connected to the grounding system of the building as close to the point of cable entry as practical. -
Page 11: Connecting To External Input Jacks
CONNECTING TO EXTERNAL INPUT JACKS When you watch a program recorded on another source (VCR or video camera), use the AUDIO/VIDEO input jacks on the front of the unit. Connect the AUDIO/VIDEO output jacks of another source to the AUDIO L/R and VIDEO jacks of this unit. -
Page 12: Connecting To A Stereo Amplifier Equipped With Digital Input Jacks
CONNECTING TO A STEREO AMPLIFIER EQUIPPED WITH DIGITAL INPUT JACKS (for DVD) Use an audio coaxial digital cable (commercially available) for the audio connections. Connect to an amplifier equipped with digital input jacks such as MD Deck or DAT Deck. MD deck, DAT deck, etc. -
Page 13: Connecting To A Dolby Digital Decoder (For Dvd)
CONNECTING TO A DOLBY DIGITAL DECODER (for DVD) If using this unit to play a DVD disc in a 5.1 channel Dolby Digital surround format, the unit outputs a DOLBY DIGITAL Data stream from its COAXIAL jack. By hooking the unit up to a Dolby Digital decoder, you can enjoy a more convincing, realistic ambience with powerful and high-quality surround sound as enjoyed in movie theaters. -
Page 14: Tv Section
TV SECTION TV OPERATION AND SETTINGS SET UP FOR THE FIRST TIME Plug in the unit power cord Plug the unit power cord into a standard AC outlet. NOTE: • If some digits appear in the corner of the screen, hit [POWER] without unplugging the power cord. -
Page 15: Picture Control
PICTURE CONTROL The unit’s picture controls – BRIGHT, CON- TRAST, COLOR, TINT and SHARPNESS – are preset to factory specifications. Although they are usually the best, you may need to make some further adjustments for a natural looking image. Make sure ... •... -
Page 16: Channel Resetting
CHANNEL RESETTING Make sure ... • The unit power must be turned on. RESETTING CHANNELS Select “CHANNEL SET UP” Hit [SETUP] on the remote control. Press [K / L] to point to “CHAN- NEL SET UP”, then hit [ENTER]. Begin auto preset Press [K / L] to point to “AUTO PRESET”, then hit [ENTER]. -
Page 17: Menu Language
MENU LANGUAGE Select “LANGUAGE” Hit [SETUP]. Press [K / L] to point to “LAN- GUAGE”, then hit [ENTER] to select “ENGLISH” or “ESPAÑOL”= Spanish or “FRANÇAIS”= French. Exit the Language mode Hit [SETUP] to return to exit the menu. NOTE: •... -
Page 18: Dvd Section
DVD SECTION Playable Mark (logo) discs DVD-Video * 1,2,3,10 DVD-RW DVD-R * 1,3,4,5,6 DVD+RW DVD+R * 1,3,4,5,7,8,9 Audio CD * 3,5 CD-RW CD-R * 3,4,5,8,9 is a trademark of DVD Format/Logo Licensing Corporation. If you cannot play back a disc which bears one of the marks above, check the following notes. *1: This unit conforms to the NTSC color system. -
Page 19: C Playing A Disc
BASIC PLAYBACK Getting started ¡ Turn on the power of amplifier and any other com- ponents, if necessary. Hit [POWER]. ¡ The power will turn on. Hit [OPEN/CLOSE A] to open disc loading tray. Place the chosen disc in the tray, with the label facing up. -
Page 20: Resume
RESUME During playback, hit [STOP C]. ¡ Resume message will appear on the TV screen. Hit [PLAY O], playback will resume from the point at which playback was stopped. ¡ To cancel resume, hit [STOP C] twice. ¡ If the unit is turned off, resume function will be can- celled. -
Page 21: C Search Function
TRACK SEARCH There are three ways to begin playback on an Audio CD at a specific track. Using the Number buttons Press the Number buttons to enter the desired Track Number. ¡ Playback will start at the selected track. ¡ For single digit tracks (1-9), hit a single number (eg. -
Page 22: C Special Playback Function
SPECIAL PLAYBACK FUNCTION REPEAT REPEAT is available only during playback. REPEAT TITLE / CHAPTER To activate the repeat function, hit [REPEAT] during playback. ¡ The repeat mode changes as described below every time you hit the button. CHAPTER TITLE (current chapter repeat) (current title repeat) NOTES: ¡... -
Page 23: C Changing The Settings
CHANGING THE SETTINGS SUBTITLE LANGUAGE The unit allows you to select a language for subtitles during DVD (if available) playback. Hit [SUBTITLE] during playback. ¡ The subtitle language will be displayed on the display bar at the top of the screen. Hit [SUBTITLE] repeatedly to select your desired subtitle language. -
Page 24: Camera Angle
CAMERA ANGLE Some DVDs contain scenes which have been shot simultaneously from various angles. You can change the camera angle when the “ screen. Hit [ANGLE] during playback. ¡ If the “ANGLE ICON” setting is “OFF” in the “DISPLAY” menu, the “ ”... -
Page 25: C The On-Screen Information
THE ON-SCREEN INFORMATION You can check the information about the current disc by hitting For DVD-Vs Hit [DISPLAY] during playback to show cur- rent Chapter. ¡ The elapsed and remaining playing time of the current chapter will be displayed. Hit [DISPLAY] again to show current Title. ¡... -
Page 26: C Changing The Dvd Setup Items
CHANGING THE DVD SETUP ITEMS CUSTOM MENU You can change the DVD player’s settings. Hit [SETUP] twice in STOP mode so that the DVD SETUP menu appears. ¡ Hit [L] to select “CUSTOM” then hit [ENTER]. NOTE: ¡ If the menu does not appear, hit [PLAY O] first, then hit [STOP C]. -
Page 27: Display Setting
DISPLAY SETTING You can change certain aspects of the DVD display screens and on-screen messages on the TV screen. Follow steps 1 to 2 in the “CUSTOM MENU” sec- tion on page 26. Press [ ] to select the below items then hit [ENTER]. -
Page 28: Parental Control
PARENTAL CONTROL Parental Control limits the disc viewing that exceed your setting (with a password or playback will stop). This feature allows you to prevent discs with alterna- tive scenes from being played by your children. PARENTAL LEVEL Parental Level allows you to set the rating level of your DVD discs. -
Page 29: Troubleshooting Guide
TROUBLESHOOTING GUIDE If the unit does not perform properly when operated as instructed in this Owner’s Manual, check the player, consulting the following checklist. Problem No power. The unit does not respond to the remote control. TV Mode Sometimes a performance problem can be easily solved by checking seemingly apparent but often overlooked possibilities. - Page 30 DVD Mode Problem No picture Disc cannot be played No sound No DTS audio is output Distorted picture Audio or subtitle language does not match the set up The camera angle cannot be changed Audio or subtitle language cannot be changed “Prohibited icon”...
-
Page 31: C Maintenance
CABINET CLEANING • Wipe the front panel and other exterior surfaces of the unit with a soft cloth immersed in lukewarm water and wrung dry. • Never use a solvent or alcohol. Do not spray insec- ticide liquid near the unit. Such chemicals may cause damage and discoloration to the exposed sur- faces. -
Page 32: Specifications
GENERAL SPECIFICATIONS CRT : 9 inch in-line gun, 90˚ deflection tube Television system: NTSC-M TV Standard Channel coverage: VHF: 2 ~ 13 UHF: 14 ~ 69 CATV: 2 ~13, A ~ W, W+1 ~ W+84, A-5 ~ A-1, 5A Tuning System: 181 channel frequency synthesized tuning system... -
Page 33: C Español
INDICE ■ CONTROLES DE OPERACIÓN Y FUNCIONES ..33 PANEL FRONTAL DE LA UNIDAD ....33 MANDO A DISTANCIA ......33 VISTA POSTERIOR . - Page 34 22. Botón CLEAR Para cancelar o borrar un ajuste entrado actualmente. 23. Botón DISPLAY Modo del televisor: Presione para visualizar el número del canal en la presiona de nuevo, el número del canal pantalla. Si desaparecerá. Modo de DVD: Visualiza el estado actual en la pantalla del televisor.
- Page 35 ANTENA COMBINADA DE VHF/UHF La antena combinada de VHF/UHF de 75 ohmios puede conectarse a la toma ANT. ANTENA SEPARADAS DE VHF/UHF En algunas zonas será necesario utilizar una antena exterior. TELEVISION POR CABLE SIN CAJA DE CONVERTIDOR / DECODIFICADOR Utilice esta conexión si su sistema de televisión por cable se conecta directamente a su unidad sin una caja de convertidor.
- Page 36 NOTAS: • Cerciórese que su vehículo tiene un sistema eléctri- co con tierra negativa de 13,2 voltios (12 voltios). • Cerciórese de utilizar sólo el cable de batería de coche entregado. El uso de otros cables puede dañar la unidad. •...
- Page 37 SECCIÓN DE TV FUNCIONES Y AJUSTES DE TV AJUSTES PARA LA PRIMERA VEZ Enchufe el cable eléctrico Enchufe el cable de alimentación de la unidad en una toma de CA. NOTA: • Si aparecen algunos dígitos en la esquina de la pantalla, presione [POWER] sin desenchufar el cable de la alimentación.
- Page 38 SECCIÓN DE DVD REPRODUCCIÓN DE UN DISCO REPRODUCCIÓN BÁSICA Para empezar ¡ Conecte el interruptor del amplificador y otros equipos, si fuera necesario. Presione [POWER]. ¡ La alimentación se conectará. Presione [OPEN/CLOSE A]. ¡ La bandeja de carga del disco se abrirá. Ponga el dlsco en la bandeja con el lado de la eliguta hacia arriba.
- Page 39 MEMO – 39 –...
-
Page 40: C Warranty
FUNAI CORP. will repair this product, free of charge in the USA in the event of defect in materials or workman- ship as follows: DURATION: PARTS: FUNAI CORP. will provide parts to replace defective parts without charge for one (1) year from the date of original retail purchase.