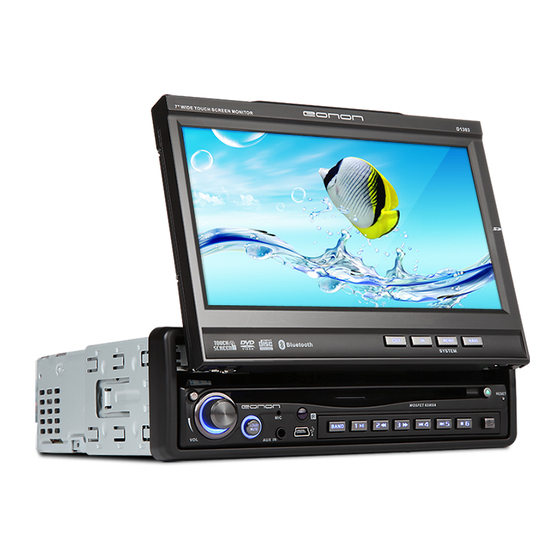
Eonon D1303 User Manual
Hide thumbs
Also See for D1303:
- User manual (28 pages) ,
- User manual (32 pages) ,
- User manual (32 pages)
Table of Contents
Advertisement
Advertisement
Table of Contents

Related Manuals for Eonon D1303


Summary of Contents for Eonon D1303
- Page 33 user‟s guide May 2009 © 2009 Sygic, s.r.o. All rights reserverd.
-
Page 34: Table Of Contents
Using the “Main screen” ............1 Entering an Address ...............2 Getting directions ..............5 Acquiring GPS Position ............6 Navigating to Points of Interest ..........7 Navigating Home ..............9 Navigating to Your Most Recent Locations ......9 Route Details ............... 13 Modifying the Route ............. 14 Map Browsing Mode ............ -
Page 35: End User License Agreement
End User License Agreement BY INSTALLING, COPYING OR USING ALL OR ANY PORTION OF THIS SOFTWARE YOU ACCEPT ALL THE TERMS AND CONDITIONS OF THIS AGREEMENT. This Sygic, s.r.o. End-User License Agreement ("EULA") is a legal agreement between you (either an individual or a single entity) and Sygic, s.r.o. - Page 36 In certain countries the use of flashpost / speedcamera information might be in conflict with the law and/or regulations. By using such information user agrees to indemnify Sygic and its 3rd party suppliers of any claims related to such flashpost / speedcamera information. Usage is at own risk. MAP DATA COPYRIGHTS ©...
-
Page 37: Main Screen
I. Getting Started Using the To enter the quick menu, touch the info panel (B). “Main screen” If the menu contains more pages, you can show the next page using buttons at the bottom of the screen. Back To enter the main menu, touch the map area (A) on the main screen. -
Page 38: Entering An Address
Entering an Address Next, you will be asked to select Country, City, Street and House number or Street To navigate to your destination, crossing. enter Main menu, select Navigate to... icon and then choose Address. User‟s Guide... - Page 39 After the destination is entered, If your device knows your current the confirmation screen is position, your route will be displayed: calculated immediately.If your device does not have accurate position, you will get options, how to determine the starting point of the route: Wait for valid signal (Recommended)
- Page 40 After the route is calculated, the route summary is displayed. It shows information about distance and time left to finish, estimated time of arrival and the method used (Fastest, Economic, Shortest, Pedestrian, Bicycle). IMPORTANT: By default, the method of calculation is set to “Fastest”.
-
Page 41: Getting Directions
The calculated route is displayed on the screen as a blue line. Next change of direction at crossing Distance to next change of direction Estimated time of arrival at destination Current velocity Distance to destination Current street GPS signal strength Current city Lane Assistant Next street to take... -
Page 42: Acquiring Gps Position
Acquiring GPS Position If the bars or port name is red, re-check the GPS settings (see Installation Manual). In case there is no GPS signal, the screen becomes grey. This If the bars are grey, stand can happen under following outside with the good visibility of conditions: the sky until the signal is... - Page 43 II. Planning Your Route Navigating to Points of Next, define the area of searching: Interest Near my position Finds POI around you If you need to drive to a gas station, restaurant, hotel, or any Near address… other point of interest, enter the Finds POI near the address that you specify Main menu, select...
- Page 44 How to find a point of interest: Select a Group (e.g. Sports) and then select the POI type (e.g. Golf Course). If you don‟t know the group, use Show All button to get a list of all POI types. You can refine the results by typing a name of the POI.
-
Page 45: Navigating Home
Navigating Home Navigating to Your Most Recent Locations First, set your home location: Once you have navigated to a Main menu > Settings > destination, Sygic DRIVE makes Set home location, and enter it easy to return to the same your home address. - Page 46 NOTE: Destinations are added automatically to the list, but if you want to quickly store your current position for future use, just select Memorize position from Main menu. Memorized position will appear in the list with icon. Stored favorite locations To view a list of your favorite locations, select Main menu >...
- Page 47 How to add a favorite to Main menu > Manage POI > Add POI > History location > Select memorized position Quick Menu (tap information (marked with icon) panel on the main screen, or press right button) > Add to favourites Main menu >...
- Page 48 Previous addresses When entering an address through Main menu > Navigate to... > Address, the list of previously selected Countries / Cities / Streets appears, as you go through the address details. They are marked with icon. Other icons that you can see during address search: City Capital city...
-
Page 49: Route Details
III. Changing the Route Route Details Choose Show route summary > Details to get a detailed overview about the You can check the calculated route. route before you start driving. Enter Main menu > Route menu. The blue highlighted buttons indicate that specific type of road was used. -
Page 50: Modifying The Route
To avoid it, tap the blue highlighted button. Show on map Show route instructions Modifying the Route If you need to make modifications to the existing route, enter the Main menu > Alternative route. Show route as images You can Compute alternative route in case you don‟t like the route calculated on the first time. -
Page 51: Map Browsing Mode
Map Browsing Mode add a waypoint the same way, as setting the destination in previous chapters. Checking the details directly in the map, or even planning the route can be done in map If you want to cancel your browsing mode. Select Main modifications of the route, use menu >... - Page 52 Available options for the map: You can select a place on the map and then enter the context Find... menu for that point by pressing You can find a position button. Following actions by defining it the are available: standard ways Navigate there Sets the new destination.
-
Page 53: Itinerary Planning
Avoid... You can select a radius around the point, which will be avoided in the route calculation. Existing route will be recalculated. Itinerary planning You can see the starting point If you have added some , the numbered waypoints and waypoints to your route via the finish . - Page 54 Set as visited Stops Delete the waypoint. navigating to this waypoint and recalculates the route to the following one Itinerary options Set as finish point Puts the The following actions can be waypoint to the end and performed with each itinerary moves others upwards in the (available through the Options list...
- Page 55 III. Settings To change the factory settings, Enable sounds go to Main menu and select Volume settings: Settings icon. Set the sound intensity NOTE: Buttons are displaying the separately for low driving situation that will occur when you speed and for high speeds. push them, not the current Advanced settings: status.
- Page 56 GPS and TMC hardware. Set language (user interface) Signpost settings: Set voice (language of Sets the number of voice instructions) signpost tables displayed at Switch map: one time and and the level Load different map material of detail (Full, Simplified, from your device.
-
Page 57: Advanced Preferences
Advanced preferences Configuration of Information panel on the main screen Main menu > Settings > Advanced settings Notification settings of maximum speed limit Avoid U-Turns Safety camera settings (if your product includes this data) Enable lane assistant Enable Autozoom Warn if Railway crossing Backlight settings Sygic DRIVE... - Page 58 Disclaimer The information contained in this document is the property of Sygic s.r.o. and may be used only for the purposes of operating and supporting the relevant software created by Sygic s.r.o. Sygic s.r.o. reserves all rights concerning the information contained herein. This document or any part of it may not be reproduced, distributed, or translated into other languages in any way or form except with written approval of Sygic s.r.o.