Table of Contents
Advertisement
Advertisement
Table of Contents

Related Manuals for Tapco Link.USB


Summary of Contents for Tapco Link.USB
-
Page 2: Important Safety Instructions
IMPORTANT SAFETY INSTRUCTIONS 1. Read these instructions. 2. Keep these instructions. 3. Heed all warnings. 4. Follow all instructions. 5. Do not use this apparatus near water. 6. Clean only with dry cloth. 7. Do not block any ventilation openings. Install in accordance with the manufacturer’s instructions. - Page 3 LOUD TECHNOLOGIES INC. END USER LICENSE AGREEMENT Tracktion 2.0 By clicking on the “I Accept” button, installing, copying or otherwise using the Software, you agree to be bound by the terms of this License Agreement. If you do not agree to the terms of this License Agreement, click on the “I Do Not Accept”...
- Page 4 WARRANTIES, EITHER EXPRESS OR IMPLIED, INCLUDING BUT NOT LIMITED TO IMPLIED WARRANTIES OF MERCHANTABILITY, FITNESS FOR A PARTICU- LAR PURPOSE AND NON-INFRINGEMENT OF THIRD PARTY RIGHTS WITH RESPECT TO THE SOFTWARE. SHOULD THE SOFTWARE PROVE DEFECTIVE, YOU (AND NOT LOUD Technologies Inc. OR AN AUTHORIZED REPRESENTA- TIVE) ASSUME THE ENTIRE COST OF ALL NECESSARY SERVICING, REPAIR OR CORRECTION.
-
Page 5: Table Of Contents
Repair ....................25 APPENDIX B: CONNECTIONS ..........26 APPENDIX C: LINK.USB SPECIFICATIONS ....28 Block Diagram Link.USB ..............30 What is Latency? ................31 TAPCO LIMITED WARRANTY ..........32 Don’t forget to visit our website at www.tapcogear.com for more information about this and other TAPCO products. -
Page 6: Introduction
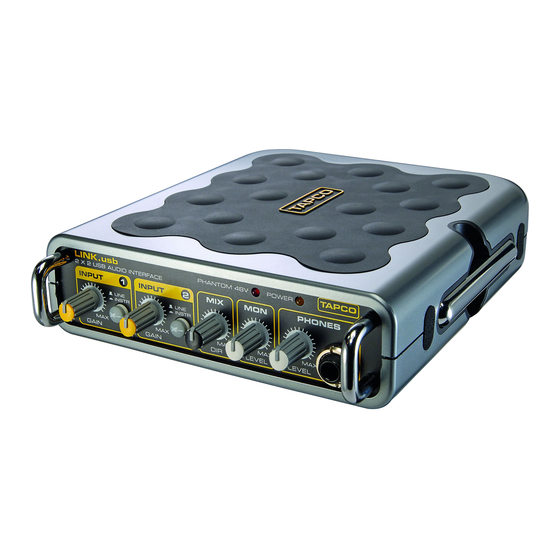
INTRODUCTION Thank you for purchasing the TAPCO Link.USB Audio Interface for digital recording systems. This is a complete, compact solution for computer-based music production on either a Macintosh or a PC. The Link.USB is a 2x2 USB interface that is powered directly off... -
Page 7: Getting Started
“No, I want to create an account.” Then click “Continue.” Enter the information to set up your profile. Then click “Create My Account.” Then proceed to register your Link.USB by clicking “TAPCO Product Registration.” • Your computer must meet the following minimum system... -
Page 8: On A Pc
To install the software on a PC running Windows XP (SP2): 1. Turn off any (non-essential) applications. 2. Insert the Link.USB CD-ROM into your PC’s CD-ROM drive. 3. The CD should begin automatically, bringing up the Link.USB installer. If not, click Start in the task bar, then click Run and click Browse. Browse to your CD drive and double-click SETUP.EXE. - Page 9 5. Next you will see the Tracktion License Agreement. Read through the text and click “I Agree.” 6. The next window lets you choose the Destination folder for installing the software files. We recommend you use the default location used by the installer, but you can choose a different location if you want by clicking the Browse button.
- Page 10 7. When the installer has completed copying the files into the destination folder, the All Installed dialog box opens. Click OK to continue. 8. A window opens asking if you want to install QuickTime. Click “Yes” if you want to install it, or “No” to continue. 9.
-
Page 11: On A Mac
To install the software on a Macintosh running OS X (version 10.3 or later): 1. Turn off any (non-essential) applications. 2. Insert the Link.USB CD-ROM into the CD-ROM drive. 3. Double-click the Link USB CD icon on the desktop. 4. To install Tracktion 2, simply drag the Tracktion application file into your Applications directory. -
Page 12: Authorizing Tracktion 2
Authorizing Tracktion 2 There is an authorization code on the sleeve of the CD-ROM that came with your Link.USB. You can authorize the software from within Tracktion or by going to http://my.tapcogear.com. From Tracktion 2: 1. Open Tracktion 2. 2. Tracktion detects that the software is unregistered and notifies you that it is running in Demo Mode. -
Page 13: Hookup Diagram
• Connect guitars or other instruments using the XLR/TRS connectors on the back of the Link.USB. Press the front panel LINE/INSTR button (guitar icon) if you are connecting your guitar or instrument directly to the Link.USB without using a preamplifier or direct box. •... -
Page 14: Making A Recording
Making a Recording The following example of a recording session uses a guitar plugged directly into the Link.USB channel 1 input, and a microphone plugged into the channel 2 input, to record audio tracks in the Tracktion 2 software. Before starting, make sure you have correctly installed the Tracktion 2 software. - Page 15 Latency describes the amount of time it takes for audio LOOK to get in and out of your software application. The lower the latency setting, the faster audio can get into and out of the software application. However, a low latency CLOSER setting requires more resources from your computer, so you need to find a happy balance between finding the...
- Page 16 5. “New edit #1” appears at the top of the item list. An edit is Tracktion’s way of keeping a version of your song. You can rename the song by clicking on the edit and entering the new name in the properties panel at the bottom of the screen.
- Page 17 8. Click on the Input 1 icon, and drag it to track 1. As it gets close, an arrow pops out and connects the icon to the track. This indicates that the track is armed for recording. To disconnect an icon (and disarm the track), drag it to the left and the arrow will disappear.
- Page 18 14. To play back your guitar recording, click the RTZ (Return to Zero) button in the Transport area and click the Play button. If you are happy with the recording, drag the Input 1 icon to the left to disarm the track.
-
Page 19: Link.usb Features
LINK.USB FEATURES Front Panel 1. INPUT GAIN Control These knobs adjust the analog gain of the input signal (before the A/D converters). They adjust the signal for both the mic and line inputs. Turn the knob fully counter-clockwise to turn the signal off, and fully clockwise to get the maximum gain. -
Page 20: Phones Jack
5. PHONES LEVEL Control This adjusts the level of the PHONES analog output on the front panel. It does not affect the MONITOR output. Note: Make sure the PHONES LEVEL control is turned all the way down before plugging in your headphones. This will protect your hearing and prevent any loud surprises. -
Page 21: Rear Panel
Rear Panel 9. INPUT These are Neutrik combo connectors, which accept balanced microphone inputs from an XLR connector, or balanced or unbalanced line-level or instrument-level inputs from a 1/4" TRS connector. The XLR inputs are wired as follows: Pin 1 = Shield or ground Pin 2 = Positive (+ or hot) Pin 3 = Negative (–... -
Page 22: Usb Connector
12. USB Connector This is the main connection between the Link.USB and the host computer. Use the USB cable provided to connect this port to a USB port on your computer. 13. Kensington Security Slot To help prevent theft, the Link.USB has a security slot designed to fit the popular Kensington security locks. -
Page 23: Appendix A: Service Information
Details concerning Warranty Service are spelled out in the Warranty section on page 32. If you think your TAPCO Link.USB has a problem, please do everything you can to confirm it before calling for service. Doing so might save you from the deprivation of your Link.USB and the associated suffering. - Page 24 USB hubs with the Link.USB. Lonely? Looking for that special someone? Do you have a question about your TAPCO Link.USB? Please call our Technical Support chaps at 1-877-827-2669, Monday to Friday, from 7 am to 5 pm PST.
-
Page 25: Repair
Note: Under the terms of the warranty, you must ship or drop-off the unit to an authorized service center. The return ground shipment is covered for those units deemed by us to be under warranty. Note: You must have a sales receipt from an Authorized TAPCO Dealer to qualify for a warranty repair. -
Page 26: Appendix B: Connections
APPENDIX B: CONNECTIONS XLR Connectors The “combo” inputs on the Link.USB accept 3-pin male XLR connectors. They are wired as follows, according to standards specified by the AES (Audio Engineering Society). XLR Balanced Wiring: Pin 1 = Shield Pin 2 = Hot (+) Pin 3 = Cold (–) SHIELD COLD... - Page 27 Stereo Headphones 1/4" TRS Stereo Unbalanced Wiring: Sleeve = Shield Tip = Left Ring = Right ���� ������ ������ ���� ��� ��� ���� ��� ������ Stereo Headphones 1/4" TRS Connector 1/4" TS Phone Plugs and Jacks “TS” stands for Tip-Sleeve, the two connections available on a mono 1/4"...
-
Page 28: Appendix C: Link.usb Specifications
APPENDIX C: LINK.USB SPECIFICATIONS Analog Specifications Frequency Response Any Input to Monitor Output: +0, –0.5 dB, 22 Hz to 22 kHz @ 48 kHz SR Any Input to Phones Output: +0, –3 dB, 30 Hz to 22 kHz @ 48 kHz SR (600Ω... -
Page 29: System Requirements
“TAPCO” is a registered trademark of LOUD Technologies Inc. All other brand names mentioned are trademarks or registered trademarks of their respective holders, and are hereby acknowledged. -
Page 30: Block Diagram Link.usb
Block Diagram Link.USB... -
Page 31: What Is Latency
What is Latency? Latency describes the amount of time it takes the input signal to pass through the system, and reach the output. When recording a guitar and monitoring through software, it is the amount of time it takes from the moment you strike your guitar string, to the moment you hear it in your headphones. -
Page 32: Tapco Limited Warranty
LOUD Technologies Inc. warrants all materials, workmanship and proper operation of this TAPCO product for a period of one year from the original date of purchase. If any defects are found in the materials or workmanship, or if the product fails to function properly during the applicable warranty period, LOUD Technologies, at its option, will repair or replace the product. - Page 33 OF ANY KIND. LOUD TECHNOLOGIES INC. SHALL NOT BE LIABLE FOR ANY INCIDENTAL, SPECIAL, OR CONSEQUENTIAL DAMAGES THAT MAY RESULT FROM ANY DEFECT IN THE TAPCO PRODUCT OR ANY WARRANTY CLAIM. Some states do not allow exclusion or limitation of incidental, special, or consequential damages or a limitation on how long warranties last, so some of the above limitations and exclusions may not apply to you.