Table of Contents
Advertisement
Quick Links
OWNER'S MANUAL
Blu-ray Disc Player
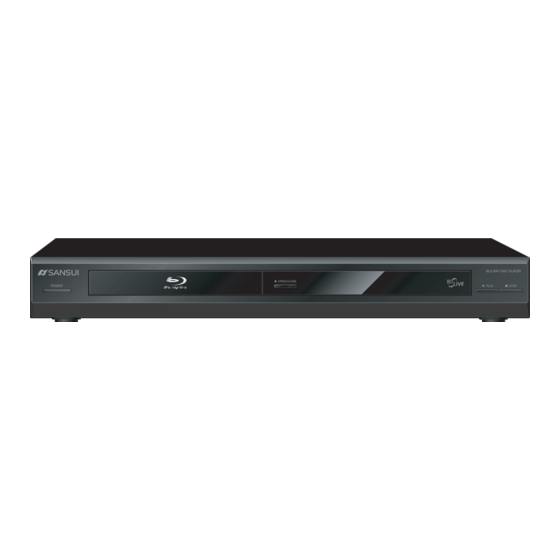
BDP3959
If you purchase a universal remote control from your local retailer, please contact the remote manufacturer for the
required programming code.
PLEASE HAVE THE MODEL NUMBER READY PRIOR TO THE CALL
FOR INFORMATION ON OUR OTHER PRODUCTS, PLEASE VISIT OUR WEBSITE AT
Before operating the unit, please read this manual thoroughly.
IF CONTACT WITH CUSTOMER SERVICE IS REQUIRED
CUSTOMER SERVICE – 1-800-289-0980
ORION WEBSITE
www.orionsalesinc.com
ATTENTION
Advertisement
Table of Contents

Summary of Contents for Sansui BDP3959
- Page 1 OWNER’S MANUAL Blu-ray Disc Player BDP3959 ATTENTION If you purchase a universal remote control from your local retailer, please contact the remote manufacturer for the required programming code. IF CONTACT WITH CUSTOMER SERVICE IS REQUIRED PLEASE HAVE THE MODEL NUMBER READY PRIOR TO THE CALL CUSTOMER SERVICE –...
- Page 4 FCC Declaration of Conformity Compliance Statement(Part15):...
-
Page 5: Disc Maintenance
Disc Usage lnformation BD, DVD, CD Disc • Handle Discs carefully • Do not touch the recorded surface • Do not apply or paste paper on the Disc Disc Maintenance • To clean fingerprints or dirt from the Disc surface, use a clean soft cloth and gently wipe from the Disc’s center outward. - Page 6 Safety INTRODUCTION PLAYABLE...
-
Page 7: Back Cover
Back cover... -
Page 8: Playable Disc Types
1 INTRODUCTION OVERVIEW BDP3959 has the capability of providing high-definition, cinema-like pictures and multi-channel audio. Soundtracks in more than one language are usually included on the disc, and subtitles in more languages are often included as well. PLAYABLE DISC TYPES The following types of discs can play in BDP3959. -
Page 9: Functional Overview
2 FUNCTIONAL OVERVIEW FRONT PANEL POWER Button The power button turns the Blu-ray disc player on and off. DISC TRAY Opens to accept a disc. OPEN/CLOSE BUTTON Opens and closes the disc tray. FRONT PANEL DISPLAY Displays the playing status, time, etc. (See next section.) PLAY/STOP BUTTONS Play and stop playback. -
Page 10: Remote Control
REMOTE CONTROL POWER Press the power button to turn the BD player on or off. ANGLE Some BD and DVDs are filmed with more than one camera angle. During playback of such a disc, pressing this button will allow you to switch camera angles. -
Page 11: Secondary Audio
SECONDARY AUDIO On BD discs equipped with multiple director’s commentaries in several languages, pressing this key will cycle through all of the languages available for the director’s commentaries. This key has no effect for DVDs and CDs. Note: Not all BD discs have secondary (Picture-in- picture) audio and video. - Page 12 SEARCH (REVERSE) Used to “Reverse” through a BD/DVD movie or CD audio track. Each time the button is pressed, the speed of fast forwarding will increase in the following order: x2, x4, x8 , x16, x32, x64, x128, x2 (repeat) To resume normal (x1 forward) playback at any time, press the PLAY key.
- Page 13 DISPLAY Press to open the on-screen display menu. NUMBER BUTTONS Press to enter the title, chapter, track, or file number. Press to enter the parental password or values in menu options. PLAY/PAUSE Pressing this button once will pause the audio and video playback.
-
Page 14: Rear Panel Connectors
REAR PANEL CONNECTORS Since the rear panel contains multiple video and audio outputs, a brief description of the capabilities of each of the outputs is described below, in order to help you choose the appropriate outputs to connect to your television and, if present, your surround-sound receiver. 2.4.1 Video Output Capabilities Each of the video outputs are capable of different levels of functionality, as described in the table below. -
Page 15: Digital Out Coaxial
2.4.3 Rear Panel Description AC CORD Connect the AC cord into an AC outlet. DIGITAL OUT COAXIAL The COAXIAL output is a digital audio output. If you have a surround-sound receiver with a COAXIAL input, connect this output to the COAXIAL input of the surround-sound receiver. AUDIO OUT ( L/R ) These are analog stereo (left/right) outputs. -
Page 16: Connecting The Bd Player
3 CONNECTING THE BD PLAYER CONNECTING TO A TV Connect your BD player to a TV as you would any standard DVD player. You will need to customize this for your own configuration, including any legacy connectors added to the rear panel. HDMI->TV With HDMI outlet TV Mainframe... - Page 17 3.2 CONNECTING TO A HOME THEATRE SYSTEM Highest-fidelity audio and video setup can only be achieved using HDMI . HDMI is BDP3959’s only output capable of 1080p video, and the only output capable of high definition audio codecs. Connect the HDMI output of the player to the HDMI input of the audio receiver. (You will need to connect a second HDMI cable from the HDMI output of the audio receiver to the HDMI input of the television.) Coaxial cable Mainframe...
- Page 18 PLAYING A BD OR DVD DISC STANDARD (OR NORMAL) PLAYBACK OF A BD OR DVD DISC Press the POWER button on the front panel of the BD player. --------------- OR--------------- Press the power button on the remote. Turn on the TV, and using the TV remote control, select the input on the TV that is connected to the BD player.
- Page 19 When a DVD or BD disc is inserted into the BD player, the main menu will appear, as shown below: If “Optical Disc AutoPlay” was enabled from the “System” setup menu, the main menu will disappear in a few seconds, without user intervention. If the main menu remains on the TV screen for more than a few seconds, use the arrow keys on the remote control to select the disc, and then press ENTER key.
- Page 20 To stop playback, press the STOP button on the remote control. To remove the disc, press OPEN/CLOSE on the front panel of the BD player to open the tray. --------------- OR--------------- To remove the disc, press the EJECT button on the BD player remote to open the tray.
-
Page 21: Fast Forward
NON-STANDARD PLAYBACK OF A BD OR DVD DISC 4.2.1 Fast Forward When the disc is playing normally, press the forward SEARCH button on the remote to begin fast forward at x2 normal playback speed. Each time the forward SEARCH button is pressed, the playback speed will double. - Page 22 OTHER BD AND DVD PLAYBACK FEATURES 4.3.1 Skipping to the Next Chapter When the disc is playing normally, press the SKIP button once to jump to the next chapter on the disc. The next chapter will start playing automatically. 4.3.2 Skipping to the Start of the Current Chapter When the disc is playing normally, press the SKIP button once to jump to the beginning of the currently playing chapter.
-
Page 23: Repeating A Title Or Chapter
To jump to a specific chapter, after the word TITLE: appears on the screen, press the JUMP button again, and the word CHAPTER appears. Enter the number of the chapter you wish to jump to, and press ENTER key. 4.3.6 Viewing Director’s Commentary During Playback of Blu-Ray discs Blu-Ray discs sometimes (but not always) contain director’s commentaries or other “secondary video”... -
Page 24: Setup Menu
5 SETUP MENU BASIC SETUP MENU OPERATION Action Result Displays the main Setup menu: Press the POWER button on the remote or front panel. --------------- OR-------------- Settings Settings player is on, but not playing-this screen will appear automatically if a disc is not being played. -
Page 25: Display Menu Category
Action Result In order to configure the BD player for proper audio and video output, press the up/down arrow keys ( on the remote until one the following setup menu categories is highlighted: Display Audio Language Parental System Network Info Each of these menus is described in more detail in the next sections. -
Page 26: Tv Aspect Ratio
5.2.1 TV Aspect Ratio You can use this menu item to tell the BD player whether you have a rectangular shaped 16:9- aspect ratio television set, or a more traditional (square) 4:3 aspect ratio television set. To tell the BD player the TV’s aspect ratio, make sure that the Display Setup menu item is highlighted: Display Then, press the right arrow key ( ) on the remote to make the Display Options Menu appear. -
Page 27: Film Mode
TV Aspect Menu Selection If your TV is more rectangular If your TV is more square (4:3), choose: (16:9), choose: 16:9 Wide 16:9 Pillarboxed 4:3 Letterboxed 4:3 Pan & Scan Disc Contents Movie will be shown in Center of movie rectangular “wide”... - Page 28 Please choose a new Film Mode. Press the up/down arrow keys ( ) on the remote until the desired Film Mode setting (On or Off) is highlighted. Then, press the ENTER key on the remote to set the Film Mode. The circled checkmark ( ) will then briefly move to the highlighted Film Mode setting.
- Page 29 5.2.3 Exiting the Display Category When you are done setting up the BD player’s display settings, you may use the left arrow key ( ) on the remote until the “Display” menu is highlighted, and then you can use the up/down arrow keys( )on the remote to choose another menu category.
-
Page 30: Pcm Downsampling
disc BD Player Possible Digital Audio Tracks on the disc Audio Output Type Dolby TrueHD Blu-Ray Dolby Digital Plus HDMI DTS-HD Master Audio Essential Dolby Digital HDMI, Blu-Ray and DVD COAXIAL PCM (BD - up to 7.1 channels @96 kHz) PCM (DVD - stereo only, up to 96 kHz) Any selected digital track will be decoded, mixed with effects Analog... -
Page 31: Digital Output
Please choose a new PCM Downsampling. 96 kHz 48 kHz If you don’t have a surround sound receiver connected to the BD player, you should set the PCM downsampling to 48 kHz , and proceed to the next setup menu item. This is true regardless of whether the audio is connected to the TV with HDMI, SPDIF, or the analog stereo outputs. - Page 32 Then, press the right arrow key ( ) on the remote to make the Digital Audio Options Menu appear. Press the up/down arrow keys ( ) on the remote until the Digital Output choice is highlighted: Digital Output PCM Stereo Please choose a new Digital Output.
-
Page 33: Dynamic Range Control
5.3.4 Dynamic Range Control Dynamic Range Control means that you can allow the BD player to make the loud parts of a movie’s audio track quieter than they would be in the theatre, without making the dialog of the actors any quieter. This would be useful, for instance, when you want to watch a movie in the evening when others might be sleeping. -
Page 34: Language Menu Category
LANGUAGE MENU CATEGORY To set the languages of the BD player, press the up/down arrow keys ( ) on the remote until the Language menu category is highlighted on the setup menu screen. Info Language Display English Audio Menu Auto Audio Auto Settings... -
Page 35: Menu Language
Please choose a new OSD. English French Spanish The up/down arrow keys ( ) on the remote can then be used to instantly change the on-screen display to English, French, Spanish. Once the desired language has been highlighted, press the ENTER key on the remote to set the language. - Page 36 Please choose a new Menu. Auto English French Spanish Italian German Portuguese Russian Once the desired language has been highlighted, press the ENTER key on the remote to set the default language for menus that appear after a BD disc is inserted. The circled checkmark ( ) will then move briefly to that language.
-
Page 37: Subtitle Language
Please choose a new Audio. Auto English French Spanish Italian German Portuguese Russian Once the desired disc audio language has been highlighted, press the ENTER key on the remote to set the default language that characters in the movie will speak. The circled checkmark ( ) will then move briefly to that language. - Page 38 Please choose a new Subtitle. None English French Spanish Italian German Portuguese Russian Once the desired subtitle language has been highlighted, press the ENTER key on the remote to set the language. The circled checkmark ( ) will then move briefly to that language. NOTE: Not all subtitle languages are available on all discs.
-
Page 39: Parental Control
PARENTAL CONTROL To set the player’s parental control settings, from the “Settings” menu, press the right arrow key ( ) on the remote until the “Parental Control” menu choice is highlighted, as shown below: Display Parental Audio Parental Country Language Parental Control Parental Level 1 [Kid Safe]... -
Page 40: Parental Country
5.5.1 Parental Country Use this menu item to tell the BD player what country’s rating system you wish to follow. To change the parental control country, from the parental menu, press the right arrow key ( ) on the remote until one of the parental menu items (Parental Level, Parental Password, Parental Control, or Parental Country) is highlighted. -
Page 41: Parental Level
Press the ENTER key. You will then be prompted with a message: Please choose a new Parental Control. NOTE: If ‘Parental Control’ was previously turned on, you will be prompted to enter the parental control password before being allowed to change this setting. Use the up or down arrow keys ( ) on the remote to highlight either the ‘On’... -
Page 42: Parental Password
Please choose a new Parental Level. 1 [Kid Safe] 2 [G] 3 [PG] 4 [PG-13] 5 [PG-R] 6 [R] 7 [NC-17] 8 [Adult] Use the up or down arrow keys ( ) on the remote to highlight one of the parental levels. Then, once the desired parental level has been highlighted, press the ENTER key on the remote to save your selection. -
Page 43: Optical Disc Autoplay
NOTE: If you forget the parental control password, you must go to the “System” Setup Menu category, and re-set the player to the factory defaults. 5.5.5 Exiting the Parental Setup Menu When you are done setting up the BD player’s parental controls, you may use the left arrow key ( ) on the remote until only the left side of the setup menu is highlighted, and then you can use the up/down arrow keys ( ) on the remote to choose another menu category. -
Page 44: Bd-Live Internet Access
Then, press the ENTER key. The following message will appear: Please choose a new Optical disc AutoPlay. Use the up/down arrow keys ( )to choose one of the following options: When a disc is inserted into the BD player, start loading and playing the main menu automatically, without waiting for the PLAY button to be pressed. -
Page 45: Erase Blu-Ray Storage
Always Allow Allow the BD the inserted Blu-Ray disc to access content from all BD-Live internet sites whose internet address is encoded onto the disc. There is no danger of Access: malicious code download from valid commercial BD discs, but choosing this option and downloading BD-live content via illegally authored BD discs, or discs obtained from questionable sources, could result in malicious code being downloaded onto the player. -
Page 46: Screen Saver Duration
Press the ENTER key. The following screen will appear: Erase Blu-ray storage Cancel Use the left/right arrow keys( ) to choose “OK”, then press the ENTER key. Once you press “OK”, all bookmarks and BD-live content saved in memory will be deleted. 5.6.5 Screen Saver Duration The BD player has a ‘screen saver’... -
Page 47: Reset Settings
5.6.6 Reset Settings This setup menu selection will allow you to return all setup menu choices to the factory default settings. NOTE: This will also reset the Parental Password back to the factory default, if it was changed To return to the factory default settings, from the Setup menu, press the right arrow key( ). - Page 48 Language Network Parental Interface Wired System Link Status Link Down MAC Address 00:10:18:00:00:01 IP Mode Dynamic Network Settings IP Address 0.0.0.0 Subnet Mask 0.0.0.0 Gateway 0.0.0.0 Info Primary DNS 0.0.0.0 Secondary DNS 0.0.0.0 Display Audio Network Menu You can configure various portions of the BD player’s ethernet connection, as described in the next sections.
- Page 49 Press the ENTER key. The following screen will appear: Please choose a new IP Mode Manual Dynamic Choosing Dynamic allows the BD player to obtain its ethernet address and other parameters from • your ISP (or router). Select this option if your ISP (or home router) uses DHCP to assign ethernet addresses to computers and other internet devices.
- Page 50 6 PLAYBACK OF DIGITAL AUDIO AND PHOTO FILES FROM A CD OR USB MEMORY STICK INTRODUCTION This section explains how to playback PC-type audio and picture files that have been placed onto a disc or USB memory stick. FEATURES SUPPORTED FOR DIGITAL AUDIO AND PHOTO PLAY BACK: The following features are supported by the media player: Audio Player:...
- Page 51 SUPPORTED MUSIC AND PHOTOGRAPH FILE TYPES The files supported by the BD player are: Music : • .mp3 files • .wma files Photos : • .jpeg files SETTING U P FOR PLAYBACK Many audio and/or picture files that can be viewed on a personal computer can also be played back on the BD player.
- Page 52 • The BD player determines whether files on the data disc contain audio or photographs based on the 3-4 characters of the files name. Song (Audio) files must end with “.mp3”, “.wma” Photograph files must end with “.jpg”, “.jpeg ” 6.4.2 Using a Computer to Prepare a USB Memory Stick for Music/Photo Playback If you are using a USB memory stick for music or viewing photographs, you should insert the USB memory...
- Page 53 If supported picture files are on an inserted data Pictures disc (and/or USB memory stick), this icon will appear. Settings If supported music files are on an inserted data Music disc (and/or USB memory stick), this icon will appear. File Type Selector You must choose one of the file types (Music or Pictures) before starting playback.
- Page 54 AUDIO F ILE PLAYBACK The BD player can playback mp3 and wma music files that have been burned onto a data disc, DVD-R/RW. 6.5.1 Selecting a Source (disc or USB) for Viewing Audio Files To playback audio files, after inserting the data disc (or USB memory stick), you should see a menu as shown in figure on the previous page.
- Page 55 6.5.2 Playing Back Multiple Audio Files Choosing the ‘play files’ selection in the leftmost circle will bring up a dialog box that allows you to play all the files on the USB stick (or data disc), as shown below: Songs From India Songs From India Music Classical...
- Page 56 6.5.3 Playing Back Individual Audio Files To play individual songs on the USB stick or data disc, navigate through the files and folders using the arrow keys, highlight the file you wish to play, then press ENTER key. A screen as shown below will appear: Music 4 item(s)
- Page 57 6.5.4 Creating an Audio Playlist From the “File Type Selector” window , choose ‘Music: Settings Music Pictures Choose ‘Optical disc’ (or USB) from the “Audio Media Selector”, and then press ENTER key: Music Music 3 item(s) Main Menu Play Files Playlist Browse Pictures Now Playing...
- Page 58 Highlight ‘Add To Playlist’ and press ENTER key: Music 3 item(s) Graduation Add all to playlist Add to Playlist Previous Folder File1.mp3 Play (File) Play Files Picnic in the park.mp3 Beach.wma Browse Pictures Now Playing The audio file added to the playlist will now be highlighted: Music 3 item(s) Graduation...
- Page 59 Highlight ‘Add To Playlist’ and press ENTER key: Music 3 item(s) Add to Playlist File1.mp3 Add all to playlist Picnic in the park.mp4 Previous Folder Play (File) Beach.wma Play Files Graduation Browse Pictures Now Playing The audio file added to the playlist will now be highlighted: Music 3 item(s) File1.mp3...
- Page 60 Once all of the desired audio file have been entered onto the playlist, use the left arrow key( ) to highlight ‘Previous Folder’ (on the right hand side of the screen), then press ENTER key: Music 3 item(s) File1.mp3 Add all to playlist Picnic in the park.mp3 Previous Folder Beach.wma...
- Page 61 A box will appear showing several options. Choose ‘ Play All’, and the audio files in the playlist will begin to play. Music 3 item(s) Please select Play mode Play All File1.mp3 Add all to playlist Play Selection Picnic in the park.divx Previous Folder Cancel Play Files...
- Page 62 V IEWING P HOTOGRAPHS The BD player can be used to view digital photograph files that have been burned onto a data disc, DVD-R/RW. 6.6.1 Selecting a Source (disc or USB) for Viewing Photos To view photographs, after inserting the data disc (or USB memory stick), you should see a menu (File Type Selector).
- Page 63 Shows that you have chosen to view pictures. Pictures Indicates whether you have selected to view photos from USB or 21 item(s) Party Vacation Graduation disc. Allows you to add all files in current folder to the playlist. Add all to playlist Allows you to Previous Folder •...
- Page 64 6.6.3 Creating a Playlist with Pictures From the “File Type Selector” window , choose ‘Pictures’: Settings Pictures Music Choose ‘Optical disc’ (or USB) from the “Pictures Media Selector”, and then press ENTER key: Pictures Pictures 3 item(s) Playlist Optical disc Main Menu Play Files Browse Music...
-
Page 65: Using Bd-Live
7 USING BD-LIVE FEATURES Some (but certainly not all) BD discs contain additional features that are made available to players that are connected to the internet, and have additional memory added. These additional features may include things like the ability to download new movie trailers, additional ‘commentary’... -
Page 66: Problems And Troubleshooting
PROBLEMS AND TROUBLESHOOTING Use the following check list for troubleshooting when you have problems with your unit. Be sure all connections are properly made when using with other units. Contact customer service if problems persist. OPERATION The remote control does not function. •... -
Page 67: Audio Problems
Unable to playback BD or DVD disc • Assure that BD or DVD disc’s recording surface is not dirty. Clean disc if necessary following the instructions on page 5 of this manual. TV does not display video being played • Confirm that you have selected the proper input for the BD player from your TV’s menu options. - Page 68 PLAY BACK Unable playback BD, DVD disc • Please confirm BD, DVD disc’s region code is the same as BD player. • Assure that BD or DVD disc’s recording surface is not dirty. Clean disc if necessary following the instructions on page 5 of this manual. •...
-
Page 69: Specification
SPECIFICATION Specification Parameter Power supply A C120V 60Hz Power Consumption Weight 5.8lbs (2.6kg) 430mm W x 56mm H x 245mm L Dimensions (16.9inches (W) x 2.2inches (H) x 9.6inches (L)) Ambient Environment +35°C +5°C temperature , +80% +20% humidity Accessories Remote control x 1, Batteries (UM-4) x 2, AV Cable x 1 LICENSES ●... -
Page 70: Gnu General Public License
Appendix A GNU GENERAL PUBLIC LICENSE This Sansui Blu-ray Disc Player is in part operated by the Linux OS. The Linux OS contains software that complies with GPL/LGPL. In order to obtain additional information and the source code please visit ORION’s website at www.orionsalesinc.com/GPL. - Page 71 Freetype We currently do not enable the Truetype compile option that would cause us to use patented technology. We therefore fall under the FreeType. License, a BSD-like license, found in the file `FTL.TXT'. Here is more detail taken from recent emails between RM and XM: Question: Can you provide a list of compilation/build options we use with the Freetype library.
- Page 72 GNU GENERAL PUBLIC LICENSE Version 2, June 1991 Copyright (C) 1989, 1991 Free Software Foundation, Inc. 51 Franklin Street, Fifth Floor, Boston, MA 02110-1301, USA Everyone is permitted to copy and distribute verbatim copies of this license document, but changing it is not allowed. Preamble The licenses for most software are designed to take away your freedom to share and change it.
- Page 73 2. You may modify your copy or copies of the Program or any portion of it, thus forming a work based on the Program, and copy and distribute such modifications or work under the terms of Section 1 above, provided that you also meet all of these conditions: a) You must cause the modified files to carry prominent notices stating that you changed the files and the date of any change.
- Page 74 It is not the purpose of this section to induce you to infringe any patents or other property right claims or to contest validity of any such claims; this section has the sole purpose of protecting the integrity of the free software distribution system, which is implemented by public license practices.
- Page 75 Appendix B Luxi Font Copyright Luxi fonts copyright (c) 2001 by Bigelow & Holmes Inc. Luxi font instruction code copyright (c) 2001 by URW++ GmbH. All Rights Reserved. Luxi is a registered trademark of Bigelow & Holmes Inc. Permission is hereby granted, free of charge, to any person obtaining a copy of these Fonts and associated documentation files (the "Font Software"), to deal in the Font Software, including without limitation the rights to use, copy, merge, publish, distribute, sublicense, and/or sell copies of the Font Software, and to permit persons to whom the Font Software is furnished to do so, subject to the...