Table of Contents
Advertisement
Quick Links
OWNER'S MANUAL
30" WIDE FLAT DIGITAL TELEVISION
HDTV3000
If you purchase a universal remote control from your local retailer, please contact the remote
manufacturer for the required programming code.
When shipped from the factory, the TV/CABLE menu option is set to the "CABLE" (Cable Television)
mode. If not using Cable TV, set this menu option to the "TV" position.
PLEASE HAVE THE MODEL NUMBER READY PRIOR TO THE CALL
FOR INFORMATION ON OUR OTHER PRODUCTS, PLEASE VISIT OUR WEBSITE AT
Before operating the unit, please read this manual thoroughly.
ATTENTION
TV/CABLE MODE SELECTION
IF CONTACT WITH CUSTOMER SERVICE IS REQUIRED
CUSTOMER SERVICE – 1-800-289-0980
ORION WEBSITE
www.orionsalesinc.com
R
Advertisement
Table of Contents

Related Manuals for Sansui HDTV3000


Summary of Contents for Sansui HDTV3000
- Page 1 OWNER’S MANUAL 30” WIDE FLAT DIGITAL TELEVISION HDTV3000 ATTENTION If you purchase a universal remote control from your local retailer, please contact the remote manufacturer for the required programming code. TV/CABLE MODE SELECTION When shipped from the factory, the TV/CABLE menu option is set to the “CABLE” (Cable Television) mode.
-
Page 2: Important Safeguards
The lightning flash with arrowhead symbol, within an equilateral triangle is intended to alert the user to the presence of uninsulated dangerous voltage within the product's enclosure that may be of sufficient magnitude to constitute a risk of electric shock. CAUTION: TO REDUCE THE RISK OF ELECTRIC SHOCK, DO NOT REMOVE... - Page 3 13. LIGHTNING To protect your unit during a lightning storm, or when it is left unattended and unused for long periods of time, unplug it from the wall outlet and disconnect the antenna or cable system. This will prevent damage to the unit due to lightning and power line surges.
-
Page 4: Table Of Contents
Contents PREPARATIONS IMPORTANT SAFEGUARDS ............2 Contents ..................4 Features ..................5 Power source ................5 Parts and functions ..............6 Remote control ................7 Antenna connections ..............8 Cable TV connections ..............9 Connections to other equipment ..........10 Starting setup ................ -
Page 5: Features
Features High Quality Picture Horizontal Resolution More than 500 lines. It exceeds Super VHS (400 lines) or Laser Disc (430 lines) in resolution. Compatible with a wide range of audio outputs Digital Audio Jack (Coaxial) - When a component with a built- in Dolby Digital decoder is connected, Dolby Digital sound can produce the effect of being in a movie theater or a concert hall. -
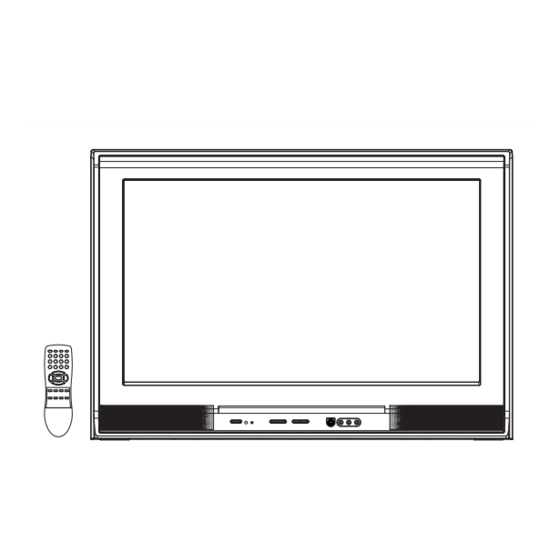
Page 6: Parts And Functions
Parts and functions Front POWER button AUDIO (L/R)/VIDEO IN jacks (VIDEO3) Remote sensor S-VIDEO IN jack (VIDEO3) POWER indicator *CHANNEL ▲/▼ buttons *VOLUME ▲/▼ buttons * To display the menu screen. Press both VOLUME ▲/▼ buttons at the same time to display the menu screen. CHANNEL ▲/▼... -
Page 7: Remote Control
Remote control 4. ENTER button - Press to enter or select information for menu screen operations. 5. VOL (VOLUME) + / – buttons - Press the + button to increase, or the – button to decrease the volume level. Use to select the desired setting during the menu screen operation. -
Page 8: Antenna Connections
Antenna connections If you are using an indoor or outdoor antenna, follow the instructions below that correspond to your antenna system. If you are using a cable TV service (CABLE), see page 9 for Cable TV connections. Combination VHF/UHF Antenna (Single 75 ohm Cable or 300 ohm Twin-lead Wire) Connect the 75 ohm Cable from the Combination VHF/UHF Antenna to the RF IN Jack. -
Page 9: Cable Tv Connections
Cable TV connections This unit has an extended tuning range and can tune most cable channels without using a Cable TV Converter box. Some Cable TV companies offer “premium pay channels” in which the signal is scrambled. Descrambling these signals for normal viewing requires the use of a descrambler device which is generally provided by the Cable TV company. -
Page 10: Connections To Other Equipment
Connections to other equipment The exact arrangement you use to interconnect various video and audio components to the TV is dependent on the model and features of each component. Check the Owner's Manual provided with each component for the location of video and audio inputs and outputs. The connection diagrams below are offered as suggestions. - Page 11 Connections to other equipment (continued) To connect the TV to a DVD player/Satellite receiver If your DVD player or Satellite receiver has a S-Video out jack, connect cords as shown. To Audio OUT To S-Video OUT To S-VIDEO IN 1 (or 2) S-Video cord (not supplied) Audio cord (not supplied) To AUDIO IN 1 (or 2)
- Page 12 Connections to other equipment (continued) To connect the TV to a DTV receiver/set-top box If you connect a DTV receiver/set-top box, connect your TV to a DTV receiver/set-top box using a component video cord. To Audio OUT To Component OUT Video cord (not supplied) Audio cord (not supplied) To COMPONENT IN 1 (or 2)
- Page 13 Connections to other equipment (continued) To connect an audio system This connection allows you to use an audio amplifier and external speakers, and adjust the audio level using the TV/DVD’s remote control. To control the audio, turn on the TV/DVD and the stereo amplifier, and turn off the TV/DVD’s built-in speakers (see “Turning off the built-in speakers”...
- Page 14 Connections to other equipment (continued) To connect the TV to a camcorder To playback from a camcorder, connect the camcorder to the TV as shown. Front of the TV To Audio/Video OUT Audio/Video cord (not supplied) To connect the TV to a Game The TV can also be used as a display device for many video games.
-
Page 15: Starting Setup
Starting setup The STARTING SETUP menu appears IMPORTANT: Make sure that the antenna or cable TV system the first time you turn on the TV, and connection is made! helps you select the menu language, specify the TV/CABLE setting, and Press POWER. -
Page 16: Setting The Language
Setting the language You can choose from three different Press MENU. The menu screen will appear. languages (English, French and Spanish) for the on-screen displays. Then press to select SETUP menu. SETUP LANGUAGE ENGLISH CLOCK SET 12:00 AM TV/CABLE CABLE AUTO CH MEMORY ADD/DELETE :SELECT... -
Page 17: Memorizing Channels
Memorizing channels This TV is equipped with a channel memory feature which allows channels to skip up or down to the next channel set into memory, skipping over unwanted channels. Before selecting channels, they must be pro- grammed into the TV’s memory. This TV can receive up to 250 VHF/UHF channels and 500 cable TV channels. To use this TV with an antenna, set the TV/CABLE menu option to the TV mode. -
Page 18: Clear All
Memorizing channels (continued) Automatic memory tuning Press MENU. The menu screen will appear. Press to select SETUP menu, then press ▲ or ▼ to SETUP select “AUTO CH MEMORY”. LANGUAGE ENGLISH CLOCK SET 12:00 AM TV/CABLE CABLE AUTO CH MEMORY ADD/DELETE :SELECT :ADJUST... -
Page 19: Setting Your Favorite Channels
Setting your favorite channels You can preset up to 12 of your Setting your favorite channels favorite channels. Select a channel you wish to include in your favorite channel list. Press MENU, then press to select OPTION menu. O P T I O N O N / O F F T I M E R O F F FAVO R I T E C H... -
Page 20: Tv Operation
TV operation To turn on the TV, press POWER. Adjust the volume level by pressing VOL + or – . The volume level will be indicated on the screen by green bars. As the volume level VOLUME increases, so do the number of bars. -
Page 21: Quick View
TV operation (continued) ▲/▼ Press and release CH ▲ or ▼. The channel automatically stops at the next channel set into memory. For proper operation, before selecting ABCD channels, they should be set into the memory. See pages 17 and 18 “Memorizing channels”. -
Page 22: Setting The V-Chip
Setting the V-Chip An age limitation can be set to restrict children from viewing or hearing violent scenes or picture that you may choose to exclude. The restriction applies to “TV RATING” and “MOVIE RATING” if this data is transmitted. You may set this restriction separately. To use the V-Chip function, you must register a password. - Page 23 Setting the V-Chip (continued) To set the V-CHIP Press MENU, then press select LOCKS menu. L O C K S V- C H I P S E T F RO N T PA N E L L O C K N E W PA S S WO R D : S E L E C T : A D J U S T...
- Page 24 Setting the V-Chip (continued) To change the password Press MENU, then press to select LOCKS menu. L O C K S V- C H I P S E T F RO N T PA N E L L O C K N E W PA S S WO R D : S E L E C T : A D J U S T...
-
Page 25: Setting The Front Panel Lock
Setting the front panel lock You can lock the front panel To lock the front panel buttons to prevent your settings from being changed accidentally Press MENU, then press (by children, for example). When to select LOCKS menu. the front panel lock is in ON, all L O C K S V- C H I P S E T control buttons on the TV front... -
Page 26: Labeling Channels
Labeling channels Channel labels appear over the To create channel labels channel number display each time you turn on the TV, select a Select a channel you want to label. channel, or press DISPLAY. You can choose any four charac- Press MENU, then press ters to identify a channel. -
Page 27: Labeling The Video Input Source
Labeling the video input source The video label feature allows Press MENU, then press you to label each input source for to select OPTION your TV. menu. OPTION Press ▲ or ▼ to select ON / OFF TIMER FAVORITE CH “VIDEO LABEL”. -
Page 28: Setting The Clock
Setting the clock You must set the clock correctly for EXAMPLE: Setting the clock to “8:30 AM”. the “ON/OFF TIMER” to activate at the correct time. Press MENU, then press to select SETUP menu. SETUP LANGUAGE ENGLISH CLOCK SET 12:00 AM TV/CABLE CABLE AUTO CH MEMORY... -
Page 29: Setting The On Timer
Setting the on timer This feature allows you to have the EXAMPLE: Turning on the TV to channel 12 at 7:30 AM, daily. TV automatically turn on at a Preparation: predetermined time. If you program Set the clock, if you have not already done so (see page 28). the ON TIMER to daily once, the TV will turn on everyday at the same Press MENU. -
Page 30: Setting The Off Timer
Setting the off timer This feature allows you to have EXAMPLE: Turning off the TV at 11:30 PM, daily. the TV turn off automatically at a Preparation: predetermined time. If you pro- Set the clock, if you have not already done so (see page 28). gram the OFF TIMER once, the TV will automatically turn off at the Press MENU. -
Page 31: Setting The Picture Size
Setting the picture size You can view 480i and 480p Selecting the picture size format programs in a variety of picture sizes—NATURAL, CINEMA Press MENU. Press WIDE1, CINEMA WIDE2, CINEMA select SETUP menu. WIDE3, and FULL. Press ▲ or ▼ to select “PIC- S E T U P TURE SIZE”. - Page 32 Setting the picture size (continued) NOTE: CINEMA WIDE2 picture size (for letter box programs) The PICTURE SIZE feature is not available for some program formats The entire picture is uniformly (such as 1080i or 720p). enlarged—it is stretched the same Such formats will display in FULL.
-
Page 33: Setting The Picture Scroll
Setting the picture scroll You can scroll the picture in CINEMA WIDE2 and CINEMA Press MENU in CINEMA WIDE3 WIDE2 or CINEMA WIDE3 mode. SETUP LANGUAGE ENGLISH Then press to select CLOCK SET 12:00 AM TV/CABLE CABLE SETUP menu. AUTO CH MEMORY ADD/DELETE :SELECT :ADJUST... -
Page 34: Adjusting The Picture Preference
Adjusting the picture preference You can select four picture Adjusting the picture preference modes—SPORTS, STANDARD, MOVIE, and MEMORY—as de- Press MENU, then press scribed in the following table: select PICTURE menu. PICTURE PICTURE PREFERENCE SPORTS BRIGHTNESS CONTRAST COLOR TINT SHARPNESS : SELECT : ADJUST Press ▲... -
Page 35: Picture Control Adjustment
Picture control adjustment Picture control adjustment Press MENU, then press to select PICTURE menu. PICTURE PICTURE PREFERENCE SPORTS BRIGHTNESS CONTRAST COLOR TINT SHARPNESS : SELECT : ADJUST Press ▲ or ▼ to select the item you want to adjust. PICTURE Press to adjust the setting. -
Page 36: Selecting The Color Temperature
Selecting the color temperature/Selecting the Scan Velocity Modulation (SVM)/Resetting your picture adjustment Selecting the color temperature Change the picture quality by selecting from three preset color temperatures—COOL, MEDIUM, and WARM: Press MENU, then press to select PICTURE menu. PICTURE Press ▲ or ▼ to select “COLOR COLOR COOL TEMPERATURE... -
Page 37: Closed Caption
Closed Caption WHAT IS CLOSED CAPTIONING? This television has the capability to decode and display Closed Captioned television programs. Closed Captioning will display text on the screen for hearing impaired viewers or it will translate and display text in another language. Captions: This Closed Caption Mode will display text on the screen in English or another language. -
Page 38: Cc Advanced
CC advanced Closed Caption are factory preset This feature is designed to customize Digital Caption only. but you can adjust them individu- ally as follow: Press MENU. The menu screen will appear. Press to select SETUP menu. SETUP LANGUAGE ENGLISH CLOCK SET 12:00 AM TV/CABLE... -
Page 39: Selecting Stereo
Selecting stereo/Second Audio Program (SAP)/ Sound control adjustment The multi-channel TV sound Selecting stereo/Second Audio Program (SAP) (MTS) feature provides high- fidelity stereo sound. MTS also Press MENU, then press can transmit a second audio to select AUDIO menu. program (SAP) containing a Press ▲... -
Page 40: Turning Off The Built-In Speakers
Turning off the built-in speakers/Selecting the BBE/Selecting the digital output Turning off the built-in speakers Use this feature to turn the TV/DVD speakers off when you connect an audio system (see pages 13). Press MENU, then press to select AUDIO menu. A U D I O M T S S T E R E O... -
Page 41: Selecting The Audio Language
Selecting the audio language/Resetting your audio adjustments Selecting the audio language When two or more audio languages are included in a digital signal, you can select one of the audio language. Press MENU, then press to select AUDIO menu. A U D I O M T S S T E R E O B A S S... -
Page 42: Checking The Digital-Signal Strength
Checking the Digital-signal strength You can view the digital signal meter. Press MENU, then press to select SETUP menu. SETUP LANGUAGE ENGLISH CLOCK SET 12:00 AM TV/CABLE CABLE AUTO CH MEMORY ADD/DELETE :SELECT :ADJUST Press ▲ or ▼ to select “SIGNAL METER”. -
Page 43: Troubleshooting
Troubleshooting Use the following check list for troubleshooting when you have problems with your TV. Consult your local dealer or service outlet if problems persist. Be sure all connections are properly made when using with other units. SYMPTOMS POSSIBLE SOLUTIONS SYMPTOMS POSSIBLE SOLUTIONS •... -
Page 44: Specifications
Specifications Power supply: AC 120 V 60 Hz Power consumption: Operation: 195 W Stand by: Weight: 117.7 lbs (53.5 kg) Dimensions: Width: 31-5/16 inches (796 mm) Height: 21-5/8 inches (549.2 mm) Depth: 22-3/16 inches (563 mm) Inputs: VIDEO: 1 V (p-p)/75 ohms AUDIO: –8 dBm/50k ohms S-VIDEO:... -
Page 45: Limited Warranty
LIMITED WARRANTY 30” WIDE FLAT DIGITAL TELEVISION ORION warrants this product to be free from manufacturing defects in material and workmanship under normal use and conditions for a period of ninety (90) days from date of original purchase in the United States only. Should service be necessary under this warranty for any reason due to a manufacturing defect or malfunction during the first ninety (90) days period from date of original purchase, ORION will provide carry-in repair service at an ORION authorized Independent Service Center at no charge. - Page 46 Memo ...........................................................................................................................................................................................................................................................................................................................................................................................................................................................................................................................
- Page 47 ...........................................................................................................................................................................................................................................................................................................................................................................................................................................................................................................................
- Page 48 Printed in Thailand J3S60201A SH 05/08...