Advertisement
Quick Links
Advertisement

Related Manuals for A4 Tech. X-710


Summary of Contents for A4 Tech. X-710
- Page 1 SPEED Game Mouse User’s Manual Model(s): X-710 X-718 www.a4tech.com...
- Page 2 THIS DEVICE COMPLIES WITH PART 15 OF THE FCC RULES. OPERATION IS SUBJECT TOTHE FOLLOWING TWO CONDITIONS: (1) THIS DEVICE MAY NOT CAUSE HARMFUL INTERFERENCE AND (2) THIS DEVICE MUST ACCEPT ANY INTERFERENCE RECEIVED, INCLUDING INTERFERENCE THAT MAY CAUSE UNDESIRED OPERATION. Federal Communications Commission Requirements The equipment has been tested and found to comply with the limits for Class B Digital Device, pursuant to part 15 of the FCC Rules.
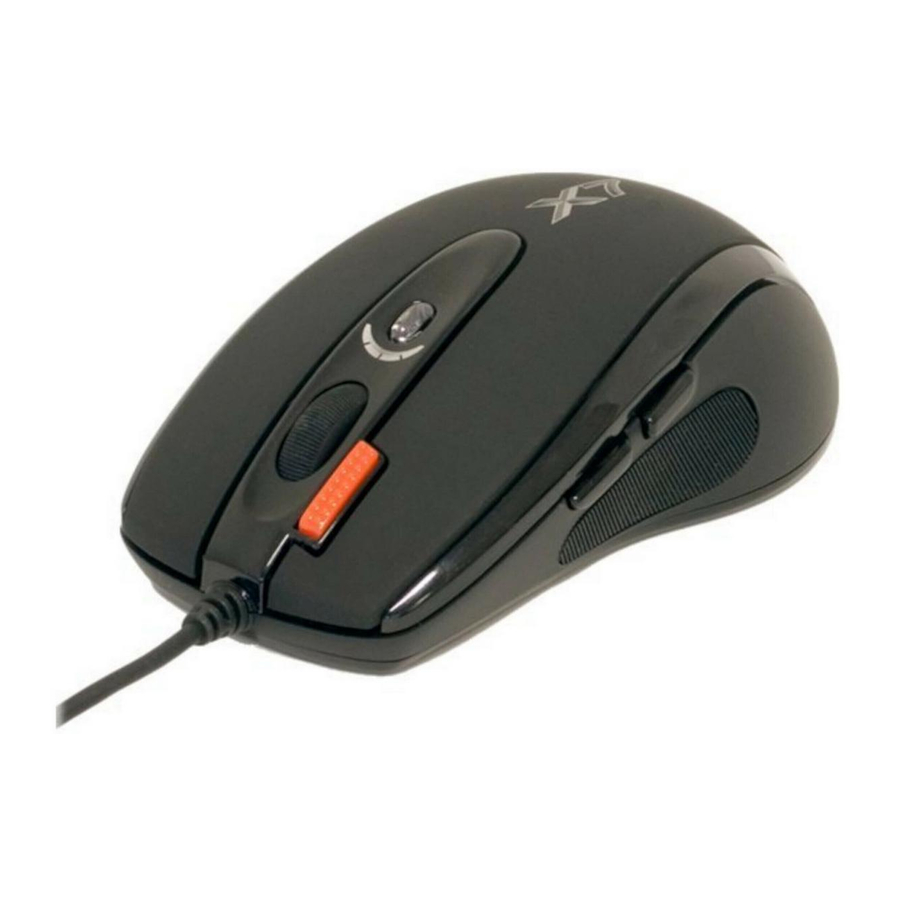
- Page 3 HOW TO CONNECT YOUR MOUSE Locate an available USB mouse port on the back of your computer. Insert the USB mouse connector into the USB port . If you like to use the PS2 port (for the round PS/2 plug), you will need to plug the USB connector with a PS2 adapter.
- Page 4 MODEL: X-710 At Resolution: Scrolling Wheel will change to: 400DPI Green 600DPI Yellow 800DPI 1000DPI Click 6 MODEL: X-718 At Resolution: Scrolling Wheel will change to: 600DPI Green 800DPI Yellow 1200DPI 1600DPI Red & Yellow 2000DPI coruscating Click to quickly shift from 600, 800, 1200, 1600 to as high as 2000 DPI...
- Page 5 MUST: Make sure you have completely finished setting up your mouse pad and mouse Insert the included Compact Disc (CD) into your CD-ROM Click “Install Driver”. Select model: X-710/718 Optical Mouse Click the button on the right to install driver Follow the on screen instruction to complete your installation Restart your computer after the driver has been installed 8.
-
Page 6: Section I: Button Assignment
STEP TWO: HOW TO PROGRAM YOUR MOUSE BUTTONS MOUSE PROPERTY Keyboard Property Open your Mouse Properties. First Tab: Button Section I: Button Assignment 1. The mouse image that appears in the first section is a key to numbers listed to the right. For example, button #1 has been assigned as “Main Button”... - Page 7 STEP THREE: HOW TO SET X7-JUMP FUNCTION ( LEARN TO SIMULATE KEYBOARD’S COMMANDS AND PROGRAM XY SENSITIVITY INDEPENDENTLY) The function not only provides program XY sensitivity Smart-X7 independently , but also can be set in any of the buttons from # 2 to # 5 of simulation functions for the keyboard and half of the mouse button simulation functions for the keyboard.
- Page 8 You can configure your mouse as synchronism or non-synchronism higher/lower with many parameters to control the X/Y dpi by yourself in this smart X7 Software , Model At Resolution: X-710 400DPI 600DPI 800DPI 1000DPI...
- Page 9 Section II: Keystrokes To ADD keystrokes: Click on the button “New Keystroke” and you’ll see a “Keystroke” Window pops up (Image: left, bottom) Here you will see 3 radio buttons: Press and hold will input keystrokes consecutively Press and hold will only input once the keystrokes Press will input keystrokes consecutively, press again will release the keystrokes If you select the 1...
- Page 10 Example 1: Select 1 Radio Button 1. Click on “Record” (Reference: Image A) 2. Press “R” on the Keyboard 3. Click “OK” 4. It will bring you back to previous page 5. Now click on “Keystroke (R)”, the one you just created 6.
- Page 11 Example 2: Select 1 Radio Button 1. Click on “Ctrl+A” (Reference: Image C) 2. Press “Ctrl+A” on the Keyboard 3. Click “OK” 4. It will bring you back to previous page 5. Now click on “Keystroke (Ctrl+A)”, the one you just created 6.
- Page 12 Example 3: Select 2 Radio Button 1. Click on “Record” (Image E) 2. Press “A4TECH” on the Keyboard 3. Click “OK” 4. It will bring you back to previous page 5. Now click on “Keystroke(A4TECH)”, the one you just created 6.
- Page 13 Example 4: Select 3 Radio Button 1. Click on “Record” 2. Press “Z the Keyboard (Image G) 3. Click “Stop” to stop recording >> then click “OK” 4. It will bring you back to previous page (Image F) 5. Now click on “Keystroke(Z)”, the one you just created 6.
-
Page 14: Tech Support
have successfully created a command. TECH SUPPORT For tech support, please visit our website at www.a4tech.com or email us support@a4tech.com WARRANTY All A4 Tech products come with 2 years limited warranty.