Table of Contents
Advertisement
Advertisement
Table of Contents

Related Manuals for Baby Lock A_LINE Maria BL23A


Summary of Contents for Baby Lock A_LINE Maria BL23A
-
Page 2: Important Safety Instructions
IMPORTANT SAFETY INSTRUCTIONS This sewing machine is not a toy. Do not allow children to play with this machine. The machine is not intended for use by children or mentally infirm persons without proper supervision. This sewing machine is designed and manufactured for household use only. Read all instructions before using this sewing machine. - Page 3 CONSIGNES IMPORTANTES DE SECURITE Pour utiliser un appareil électrique, il faut toujours respecter les consignes de sécurité fondamentales, notamment les consignes suivantes : Avant d’utiliser cet appareil, lisez toutes ces instructions. DANGER : Pour réduire les risques d’électrocution. Il ne faut jamais laisser un appareil sans surveillance lorsqu’il est branché. Il faut toujours débrancher cette machine à...
-
Page 4: Instrucciones Importantes De Seguridad
INSTRUCCIONES IMPORTANTES DE SEGURIDAD Cuando se utiliza un aparato eléctrico es necesario tomar ciertas precauciones básicas de seguridad, como las siguientes: Lea todas las instrucciones antes de utilizar este aparato. PELIGRO — Para reducir el riesgo de choque eléctrico: 1. No deje nunca el aparato sin vigilancia mientras esté enchufado. Desenchufe siempre la máquina de la toma eléctrica inmediatamente después de utilizarla y antes de limpiarla. - Page 5 Do´s and Don´ts 1. Always be aware of the up-and-down movement of the needle and do not turn your attention from the machine while it is running. 2. When leaving the sewing machine unattended, the main switch of the machine must be switched off or the plug must be removed from the socket-outlet.
-
Page 6: Table Of Contents
TABLE OF CONTENTS SECTION ESSENTIAL PARTS Names of Parts ............. . . 8 SECTION GETTING READY TO SEW Included Accessories and Attachments . - Page 7 TABLE DES MATIÈRES SECTION I PIÈCES PRINCIPAUX Noms des pièces ..........................9 SECTION II SE PRÉPARER À COUDRE Accessories et pièces inclus ......................11 Cosignes d’utilisation ........................13 Relier la machine au pouvoir ......................13 Contrôle de vitesse de la couture ....................13 Pour coudre au bras libre ........................
- Page 8 INDICE SECCION I: PIEZAS ESENClALES Nombres de las partes ............................9 SECCION II: PUESTA EN MARCHA Accesorios y refacciones incluidos ........................11 Instrucciones para la operación ......................... 13 Conexión de la máquina a la toma de corriente ....................13 Pedal de control ..............................13 Para costra con brazo libre ..........................
-
Page 9: Names Of Parts
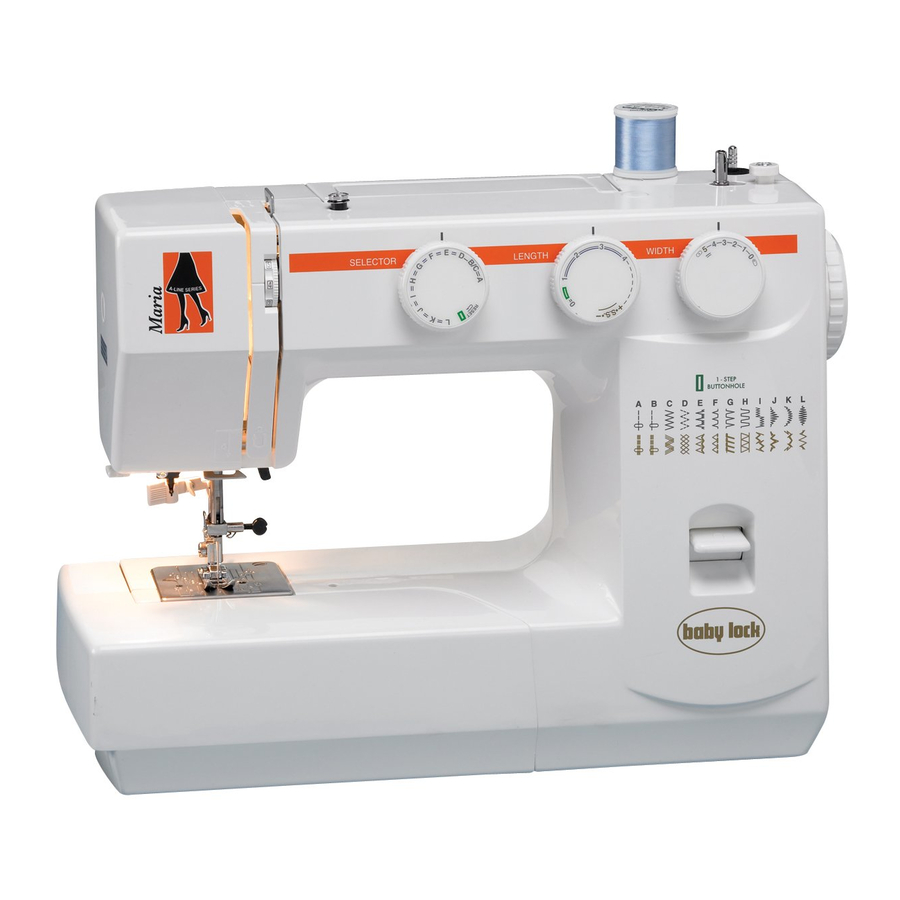
SECTION I ESSENTIAL PARTS • Names of Parts Reverse stitch button Pattern selector dial Stitch length dial Stitch width dial Bobbin winder stopper Bobbin winder spindle Spool pins Bobbin winder thread guide Thread guide 10 Thread take-up lever 11 Thread tension dial 12 Face plate 13 Thread cutter 14 Needle threader... -
Page 10: Pièces Principaux
SECTION I PIÈCES PRINCIPAUX SECTION I PIEZAS ESENCIALES • Noms des Pièces • Nombres de las partes 1 Bouton de renverse 1 Selector de retroceso. 2 Sélecteur des motifs 2 Selector de dibujos. 3 Sélecteur de la longueur du point 3 Regulador de la longitud de puntada. -
Page 11: Section Ii Getting Ready To Sew
SECTION II GETTING READY TO SEW Included Accessories and Attachments Ref. No. Part No. Description 102261000 3 x Bobbin 639804000 Needle set (HAx1 – size 14) 611406002 Zipper foot 740801004 Automatic buttonhole foot 743817002 Blind hem foot 743819004 Button sewing foot 647808009 Seam ripper / Buttonhole opener 647803004... -
Page 12: Accessories Et Pièces Inclus
SECCION II PUESTA EN MARCHA SECTION II SE PRÉPARER À COUDRE Accesorios y refacciones incluidos Accessoires et pièces inclus ° ° Referencia Número de Descripción de pièce Désignation de réf la parte 102261000 3 x canettes 102261000 3 x canillas 639804000 Jeu d’aiguille (HAx1 –... -
Page 13: Operating Instructions
Operating Instructions: The symbol “ ” of a switch indicates the “OFF” position of a switch. This appliance has a polarized plug (one blade wider than the other). To reduce the risk of an electric shock, this plug is intended to fit in a polarized outlet only one way. -
Page 14: Cosignes D'utilisation
Instrucciones para la operación: Consignes d’utilisation: El simbolo “ “ de un interruptor indica la posicion Le symbole “ “ d’un commutateur indique la “Apagada” de un interruptor. position de repos d’un commutateur. Para aparatos con clavija polarizada (una pieza del Pour les appareils ayant une prise polarisée enchufe más ancha que la otra). -
Page 15: Free Arm Sewing
• Free Arm Sewing Pull the end of the extension table away from the machine, as illustrated. Extension Table The extension table provides added sewing surface and can be easily removed for free arm sewing. For attaching the table Push the extension table until its lugs fit into the machine. -
Page 16: Pour Coudre Au Bras Libre
• Pour coudre au bras libre • Para Costra con Brazo Libre Tirez le bout de la table d’extension de la machine, Retirar el suplemento, tirando hacia la izquierda, tal comme indiqué sur la figure. como muestra la figura. Suplemento del Brazo Libre Table d’extension El suplemento del brazo libre añade a este una mayor La table d’extension ajoute de la surface pour... -
Page 17: Changing Needle
• Changing Needle Raise the needle by turning the handwheel toward you and lower the presser foot. Loosen the needle clamp screw by turning it counter-clockwise. Remove the needle from the clamp. Insert the new needle into the needle clamp with the flat side away from you. -
Page 18: Changer L'aiguille
• Changer L’aiguille • Cambio de Aguja Élevez l’aiguille en tournant le volant vers vous et Girar manualmente, hacia uno mismo, el volante hasta que fermez la prise de courant. Desserrez la vis du la aguja alcance su posición más elevada; mediante la palanca crampon de l’aiguille en la tournant vers vous. -
Page 19: Setting Spool Pins
• Setting Spool Pins The spool pins are used for holding the spool of thread in order to feed thread to the machine. To use, pull up the spool pin. Push down for storage. Upper thread Hole Tangle Note: When using thread which has tendency to tangle around the spool pin, thread through the hole of spool pin as shown. -
Page 20: Fixer Les Chevilles À Bobines
• Posicionado de los Portacarretes • Fixer les Chevilles à Bobines Los protacarretes tienen como finalidad sujetar los Les chevilles à bobines sont utilisées carretes de hilo para el enhebrado de la aguja. pour fournir le fil nécessaire à l’enfilage de la machine. -
Page 21: Removing Or Inserting The Bobbin Case
• Removing or Inserting the Bobbin Case Open the hook cover. Raise the needle by turning the handwheel toward you. Take out the bobbin case by holding the latch. When inserting the bobbin case, pull and hold the latch and then place the bobbin case into the hook as far in as possible. -
Page 22: Demontage Et Remontage De La Canette
• Demontage et Remontage de la Canette • Extracción e Instalación de la Caja de Bobina Ouvrir le capot du crochet de navette. Abrir la tapa de la lanzadera. Élevez l’aiguille en tournant le volant vers vous. Girar manualmente el volante, hacia uno mismo, hasta que la aguja alcance su posición más elevada. -
Page 23: Winding The Bobbin
• Winding the bobbin Pull the handwheel out to the right. Draw the thread from spool. Guide the thread around the bobbin winder thread guide. Insert the thread through the hole in the bobbin from the inside to the outside. Put the bobbin on the bobbin winder spindle. -
Page 24: Enfilage De La Bobine De Fil
• Enfikage de la Bobine de Fil • Devanado de la Canilla Tirez sur le volant vers la droite. Hale el volante hacia derecha. Tirez sur le bout du fil de la bobine. Extraiga el hilo del carrete. Guidez-le autour du guide-fil du bobineur. Guíe hilo alrededor del guiahilo del devanador de bobina. -
Page 25: Threading Bobbin Case
• Threading Bobbin Case Place the bobbin into the bobbin case. Make sure the thread unwinds in the direction of the arrow. Pull the thread into the bobbin case slot. Draw the thread under the tension spring and into the delivery eye. * Leave about 10 cm (4 inches) of free thread. -
Page 26: Enfilage Du Boitier De Canette
• Enhebrado del Hilo de la Canilla • Enfilage du Boitier de Canette Una vez llenada, introducir la canilla en la caja de Mettre la canette dans son boitier. bobina, asegurandose de que el hilo gira en la S’assurer que le fil se dévide dans le sens dirección de la flecha de la figura. -
Page 27: Threading The Machine
• Threading the Machine Raise take-up lever to its highest position by turning the handwheel toward you. Raise presser foot. Place spool of thread on spool pin as shown, with thread coming from the back of the spool. 1 Draw thread into thread guide using both hands. -
Page 28: Enfilage De La Machine
• Enhebrado del Hilo de Aguja • Enfilage de la Machine Elevar el trahilos (3) a su posición más alta. mediante Levez le releveur de fil à la plus haute position el giro manual hacia uno mismo del volante. en tournant le volant vers vous. Elevar el pie prensatelas;... -
Page 29: Needle Threader
• Needle Threader Raise the needle to its highest position. Pull down the needle threader knob as far as it will go. Turn the knob in the direction of the arrow in the illustration, then insert Hook into the needle eye. Lead the thread around Guide and under Hook. -
Page 30: Dispositif D'enfilage
• Enhebrador de la Aguja • Dispositif D’enfilage Levante la aguja a su posición más alta. Soulever l’aiguille jusqu’à son point le plus élevé. Baje la perilla del enhebrador de aguja Tirer le bouton du dispositif d’enfilage aussi loin tanto como pueda. que possible. -
Page 31: Drawing Up Bobbin Thread
• Drawing Up Bobbin Thread Raise the presser foot and hold the needle thread lightly with your left hand. Turn the handwheel slowly toward you with your right hand until the needle goes down and continue turning the handwheel until the take-up lever is at its highest position. -
Page 32: Comment Faire Remonter Le Fil De La Canette
• Cómo sacar el Hilo de la Canilla • Comment Faire Remonter le Fil de la Canette Elevar el pie prensatelas, sujetar con la mano Remonter le pied et tenez légèrement le fil izquierda la hebra del hilo de la aguja. de l’aiguille avec la main gauche. -
Page 33: Balancing Needle Thread Tension
Balancing Needle Thread Tension z Correct tension: The thread tension is adjusted depending on the sewing materials, layers of fabric and sewing method. * The ideal straight stitch has threads locked between two layers of fabric, as illustrated (magnified to show detail). * For an ideal zigzag stitch, the bobbin thread does not show on the right side (top side) of the fabric, and the needle thread shows... -
Page 34: Balancer La Tension Du Fil
Balancer la Tension du Fil de L’aiguille Ajuste de la Tensión del Hilo de la Aguja Bonne tension: Tensión correcta: La tension du fil doit être adaptée selon les La tensión del hilo se ajusta dependiendo de los tissus utilisés, le nombre de couches de tissus materiales de costura, de las capas de tela y del et la méthode de couture. -
Page 35: Pattern Selector Dial
• Pattern Selector Dial Raise the needle above the fabric and match the desired pattern with the setting mark by turning the pattern selector dial. • • Selecting Stretch Stitch Patterns When sewing stretch stitch, set the stitch length dial at “ S.S. ”. •... -
Page 36: Sélecteur Des Motifs
• Sélecteur des Motifs • Selector de Dibujos Levez l’aiguille au-dessus du tissu et choissisez Elija el motivo deseado en la marca de ajuste haciendo le motif désiré à la marque de réglage en tournant subir la aguja y girar el mando del selector de puntadas. le selecteur des motifs. -
Page 37: Reverse Stitch Button
• Reverse Stitch Button As long as you keep the reverse stitch button depressed, the machine sews backwards. • Seam Guide Line The numbers on the needle plate indicate the distance between the center needle position and the line. The numbers in front are millimeters. The numbers in back are fractions of an inch. -
Page 38: Bouton De Renverse
• Bouton de Renverse • Botón Selector de Retroceso Si vous tenez le bouton de renverse vers le bas la Mientras se mantenga presionado el botón selector de machine coud les points de renverse vers l’arrière. retroceso, la máquina realizará la costura marcha atrás. •... -
Page 39: Section Iii Basic Sewing
SECTION III BASIC SEWING • Straight Stitch Sewing Pattern selector dial: A or B Presser foot: Zigzag foot • • • Thread tension: 2 - 6 Stitch length: 1.5 - 4 Stitch width: B (0) Raise the presser foot and position the fabric next to a stitching guide line on the needle plate. -
Page 40: Section Iii Couture De Base
SECCION III. OPERACIONES BASICAS SECTION III. COUTURE DE BASE DE COSTURA • Costura de Puntada Recta • Utilisation du Point Droit Selector de patrón: A, B Cadran de sélection du point :A ou B Prensatelas: Prensatelas de zigzag Pied presseur: Pied zigzag Tensión del hilo: 2–6... -
Page 41: Zigzag Stitching
• Zigzag Stitching Pattern selector dial: C Presser foot: Zigzag foot Thread tension: 2 - 5 Stitch length: 0.5 -4 Stitch width: 0.5 - 5 • • • Simple zigzag stitching is widely used for over- casting, sewing on buttons, etc. SECTION IV UTILITY STITCHING •... -
Page 42: Le Point Zigzag
• Puntada de Zigzag • Le point Zigzag Cadran de sélection du point: C Selector de patrón: Pied presseur: Pied zigzag Prensatelas: Prensatelas de zigzag Tension du fil: 2 – 5 Tensión del hilo: 2 – 5 Longueur du point: 0.5 –4 Longitud de puntada: 0.5–... -
Page 43: Overedge Stitch
• Overedge Stitch Pattern selector: Presser foot: Zigzag foot Thread tension: 1 - 4 Stitch length: S.S. • • • Stitch width: 3 - 5 Overedge stitch will be done most successfully when the right side stitches of zigzag fall slightly off the edge of the fabrics. -
Page 44: Point Zigzag
• Point Zigzag • Puntada ZIG-ZAG Cadran de sélection du point: Selector de patrón: Pied presseur: Pied zigzag Prensatelas: Prensatelas de zigzag Tension du fil: 1–4 Tensión del hilo: 1–4 Longueur du point: S.S. Longitud de puntada: S.S. Largeur du point: 3 –5 Anchura de puntada: 3–... -
Page 45: Triple Strength Stitch
• Triple Strength Stitch Pattern selector: A or B Presser foot: Zigzag foot Thread tension: 2 - 6 Stitch length: Stitch width: • • • B (0) The stitch is sewn with two stitches forward and one stitch backward forming a seam that does not rip easiIy. -
Page 46: Points Triple
• Points Triple • Puntada Recta Elástica Cadran de sélection du point: A ou B Selector de patrón: A, B Pied presseur: Pied zigzag Prensatelas: Prensatelas de zigzag Tension du fil: 2 - 6 Tensión del hilo: 2–6 Longueur du point: S.S. -
Page 47: Dropping The Feed Dogs
• Dropping the Feed Dog z Open the hook cover. q Hook cover x To drop the feed dog, pull down the drop lever and move it to the right, as illustrated. w Drop lever c To raise the feed dog, pull down the drop lever and move it to the left, as illustrated. -
Page 48: Abaisser La Griffe D'entraînement
• Descenso de las Dientes Transportadores • Abaisser la Griffe D’entraînement z Abra la cubierta del gancho. z Ouvrir le couvercle du boîtier q Cubierta del gancho q Couvercle du boîtier x Para bajar las dientes transportadores, baje la x Pour abaisser la griffe d’entraînement, tirer palanca elevadora y muévala a la derecha, tal le levier d’abaissement vers le bas et le como se muestra en la ilustración. -
Page 49: Sewing Buttons
Sewing Buttons Pattern selector: Presser foot: Button sewing foot Thread tension: 1 - 3 Stitch length: Stitch width: Adjust as necessary • • • Feed dog position: Down Adjust the stitch width, and turn the handwheel to check if the needle enters into each hole in the button. -
Page 50: Coudre Les Boutons
Coudre les Boutons Confección de Botones Selector del patrón: Cadran de sélection du point: C Pied presseur: Pied zigzag Prensatelas: Prensatelas de zigzag Tension du fil: 1–3 Tensión del hilo: 1–3 Longueur du point: Au choix Longitud de puntada: Cualquiera Largeur du point: À... -
Page 51: Automatic Buttonhole
• Automatic Buttonhole Pattern selector: Presser foot: Automatic BH foot Thread tension: 1 - 5 • • • Stitch length: ( 0.25 - 1) Stitch width: * The size of buttonhole is automatically set by placing the button in the automatic buttonhole foot (R). -
Page 52: Boutonnière Automatique
• Como Hacer Ojales Automáticamente • Boutonnière Automatique Cadran de sélection du point: Selector de patrón: Pied presseur: Pied pour boutonnière Prensatelas: Prensatelas para automatique ojales automáticos Tension du fil: 1–5 Tensión del hilo: 1–5 Longueur du point: ( 0.25–1) Longitud de puntada: (0.25–1) Largeur du point:... - Page 53 Insert fabric under the foot. Turn the handwheel slowly toward you with your right hand until the needle goes down and continue turning handwheel until the take-up lever is at its highest position. Remove the fabric to the left to draw both threads to the left.
- Page 54 Coloque la tele bajo el pie. Insérez le tissu sous le pied. Tournez le volant vers vous avec votre main Despacio déle vuelta al volante hacia usted con su droite jusqu'a l’aiguille soit à son plus bas mano derecha, hasta que la aguja descienda, y point continuez à...
-
Page 55: Corded Buttonholes
• Corded Buttonholes Stitch selector: Presser foot: Automatic buttonhole foot • • • Thread tension: 1 - 5 Stitch length: ( 0.25 - 1) Stitch width: * Set the stitch width in accordance with the thickness of the cord used. 1. -
Page 56: Les Boutonnières Gansées
• Les Boutonnières Gansées • Ojales Acordonados Selector de patrón: Cadran de sélection du point : Prensatelas: Prensatelas automático Pied presseur : Pied pour boutonnière para ojales automatique Tensión del hilo: 1–5 Tension du fil : 1–5 Longitud de puntada: (0.25–1) Longueur du point : (0.25–1) -
Page 57: Zipper Application
• Zipper Application Stitch selector: Presser foot: Zipper foot Thread tension: 3 - 6 Stitch length: Stitch width: • • • Pin or baste zipper tape to fabric and place it under the foot. Smooth the threads toward the back and lower the foot. -
Page 58: Application Des Fermetures-Éclaire
Application des Fermetures-éclair Aplicación de Cremalleras Cadran de sélection du point: A Selector del patrón: Pied presseur: Pied pour Prensatelas: Prensatelas para ermetures clair cremalleras Tension du fil: 3–6 Tensión del hilo: 3–6 Longueur du point: Longitud de puntada: 2 Largeur du point: Anchura de puntada: 5 Epinglez ou bâtissez la fermeture-éclair sur le... -
Page 59: Blind Stitch Hemming
• Blind Stitch Hemming Pattern selector: E or F Presser foot: Adjustable blind hem foot Thread tension: 2 - 4 Stitch length: 1 - 3 • • • Stitch width: z Fold up the hem and fold it back to from a 0.4 to 0.7cm (1/4") allowance as illustrated. -
Page 60: Point Invisible
• Point Invisible • Puntada Invisible Selector del patrón: E, F Cadran de sélection du point: E ou F Prensatelas: Prensatelas de puntada Pied presseur: Pied à points doblodillo invisible d’ourlet invisible Tensión del hilo: 2–4 Tension du fil: 2–4 Longitud de puntada: 1–3 Longueur du point:... -
Page 61: Shell Tuck
SECTION V DECORATIVE STITCHING • Shell Tuck Stitch selector: Presser foot: Zigzag foot Thread tension: 5 - 8 Stitch length: 2 - 3 • • • Stitch width: Place the bias folded edge of fabric along the inside right edge of the needle slot of foot. The needle should fall off the edge of the fabric on the right forming a tuck. -
Page 62: Points Décoratifs
SECTION V POINTS DÉCORATIFS SECCION V PUNTADAS DECORATIVAS • Bouillonés • Lorza Selector del patrón: Cadran de sélection du point: Prensatelas: Prensatelas para zigzag Pied presseur: Pied zigzag Tensión del hilo: 5–8 Tension du fil: 5–8 Longitud de puntada: 2–3 Longueur du point: 2–3 Anchura de puntada:... -
Page 63: Decorative Satin Stitch Patterns
• Decorative Satin Stitch Patterns Stitch selector: I, J, K, L Presser foot: Zigzag foot Thread Tension: 1 - 4 Stitch length: (0.25 -1) Stitch width: • • • Sew a row of stitches and adjust the thread tension so the upper thread appears on the reverse side of the fabric. -
Page 64: Points Satins Décoratifs
• Diseños Decorativos en Raso • Points Satins Décoratifs Selector del patrón: I, J, K, L Cadran de sélection du point: I, J, K, L Prensatelas: Prensatelas para zigzag Pied presseur: Pied zigzag Tensión del hilo: 1–4 Tension du fil: 1–4 Longitud de puntada: (0.25–1) -
Page 65: Box Stitching
• Box Stitching Stitch selector: Presser foot: Zigzag foot Thread tension: 1 - 4 Stitch length: 1 - 2 Stitch width: • • • Use this stitch to join heavy weight interlining. Overlap two raw edges together and use this stitch to join them. -
Page 66: Point De Créneau
• Point de Cr neau • Puntada de Recuadro é Selector del patrón: Cadran de sélection du point: Prensatelas: Prensatelas para zigzag Pied presseur: Pied zigzag Tensión del hilo: 1–4 Tension du fil: 1–4 Longitud de puntada: 1–2 Longueur du point: 1–2 Anchura de puntada: Largeur du point:... -
Page 67: Twin Needle Sewing (Optional)
• Twin Needle Sewing (Optional) attern selector: D, G, I – L Presser foot: Zigzag foot Thread tension: 1–4 Twin needle: 2 LP -90 (2.0 mm left shank) (Twin needle is optional) Stitch length: 0.5–1 (Satin stitch patterns) S.S. (Stretch stitch patterns) Stitch width: •... -
Page 68: Coudre Avec Des Aiguilles Jumelées (Option)
Costura con Aguja Doble (Opción) • • Coudre Avec des Aiguilles Jumelées (Option) q Selector de patrón: D, G q Cadran de sélection du point: D, G I–L I–L w Prensatelas: Prensatelas para zigzag w Pied presseur: Pied zigzag e Tensión del hilo: 1–4 e Tension du fil: 1–4... -
Page 69: Section Vi Care Of Your Machine
SECTION VI CARE OF YOUR MACHINE • Sewing Light The sewing light is located behind the face plate. To change the bulb, take the face plate off the sewing machine by removing the set screw. * Unplug the power supply before changing the bulb. -
Page 70: Section Vi Entretien De Votre Machine
SECTION VI ENTRETIEN DE VOTRE SECCION VI: MANTENIMIENTO MACHINE • Camblo de la Bonbilla • Lumière pour la Couture La bombilla se encuentra situada en el interior de la ’ampoule lumineuse pour la couture est placée tapa frontal. à l’arrière du capot frontal. Aflojar el tornillo, girando en el sentido contrario al Pour changer l’ampoule, retirez le capot frontal de las agujas del reloj, y extraer la tapa frontal. -
Page 71: Dismantling And Assembling Hook Race
• Dismantling and Assembling Hook Race To dismantle hook race: Raise the needle to its highest position and open the hook cover. Open the hinged latch of bobbin case and take it out of the machine. Open the hook race ring holders and remove the hook race ring. -
Page 72: Démontage Et Remontage Du Crochet De La Navette
• Montaje y Desmontaje de la Lanzadera • Démontage et Remontage du Crochet de la Navette Desmontaje de la lanzadera: Pour démonter le crochet de la navette: Elevar, manualmente, la aguja hasta su posición más alta y abrir la tapa de la lanzadera. Tirar del pestillo y Tourner le volant vers soi pour faire extraer la caja de bobina. -
Page 73: Cleaning The Feed Dogs
• Cleaning the Feed Dogs Remove the needle and the presser foot. Remove the needle plate set screws and remove the needle plate. With a brush, clean out dust and lint clogging the feed dog teeth. Reset the needle plate. •... -
Page 74: Nettoyage Des Griffes D'entraînement
• Nettoyage des Griffes d’entraînement • Limpieza de los Dientes de Arrastre Extraer la aguja, el pie prensatelas, aflojar los tornillos Enlever le pied-de-biche et l’aiguille. y quitar la placa de aguja. Desserrer les vis de la plaque à aiguille avec un tournevis et enlever la plaque. -
Page 75: Trouble Shooting
Trouble Shooting Condition Cause Reference The machine does not 1. Threads have been caught in hook mechanism. See Page run smoothly and is 2. The feed dog is packed with lint. See Page noisy. The needle thread 1. The needle thread is not threaded properly See Page breaks. -
Page 76: En Cas De Difficulté
En cas de difficulté Condition Cause Référence La machine ne marche 1. Des fils sont pris dans le méchanisme de la navette. Voir Page pas bien et est bruyante. 2. Les griffes d’entraînement sont remplies de charpie. Voir Page Le fil de l’aiguille se 1. - Page 77 Resolucion de problemas PEOBLEMA MOTIVO SOLUCION 1. El hilo se ha enganchado en la lanzadera. La máquina no funciona Referirse a la página con suavidad y hace ruido 2. Los dientes de arrastre están sucios. Referirse a la página El hilo de aguja 1.
- Page 78 748-800-362 (E/S/F) Printed in Thailand / Impreso en Tailandia / Imprimé en Thaïlande...