Fujitsu LifeBook S760 User Manual
Hide thumbs
Also See for LifeBook S760:
- Operating manual (103 pages) ,
- Bios manual (32 pages) ,
- Getting started (13 pages)
Table of Contents
Advertisement
Available languages
Available languages
Quick Links
Download this manual
See also:
Operating Manual
Advertisement
Chapters
Table of Contents
Troubleshooting

Related Manuals for Fujitsu LifeBook S760


Summary of Contents for Fujitsu LifeBook S760
- Page 1 Learn how to use your Fujitsu User’s Guide LifeBook S760 notebook Découvrez comment utiliser Mode d’emploi votre ordinateur portable Fujitsu LifeBook S760...
- Page 2 User’s Guide Learn how to use your Fujitsu LifeBook S760 notebook...
- Page 3 Copyright and Trademark Information Fujitsu America, Incorporated has made every effort to ensure the accuracy and completeness of this document; however, as ongoing development efforts are continually improving the capabilities of our products, we cannot guarantee the accuracy of the contents of this document.
- Page 4 © Copyright 2009 Fujitsu America, Incorporated. All rights reserved. No part of this publication may be copied, reproduced, or translated, without prior written consent of Fujitsu. No part of this publication may be stored or transmitted in any electronic form without the written consent of Fujitsu.
- Page 5 IMPORTANT SAFETY INSTRUCTIONS This unit requires an AC adapter to operate. Use only UL Listed I.T.E. Class II Adapters with an output rating of 19 VDC, with a current of 4.22A (80 W). AC adapter output polarity: When using your notebook equipment, basic safety precautions should always be followed to reduce the risk of fire, electric shock and injury to persons, including the following: •...
-
Page 6: Recycling Your Battery
* To order a new battery for your Fujitsu mobile computer, go to the Fujitsu shopping site at www.shopfujitsu.com in the US or www.fujitsu.ca/products/notebooks in Canada. ** RBRC is an independent third party to which Fujitsu provides funding for battery recycling; RBRC is in no way affiliated with Fujitsu. -
Page 7: Table Of Contents
Fujitsu Contact Information ........9... - Page 8 Keyboard ........... . 26 Using the Keyboard .
- Page 9 Fujitsu Driver Update Utility ........58...
- Page 10 Secure Digital (SD) Cards........77 Installing SD Cards.
- Page 11 Restoring Your Pre-installed Software ......109 Re-installing Individual Drivers and Applications ....109 Restoring the Operating System for Windows .
- Page 12 Glossary/Regulatory Glossary ........... . . 135 Regulatory Information .
- Page 13 Appendix B: Fingerprint Sensor Device Introducing the Optional Fingerprint Sensor Device ....172 Getting Started ..........173 Installing OmniPass .
-
Page 14: Preface
Preface About This Guide The LifeBook S760 notebook from Fujitsu America provides desktop performance with the all new 2010 Intel® Core™ Processor. Your notebook has a built-in 13.3” High-Definition LED color display. This system brings the computing power of desktop personal computers (PCs) to a portable environment. -
Page 15: Fujitsu Contact Information
LEASE READ ALL WARNING INFORMATION CAREFULLY Fujitsu Contact Information Service and Support You can contact Fujitsu Service and Support in the following ways: • Toll free: 1-800-8Fujitsu (1-800-838-5487) • Website: http://www.computers.us.fujitsu.com/support Before you place the call, you should have the following information ready so that the customer support representative can provide you with the fastest possible solution: •... - Page 16 OU MUST HAVE AN ACTIVE INTERNET CONNECTION TO USE THE ONLINE LINKS Limited Warranty Your LifeBook notebook is backed by a Fujitsu International Limited Warranty. Check the service kit that came with your notebook for the Limited Warranty period and terms and conditions. 10 - About This Guide...
-
Page 17: Getting To Know Your Lifebook
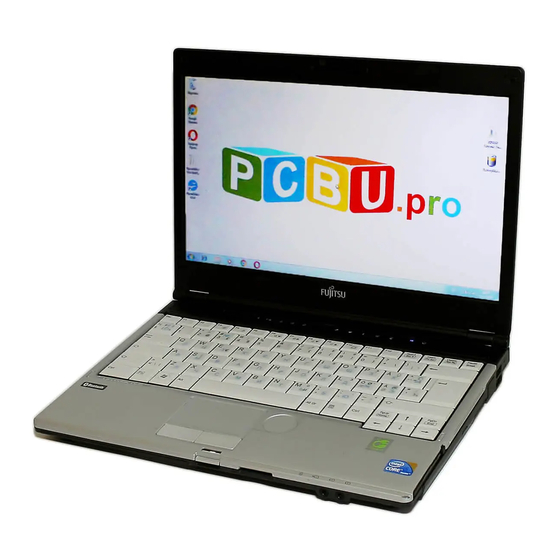
Getting to Know Your LifeBook Overview This section describes the components of your Fujitsu LifeBook S760 notebook. We strongly recommend that you read it before using your notebook – even if you are already familiar with notebook computers. Figure 1. Fujitsu LifeBook S760 notebook... -
Page 18: Locating The Controls And Connectors
Locating the Controls and Connectors Web Camera Stereo Microphone Display Latch Stereo Microphone Display Panel Status Indicator Panel Stereo Touchpad Pointing Device Speaker Fingerprint Sensor LifeBook Security/ Application Panel Power/Suspend/Resume Button Stereo Speaker Display Panel Latch Button Keyboard SD Card Slot Scroll Wheel Headphone Jack Microphone Jack... -
Page 19: Top Components
Top Components The following is a brief description of your LifeBook notebook’s top components. Web Camera The built-in camera has a resolution of 2.0 megapixels. For instructions on using the camera, see the help files that are included with the webcam software application. Stereo Microphones The built-in stereo microphones allow you to record voice and annotations. - Page 20 Status Indicator Panel The Status Indicator Panel displays symbols that correspond with a specific component of your LifeBook notebook. See “Status Indicator Panel” on page 22. Microphone/Line-In Jack The microphone/line-in jack allows you to connect an external mono microphone. See “Microphone/Line- In Jack”...
-
Page 21: Left-Side Panel Components
DC Power Jack LAN (RJ-45) Jack Wireless LAN/Bluetooth On/Off Switch Air Vents HDMI Port USB Port Figure 3. LifeBook notebook left-side panel Left-Side Panel Components The following is a brief description of your LifeBook notebook’s left-side components. DC Power Jack The DC power jack allows you to plug in the AC adapter to power your LifeBook notebook and charge the internal Lithium ion battery. - Page 22 USB 2.0 Port The USB 2.0 port allows you to connect Universal Serial Bus devices. USB 2.0 transfers data at up to 480 Mbps and is backward-compatible with USB 1.1 devices, which transfer data at up to 12 Mbps. See “Universal Serial Bus Ports”...
-
Page 23: Right-Side Panel Components
Optical Drive Express Card Air Vents Eject Button Release Button Modem (RJ-11) Jack Flexible Bay USB Ports Express/PC Card Slot (shown with Optical Drive installed) Figure 4. LifeBook notebook right-side panel Right-Side Panel Components The following is a brief description of your LifeBook notebook’s right-side components. Express/PC Card Eject Button The Express/PC Card eject button is used for removing an ExpressCard or PC Card from the slot (depending upon which type of card slot was configured with your system). - Page 24 REFER TO THE UJITSU WEBSITE AT HTTP SOLUTIONS FUJITSU Express Card Slot TheE xpress Card Slot allows you to install an Express Card. See “Using Express/PC Cards” on page 79. Flexible Bay The flexible bay can accommodate any of the following modular devices. (See “Flexible Bay Devices”...
-
Page 25: Back Panel Components
External Video Port Anti-Theft Lock Slot Figure 5. LifeBook notebook back panel Back Panel Components Following is a brief description of your LifeBook notebook’s back panel components. Anti-theft Lock Slot The anti-theft lock slot allows you to attach an optional physical lock down device. External Video Port The external monitor port allows you to connect an external monitor or LCD projector. -
Page 26: Bottom Components
Flexible Bay Device Lock Air Vents (multiple locations) Memory Upgrade Compartment Dust Filter Cover Port Replicator Connector Battery Release Latch Battery Release Latch Lithium ion Battery Pack Figure 6. LifeBook notebook bottom panel Bottom Components The following is a brief description of your LifeBook notebook’s bottom panel components. Memory Upgrade Compartment Your notebook comes with high speed Double Data Rate 3 Synchronous Dynamic RAM (DDR3 SDRAM). - Page 27 Flexible Bay Device Lock The flexible bay device lock is used to lock and release a modular flexible bay device in the flexible bay. See “Flexible Bay Devices” on page 38. Port Replicator Connector This connector allows you to connect the optional Port Replicator to your Tablet PC. Battery Release Latches The battery release latches are used to lock and release the battery in the battery bay.
-
Page 28: Status Indicator Panel
Drive Access Figure 7. Status Indicator Panel Status Indicator Panel The Status Indicators display symbols that correspond to specific components of your Fujitsu LifeBook notebook. The LEDs below each symbol tell you how each of those components is operating. Power Indicator The Power indicator symbol shows whether your system is operational. - Page 29 • Steady Off: This means that your system is either in Save-to-Disk mode, or that your notebook has been turned off. If you are charging your battery, the Power indicator will remain on even if your notebook is shut off. The Power indicator will also remain on if you have either adapter connected and are shut down from Windows.
-
Page 30: Security Indicator
• If the battery pack is installed while the power is turned off, the battery level indicator will display the charge level for five seconds after it blinks orange. • If the AC adapter is not connected or the battery pack is not fully charged when the computer is switched to standby mode, the indicator will blink. - Page 31 CapsLock Indicator The CapsLock indicator shows that your keyboard is set to type in all capital letters. ScrLk Indicator The ScrLk indicator shows that your scroll lock is active. 25 - Status Indicator Panel...
-
Page 32: Keyboard
Figure 8. Keyboard Using the Keyboard Your Fujitsu LifeBook notebook has an integral 84-key keyboard. The keys perform all the standard functions of a 101-key keyboard, including the Windows keys and other special function keys. This section describes the following keys. - Page 33 • Cursor keys: Your keyboard contains four arrow keys for moving the cursor or insertion point to the right, left, up, or down within windows, applications and documents. • Function keys: The keys labeled [F1] through [F12], are used in conjunction with the [Fn] key to produce special actions that vary depending on what program is running.
- Page 34 Function Keys Your LifeBook notebook has 12 function keys, F1 through F12. The functions assigned to these keys differ for each application. You should refer to your software documentation to find out how these keys are used. • The [Fn] key provides extended functions for the notebook and is always used in conjunction with another key.
-
Page 35: Touchpad Pointing Device/Scroll Wheel
Figure 9. Touchpad pointing device The Touchpad pointing device comes built into your Fujitsu LifeBook notebook. It is used to control the movement of the pointer to select items on your display panel. The Touchpad is composed of a cursor control, a left button, a right button, and a scroll/fingerprint sensor. - Page 36 To the right of the touchpad is a circular dimple, approximately an inch in diameter. This is known as the “scroll wheel” and is used for scrolling up and down pages and zooming in and out on photos. Note that the scroll wheel does not actually move;...
- Page 37 Double-Clicking Double-clicking means pushing and releasing the left button twice in rapid succession. This procedure does not function with the right button. To double-click, move the cursor to the item you wish to select, press the left button twice, and immediately release it. You can also perform the double-click operation by tapping lightly on the Touchpad twice.
- Page 38 Dragging Dragging means pressing and holding the left button, while moving the cursor. To drag, move the cursor to the item you wish to move. Press and hold the left button while moving the item to its new location and then release it.
-
Page 39: Using The Scroll Wheel
Scrolling Using the fingerprint sensor as a scrolling button allows you to navigate through a document quickly without using the window’s scroll bars. This is particularly useful when you are navigating through on-line pages. To use the sensor, slide your finger forwards or backwards, depending upon the direction you want to scroll. -
Page 40: Navigating Using Gestures (Windows 7 Systems)
Navigating Using Gestures (Windows 7 systems) The touchpad allows you to use gestures to zoom in or out on a page or scroll quickly through large documents. Zooming In: To zoom in on a page using the touchpad, simply place two fingers together on the touchpad and move them away from each other. -
Page 41: Touchpad Control Adjustment
Enabling/Disabling Gesture Functions: To enable or disable the gesturing functions, go to Start > Control Panel > Hardware and Sound. Double-click Mouse, and the Mouse Properties window will appear. Select the Device Settings tab and click the [Settings...] button. To enable/disable continuous scrolling: Select Virtual Scrolling from the left pane, check Enable Vertical Scrolling and/or Enable Horizontal Scrolling, and then check Chiral Motion. - Page 42 Figure 20. Speeding up cursor movement Figure 19. Continuous scrolling 36 - Touchpad Pointing Device/Scroll Wheel...
-
Page 43: Volume Control
Volume Control Your Fujitsu LifeBook notebook has multiple volume controls which interact with each other. NY SOFTWARE THAT CONTAINS AUDIO FILES WILL ALSO CONTAIN A VOLUME CONTROL OF ITS OWN YOU INSTALL AN EXTERNAL AUDIO DEVICE THAT HAS AN INDEPENDENT VOLUME CONTROL... -
Page 44: Flexible Bay Devices
Figure 21. Flexible Bay Flexible Bay Devices Your Fujitsu LifeBook notebook contains a Flexible Bay. The Flexible Bay can house an optical drive, a Lithium ion battery, or a weight saver. Your Flexible Bay will have one of the following devices installed. - Page 45 OU SHOULD NEVER LEAVE YOUR LEXIBLE AY EMPTY WHEN THE NOTEBOOK IS IN OPERATION LEFT EMPTY DUST OR FOREIGN MATTER MAY ACCUMULATE INSIDE THE NOTEBOOK Cold-swapping To cold-swap modular devices in your Flexible Bay follow these easy steps: Close any open files. Shut down your LifeBook notebook.
-
Page 46: Lifebook Security/Application Panel
Enter Button 1/ Button 3/ Enter Button Support Button Display Manager Button 2/ Button 4/ Power Saving Utility Screen Lock Figure 23. LifeBook Security/Application Panel LifeBook Security/Application Panel A unique feature of your LifeBook notebook is the Security/Application Panel that allows you to secure your notebook from unauthorized use. -
Page 47: Passwords
Passwords The user and supervisor password may be set on this notebook. A supervisor password is typically the same for all LifeBook notebooks in a working group, office, or company to allow for system management. Individual LifeBook notebooks in a group environment should not use a common password. A password consists of one to five button strokes plus the [Enter] button. - Page 48 Depending upon your operating system, use the appropriate procedure below. Windows XP: Go to the Start menu. Click on Run. Type in: C:\Program Files\Fujitsu\Security Panel Application\Supervisor\FJSECS.EXE, then press [Enter] Follow the on-screen instructions to set the Supervisor password. Windows Vista and Windows 7: Go to the Start menu.
-
Page 49: Operating Your Lifebook Security/Application Panel
Operating Your LifeBook Security/Application Panel The security lock feature is in effect both when the system resumes from Off or suspend state. You will need to enter the user password right after pressing the Suspend/Resume button. Your system will not boot or resume from Standby without entering your supervisor/user password. -
Page 50: Precautions
Precautions Opening and Closing the Cover Closing the cover automatically places the notebook into suspend mode. Opening it does not place the notebook into normal operation automatically. Instead, you must enter the proper security password after pushing the power/suspend/resume button. The setting can be changed in Power Options Control Panel. Low Battery Operations If your LifeBook notebook has low battery, pushing the Power/Suspend/Resume button only turns on the Security Indicator. - Page 51 User: Go to Start Menu, Click on Control Panel. Open Programs (In Windows Vista and Windows 7: Programs and Features) in the Control Panel. Select the Security Panel Application (In Windows Vista and Windows 7: Security Panel) in the list, and click Add/Remove.
-
Page 52: Launching Applications With The Security/Application Panel
If you forget both passwords, contact Fujitsu America Service and Support at 1-800-8FUJITSU (1-800- 838-5487). Fujitsu America charges a service fee for unlocking a password restricted LifeBook notebook. When calling please have a valid credit card and provide proof of ownership. You will then be given instructions on where to ship your notebook. - Page 53 To change an application associated with the Application buttons, click on the tab for the button you would like to reconfigure – for example, Application A. Click on Browse from Start Menu, scroll down the list of applications, click on the application you wish to launch with this button, and then click OK. The button will now launch the new application.
- Page 54 To re-activate, follow the same procedure, except for step 4. Click on Activate Panel instead. VERY TIME YOU START INDOWS THE PPLICATION ANEL IS ACTIVATED EVEN IF YOU DEACTIVATED IT BEFORE YOU SHUT DOWN 48 - LifeBook Security/Application Panel...
-
Page 55: Getting Started With Your Lifebook
Getting Started with Your LifeBook DC Power Jack AC Adapter Figure 24. Connecting the AC Adapter Power Sources Your Fujitsu LifeBook notebook has three possible power sources: a primary Lithium ion battery, an AC adapter or an optional Auto/Airline adapter. -
Page 56: Connecting The Power Adapters
Connecting the Power Adapters The AC adapter or optional Auto/Airline adapter provides power for operating your notebook and charging the batteries. Connecting the AC Adapter Plug the DC output cable into the DC power jack of your LifeBook notebook. Plug the AC cable to the AC Adapter. Plug the AC adapter into an AC electrical outlet. -
Page 57: Display Panel
Figure 25. Opening the Display Panel Display Panel Your Fujitsu LifeBook notebook contains a display panel that is backlit for easier viewing in bright environments and maintains top resolution through the use of active-matrix technology. SE CARE WHEN OPENING AND CLOSING THE DISPLAY... -
Page 58: Adjusting Display Panel Brightness
Adjusting Display Panel Brightness Once you have turned on your LifeBook notebook, you may want to adjust the brightness level of the screen to a more comfortable viewing level. In Windows XP systems, the brightness can be adjusted using the keyboard. In Windows Vista and Windows 7 systems, there are three ways to adjust the brightness, by using the keyboard, the Power Options, or the Windows Mobility Center. -
Page 59: Starting Your Lifebook Notebook
Starting Your LifeBook Notebook Power On Power/Suspend/Resume Button The Power/Suspend/Resume button is used to turn on your notebook from its off state. Once you have connected your AC adapter or charged the internal Lithium ion battery, you can power on your notebook. HEN YOU TURN ON YOUR OOK NOTEBOOK BE SURE YOU HAVE A POWER SOURCE... -
Page 60: Boot Sequence
This information is in the BIOS program. Each time you power up or restart your notebook, it goes through a boot sequence which displays a Fujitsu logo until your operating system is loaded. During booting, your notebook is performing a standard boot sequence including a Power On Self Test (POST). -
Page 61: Bios Setup Utility
Turn on or restart your LifeBook notebook. To enter the BIOS Setup Utility, press the [F2] key once the Fujitsu logo appears on the screen. This will open the main menu of the BIOS Setup Utility with the current settings displayed. -
Page 62: Booting The System
When you turn on your notebook for the first time, it will display a Fujitsu logo on the screen. If you do nothing the system will load the operating system, and then the Windows Welcome will begin. - Page 63 First of all, you will need to read and accept the End User License Agreements (EULAs). • F YOU REJECT THE TERMS OF THE LICENSE AGREEMENTS YOU WILL BE ASKED TO REVIEW THE LICENSE AGREEMENTS FOR INFORMATION ON RETURNING INDOWS OR TO SHUT DOWN YOUR ABLET •...
-
Page 64: Registering Your Lifebook Tablet Pc With Fujitsu
Your system has a convenient tool called the Fujitsu Driver Update (FDU) utility. With FDU, you can choose to automatically or manually go to the Fujitsu site to check for new updates for your system. For more information about the FDU utility, refer to “Automatically Downloading Driver Updates” on page 115. -
Page 65: Power Management
Power Management Your Fujitsu LifeBook notebook has many options and features for conserving battery power. Some of these features are automatic and need no user intervention, such as those for the internal modem. However, others depend on the parameters you set to best suit your operating conditions, such as those for the display brightness. -
Page 66: Hibernation (Save-To-Disk) Feature
• Pressing the Power/Suspend/Resume button when your system is turned on. • Selecting “Sleep” after clicking [Start] then clicking the small arrow at the bottom right of the window. • Timing out from lack of activity. • Allowing the battery to reach the Dead Battery Warning condition. Your notebook’s system memory typically stores the file on which you are working, open application information, and any other data required to support operations in progress. -
Page 67: Windows Power Management
Enable or Disable the Hibernation Feature Windows Vista/Windows 7: The Hibernate is enabled by default. To disable or enable the Hibernation feature follow these steps: From the Start menu, select Control Panel, then select the Power Options icon. Select “Choose what the power button does” or “Choose what closing the lid does”, then make your selections (Do Nothing, Sleep, Hibernate, or Shut Down). -
Page 68: Powering Off
Select the Restart option from within the Windows Shut Down dialog box. Click OK to restart your notebook. Your notebook will shut down and then reboot. URNING OFF YOUR OOK NOTEBOOK WITHOUT EXITING INDOWS OR TURNING ON YOUR NOTEBOOK WITHIN SECONDS OF THE NOTEBOOK BEING SHUT OFF MAY CAUSE AN ERROR WHEN YOU START THE NEXT TIME Powering Off... -
Page 69: Anytime Usb Charge Utility
Anytime USB Charge Utility Your system contains a handy utility that allows you to charge USB peripherals even when the system is powered off. This is called the Anytime USB Charge Utility. Installation If the utility has not yet been installed on your system, perform the following steps to do so: Power on your PC and logon as an Administrative user or a member of the Administrator's group. - Page 70 Uninstalling the utility Click the [Start] button to open the [Start] menu. Click [Control Panel] in the [Start] menu. Perform the following steps in accordance with your operating system. Windows 7: • Click [Uninstall Program]. • Select [Big Icon] or [Small Icon] to view the [Control Panel], then click [Programs and Features]. •...
-
Page 71: User-Installable Features
Chapter 3 User-Installable Features Lithium ion Battery Your LifeBook notebook has a Lithium ion battery that provides power for operating your notebook when no external power source is available. The battery is durable and long lasting, but should not be exposed to extreme temperatures, high voltages, chemicals or other hazards. -
Page 72: Recharging The Batteries
• CTUAL BATTERY LIFE WILL VARY BASED ON SCREEN BRIGHTNESS APPLICATIONS FEATURES . CD- POWER MANAGEMENT SETTINGS BATTERY CONDITION AND OTHER CUSTOMER PREFERENCES DVD W , DVD/CD-RW DRIVE ULTI ORMAT RITER DRIVE COMBO OR HARD DRIVE USAGE MAY ALSO HAVE A SIGNIFICANT IMPACT ON BATTERY LIFE HE BATTERY CHARGING CAPACITY IS REDUCED AS THE BATTERY AGES F YOUR BATTERY IS RUNNING LOW QUICKLY... - Page 73 DVD/CD-RW/CD-ROM SING HEAVY CURRENT DEVICES SUCH AS THE MODEM OR FREQUENT ACCESSES MAY PREVENT CHARGING COMPLETELY Low Battery State When the battery is running low, a low battery notification message will appear. If you do not respond to the low battery message, the batteries will continue to discharge until they are too low to operate. When this happens, your notebook will go into Standby mode.
-
Page 74: Replacing The Battery
Replacing the Battery With the purchase of an additional battery, you can have a fully charged spare to swap with one that is not charged. There are two ways to swap batteries, cold-swapping and hot-swapping: Cold-swapping Batteries To cold-swap batteries in your battery bay follow these easy steps: Have a charged battery ready to install. - Page 75 Right Battery Latch Battery Lift Point Left Battery Latch Battery Pack Figure 26. Removing a Battery Follow steps 3 through 8 in “Cold Swapping Batteries”. F THE ITHIUM ION BATTERY CONNECTOR IS NOT FULLY SEATED YOU MAY NOT BE ABLE TO USE YOUR NOTEBOOK OR CHARGE YOUR BATTERY 69 - Lithium ion Battery...
-
Page 76: Optical Drive
Media Holder Tray Emergency Tray Release Media Tray Eject Button Figure 27. Optical Drive Optical Drive There is a variety of media available to use with your systemif you have the optional Multi-Format DVD Writer installed. The drive is also known as an “optical drive”. DVD-R and DVD-RW discs hold up to 4.7 GB of data (DVD-R discs used with Multi-Format Dual-Layer DVD writer hold up to 8.5 GB). -
Page 77: Media Player Software
LifeBook notebook a short distance. Gently pull the tray out until a media disc can easily be placed in the tray. • OU SHOULD PERIODICALLY CHECK THE UJITSU WEBSITE AT US FUJITSU COMPUTERS FOR THE MOST CURRENT DRIVERS • PLAYERS ARE SET TO PLAY... - Page 78 Place the media into the tray, label side up, with the hole in the center of the disc. Snap the disc onto the raised circle in the center of the tray. Gently push the holder tray back in until you hear a click F YOU HAVE DISABLED THE NSERT OTIFICATION...
-
Page 79: Removing Media
Removing Media Push and release the eject button on the front of the optical drive. This will stop the drive and the holder tray will come out of the LifeBook notebook a short distance. Gently pull the tray out until the disc can easily be removed from the tray. Carefully remove the media disc from the holder tray. -
Page 80: Using The Media Player Software
Using the Media Player Software EPENDING UPON ITS CONFIGURATION YOUR SYSTEM MAY NOT HAVE THE MEDIA PLAYER SOFTWARE INSTALLED F IT IS NOT INSTALLED REFERENCE THE DOCUMENTATION THAT ACCOMPANIES THE MEDIA APPLICATION Starting a DVD Movie Insert the DVD into the optical drive of the notebook. If the CD AutoRun feature activates, skip Step 2. The first time you insert a movie into the DVD/CD-RW tray, you will be prompted to select what you want the system to do when discs are inserted (e.g., start automatically or wait for a prompt). -
Page 81: Using Media Player On Battery Power
YOU MAY PURCHASE ONE 1-877-372-3473. EITHER ONLINE AT HTTP COMPUTERS FUJITSU COM OR BY CALLING To Watch a Movie on Battery Power: Have an additional full-charged battery or your AC adapter ready for use. Start watching your DVD movie. When the low battery warning occurs, immediately stop the movie and exit the media player. - Page 82 Power down your notebook and replace the discharged battery with an additional fully-charged battery. If you do not have an additional battery, you may attach AC power as soon as you see the low battery warning. Resume operation by pressing the Suspend button again. This is not required if you attached AC power without entering standby mode.
-
Page 83: Secure Digital (Sd) Cards
Secure Digital Card Secure Digital Card Slot Figure 30. Installing a Secure Digital Card Secure Digital (SD) Cards Your LifeBook notebook Secure Digital (SD) cards on which you can store and transfer data to and from a variety of digital devices. These cards use flash memory architecture, which means they don’t need a power source to retain data. -
Page 84: Installing Sd Cards
Installing SD Cards SD Cards are installed in the SD Card slot (Figure 30). To install a card, follow these simple steps SD C ’ NSTALLING OR REMOVING AN ARD DURING YOUR OOK NOTEBOOK S SHUTDOWN OR BOOTUP PROCESS MAY DAMAGE THE CARD AND OR YOUR OOK NOTEBOOK O NOT INSERT A CARD INTO A SLOT IF THERE IS WATER OR ANY OTHER SUBSTANCE ON THE CARD AS... -
Page 85: Using Express/Pc Cards
Eject Button PC Card Express Card Figure 31. Installing/Removing Express Cards or PC Cards Using Express/PC Cards Depending upon your system configuration, your LifeBook Tablet PC supports either ExpressCards or PC Cards, both of which can perform a variety of functions depending on which type of card you install. There are two different width ExpressCards: 34 mm and 54 mm. -
Page 86: Installing Express/Pc Cards
Installing Express/PC Cards • PC C ’ NSTALLING OR REMOVING AN XPRESS ARD OR ARD DURING YOUR NOTEBOOK S SHUTDOWN OR BOOTUP PROCESS MAY DAMAGE THE CARD AND OR YOUR NOTEBOOK • PC C O NOT INSERT AN XPRESS ARD OR ARD INTO A SLOT IF THERE IS WATER OR ANY OTHER SUBSTANCE ON THE CARD AS YOU MAY PERMANENTLY DAMAGE THE CARD YOUR NOTEBOOK... -
Page 87: Removing Express/Pc Cards
Removing Express/PC Cards See your Express Card or PC Card manual for specific instructions on removing your card. Some cards may require your notebook to be in Standby Mode or Off during removal. • PC C INDOWS HAS A SHUTDOWN PROCEDURE FOR XPRESS ARDS AND ARDS THAT MUST BE FOLLOWED... -
Page 88: Memory Upgrade Module
Memory Upgrade Module Your Fujitsu LifeBook notebook comes with a minimum of 1GB of high speed Double Data Rate 3 Synchronous Dynamic RAM (DDR3-1066 SDRAM) factory installed. To increase your notebook’s memory capacity, you may install an additional memory upgrade module. The memory upgrade must be a dual-in- line (DIMM) SDRAM module. - Page 89 Figure 32. Opening the Memory Compartment Figure 33. Installing a Memory Module Insert the memory upgrade module at a 45° angle. Press the connector edge of the module firmly down and into the connector until it lodges under the retaining clip. You’ll hear a click when it is properly in place. Replace the cover and reinstall the screws.
-
Page 90: Removing A Memory Upgrade Module
Removing a Memory Upgrade Module Perform steps 1 through 4 of Installing a Memory Upgrade Module. Pull the clips sideways away from each side of the memory upgrade module at the same time. Memory While holding the clips out, remove the module from the Clip slot by lifting it up and pulling it away from your notebook. - Page 91 Windows Vista: Check the memory capacity by clicking [Start] -> Control Panel -> System and Maintenance -> System. The amount of memory is displayed next to “Memory - RAM:” There may be a variation between the actual memory size and what is displayed. This is possible if your system is configured with a graphics controller which dynamically allocates system memory to accelerate graphics performance.
-
Page 92: Device Ports
Device Ports Your Fujitsu LifeBook notebook and the optional Port Replicator come equipped with multiple ports to which you can connect external devices including: disk drives, keyboards, modems, printers, etc. Modem (RJ-11) Telephone Jack The modem (RJ-11) jack is used for an internal modem. To connect the telephone cable follow these steps: Align the connector with the port opening. -
Page 93: Hdmi Port
Select the Modems tab, and click the [Properties] button. Select the Modem tab and adjust the volume as necessary. HE INTERNAL MODEM IS NOT INTENDED FOR USE WITH IGITAL SYSTEMS O NOT CONNECT THE INTERNAL MODEM TO A IGITAL AS IT MAY CAUSE SERIOUS DAMAGE TO THE INTERNAL ’... -
Page 94: Internal Lan (Rj-45) Jack
Internal LAN (RJ-45) Jack The internal LAN (RJ-45) jack is used for a Gigabit (10Base-T/100Base-Tx/1000Base-T) Ethernet LAN connection. You may need to configure your notebook to work with your particular network. (Please refer to your network administrator for information on your network configuration.) To connect the LAN cable follow these easy steps: Align the connector with the port opening. - Page 95 Align the connector with the port opening, then push the connector into the port until it is seated. ICROSOFT INDOWS ISTA USERS ONLY HEN ATTACHING A DEVICE DO ONE OF THE FOLLOWING E SURE BEFORE , OR, TO ATTACH THE DEVICE TURNING ON YOUR SYSTEM WAIT FOR APPROXIMATELY THREE MINUTES AFTER THE SYSTEM BOOTS UP BEFORE ATTACHING THE...
-
Page 96: Headphone/Line-Out Jack
Headphone/Line-Out Jack The headphone/line-out jack allows you to connect headphones or powered external speakers to your notebook. Your headphones or speakers must be equipped with a 1/8” (3.5 mm) stereo mini-plug. In order to connect headphones or speakers follow these easy steps: Align the connector with the port opening. -
Page 97: Microphone/Line-In Jack
Microphone/Line-In Jack The microphone/line-in jack allows you to connect an external mono microphone. Your microphone must be equipped with a 1/8”(3.5 mm) mono mini-plug in order to fit into the microphone jack of your notebook. In order to connect a microphone follow these easy steps: Align the connector with the port opening. -
Page 98: External Video Port
External Video Port The external video port allows you to connect an external monitor or LCD projector. In order to connect an external video device, follow these easy steps: Align the connector with the port opening. Push the connector into the port until it is seated. -
Page 99: Troubleshooting Your Lifebook
Chapter 4 Troubleshooting Your LifeBook Troubleshooting There may be occasions when you encounter simple setup or operating problems that you can solve on the spot, or problems with peripheral devices that can be solved by replacing the device. The information in this section helps you isolate and resolve some of these straightforward issues and identify failures that require service. - Page 100 If you have tried the solutions suggested in the Troubleshooting Table without success, contact your support representative: Toll free: 1-800-8Fujitsu (1-800-838-5487) Web site: http://www.fujitsu.com/us/support/. Before you place the call, you should have the following information ready so that the customer support representative can provide you with the fastest possible solution: •...
-
Page 101: Specific Problems
Specific Problems Using the Troubleshooting Table When you have problems with your LifeBook notebook, try to find the symptoms under the Problem column of the troubleshooting table for the feature giving you difficulty. You will find a description of common causes for that symptom under the column Possible Cause and what, if anything, you can do to correct the condition under Possible Solutions. -
Page 102: Audio Problems
Problem Possible Cause Possible Solutions Audio Problems There is no sound coming The volume is turned Use the [Fn+F9] key combination on your keyboard to control the from the built-in speakers. too low. volume. Pressing [F9] repeatedly while holding [Fn] will increase the volume of your notebook. -
Page 103: Hard Drive Problems
Problem Possible Cause Possible Solutions LifeBook notebook fails to Incorrect DVD Player or Install DVD Player software. (See “Media Player Software” on recognize DVD/CD- no DVD Player software page 71 for more information.) RW/CD-ROM’s. is installed. (continued) Wrong drive designator Verify the drive designator used by the application is the same as was used for the disc in the one used by the operating system. -
Page 104: Memory Problems
Problem Possible Cause Possible Solutions You have installed an exter- Your external device is Re-install your device. See “Device Ports” on page 86. nal keyboard or mouse, and not properly installed. it does not seem to work. Your operating system Check your device and operating system documentation and acti- software is not set up vate the proper driver. -
Page 105: Pc Card Problems
Problem Possible Cause Possible Solutions You have installed a USB The device may have Close the application and restart your notebook. device. Your notebook does been installed while an not recognize the device, or application was running, the device does not sem to so your notebook is not work properly. -
Page 106: Power Failures
Problem Possible Cause Possible Solutions A card inserted in the PC The card may have Close the application and restart your notebook. Card slot does not work or been installed while an is locking up the system. application was running, (continued) so your notebook is not aware of its installation. - Page 107 Problem Possible Cause Possible Solutions Your LifeBook notebook The power manage- Press any button on the keyboard, or move the mouse to restore turns off all by itself. ment parameters are operation. If that fails, push the Power/Suspend/Resume button. set for auto timeouts Check your power management settings, or close your applica- which are too short for tions and go to the Power Options Properties located in the Con-...
-
Page 108: Shutdown And Startup Problems
Problem Possible Cause Possible Solutions The batteries seem to You are running an Use both the primary battery and an optional second battery and/or use a power adapter for this application when at all discharge too quickly. application that uses a lot of power due to fre- possible. -
Page 109: Video Problems
Set the operating source by pressing the [ESC] key while the plays power on info, but tings of the setup utility Fujitsu logo is on screen or use the [F2] key and enter the setup doesn’t load the OS. are not compatible with utility and adjust the source settings from the Boot menu. - Page 110 Problem Possible Cause Possible Solutions The built-in display is blank The notebook is set for Pressing [F10] while holding down the [Fn] key allows you to when you turn on your Life- an external monitor change your selection of where to send your display video. Each Book notebook.
-
Page 111: Miscellaneous Problems
Problem Possible Cause Possible Solutions Your display won’t turn on The system may be Check the status indicator panel to verify that the Security icon is when the system is turned password-protected. blinking. If it is blinking, enter your password. on or when it has resumed. -
Page 112: Power On Self Test Messages
Power On Self Test Messages The following is an alphabetic list of error-and-status messages that Phoenix BIOS and/or your operating system can generate and an explanation of each message. Error messages are marked with an *. If an error message is displayed that is not in this list, write it down and check your operating system documentation both on screen and in the manual. - Page 113 *Incorrect Drive A type – run SETUP Type of floppy drive A: not correctly identified in Setup. This means that the floppy disk drive type identified in your setup utility does not agree with the type detected by the Power On Self Test. Run the BIOS setup utility to correct the inconsistency.
- Page 114 *Operating system not found Operating system cannot be located on either drive A: or drive C: Enter the setup utility and see if both the fixed disk, and drive A: are properly identified and that the boot sequence is set correctly. Unless you have changed your installation greatly, the operating system should be on drive C:.
- Page 115 nnnn Shadow RAM Passed Where nnnn is the amount of shadow RAM in kilobytes successfully tested. *System battery is dead – Replace and run SETUP The BIOS CMOS RAM memory hold up battery is dead. This is part of your BIOS and is a board mounted battery which requires a support representative to change.
-
Page 116: Emergency Media Player Drive Tray Release
Emergency Media Player Drive Tray Release If for some reason the eject button fails, you can open the DVD/CD-ROM tray with a paper clip or similar tool inserted into the eject hole in the far right side of the front of the tray. Straighten one side of a paper clip and push it gently into the hole. -
Page 117: Restoring Your Pre-Installed Software
PARTY S WEBSITE To re-install drivers and/or applications: Boot up the system and insert the DAR CD after Windows has started. A Fujitsu Installer screen is displayed after the CD is inserted. After reading the License Agreement, click [I agree]. -
Page 118: Restoring The Operating System For Windows
HE COMPONENTS LISTED ARE COLOR CODED IN TERMS OF THEIR INSTALL STATUS LUE INDICATES THAT THE COMPONENT CAN BE INSTALLED REEN INDICATES THAT THE COMPONENT NEEDS TO BE INSTALLED SEPARATELY REY INDICATES A COMPONENT THAT IS ALREADY INSTALLED GREY ITEMS CAN BE REINSTALLED BUT PRIOR TO INSTALLATION YOU WILL RECEIVE A REMINDER THAT THE COMPONENT IS ALREADY INSTALLED... - Page 119 You can also use the TrustedCore menu to determine whether the utility is pre-loaded by powering on your system then pressing the {Enter] key when the Fujitsu logo appears on the screen. The TrustedCore Menu will appear and the Recovery and Utility option will appear in the menu.
- Page 120 To verify/change the boot-up priority (rather than booting-up from the hard drive or an external floppy disk drive), perform the following steps: Power on your system. When the Fujitsu logo appears on the screen. press the [Enter] key or click on the left mouse or touchpad button; the TrustedCore Menu will appear.
-
Page 121: Automatically Downloading Driver Updates
Your system has a convenient tool called the Fujitsu Driver Update (FDU) utility. With FDU, you can choose to automatically or manually go to the Fujitsu site to check for new updates for your system. The FDU icon should appear in the system tray at the bottom right of your screen (roll the cursor over the icons to find the correct one). - Page 122 Automatically searches for new updates on a regular basis (approximately every 3 days). Show update history Brings up a screen that displays a history of updates that have been made via the FDU. About Fujitsu Driver Update Displays the FDU version number and copyright information Fujitsu Driver Update Readme Displays the FDU readme.
-
Page 123: Care And Maintenance
Chapter 5 Care and Maintenance Caring for your LifeBook Notebook If you use your Fujitsu LifeBook notebook carefully, you will increase its life and reliability. This section provides some tips for looking after the notebook and its devices. • (ESD). - Page 124 If your notebook will not boot after it has dried out, call your support representative. • Do not use your Fujitsu LifeBook notebook in a wet environment (near a bathtub, swimming pool). • Always use the AC adapter and batteries that are approved for your notebook.
-
Page 125: Cleaning Your Lifebook Notebook
Cleaning your LifeBook notebook • Always disconnect the power plug. (Pull the plug, not the cord.) • Clean your LifeBook notebook with a damp, lint-free cloth. Do not use abrasives or solvents. • Use a soft cloth to remove dust from the screen. Never use glass cleaners. •... -
Page 126: Cleaning The Dust Filter
Disinfecting LifeBook computers • Wipe the surface with a soft cloth wipe and a 50% ethanol solution or use another ethanol-based germicide which has been registered as a hospital disinfectant by the EPA. • SE OF INCORRECT CLEANERS CAN RESULT IN OPTICAL IMPAIRMENT OF THE OR DAMAGE TO THE COMPUTER LWAYS REFER TO THE CLEANER MANUFACTURER... -
Page 127: Storing Your Lifebook Notebook
Figure 40. Removing/installing the dust filter cover Replace the dust filter cove rby inserting the end without latch first and pushing in the cover until it latches. LWAYS BE SURE THE DUST FILTER COVER IS INSTALLED WHEN RUNNING YOUR SYSTEM OT USING THE COVER COULD CAUSE CONTAMINATION AND POSSIBLE DAMAGE TO THE SYSTEM Storing your LifeBook notebook... -
Page 128: Traveling With Your Lifebook Notebook
• Store your LifeBook in a cool, dry location. Temperatures should remain between 5° to 140° F (–15° to 60° C). Traveling with your LifeBook notebook • Do not transport your notebook while it is turned on. • It is recommended that you carry your notebook with you while traveling, rather than checking it in as baggage. -
Page 129: Batteries
Batteries Caring for your Batteries • Always handle batteries carefully. • Do not short-circuit the battery terminals (that is, do not touch both terminals with a metal object). Do not carry loose batteries in a pocket or purse where they may mix with coins, keys, or other metal objects. -
Page 130: Media Care
Media Care Caring for your Media (DVD/CD/CD-R) Media discs are precision devices and will function reliably if given reasonable care. • Always store your media disc in its case when it is not in use. • Always handle discs by the edges and avoid touching the surface. •... - Page 131 • Avoid using or storing the drive near magnets or devices that generate strong magnetic fields. • Avoid using or storing the drive where it will be subjected to shock or vibration. • Do not disassemble or dismantle the optical drive. •...
-
Page 132: System Specifications
Chapter 6 System Specifications Specifications This section provides the hardware and environmental specifications for your Fujitsu LifeBook notebook. Specifications of particular configurations will vary. Configuration Label The configuration label located on the bottom of your notebook contains specific information regarding the options you’ve chosen for your notebook. -
Page 133: Microprocessor
Microprocessor Intel® Core™ i3, i5, or i7 processor (Refer to the system label to determine the speed of your processor). Chipset • Intel QM57 or Intel HM55 Express Chipset (depending upon system configuration) Memory System Memory • DDR3-1066 MHz SDRAM dual-channel memory module. •... -
Page 134: Audio
Video RAM • Intel® HD Graphics with dynamic frequency. Automatically distributes performance to CPU and graphics applications that need an extra boost up to approximately 20%. or, • NVIDIA® GeForce® with a total of 512 MB dedicated graphics DDR3 memory Audio •... -
Page 135: Features
Features Integrated Pointing Device • Touchpad pointing device • Scroll Wheel Communications • Modem: Internal V.90 standard 56K fax/modem (ITU V.90, 56K data, 14.4K fax) • Gigabit LAN: Internal wired 10/100/1000 Gigabit Ethernet LAN Wireless LAN • Integrated Intel Centrino Advanced-N 6200 (802.11agn 2x2), or, Atheros XSPAN 801.11abgn •... -
Page 136: Device Ports
Device Ports On the LifeBook notebook: • One PC Card or Express Card slot • Secure Digital (SD) Card slot • One 15-pin D-SUB connector for VGA external monitor • Three USB 2.0 (Universal Serial Bus) connectors for input/output devices •... -
Page 137: Keyboard
• One Digital Video (DVI-D) 24-pin, female interface • One power/suspend/resume button with LED Keyboard Built-in keyboard with all functions of 101 key PS/2 compatible keyboards. • Total number of keys: 84 • Function keys: F1 through F12 • Feature extension key: Fn •... -
Page 138: Dimensions And Weight
Operating: 20% to 85%, relative, non-condensing; Non-operating; 8% to 85%, relative, non-condensing Altitude Operating: 10,000 feet (3,048 m) maximum Popular Accessories For ordering or additional information on Fujitsu accessories please visit our Web site at www.shopfujitsu.com or call 1-800-FUJITSU. 132 - Specifications... -
Page 139: Pre-Installed Software
• CyberLink PowerDVD • CyberLink YouCam • OmniPass Fingerprint application • Fujitsu Driver Update utility Depending upon the configuration of your system, one of the following packages will be installed: • Microsoft Office Starter 2010 (32-bit) and Microsoft Windows Live Essentials, or, •... - Page 140 Learning About Your Software Tutorials All operating systems and most application software have tutorials built into them upon installation. We highly recommend that you step through the tutorial before you use an application. Manuals Included with your notebook you will find manuals for your installed operating system and other pre- installed software.
- Page 141 Fujitsu Driver Update Utility The Fujitsu Driver Update (FDU) utility is pre-installed on your system. With FDU, you can choose to automatically or manually go to the Fujitsu site to check for new updates for your system. See “Automatically Downloading Driver Updates”...
- Page 142 Office Professional 2007. All you need to do is purchase the appropriate Office 2007 license kit which allows you to "un-lock" the full version of Office that you want. ® Fujitsu offers a Media License Kit for Microsoft Office Small Business 2007. Simply enter your product ®...
-
Page 143: Glossary
Glossary AC Adapter A device which converts the AC voltage from a wall outlet to the DC voltage needed to power your LifeBook notebook. Access point Wireless network device used to bridge wireless and wired network traffic. ACPI Advanced Configuration and Power Interface Active-Matrix Display A type of technology for making flat-panel displays which has a transistor or similar device for every pixel on the screen. - Page 144 ADSL Asymmetric Digital Subscriber Line. Technology for transporting high bit-rate services over ordinary phone lines. Accelerated Graphics Port. Graphics port specifically designed for graphics-intensive devices, such as video cards and 3D accelerators. Auto/Airline Adapter A device which converts the DC voltage from an automobile cigarette lighter or aircraft DC power outlet to the DC voltage needed to power your LifeBook notebook.
- Page 145 An electrical circuit which passes data between the CPU and the sub-assemblies inside your LifeBook notebook. Byte 8 bits of parallel binary information. Cache Memory A block of memory built into the micro-processor which is much faster to access than your system RAM and used in specially structured ways to make your overall data handling time faster.
- Page 146 COM Port Abbreviation for communication port. This is your serial interface connection. Command An instruction which you give your operating system. Example: run a particular application or format a floppy disk. Configuration The combination of hardware and software that makes up your system and how it is allocated for use. Cathode Ray Tube.
- Page 147 DIMM Dual-in-line memory module. Disk A spinning platter of magnetic data storage media. If the platter is very stiff it is a hard drive, if it is highly flexible it is a floppy disk, if it is a floppy disk in a hard housing with a shutter it is commonly called a diskette.
- Page 148 Disk Operating System (MS-DOS is a Microsoft Disk Operating System). Driver A computer program which converts application and operating system commands to external devices into the exact form required by a specific brand and model of device in order to produce the desired results from that particular equipment.
- Page 149 Floppy Disk A spinning platter of magnetic data storage media which is highly flexible. Gigabyte. One billion bytes. Hard drive A spinning platter of magnetic data storage media where the platter is very stiff. Input/Output. Data entering and leaving your notebook in electronic form. I/O Port The connector and associated control circuits for data entering and leaving your notebook in electronic form.
- Page 150 IEEE802.11g Wireless LAN standard that supports a maximum data rate of 54 Mbps. 802.11g devices operate in the 2.4 GHz ISM band. IEEE802.11n Wireless LAN standard that supports a maximum data rate of 540 Mbps (theoretical). 802.11n devices operate in the 2.4 GHz or 5 GHz bands. Infrared Light just beyond the red portion of the visible light spectrum which is invisible to humans.
- Page 151 Class C - supports 254 hosts on each of 2 million networks The number of unassigned Internet addresses is running out, so a new classless scheme called CIDR is gradually replacing the system based on classes A, B, and C and is tied to adoption of IPv6. An abbreviation for infrared.
- Page 152 LPT Port Line Printer Port. A way of referring to parallel interface ports because historically line printers were the first and latter the most common device connected to parallel ports. MAC Address Media Access Control Address. A unique physical address of a network card. For Ethernet, the first three bytes are used as the vendor code, controlled and assigned by IEEE.
- Page 153 Monaural A system using one channel to process sound from all sources. Maximum Transmission Unit The maximum data size that can be transferred at a time through the Internet or other networks. You can set a smaller MTU size to obtain successful communication, if you have difficulty transferring data due to the fact that the maximum size is too large.
- Page 154 Partition A block of space on a hard drive which is set aside and made to appear to the operating system as if it were a separate disk, and addressed by the operating system accordingly. PCMCIA PCMCIA is a trademark of the Personal Computer Memory Card International Association. The Personal Computer Memory Card International Association is an organization that sets standards for add-in cards for personal computers.
- Page 155 Program An integrated set of coded commands to your computers telling your hardware what to do and how and when to do it. Protocol Procedures and rules use to send and receive data between computers. - Method of sending and receiving data - Process used to handle communication errors Conditions required for communication are organized in procedures for correct transfer of information.
- Page 156 Read Only Memory. A form of memory in which information is stored by physically altering the material. Data stored in this way can not be changed by your notebook and does not require power to maintain it. SDRAM Synchronous Dynamic Random Access Memory. Serial Port A connection to another device through which data is transferred one bit at a time on a single wire with any other wires only for control of the device not for transfer of data.
- Page 157 Status Indicator A display which reports the condition of some portion of your hardware. On your LifeBook notebook this is an LCD screen just above the keyboard. Stereo (audio) A system using two channels to process sound from two different sources. Subnet mask TCP-IP network is controlled by being divided into multiple smaller networks (subnets).
- Page 158 Thin Film Transistor – A technology for flat display panels which uses a thin film matrix of transistors to control each pixel of the display screen individually. Underwriters Laboratories – An independent organization that tests and certifies the electrical safety of devices.
-
Page 159: Regulatory Information
Regulatory Information Notice Changes or modifications not expressly approved by Fujitsu could void this user’s authority to operate the equipment. FCC NOTICES Notice to Users of Radios and Television This equipment has been tested and found to comply with the limit for class B digital devices, pursuant to parts 15 of the FCC Rules. - Page 160 If trouble is experienced with this equipment, for repair or warranty information, please refer to the manual or contact Fujitsu America, Incorporated, Customer Service. If the equipment is causing harm to the telephone network, the telephone company may request that you disconnect the equipment until the problem is resolved.
- Page 161 The equipment cannot be used on public coin service provided by the telephone company. Connection to party line service is subject to state tariffs. (Contact the state public utility commission, public service commission or corporation commission for information). If your home has specially wired alarm equipment connected to the telephone line, ensure the installation of this computer does not disable your alarm equipment.
- Page 162 Repairs to telecommunication equipment should be made by a Canadian authorized maintenance facility. Any repairs or alterations not expressly approved by Fujitsu or any equipment failures may give the telecommunication company cause to request the user to disconnect the equipment from the telephone line.
- Page 163 Les réparations de l’équipement de télécommunications doivent être effectuées par un service de maintenance agréé au Canada. Toute réparation ou modification, qui n’est pas expressément approuvée par Fujitsu, ou toute défaillance de l’équipement peut entraîner la compagnie de télécommunications à exiger que l’utilisateur déconnecte l’équipement de la ligne téléphonique.
-
Page 164: Fcc Regulatory Information
Appendix A: WLAN User’s Guide FCC Regulatory Information Please note the following regulatory information related to the optional wireless LAN device. Regulatory Notes and Statements Wireless LAN, Health and Authorization for use Radio frequency electromagnetic energy is emitted from Wireless LAN devices. The energy levels of these emissions, however, are much less than the electromagnetic energy emissions from wireless devices such as mobile phones. - Page 165 cables and equipment other than those specified by the manufacturer. It is the responsibility of the user to correct any interference caused by such unauthorized modification, substitution or attachment. The manufacturer and its authorized resellers or distributors will assume no liability for any damage or violation of government regulations arising from failure to comply with these guidelines.
- Page 166 003 B / NMB 003 B. Operation is subject to the following two conditions: (1) this device may not cause harmful interference, and (2) this device must accept any interference received, including interference that may cause undesirable operation. Modifications not expressly authorized by Fujitsu America, Incorporated may invalidate the user's right to operate this equipment.
-
Page 167: Before Using The Optional Wireless Lan
Before Using the Optional Wireless LAN This manual describes the procedures required to properly set up and configure the optional integrated Wireless LAN Mini-PCI device (referred to as "WLAN device" in the rest of the manual). Before using the WLAN device, read this manual carefully to ensure it's correct operation. Keep this manual in a safe place for future reference. - Page 168 Hoc networks are also known as peer-to-peer networks. Ad Hoc networks are an easy and inexpensive method for establishing network connectivity between multiple computers. Ad Hoc mode requires that the SSID, network authentication, and encryption key settings are identically configured on all computers in the Ad Hoc network.
- Page 169 Access Point (Infrastructure) Mode Network Wired LAN ADSL modem, Internet cable modem, or similar Access Point* Wireless LAN *An optional hub for a wired LAN may be required depending upon the type of access point used. How to Handle This Device The WLAN device is an optional device that may come pre-installed in your mobile computer.
-
Page 170: Deactivating/Disconnecting The Wlan Device
• Microwave ovens may interfere with the operation of WLAN devices since they operate in the same 2.4 GHz frequency range as IEEE802.11b/g/n devices. Interference by microwaves does not occur with IEEE802.11a radio which operates in the 5 GHz RF band. •... -
Page 171: Disconnection Using The Icon In The Taskbar
Disconnection Using the Icon in the Taskbar Note that disconnecting via the icon in the system tray does not turn off the radio; it continues to transmit and receive even though it’s not connected. Right-click the WLAN icon in the taskbar at the bottom right of your screen. Choose Disconnect from a network. -
Page 172: Configuring The Wireless Lan
Configuring the Wireless LAN The optional WLAN device can be configured to establish wireless network connectivity using the software that is built into Windows Vista. Support for most industry standard security solutions is contained in this software. Pre-defined parameters will be required for this procedure. Please consult with your network administrator for these parameters: Configuring the WLAN Using Windows Vista and Windows 7 Click the Start button, then select Control Panel. -
Page 173: Configuring The Wlan Using Windows Xp
Configuring the WLAN Using Windows XP Procedure Click the Start button, then select Control Panel. If the Control Panel is not in Classic View, select Classic View from the left panel. Double-click the Network Connections icon. Select “New Connection” wizard. Click the [Next] button. -
Page 174: Troubleshooting The Wlan
Troubleshooting the WLAN Troubleshooting Causes and countermeasures for troubles you may encounter while using your wireless LAN are described in the following table. Problem Possible Cause Possible Solution Unavailable Incorrect network Ad hoc connection: verify that the network names (SSID’s) and network ... - Page 175 Problem Possible Cause Possible Solution Unavailable The computer to be Check if the computer to be connected is turned ON. network connected is turned connection (continued) RF interference The use of identical or overlapping RF channels can cause interference from Access Points with the operation of the WLAN device.
-
Page 176: Wlan Specifications
WLAN Specifications Specifications Item Specification Type of network The Centrino Advanced-N 6200 (802.11abgn 2x2) and Atheros XSPAN 801.11abgn WLAN devices conform to IEEE 802.11a, 802.11b/g, and 802.11n, Wi-Fi based*. Transfer rate (Automatic switching) 54 Mbps maximum data rate (IEEE802.11n to be determined) •... - Page 177 * “Wi-Fi based” indicates that the interconnectivity test of the organization which guarantees the interconnectivity of wireless LAN (Wi-Fi Alliance) has been passed. ** The communication ranges shown above will increase or decrease depending on factors such as number of walls, reflective material, or interference from external RF sources.
-
Page 178: Using The Bluetooth Device
Using the Bluetooth Device The Integrated Bluetooth module is an optional device available for Fujitsu mobile computers. What is Bluetooth Bluetooth technology is designed as a short-range wireless link between mobile devices, such as laptop computers, phones, printers, and cameras. Bluetooth technology is used to create Personal Area Networks (PANs) between devices in short-range of each other. - Page 179 Users are not authorized to modify this product. Any modifications invalidate the warranty. This equipment may not be modified, altered, or changed in any way without signed written permission from Fujitsu. Unauthorized modification will void the equipment authorization from the FCC and Industry Canada and the warranty.
-
Page 180: 175 - Introducing The Optional Fingerprint Sensor Device
Appendix B: Fingerprint Sensor Device Introducing the Optional Fingerprint Sensor Device Your system may have an optional fingerprint sensor device below the Touchpad, between the left and right buttons. This also serves as a scroll button. Figure 42. Fingerprint sensor LTHOUGH THE SYSTEM MAY HAVE A FINGERPRINT SENSOR IN PLACE OF A SCROLL BUTTON FINGERPRINT SENSOR CAN BE USED FOR SCROLLING IMPLY MOVE YOUR FINGERPRINT OVER THE... -
Page 181: Getting Started
With a fingerprint sensor, you can avoid having to enter a username and password every time you want to: • Log onto Windows • Resume from standby mode • Cancel a password-protected screen saver • Log into web sites that require a username and password After you have “enrolled”... - Page 182 • The gold key-shaped OmniPass icon in the system tray at the bottom right of the screen. • The Softex program group in the Programs group of the Start menu System Requirements The OmniPass application requires space on your hard drive; it also requires specific Operating Systems (OS’s).
- Page 183 Verifying Information about OmniPass After you have completed installing OmniPass and restarted your system, you may wish to check the version of OmniPass on your system. To check the version information of OmniPass: From the Windows Desktop, double-click the key-shaped OmniPass icon in the taskbar (usually located in the lower right corner of the screen),...
-
Page 184: User Enrollment
Double-click Add/Remove Programs. Select OmniPass, and then click Change/Remove. Follow the directions to uninstall the OmniPass application. Once OmniPass has finished uninstalling, reboot your system when prompted. Windows Vista: Click Start on the Windows taskbar. Select Control Panel. Double-click Programs and Features. Select OmniPass, and then click Uninstall. - Page 185 John enters his OmniPass user credentials (“John_01” and “freq14”) in the OmniPass authentication prompt, and he is allowed into his webmail account. He can do this with as many web sites or password protected resources he likes, and he will gain access to all those sites with his OmniPass user credentials (“John_01”...
- Page 186 In this step OmniPass captures your fingerprint. Refer to “Enrolling a Fingerprint” on page 180 for additional information. Next, choose how OmniPass notifies you of various events. We recommend you keep Taskbar Tips on Beginner mode taskbar tips and Audio Tips on at least Prompt with system beeps only until you get accustomed to how OmniPass operates.
-
Page 187: Using Omnipass
Your system has a “swipe” fingerprint sensor. A swipe sensor is small and resembles a skinny elongated rectangle. To capture a fingerprint, gently swipe or pull your fingertip over the sensor (starting at the second knuckle) towards yourself. Swiping too fast or too slow will result in a failed capture. The Choose Finger screen has a [Practice] button;... - Page 188 When prompted to authenticate, you must supply the appropriate credentials: an enrolled finger for the fingerprint capture window or your master password for the master password prompt (the key icon). Remembering a Password OmniPass can remember any application, GUI, or password protected resource that has a password prompt.
- Page 189 Less secure is the option to Automatically enter this password protected site when it is activated. Do not prompt for authentication. Check the upper box to get this setting, and each time you navigate to this site OmniPass will log you into the site without prompting you to authenticate HIS SETTING IS MORE CONVENIENT IN THAT WHENEVER YOU GO TO A SITE REMEMBERED WITH THIS SETTING YOU WILL BYPASS ANY AUTHENTICATION PROCEDURE AND GAIN INSTANT ACCESS TO THE...
- Page 190 Logging into Windows with a Fingerprint Device When logging into Windows with a fingerprint device, the fingerprint capture window will now appear next to the Windows Login screen. Place your enrolled fingertip on the sensor to authenticate. You will be simultaneously logged into Windows and OmniPass. The capture window will also appear if you have used Ctrl-Alt-Del to lock a system, and the fingerprint device can be used to log back in as stated above.
- Page 191 The two check boxes in Manage Passwords govern whether OmniPass prompts you to authenticate or directly logs you into the remembered site. OmniPass will overwrite an old set of credentials for a website if you attempt to use Remember Password on an already remembered site. The exception to the above rule is when resetting the Windows password.
-
Page 192: Configuring Omnipass
To set the default identity, highlight the identity you want as default and click [Set as Default]; click [Apply] to ensure the settings are saved. If you log in to OmniPass with a fingerprint device, you will automatically be logged in to the default identity for that OmniPass user. You can choose the identity with which you are logging in if you login using "master password". - Page 193 Using OmniPass Control Center, you can export and import users in and out of OmniPass. The export process backs up all remembered sites, credentials, and enrolled fingerprints for an OmniPass user. All OmniPass data for a user is backed up to a single encrypted database file. During the import process, the Windows login of the exported user is required.
-
Page 194: Omnipass Control Center
exported user. They are the credentials that had to be submitted when the user profile was exported. You will need User Name, Password, and Domain. If you don’t remember the value for Domain, in a PC or SOHO environment Domain should be your computer name. OmniPass will notify you if the user was successfully imported. - Page 195 • Open the Windows Control Panel (accessible via Start button --> Settings --> Control Panel) and double-click the Softex OmniPass icon. User Management The User Management tab has two major interfaces: Add/Remove User and Import/Export User. Import/Export User functionality is documented in “Exporting and Importing Users” on page 186. Add/Remove User functionality is straightforward.
-
Page 196: Troubleshooting
System Settings The OmniPass Startup Options interface can be found in the System Settings tab. With these options you can specify how your OmniPass Logon is tied to your Windows Logon. The first option, Automatically log on to OmniPass as the current user, will do just as it says; during Windows login, you will be logged on to OmniPass using your Windows login credentials. - Page 197 Cannot add a User with a Blank Password to OmniPass If you experience difficulties adding a user with a blank password to OmniPass, you may need to adjust your local security settings. First attempt the procedure explained in the Cannot add Windows user to OmniPass section.
-
Page 198: Index
Index About This Guide CapsLock CD-ROM adapter Click Me! plug adapters Clicking Anti-theft lock slot Cold-swapping Application Panel Configuration Label Auto/Airline Adapter Controls and Connectors Conventions Used in the Guide Cursor Battery Cursor Keys alarm care cold-swapping DC Power Jack conserving power Device Ports dead... - Page 199 Flexible Bay windows keys cold-swapping devices eject lever LAN (RJ-45) Jack installing LifeBook Security Application Panel Modular Multi-Format DVD Writer buttons removing configuring Fujitsu Contact Information deactivating Fujitsu Driver Update utility deactivating and activating Function Key launching applications operating passwords uninstalling...
- Page 200 Media Player PC Card care problems Control Panel removing loading slot removing Pointing Device Software See Touchpad using Port Replicator Memory connector capacity Power compartment AC adapter installing Auto/Airline adapter problems failure removing indicator upgrade module management Microphone Jack Modem problems problems Modem Jack...
- Page 201 ScrLk Universal Serial Bus Ports SD Card Unpacking installing removing problems SDRAM USB 2.0 Ports Secure Digital Card removing Security Panel Volume control Sleep Mode Specifications Audio Warranty Chipset Windows keys Dimensions and Weight Application key Environmental Requirements Start keys Keyboard Windows Vista Memory...
- Page 202 Guide d’utilisation Découvrez comment utiliser votre ordinateur portable Fujitsu LifeBook S760...
- Page 203 La société Fujitsu America Incorporated a fait tous les efforts possibles pour vérifier l’exactitude des informations figurant dans ce document et s’assurer qu’il n’y manque rien. Cependant, puisque nos produits font continuellement l’objet d’améliorations, nous ne pouvons garantir l’exactitude de tout le contenu de ce document.
- Page 204 © Copyright 2009 Fujitsu America, Incorporated. Tous droits réservés. Aucune partie de cette publication ne peut être copiée, reproduite ou traduite sans le consentement préalable de Fujitsu. Aucune partie de cette publication ne peut être enregistrée ou transmise électroniquement sans le consentement écrit de Fujitsu.
- Page 205 CONSIGNES DE SÉCURITÉ IMPORTANTES Pour fonctionner, cet appareil nécessite un adaptateur secteur. Utilisez uniquement un adaptateur de classe 2 pour équipement informatique, homologué UL, avec une sortie nominale de 19 V c.c. et un courant de 4,22 A (80 W). Polarité...
- Page 206 Pour commander une nouvelle batterie compatible avec votre ordinateur portable Fujitsu, visitez le site www.shopfujitsu.com si vous résidez aux États-Unis ou www.fujitsu.ca/products/notebooks si vous résidez au Canada. ** La RBRC est une organisation indépendante dont Fujitsu finance une partie des activités de recyclage ; la RBRC n’est en aucune façon affiliée à Fujitsu.
- Page 207 Conventions utilisées dans ce guide ......8 Coordonnées pour contacter Fujitsu......9 Chapitre 1 Présentation de votre ordinateur LifeBook...
- Page 208 Pavé tactile TouchPad/Bouton de défilement ..... . . 29 Utilisation du bouton de défilement ......34 Navigation avec la commande gestuelle (systèmes Windows 7) .
- Page 209 Installation de ClickMe! ........61 Utilitaire de mise à jour des pilotes Fujitsu Driver Update ... . 61 Gestion de l’alimentation .
- Page 210 Cartes Secure Digital (SD) ........82 Insérer des cartes SD .
- Page 211 Chapitre 5 Entretien Entretien de votre ordinateur portable LifeBook ....125 Nettoyage de votre ordinateur portable LifeBook ....127 Nettoyage du filtre anti-poussière.
- Page 212 Glossaire Glossaire........... . . 147 Renseignements sur la réglementation .
- Page 213 Utilisation de Bluetooth ........183 Présentation de Bluetooth .
-
Page 214: Préface
Le texte contient plusieurs renvois vers des pages contenant des informations supplémentaires sur un sujet quelconque. Exemple : (« Voir Procédure d’installation en page 43 »). Les éléments des menus à l’écran sont indiqués en caractères gras. Exemple : « Cliquez sur Menu Fujitsu, puis faites votre sélection ». -
Page 215: Coordonnées Pour Contacter Fujitsu
EUILLEZ LIRE ATTENTIVEMENT TOUS LES AVERTISSEMENTS Coordonnées pour contacter Fujitsu Service et assistance Plusieurs façons s’offrent à vous pour contacter l’équipe de service et assistance de Fujitsu : • Appel sans frais : 1-800-8Fujitsu (1-800-838-5487) • Site Internet : http://www.computers.us.fujitsu.com/support Avant de nous contacter, veuillez avoir les informations suivantes à... - Page 216 VOUS DEVEZ AVOIR UNE CONNEXION NTERNET ACTIVE Garantie limitée Votre ordinateur portable LifeBook est accompagné d’une garantie limitée internationale de Fujitsu. Pour connaître les conditions générales et la durée de votre garantie limitée, consultez la pochette de service livrée avec votre ordinateur.
-
Page 217: Présentation De Votre Ordinateur Lifebook
Cette section décrit les composants du blocnotes LifeBook S760 de Fujitsu. Nous vous suggérons de la lire avant de commencer à utiliser l’ordinateur, même si vous avez déjà utilisé des ordinateurs de ce type. Figure 1. Bloc-notes Fujitsu LifeBook S760... -
Page 218: Emplacement Des Commandes Et Des Connecteurs
Emplacement des commandes et des connecteurs Caméra Web Microphone stéréo Loquet de l’écran Microphone stéréo Écran Tableau de voyants d’état Pavé tactile TouchPad Haut-parleur Capteur d’empreintes digitales Tableau de sécurité/ et d’applications Bouton d’alimentation/veille/reprise Haut-parleur stéréo Loquet de l’écran Clavier Fente pour carte SD Bouton de défilement Prise d’écouteurs... -
Page 219: Composants Supérieurs
Composants supérieurs Voici une courte description des composants se trouvant sur le dessus de votre ordinateur LifeBook. Caméra Web La caméra intégrée fonctionne avec une résolution de 2,0 mégapixels. Pour connaître les instructions d’utilisation de la caméra, consultez les fichiers d’aide fournis avec le logiciel de la caméra web. Microphones stéréo Les microphones intégrés vous permettent d’enregistrer de la voix et des annotations. - Page 220 Tableau de voyants d’état Le tableau de voyants d’état contient des symboles correspondant à divers composants de votre ordinateur LifeBook. Voir « Tableau de voyants d’état » en page 22. Prise micro/entrée de ligne La prise micro/entrée de ligne vous permet de connecter un microphone mono externe. Voir «...
-
Page 221: Composants Sur Le Côté Gauche De L'ordinateur
Commutateur marche/arrêt pour Prise d’alimentation c.c. Prise de réseau local (RJ-45) réseau local sans fil/Bluetooth Grilles de ventilation Port HDMI Port USB Figure 3. Côté gauche de l’ordinateur LifeBook Composants sur le côté gauche de l’ordinateur Voici une courte description des composants se trouvant sur le côté gauche de votre ordinateur LifeBook. Prise d’alimentation c.c. - Page 222 Port USB 2.0 Le port USB 2.0 vous permet de connecter des périphériques USB. La norme USB 2.0 transfère des données à un débit théorique de 480 Mbit/s. Elle est rétrocompatible avec les périphériques USB 1.1 dont le débit atteint 12 Mbit/s. Voir « Ports USB » en page 94. Port HDMI Le port HDMI est conçu pour être utilisé...
-
Page 223: Composants Sur Le Côté Droit De L'ordinateur
Bouton d’éjection de Bouton d’ouverture Grilles de ventilation carte ExpressCard du lecteur optique Prise de modem (RJ11) Fente pour carte Compartiment multifonction Ports USB ExpressCard/PC Card (illustré avec le lecteur optique inséré) Figure 4. Côté droit de l’ordinateur LifeBook Composants sur le côté droit de l’ordinateur Voici une courte description des composants se trouvant sur le côté... - Page 224 NTERNET DE UJITSU À HTTP SOLUTIONS FUJITSU Fente pour carte ExpressCard Permet de brancher une carte ExpressCard. Voir « Utilisation des cartes ExpressCard/PC Card » en page 84. Compartiment multifonction (baie modulaire) Le compartiment multifonction peut accueillir n’importe lequel des périphériques suivants. ...
-
Page 225: Composants De La Face Arrière
Port vidéo externe Fente pour dispositif antivol Figure 5. Face arrière de l’ordinateur portable LifeBook Composants de la face arrière Voici une courte description des composants se trouvant à l’arrière de votre ordinateur LifeBook. Fente pour dispositif antivol La fente de dispositif antivol vous permet d’installer un dispositif antivol disponible en option. Port vidéo externe Le port vidéo externe permet de connecter un moniteur externe ou un projecteur ACL. -
Page 226: Composants Sous L'ordinateur
Loquet d’ouverture du compartiment multifonction Grilles de ventilation (emplacements multiples) Module de mémoire supplémentaire Couvercle du filtre Connecteur pour anti-poussière duplicateur de ports Loquet de Loquet de dégagement dégagement de la batterie de la batterie Loquet de dégagement de la batterie Batterie au lithium Figure 6. - Page 227 Verrou des périphériques installés dans le compartiment multifonction Ce verrou sert à verrouiller le périphérique modulaire dans la batterie et à l’en dégager. Voir « Périphériques pour le compartiment multifonction » en page 39. Connecteur pour duplicateur de ports Ce connecteur permet de brancher le duplicateur de ports en option sur votre ordinateur portable.
-
Page 228: Tableau De Voyants D'état
Figure 7. Tableau de voyants d’état Tableau de voyants d’état Le tableau de voyants d’état contient des symboles correspondant à divers composants de votre ordinateur LifeBook Fujitsu. Les diodes électroluminescentes (DEL) sous chaque symbole vous renseignent sur le fonctionnement des composants correspondants. Voyant d’alimentation Le voyant d’alimentation indique si le système est opérationnel. - Page 229 • Éteint : Votre système est en veille prolongée ou carrément éteint. Si la batterie est en cours de charge, le voyant d’alimentation demeure allumé même si l’ordinateur est éteint. Le voyant d’alimentation demeure également allumé si l’un des adaptateurs est connecté et que le système a été...
-
Page 230: Voyant De Sécurité
• Lorsque la batterie est installée et que l’ordinateur n’est pas sous tension, le voyant de charge de la pile s’affichera cinq secondes après le clignotement orange. • Lorsque l’adaptateur secteur n’est pas branché ou que la batterie n’est pas complètement chargée et que l’ordinateur se trouve en mode veille, le voyant clignote. - Page 231 Voyant Verr maj Le voyant Verr maj indique que le clavier est verrouillé pour que tous les caractères s’affichent en majuscules. Voyant Verr défil Le voyant Verr défil indique si le verrouillage du défilement est actif. 25 - Tableau de voyants d’état...
-
Page 232: Clavier
Figure 8. Clavier Utilisation du clavier Votre ordinateur portable Fujitsu LifeBook est doté d’un clavier à 84 touches. Ce clavier exécute toutes les fonctions d’un clavier à 101 touches, y compris les touches Windows et diverses touches de fonction spéciales. Cette section décrit les touches suivantes. - Page 233 • Touches de curseur : Votre clavier contient quatre touches fléchées permettant de déplacer le curseur ou le point d’insertion vers la droite, vers la gauche, vers le haut ou vers le bas, dans les fenêtres, dans les applications et dans les documents. •...
- Page 234 Touches de fonction Votre ordinateur LifeBook comporte 12 touches de fonction, [F1] à [F12]. Les fonctions affectées à ces touches varient selon l’application. Pour les connaître, consultez la documentation du logiciel utilisé. • La touche [Fn] permet d’accéder à des fonctions supplémentaires de votre ordinateur portable. Elle est toujours utilisée conjointement avec une autre touche.
-
Page 235: Pavé Tactile Touchpad/Bouton De Défilement
Pavé tactile TouchPad /Bouton de défilement Commande du curseur Bouton gauche Défilement/capteur d’empreintes digitales Bouton droit Bouton de défilement Figure 9. Pavé tactile Touchpad Votre ordinateur portable LifeBook possède un pavé tactile TouchPad intégré. Ce dispositif permet de commander le déplacement du pointeur et de sélectionner des éléments affichés à l’écran. Le pavé tactile TouchPad comprend une commande de curseur, un bouton gauche et un bouton droit, ainsi qu’un bouton de défilement/capteur d’empreintes digitales. - Page 236 Remarque : le capteur d’empreintes digitales fonctionne également comme capteur de défilement. Après avoir ouvert une session, vous pouvez déplacer votre doigt en haut ou en bas sur le capteur et ce dernier fonctionnera comme un capteur de défilement. Pour savoir comment utiliser le capteur d’empreintes digitales, voir «...
- Page 237 Cliquer Cliquer signifie enfoncer et relâcher un bouton. Pour cliquer à gauche, placez le curseur sur l’élément que vous désirez sélectionner, puis enfoncez et relâchez immédiatement le bouton gauche. Pour cliquer à droite, placez le curseur sur l’élément que vous désirez sélectionner, puis enfoncez et relâchez immédiatement le bouton droit.
- Page 238 Double-cliquer Double-cliquer signifie cliquer rapidement, deux fois de suite, avec le bouton gauche. Cette procédure ne fonctionne pas avec le bouton droit. Pour effectuer un double-clic, placez le pointeur sur l’objet voulu et appuyez rapidement deux fois sur le bouton gauche. Vous pouvez également effectuer un double-clic en tapant deux fois légèrement sur le TouchPad.
- Page 239 Glisser Glisser signifie enfoncer le bouton gauche, sans le relâcher, en déplaçant le curseur. Pour faire glisser un élément, placez d’abord le curseur sur cet élément. Ensuite, enfoncez et tenez le bouton gauche tout en déplaçant l’élément à son nouvel emplacement, puis relâchez.
-
Page 240: Utilisation Du Bouton De Défilement
Défiler Le bouton de défilement permet de parcourir rapidement des pages sans avoir à utiliser les barres de défilement de la fenêtre. Cette fonction est particulièrement utile lorsque vous naviguez sur des sites Internet. Pour utiliser le capteur, faites glisser votre doigt vers l’avant ou vers l’arrière selon le sens dans lequel vous voulez faire défiler le document. -
Page 241: Navigation Avec La Commande Gestuelle (Systèmes Windows 7)
Navigation avec la commande gestuelle (systèmes Windows 7) Le pavé tactile vous permet de faire des agrandissements et rétrécissements sur une page, ou de parcourir rapidement des documents volumineux. Agrandissements : Pour agrandir une page à l’aide du pavé tactile, il suffit de mettre deux doigts sur le pavé et de les éloigner l’un de l’autre. - Page 242 Rotation pivot : Pour faire tourner des fichiers (ex. PDF) ou des images à l'aide du pavé tactile, placez un doigt sur le pavé tactile puis dessinez un cercle avec un second doigt. Activation/désactivation des fonctions gestuelles : Pour activer ou désactiver les fonctions gestuelles, allez à Démarrer > Panneau de configuration > Périphériques (ou Matériel ou Équipement) et Sons.
-
Page 243: Réglage Des Commandes Du Pavé Tactile Touchpad
Réglage des commandes du pavé tactile TouchPad Le panneau de configuration Windows vous permet de personnaliser votre pavé tactile TouchPad avec divers paramètres disponibles dans la boîte de dialogue Propriétés de la souris. Figure 17. Agrandissement avec le TouchPad Figure 18. Rétrécissement avec le TouchPad Figure 20. -
Page 244: Réglage Du Volume
Réglage du volume Votre ordinateur LifeBook Fujitsu est doté de plusieurs commandes de volume fonctionnant en interaction. ES APPLICATIONS POUVANT REPRODUIRE DES FICHIERS AUDIO PROPOSENT ÉGALEMENT LEUR PROPRE ). S COMMANDE DE VOLUME COMMANDE LOGICIELLE I VOUS INSTALLEZ UN PÉRIPHÉRIQUE AUDIO ’... -
Page 245: Périphériques Pour Le Compartiment Multifonction
Figure 21. Compartiment multifonction (baie modulaire) Périphériques pour le compartiment multifonction Votre ordinateur portable Fujitsu LifeBook est doté d’un compartiment multifonction (ou baie modulaire). La baie modulaire permet d’insérer un lecteur optique, une batterie au lithium ou un volet réducteur de poids. - Page 246 ’ E COMPARTIMENT MULTIFONCTION NE DOIT JAMAIS ÊTRE VIDE LORSQUE L ORDINATEUR EST EN MARCHE I VOUS LA LAISSEZ VIDE DE LA POUSSIÈRE ET DES CORPS ÉTRANGERS PEUVENT ’ ’ INFILTRER DANS L ORDINATEUR Remplacement hors tension Pour remplacer à froid un périphérique modulaire dans le compartiment multifonction, procédez comme suit : Fermez tous les fichiers ouverts.
-
Page 247: 41 - Tableau De Sécurité Et D'applications Lifebook
Enter Bouton 1/ Bouton 3/ Bouton Entrée Bouton Soutien Gestionnaire d’affichage Bouton 2/ Bouton 4/ Utilitaire Économiseur Verrouillage d’énergie de l’écran Figure 23. Tableau de sécurité et d’applications LifeBook Tableau de sécurité et d’applications LifeBook Fonction unique aux portables LifeBook, le tableau de sécurité et d’applications vous permet de protéger l’ordinateur contre une utilisation non autorisée. -
Page 248: Mots De Passe
Mots de passe Des mots de passe d’utilisateur et de superviseur peuvent être définis sur l’ordinateur. Afin de faciliter la gestion des systèmes, le mot de passe de superviseur est habituellement le même sur tous les portables LifeBook d’un groupe de travail, d’un bureau ou d’une entreprise. Toutefois, les portables LifeBook individuels utilisés dans un environnement de groupe ne devraient pas utiliser un mot de passe commun. - Page 249 Dans Windows XP : Allez au menu Démarrer. Cliquez sur [Exécuter]. Tapez : C:\Program Files\Fujitsu\Security Panel Application\Supervisor\FJSECS.EXE, puis appuyez sur [Entrée]. Suivez les instructions affichées à l’écran pour définir le mot de passe de superviseur. Pour Windows Vista et Windows 7 : Allez au menu Démarrer.
-
Page 250: Utilisation Du Tableau De Sécurité Et D'applications De Votre Lifebook
Utilisation du tableau de sécurité et d’applications de votre LifeBook La fonction de verrouillage de sécurité est activée à la mise hors tension du système, de même qu’à sa reprise depuis le mode veille. Vous devrez entrer le mot de passe juste après avoir appuyé sur le bouton de veille/reprise. -
Page 251: Mises En Garde
Mises en garde Ouverture et fermeture du couvercle de l’écran Lorsque le couvercle est fermé, l’ordinateur portable se place automatiquement en mode veille. L’ouverture du couvercle ne met pas automatiquement le portable en mode de fonctionnement normal. C’est pourquoi vous devez entrer le mot de passe de sécurité après avoir enfoncé le bouton d’alimentation/veille/reprise. Ce paramètre peut être modifié... - Page 252 Suppression de l’application Tableau de sécurité avec des mots de passe encore actifs L’utilisation de cette fonction ne permettra aucune modification du mot de passe. Selon la configuration de votre système d’exploitation, les procédures peuvent être légèrement différentes, comme décrit ci-dessous : A SUPPRESSION DES APPLICATIONS NE SUPPRIME PAS LE MOT DE PASSE ETTE OPÉRATION ’...
- Page 253 « Définition des mots de passe » page 42. Si vous oubliez les deux mots de passe, prenez contact avec le service à la clientèle et de soutien de Fujitsu America au 1-800-8FUJITSU (1-800-838-5487). La société Fujitsu America exige des frais de service pour le déverrouillage d’un PC Tablette protégé...
-
Page 254: Lancement D'applications Avec Le Tableau De Sécurité Et D'applications
Lancement d’applications avec le Tableau de sécurité et d’applications Le tableau de sécurité permet également de lancer des applications au toucher d’un bouton lorsque le système est en marche. Lorsque vous enfoncez un bouton de ce tableau, le système lance l’application configurée par l’utilisateur. - Page 255 Pour changer l’application associée à un bouton, cliquez sur l’onglet correspondant au bouton à reconfigurer – Application A, par exemple. Cliquez sur l’option Rechercher du menu Démarrer, repérez l’application à lancer avec ce bouton dans la liste et cliquez sur [OK]. Le bouton est dorénavant configuré pour lancer la nouvelle application.
- Page 256 Pour le réactivez, exécutez la même procédure, sauf qu’à l’étape 4 vous devez plutôt cliquer sur [Activer le tableau d’applications]. L’ ’ UTILITAIRE ABLEAU D APPLICATIONS OOK EST ACTIVÉ À CHAQUE DÉMARRAGE DE INDOWS ’ ’ MÊME SI VOUS L AVEZ DÉSACTIVÉ...
-
Page 257: Première Mise En Marche De Votre Ordinateur Portable Lifebook
Chapitre 2 Première mise en marche de votre ordinateur portable LifeBook Prise d’alimentation c.c. Adaptateur secteur Figure 24. Connexion de l’adaptateur secteur... -
Page 258: Sources D'alimentation
Sources d’alimentation Votre ordinateur portable LifeBook Fujitsu peut utiliser trois sources d’alimentation différentes : une batterie au lithium principale, un adaptateur secteur et un adaptateur auto/avion. Connexion des adaptateurs d’alimentation L’adaptateur secteur et l’adaptateur auto/avion disponible en option permettent tous deux de faire fonctionner votre ordinateur portable et de charger les batteries. -
Page 259: Écran
Figure 25. Ouverture de l’écran Écran Votre ordinateur portable LifeBook Fujitsu comporte un écran à rétro-éclairage permettant une lecture facile dans les environnements à forte luminosité. Cet écran offre également une excellente résolution grâce à une technologie de matrice active. -
Page 260: Réglage De La Luminosité De L'écran
Réglage de la luminosité de l’écran Lorsque vous avez allumé votre ordinateur portable LifeBook, vous pouvez régler la luminosité de l’écran à un niveau plus confortable. Sur les systèmes Windows XP, la luminosité peut être réglée en utilisant le clavier. Sur les systèmes Windows Vista et Windows 7, il y a trois façons d’ajuster la luminosité : en utilisant le clavier, les Options d’alimentation ou le Centre de mobitilité... -
Page 261: Démarrage De Votre Ordinateur Portable Lifebook
Démarrage de votre ordinateur portable LifeBook Mise sous tension Bouton d’alimentation/veille/reprise Lorsque votre ordinateur portable est éteint, le bouton d’alimentation/veille/reprise permet de l’allumer. Pour allumer votre ordinateur portable LifeBook, vous devez avoir connecté votre adaptateur secteur ou disposer d’une batterie au lithium chargée. ’... -
Page 262: Procédure D'amorçage
BIOS. Chaque fois que vous démarrez ou redémarrez votre ordinateur, il exécute une procédure d’amorçage et l’écran affiche le logo Fujitsu jusqu’à ce que le système d’exploitation soit chargé. Cette procédure comporte diverses opérations dont un auto-test de mise sous tension. Si la procédure d’amorçage est exécutée sans échec et sans demande d’accès à... -
Page 263: Mots De Passe D'accès Au Disque Dur
TrustedCore tel que décrit ci-dessous) : Allumez ou redémarrez votre ordinateur portable LifeBook. Pour accéder à l’utilitaire, appuyez sur la touche [F2] lorsque le logo Fujitsu apparaît à l’écran. Le menu principal de l’utilitaire de configuration du BIOS s’affichera avec les paramètres courants. - Page 264 Utilisation du menu TrustedCore Lorsque le logo Fujitsu apparaît à l’écran, appuyez sur la touche [Entrée] ou cliquez avec le bouton gauche de la souris ou du pavé tactile TouchPad. Le menu TrustedCore s affichera. Ce menu fournit des raccourcis vers les menus et écrans d’informations suivants : •...
-
Page 265: Démarrage Du Système
La première fois que vous allumez votre ordinateur portable LifeBook, l’écran affiche le logo Fujitsu. Si vous n’intervenez pas, l’ordinateur charge le système d’exploitation et lance la procédure d’ouverture Windows. - Page 266 Vous serez invité à entrer votre nom d’utilisateur et votre mot de passe, puis vous pourrez choisir une icône pour votre compte. L’écran suivant demande de fournir un nom d’ordinateur et vous permet de choisir un environnement de bureau. Vous verrez ensuite un écran « Aider à protéger automatiquement Windows » dans lequel le choix par défaut est «...
-
Page 267: Enregistrement De Votre Pc Tablette Lifebook Chez Fujitsu
Fujitsu Driver Update). Avec FDU, vous pouvez choisir d’aller automatiquement ou manuellement sur le site de Fujitsu pour obtenir les mises à jour récentes de votre système. Pour obtenir davantage de renseignements concernant l’utilitaire FDU, reportez-vous à « Téléchargement automatique des mises à... -
Page 268: Gestion De L'alimentation
Gestion de l’alimentation Votre ordinateur Fujitsu LifeBook possède plusieurs dispositifs permettant d’économiser l’énergie des batteries. Certains de ces dispositifs fonctionnent automatiquement et ne requièrent aucune intervention, notamment en ce qui concerne le modem interne. Cependant, d’autres dépendent de paramètres que vous pouvez configurer en fonction de vos conditions d’utilisation, notamment en ce qui concerne la luminosité... -
Page 269: Mode Veille (Sommeil)
Mode veille (sommeil) Lorsque le mode sommeil est activé, Windows conserve le contenu de votre mémoire de système durant la période d’inactivité en maintenant l’alimentation de certains composants critiques. Ce mode éteint l’unité centrale, l’écran, le disque dur et tous les autres composants internes sauf ceux qui sont nécessaires pour conserver la mémoire du système et permettre son redémarrage. -
Page 270: Mode Veille Prolongée (Enregistrement Sur Le Disque)
Habituellement, la mémoire de système de l’ordinateur enregistre le fichier sur lequel vous travaillez, l’information sur les applications ouvertes et d’autres données nécessaires aux opérations en cours. Lorsque vous quittez le mode sommeil, l’ordinateur retournera à l’état où vous l’avez laissé. Pour reprendre l’utilisation de l’ordinateur, vous devez employer le bouton d’alimentation/veille/reprise et vous devez disposer d’une source d’alimentation valide. -
Page 271: Gestion De L'alimentation Dans Windows
Activation et désactivation de la fonction de veille prolongée Pour Windows Vista/Windows 7 : Le mode veille prolongée est activé par défaut. Pour activer ou désactiver la fonction de veille prolongée, exécutez les opérations suivantes : À partir du menu [Démarrer], sélectionnez Panneau de configuration, puis Options d’alimentation. Puis sélectionnez «... -
Page 272: Mise Hors Tension
Dans Windows XP : Cliquez sur le bouton du menu Démarrer et cliquez sur Arrêter l’ordinateur. Dans la boîte de dialogue d’arrêt Windows qui apparaît, sélectionnez l’option Redémarrer. Enfin, cliquez sur OK. L’ordinateur s’arrête et redémarre. ’ I VOUS ARRÊTEZ VOTRE ORDINATEUR SANS FERMER INDOWS OU SI VOUS L ALLUMEZ MOINS ’... -
Page 273: Utilitaire Du Chargeur Usb Anytime
Utilitaire du Chargeur USB Anytime Votre ordinateur est doté d’un utilitaire pratique qui vous permet de charger des périphériques USB même lorsque l’ordinateur est éteint. Cet utilitaire est appelé « Anytime USB Charge » (chargement USB à tout moment). Installation Si l’utilitaire n’est pas encore installé... - Page 274 Désinstallation de l’utilitaire Cliquez sur le bouton [Démarrer] et ouvrez le menu Démarrer. Dans ce menu, cliquez sur Panneau de configuration. Effectuez les étapes qui s’affichent selon votre système d’exploitation : Dans Windows 7 : • Cliquez sur [Désinstaller le programme]. •...
-
Page 275: Options Installables Par L'utilisateur
Chapitre 3 Options installables par l’utilisateur Batterie au lithium Votre ordinateur portable LifeBook possède une batterie au lithium qui en permet le fonctionnement lorsque vous n’avez pas accès à une source d’alimentation externe. Cette batterie est robuste et durable, mais elle ne doit pas être exposée à des températures extrêmes, à des tensions élevées, à des produits chimiques ou à... -
Page 276: Procédure De Recharge Des Batteries
E LAISSEZ JAMAIS UNE BATTERIE DÉFECTUEUSE DANS VOTRE ORDINATEUR LLE POURRAIT ’ ’ ENDOMMAGER L ADAPTATEUR SECTEUR ADAPTATEUR AUTO AVION DISPONIBLE EN OPTION ’ LA DEUXIÈME BATTERIE SI VOUS EN POSSÉDEZ UNE OU L ORDINATEUR LUI MÊME NE BATTERIE ’ ENDOMMAGÉE PEUT ÉGALEMENT NUIRE AU FONCTIONNEMENT DE L ORDINATEUR EN UTILISANT TOUT LE COURANT DISPONIBLE... - Page 277 SSUREZ VOUS QUE LE VOYANT DE CHARGE EN COURS ET LE POURCENTAGE DE CHARGE SONT ’ ’ ’ VISIBLES À L INTÉRIEUR DE L ICÔNE DU NIVEAU DE CHARGE SUR LE TABLEAU DE VOYANTS D ÉTAT Puisque les batteries au lithium n’ont aucun effet de mémoire, il n’est pas nécessaire de décharger complètement votre batterie avant de la recharger.
- Page 278 • ’ ORSQUE L AVIS DE BATTERIE FAIBLE APPARAÎT VOUS DEVEZ ENREGISTRER TOUTES VOS DONNÉES ’ ACTIVES ET PLACER VOTRE ORDINATEUR OOK EN MODE VEILLE JUSQU À CE QUE VOUS PUISSIEZ ’ ’ DISPOSER D UNE AUTRE SOURCE D ALIMENTATION OUS DEVEZ CONNECTER LE PLUS RAPIDEMENT POSSIBLE UNE BATTERIE CHARGÉE UN ADAPTATEUR SECTEUR OU UN ADAPTATEUR AUTO...
-
Page 279: Remplacement De La Batterie
Remplacement de la batterie Si vous achetez une batterie supplémentaire de rechange, vous pourrez remplacer la batterie principale si elle vient à se décharger complètement. Deux méthodes s’offrent à vous pour remplacer votre batterie : le remplacement hors tension et le remplacement sous tension. Remplacement hors tension Pour remplacer la batterie alors que le système est hors tension, exécutez les opérations suivantes : Trouvez une batterie chargée, prête à... - Page 280 Loquet droit de la batterie Point de retrait de la batterie Loquet gauche de la batterie Batterie au lithium Figure 26. Retrait de la batterie Suivez les étapes 3 à 8 de la section « Remplacement hors tension ». ’ I LE CONNECTEUR DE LA BATTERIE AU LITHIUM N EST PAS BIEN ENFONCÉ...
-
Page 281: Lecteur Optique
Plateau du lecteur multimédia Ouverture d’urgence du plateau Touche d’éjection du lecteur multimédia Figure 27. Lecteur optique Lecteur optique De nombreux supports peuvent être utilisés avec votre système si vous avez le graveur de DVD multiformat en option. Le lecteur est également connu sous le nom de « lecteur optique ». Les disques DVD-R et DVD-RW ont une capacité... -
Page 282: Logiciels Du Lecteur Multimédia
• ’ ISITEZ RÉGULIÈREMENT LE SITE EB DE UJITSU À L ADRESSE US FUJITSU COMPUTERS POUR OBTENIR LES MISES À JOUR DE PILOTES LES PLUS RÉCENTES • DVD L OUS LES LECTEURS DE OOK SONT COMPATIBLES AVEC LES TITRES DE DONT LE NUMÉRO... - Page 283 Placez le disque dans le plateau de chargement, l’étiquette vers le haut, avec l’orifice au milieu du disque. Enfoncez le disque dans le cercle surélevé situé au centre du plateau. Fermez le plateau de chargement en le poussant doucement jusqu’à ce que vous entendiez un clic. ’...
-
Page 284: Retrait D'un Disque
Retrait d’un disque Appuyez et relâchez la touche d’éjection située à l’avant du lecteur optique. Le lecteur s’arrêtera et le plateau sortira légèrement de l’ordinateur LifeBook. Tirez doucement le plateau jusqu’à ce le disque puisse en être facilement retiré. Retirez doucement le disque du plateau de chargement. Fermez le plateau de chargement en le poussant doucement jusqu’à... -
Page 285: Utilisation Des Logiciels Du Lecteur Multimédia
Utilisation des logiciels du lecteur multimédia ’ ELON VOTRE CONFIGURATION IL EST POSSIBLE QUE VOTRE SYSTÈME NE DISPOSE PAS D UN LOGICIEL ’ DE LECTEUR MULTIMÉDIA PRÉINSTALLÉ I CELUI CI N EST PAS INSTALLÉ CONSULTEZ LA DOCUMENTATION ’ ACCOMPAGNANT L APPLICATION MULTIMÉDIA Démarrage d’un film DVD Insérez le DVD dans le lecteur optique de l’ordinateur. -
Page 286: Utilisation Du Lecteur Multimédia Avec Alimentation Par Batterie
VOUS POUVEZ VOUS EN PROCURER UNE SOIT 1-877-372-3473. EN LIGNE À HTTP COMPUTERS FUJITSU SOIT EN APPELANT AU Pour regarder un film avec une alimentation par batterie : Ayez à votre disposition une batterie supplémentaire chargée à fond ou un adaptateur secteur. - Page 287 Lorsque le voyant de batterie faible s’allume, arrêtez immédiatement le film et quittez le lecteur multimédia. ’ I VOUS N ARRÊTEZ PAS LE LECTEUR MULTIMÉDIA RAPIDEMENT ET QUE LE PORTABLE OOK TENTE ’ DE S ARRÊTER AUTOMATIQUEMENT ÉTAT CRITIQUE DE BATTERIE FAIBLE LE PORTABLE ’...
-
Page 288: Cartes Secure Digital (Sd)
Carte Secure Digital Fente pour carte Secure Digital Figure 30. Installer une carte Secure Digital Cartes Secure Digital (SD) Votre ordinateur portable LifeBook peut accueillir des cartes Secure Digital (SD), sur lesquelles vous pouvez stocker et transférer des données vers et à partir de divers dispositifs numériques. Ces cartes utilisent une architecture de mémoire flash, ce qui veut dire que vous n’avez pas besoin d’une source d’énergie pour conserver les données. -
Page 289: Insérer Des Cartes Sd
Insérer des cartes SD Les cartes SD sont insérées dans la fente pour carte SD (figure 30). Pour insérer une carte, exécutez les opérations suivantes : ’ I VOUS INSÉREZ OU RETIREZ UNE CARTE PENDANT LE PROCESSUS D ARRÊT OU DE DÉMARRAGE DE ’... -
Page 290: Utilisation Des Cartes Expresscard/Pc Card
Bouton d’éjection Carte PC Card Carte ExpressCard Figure 31. Installation/Retrait de cartes ExpressCard ou PC Card Utilisation des cartes ExpressCard/PC Card Selon la configuration de votre système, votre ordinateur Tablette peut soit fonctionner avec des ExpressCard, soit avec des PC Card ; elles ont chacune leurs propres fonctions. Il existe deux largeurs différentes de cartes ExpressCard : 34 mm et 54 mm. -
Page 291: Installation Des Cartes Expresscard/Pc Card
Installation des cartes ExpressCard/PC Card • PC C I VOUS NSÉREZ OU RETIREZ UNE CARTE XPRESS ARD OU ARD PENDANT LE PROCESSUS ’ ’ ARRÊT OU DE DÉMARRAGE DE VOTRE ORDINATEUR PORTABLE VOUS RISQUEZ D ENDOMMAGER ’ LA CARTE ET OU L ORDINATEUR •... -
Page 292: Retrait Des Cartes Expresscard/Pc Card
Retrait des cartes ExpressCard/PC Card Le guide d’utilisation de votre carte ExpressCard/PC Card vous indiquera comment la retirer. Certaines cartes pourraient nécessiter que votre ordinateur portable LifeBook soit en mode veille ou qu’il soit éteint pendant que vous les retirez. •... -
Page 293: Module De Mémoire Additionnelle
Module de mémoire additionnelle Votre ordinateur portable Fujitsu est fourni avec une mémoire vive dynamique synchrone de type 3, à haute vitesse et à double débit binaire, de 1 Go (SDRAM DDR3-1066), installée en usine. Pour augmenter la capacité de mémoire de votre portable, vous pouvez installer un module de mémoire additionnel. La mémoire additionnelle doit être un module SDRAM (DIMM) à... - Page 294 Retirez le module de mémoire additionnelle de sa gaine protectrice antistatique. Alignez le module de mémoire additionnelle avec la pièce vers le haut. Alignez le bord du connecteur du module avec la fente du connecteur dans le compartiment. Assurez-vous que les broches du connecteur sont alignées avec les broches de la fente.
-
Page 295: Retrait D'un Module De Mémoire Additionnelle
Replacez le couvercle et les vis. ’ E MODULE DE MÉMOIRE ADDITIONNELLE N EST PAS UN ÉLÉMENT QUE VOUS RETIREZ DE VOTRE ’ ORDINATEUR DE FAÇON ROUTINIÈRE PRÈS L INSTALLATION VOUS DEVRIEZ LE LAISSER EN PLACE ’ JUSQU À CE QUE VOUS DÉCIDIEZ DE CHANGER LA CAPACITÉ DE MÉMOIRE DU SYSTÈME Retrait d’un module de mémoire additionnelle Exécutez les étapes 1 à... - Page 296 Dans Windows 7 : Vérifiez la capacité de mémoire en cliquant sur Démarrer -> Paramètres -> Panneau de configuration, puis (mode d’affichage par catégories) en cliquant sur l’icône Système et Sécurité. Sélectionnez l’icône Sécurité et cochez sur la case correspondant à la capacité de mémoire à côté de «...
-
Page 297: Ports De Périphériques
Ports de périphériques Votre ordinateur portable LifeBook Fujitsu et le duplicateur de port optionnel sont équipés de plusieurs ports auxquels vous pouvez brancher des dispositifs externes tels que : lecteurs de disque, claviers, modems, imprimantes, etc. Prise de téléphone modem (RJ-11) La prise de téléphone modem (RJ-11) est utilisée pour un modem interne. - Page 298 Pour Windows Vista et Windows 7 : Cliquez sur [Démarrer] -> Panneau de configuration. Sous Windows Vista, sélectionnez Affichage classique dans le panneau de gauche ; sous Windows 7, sélectionnez Grandes Icônes ou Petites Icônes en mode d’Affichage en : champs. Double-cliquez sur Phone and Modems (Téléphone et modems).
-
Page 299: Port Hdmi
Port HDMI Le port HDMI (High-Definition Multimedia Interface, ou Interface multimédia à haute définition) est une interface numérique audio/vidéo permettant de faire transiter des flux de données non compressées. Le HDMI sert à brancher des périphériques numériques compatibles avec votre ordinateur (un téléviseur grand écran, par exemple). -
Page 300: Prise De Réseau Local (Rj-45) Interne
Prise de réseau local (RJ-45) interne La prise de réseau local interne (RJ-45) est utilisée pour une connexion de réseau local Gigabit Ethernet (10Base-T/100Base-Tx/1000Base-T). Il est possible que vous deviez configurer votre ordinateur portable selon les particularités de votre réseau (pour de plus amples informations sur la configuration de votre réseau, veuillez consulter votre administrateur de réseau). -
Page 301: Prise D'écouteurs/Sortie De Ligne
Ports USB 2.0 Figure 38. Connexion d’un périphérique USB Prise d’écouteurs/sortie de ligne La prise d’écouteurs/sortie de ligne vous permet de connecter à votre ordinateur des écouteurs ou des haut- parleurs externes sous tension. Vos écouteurs ou haut-parleurs doivent être munis d’une mini-prise stéréo de 3,5 mm (1/8 po). -
Page 302: Prise Micro/Entrée De Ligne
Prise micro/entrée de ligne La prise micro/entrée de ligne vous permet de connecter un microphone mono externe. Votre microphone doit être muni d’une mini fiche de connexion mono de 3,5 mm (1/8 po) pour qu’il puisse être branché sur la prise microphone de votre ordinateur portable. Pour connecter un microphone, exécutez ces opérations simples : Alignez le connecteur avec l’ouverture du port. -
Page 303: Dépannage De Votre Lifebook
Chapitre 4 Dépannage de votre LifeBook Dépannage Il est possible que vous rencontriez parfois des problèmes simples de configuration ou d’exploitation pouvant être résolus sur le champ, ou des problèmes au niveau d’un périphérique pouvant être résolus en remplaçant l’équipement. Les informations contenues dans cette section vous aideront à isoler et résoudre certains de ces problèmes simples et à... - Page 304 : Numéro sans frais : 1-800-8Fujitsu (1-800-838-5487) Courriel : http://www.fujitsu.com/us/support/. Avant de nous contacter, veuillez avoir les informations suivantes à portée de main pour que notre préposé du service à la clientèle puisse vous venir en aide le plus rapidement possible : •...
-
Page 305: Problèmes Spécifiques
Problèmes spécifiques Utilisation du tableau de dépannage Lorsque vous éprouvez des problèmes avec votre ordinateur portable LifeBook, essayez de trouver les symptômes sous la colonne Problème du tableau suivant pour la fonction qui vous cause des problèmes. Vous trouverez une description des causes communes pour ce symptôme sous la colonne Cause possible ; le cas échéant, ce que vous pouvez faire pour corriger la situation se trouve sous la colonne Solutions possibles. -
Page 306: Problème
Un pilote est mal configuré. Le pilote audio peut être installé ou réinstallé à l’aide du CD de pilotes et d’applications livré avec votre LifeBook Fujitsu. Consultez la documentation de votre application et de votre système d’exploitation pour obtenir de l’aide. - Page 307 Problème Cause possible Solutions possibles Problèmes de lecteur DVD/CD-RW/CD-ROM L’ordinateur portable Le disque n’est pas bien Ouvrez le plateau du lecteur optique et réinstallez LifeBook ne reconnaît pas logé dans le cercle surélevé correctement le disque. les DVD/CD-RW/CD-ROM. au centre du lecteur. Le tiroir du lecteur optique Appuyez sur le devant du tiroir du lecteur optique jusqu’à...
-
Page 308: Problèmes De Disque Dur
Problème Cause possible Solutions possibles Problèmes de disque dur Vous ne pouvez pas accéder Un mauvais identificateur Assurez-vous que la lettre d’unité utilisée par l’application à votre disque dur. d’unité a été utilisé par une est bien celle qu’utilise le système d’exploitation. Lorsque application lorsqu’un disque le système d’exploitation est démarré... -
Page 309: Problèmes De Mémoire
Problème Cause possible Solutions possibles Vous avez connecté un Le logiciel de votre système Consultez la documentation du périphérique et du système clavier externe ou une d’exploitation n’est pas d’exploitation, puis installez le pilote approprié. souris et il/elle semble configuré avec le bon pilote bloquer le système. -
Page 310: Problèmes De Carte Pc Card
Problème Cause possible Solutions possibles Problèmes de carte PC Card Une carte insérée dans la La carte est mal installée. Retirez et réinstallez la carte. Voir « Utilisation des cartes fente pour carte PC Card ExpressCard/PC Card » en page 84. ne fonctionne pas ou La carte a peut-être Fermez l’application et redémarrez votre ordinateur portable. - Page 311 Problème Cause possible Solutions possibles Lorsque vous allumez le La batterie principale Vérifiez le tableau de voyants d’état pour déterminer la LifeBook, rien ne semble installée est complètement présence et l’état des batteries. Voir « Tableau de voyants se produire. déchargée, il n’y a pas de d’état »...
- Page 312 Problème Cause possible Solutions possibles Votre ordinateur portable Les paramètres de gestion Appuyez sur n’importe quelle touche sur le clavier, ou LifeBook s’éteint tout seul. d’alimentation sont réglés à déplacez votre souris pour restaurer le fonctionnement. des temporisations (délais Si cela ne fonctionne pas, appuyez sur le bouton d’inactivité) automatiques d’alimentation/veille/reprise Vérifiez vos paramètres trop courtes par rapport à...
- Page 313 Problème Cause possible Solutions possibles Le LifeBook ne fonctionne La batterie est épuisée. Remplacez la batterie par une batterie chargée ou branchez pas lorsqu’il est alimenté un adaptateur d’alimentation. uniquement par batterie. Aucune batterie Installez une batterie chargée. n’est installée. Les batteries installées ne Vérifiez si les batteries sont bien connectées en sont pas bien connectées.
-
Page 314: Problèmes D'arrêt Et De Démarrage
Problème Cause possible Solutions possibles Les batteries semblent Les fonctions d’économies Consultez le menu Options d’alimentation du Panneau de se décharger trop vite. d’énergie sont peut-être configuration pour changer les paramètres en fonction de (suite) désactivées. vos besoins. La luminosité est réglée Réduisez la luminosité. - Page 315 Configurez la source d’exploitation en appuyant sur la touche marche et affiche les de l’utilitaire de configuration [Échap] pendant que le logo Fujitsu est affiché sur l’écran ou informations sur la mise du BIOS sont incompatibles utilisez la touche [F2], accédez à l’utilitaire de configuration et en marche, mais n’est pas...
-
Page 316: Problèmes Vidéo
Problème Cause possible Solutions possibles L’écran ne s’allume pas Vous avez installé le Consultez les indicateurs d’état pour voir si l’icône de sécurité au démarrage ou à la Tableau de sécurité et est affichée. Le cas échéant, saisissez votre mot de passe sortie du mode Veille. - Page 317 Problème Cause possible Solutions possibles L’écran devient vide par L’ordinateur portable s’est Appuyez sur n’importe quelle touche sur le clavier, lui-même après avoir retrouvé en temporisation ou déplacez votre souris pour restaurer le fonctionnement. été utilisé. vidéo, en mode veille ou en Si cela ne fonctionne pas, appuyez sur le bouton mode veille prolongée car d’alimentation/veille/reprise Vérifiez vos paramètres de...
-
Page 318: Problèmes Divers
Problème Cause possible Solutions possibles L’écran d’application L’application que vous La compression de l’affichage fournit un affichage plus clair n’utilise qu’une partie de utilisez ne prend pas mais plus petit pour les applications qui ne prennent pas en la surface d’affichage et est en charge la résolution charge la résolution du système. -
Page 319: Messages De L'auto-Diagnostic De Mise Sous Tension
Messages de l’auto-diagnostic de mise sous tension Voici une liste alphabétique des messages d’erreur et d’état que le BIOS Phoenix et/ou votre système d’exploitation peuvent générer ainsi qu’une explication pour chacun d’eux. Les messages d’erreurs sont marqués d’un *. Si un message d’erreur est affiché et ne se trouve pas dans la liste, prenez-le en note et vérifiez-le dans la documentation de votre système d’exploitation (à... - Page 320 *Échec du disque fixe n (où x=1 à 4) Le disque fixe ne fonctionne pas ou n’est pas bien configuré. Cela pourrait signifier que le type de disque dur identifié dans votre utilitaire de configuration ne concorde pas avec le type détecté par l’auto-diagnostic de mise sous tension.
- Page 321 *Erreur de clavier Le clavier ne fonctionne pas. Vous pourriez avoir besoin de remplacer votre clavier ou le contrôleur de votre clavier mais vous pourriez utiliser un clavier externe en attendant. Prenez contact avec le service d’assistance. *Touche bloquée Le BIOS a découvert une touche bloquée et affiche le code de balayage pour la touche bloquée. Vous pourriez avoir besoin de remplacer votre clavier mais vous pourriez utiliser un clavier externe en attendant.
- Page 322 *Appuyez sur <F1> pour reprendre, sur <F2> pour CONFIGURER Affiché après tout message d’erreur récupérable. Appuyez sur [F1] pour continuer le démarrage ou sur [F2] pour accéder à l’utilitaire de configuration du BIOS et modifier la configuration. *Amorçage précédent incomplet – Configuration par défaut utilisée L’auto-diagnostic de mise sous tension précédent n’a pas été...
- Page 323 Système BIOS doublé Système BIOS copié sur la mémoire RAM fantôme. *Total de contrôle du CMOS incorrect - Utilisation de la configuration par défaut La mémoire RAM du CMOS BIOS a été corrompue ou mal modifiée, peut-être par un programme d’application qui change les données stockées dans la mémoire du BIOS.
-
Page 324: Ouverture D'urgence Du Plateau Du Lecteur Multimédia
Ouverture d’urgence du plateau du lecteur multimédia Si pour une raison quelconque la touche d’éjection ne fonctionne pas, vous pouvez ouvrir le plateau du lecteur de DVD/CD-ROM avec un trombone ou un instrument similaire que vous insérerez dans le trou d’éjection situé... -
Page 325: Restaurer Vos Logiciels Pré-Installés
NTERNET DE LEUR FABRICANT Pour réinstaller des pilotes et/ou applications : Lancez le système et insérez le disque PRA après que Windows a démarré. Un écran d’installation Fujitsu s’affiche une fois que le disque est inséré. Lorsque vous avez lu le contrat de licence, cliquez sur [J’accepte]. -
Page 326: Restauration Du Système D'exploitation Pour Les Systèmes Windows
’ ES COMPOSANTS CITÉS SONT CHROMOCODÉS EN FONCTION DE LEUR ÉTAT D INSTALLATION E BLEU INDIQUE QUE LE COMPOSANT PEUT ÊTRE INSTALLÉ E VERT INDIQUE QUE LE COMPOSANT DOIT ÊTRE INSTALLÉ SÉPARÉMENT E GRIS INDIQUE QUE LE COMPOSANT EST DÉJÀ INSTALLÉ LES ÉLÉMENTS EN ’... - Page 327 Vous pouvez également utiliser le menu TrustedCore pour savoir si l’utilitaire est pré-chargé en mettant l’ordinateur sous tension avec la touche [Entrée] lorsque le logo Fujitsu apparaît à l’écran. Le menu TrustedCore apparaîtra, et l’option Restauration et Utilitaires s’y affichera.
- Page 328 : Mettez le système sous tension. Lorsque le logo Fujitsu apparaît à l’écran, appuyez sur la touche [Entrée] ou cliquez avec le bouton gauche de la souris ou du pavé tactile TouchPad. Le menu TrustedCore s’affichera.
-
Page 329: Téléchargement Automatique Des Mises À Jour De Pilotes
Téléchargement automatique des mises à jour de pilotes Votre système dispose d’un outil pratique appelé Utilitaire de Mise à jour des pilotes Fujitsu (FDU ou Fujitsu Driver Update). Avec FDU, vous pouvez choisir d’aller automatiquement ou manuellement sur le site de Fujitsu pour obtenir les mises à... - Page 330 Après avoir cliqué sur l’icône, l’utilitaire FDU se connectera automatiquement au site Fujitsu pour vérifier les mises à jour et les télécharger. Pendant le processus de téléchargement, l’icône affiche une barre rouge indiquant qu’elle ne peut pas être utilisée pendant que le téléchargement est en cours.
-
Page 331: Chapitre 5 Entretien
Entretien Entretien de votre ordinateur portable LifeBook Si vous prenez soin de votre ordinateur portable LifeBook Fujitsu, vous augmenterez sa durée de vie et sa fiabilité. Cette section fournit certains conseils relatifs à l’entretien de votre ordinateur portable et de ses dispositifs. - Page 332 • E SYSTÈME CONTIENT DES COMPOSANTS POUVANT ÊTRE FORTEMENT ENDOMMAGÉS PAR UNE (DES). P DÉCHARGE ÉLECTROSTATIQUE OUR MINIMISER CE RISQUE VEUILLEZ PRENDRE LES PRÉCAUTIONS SUIVANTES • VANT DE CONNECTER OU DE DÉCONNECTER VOTRE ORDINATEUR PORTABLE LORSQUE VOUS UTILISEZ UN DUPLICATEUR DE PORTS IL EST TOUJOURS RECOMMANDÉ...
-
Page 333: Nettoyage De Votre Ordinateur Portable Lifebook
Laissez-le sécher pendant 24 heures, ou plus si nécessaire. S’il ne démarre pas une fois sec, contactez le service d’assistance. • N’utilisez pas votre ordinateur portable LifeBook Fujitsu dans un environnement très humide (à proximité d’une baignoire, d’une piscine). • Utilisez toujours l’adaptateur secteur d’origine et des piles homologuées pour votre ordinateur portable. - Page 334 Suivez les procédures de nettoyage en utilisant des produits nettoyants recommandés disponibles dans le commerce. Extérieur et clavier de l’ordinateur Pour nettoyer l’extérieur et le clavier, utilisez l’un des nettoyants suivants : • Kit de nettoyage pour ordinateur portable Office Depot® N° 154-616 •...
-
Page 335: Nettoyage Du Filtre Anti-Poussière
Désinfection des ordinateurs LifeBook • Nettoyez la surface de l’ordinateur à l’aide d’un tissu doux imbibé d’une solution d’éthanol à 50 % ou d’un autre germicide à base d’éthanol homologué par l’EPA (« Environment Protection Agency », ou Agence américaine de protection de l’environnement) en tant que désinfectant hospitalier. ... -
Page 336: Rangement De Votre Ordinateur Portable Lifebook
Figure 40. Retrait/installation du filtre anti-poussière Mettez le filtre à nouveau en place en insérant d’abord une extrémité, puis poussez jusqu’au bout jusqu’à ce qu’il s’enclenche. SSUREZ VOUS TOUJOURS QUE LE FILTRE ANTI POUSSIÈRE EST INSTALLÉ AVANT DE METTRE VOTRE SYSTÈME EN MARCHE ANS LE CAS CONTRAIRE VOUS RISQUEZ DE CONTAMINER VOTRE SYSTÈME... -
Page 337: Voyager Avec Votre Ordinateur Portable Lifebook
Voyager avec votre ordinateur portable LifeBook • Ne transportez pas votre ordinateur portable pendant qu’il est en marche. • Il est recommandé de transporter votre ordinateur portable en cabine au lieu de l’enregistrer comme bagage. • Lorsque vous partez en voyage, apportez toujours avec vous le CD de remise en état du système fourni avec votre ordinateur portable. -
Page 338: Batteries
Batteries Entretien de vos batteries • Manipulez toujours les batteries avec soin. • Ne court-circuitez pas les terminaux des batteries (c’est à dire, ne touchez pas les deux terminaux avec des objets métalliques). Ne transportez pas des batteries dans votre poche ou sac à main où elles pourraient entrer en contact avec de la monnaie, des clés ou d’autres objets métalliques. -
Page 339: Entretien De Votre Lecteur Multimédia
Entretien de votre lecteur multimédia Entretien de votre lecteur multimédia (DVD/CD/CD-R) Les disques multimédias sont des dispositifs précis qui fonctionneront de manière fiable si vous en prenez bien soin. • Rangez toujours vos disques multimédias dans leurs étuis lorsqu’ils ne sont pas utilisés. •... -
Page 340: Cartes Expresscard/Pc Card
Entretien du lecteur optique Votre lecteur optique est durable, mais vous devez en prendre soin. Veuillez faire attention aux points suivants : • Le lecteur fait pivoter le disque compact à une vitesse très élevée. Lorsqu’il fonctionne, évitez de le déplacer ou de le soumettre à des chocs ou à des vibrations. •... -
Page 341: Spécifications Techniques
Spécifications techniques du système Cette section présente les spécifications techniques du matériel et de l’environnement de votre ordinateur portable LifeBook Fujitsu. Selon les configurations, les spécifications techniques peuvent varier. Étiquette de configuration L’étiquette de configuration qui est située sur le dessous de votre ordinateur portable comporte des informations spécifiques à... -
Page 342: Microprocesseur
Microprocesseur Processeur Intel® Core™ i3, i5, ou i7 (Consulter l’étiquette de configuration afin de déterminer la vitesse de votre processeur). Puce • Intel QM57 ou Intel HM55 Express (selon la configuration du système) Mémoire Mémoire système • Module mémoire vive à double canal SDRAM DDR3 1066 MHz •... -
Page 343: Audio
Mémoire vive vidéo • Graphiques Intel® HD avec fréquence dynamique. Distribution automatique de puissance informatique à l’UC et aux applications graphiques ayant besoin d’un surplus de puissance pouvant aller jusqu’à 20 % en plus, ou • NVIDIA® GeForce® avec une capacité totale de 512 Mo de mémoire graphique DDR3 dédiée Audio •... -
Page 344: Caractéristiques Techniques
Caractéristiques techniques Dispositif de pointage intégré • Pavé tactile TouchPad • Bouton de défilement Communications • Modem : modem télécopieur interne 56 K V.90 (ITU V.90 ; 56 K données ; 14,4 K fax) • Réseau local Gigabit (ou Giga-octet) : Carte réseau local interne filaire 10/100/1000 Gigabit Ethernet Réseau local sans fil •... -
Page 345: Ports De Périphériques
Ports de périphériques Sur le portable LifeBook : • Une fente pour carte PC Card ou ExpressCard • Fente pour carte Secure Digital (SD) • Connecteur D-SUB 15 broches pour moniteur VGA externe • Trois connecteurs USB 2.0 (Universal Serial Bus) pour périphériques en entrée/sortie •... -
Page 346: Clavier
Clavier Clavier intégré avec toutes les fonctions de claviers compatibles PS/2 de 101 touches. • Nombre total de touches : 84 • Touches de fonction : De F1 à F12 • Touches supplémentaires : Fn • Deux touches Windows : Une touche Démarrage, une touche Applications •... -
Page 347: Dimensions Et Poids
Dimensions et poids Dimensions générales Environ 316 mm (larg.) x 227 mm (prof.) x 24,2/32,3 mm (haut.) (12,44 po x 8,94 po x 0,95 po/1,27 po) Poids Environ 1,56 kg (3,44 lb) avec réducteur de poids, 1,69 kg (3,73 lb) avec graveur de DVD multiformat double couche, et 1,81 kg (3,99 lb) avec batterie supplémentaire. -
Page 348: Accessoires Préférés Des Utilisateurs
Altitude Utilisation : 3 048 m (10 000 pieds) maximum Accessoires préférés des utilisateurs Pour commander des accessoires Fujitsu ou obtenir des renseignements supplémentaires, visitez le site www.shopfujitsu.com ou composez le 1-800-FUJITSU. Logiciels pré-installés Selon votre système d’exploitation préinstallé, votre ordinateur est livré avec des logiciels inclus afin de vous permettre d’écouter des fichiers audio et de visionner des fichiers vidéo de formats divers. -
Page 349: Apprendre À Utiliser Vos Logiciels
Apprendre à utiliser vos logiciels Tutoriaux Tous les systèmes d’exploitation et la plupart des logiciels d’application ont des tutoriaux intégrés dès leur installation. Nous vous recommandons vivement de passer en revue le tutorial avant d’utiliser une application. Guides Sont compris dans votre portable, les guides d’utilisation pour vos logiciels du système d’exploitation et autres applications préinstallées. - Page 350 L’utilitaire Fujitsu Driver Update (FDU) est fourni avec votre système. Avec FDU, vous pouvez choisir d’aller automatiquement ou manuellement sur le site de Fujitsu pour obtenir les mises à jour récentes de votre système. Voir « Téléchargement automatique des mises à jour de pilotes » en page 123.
- Page 351 Microsoft Office 2010. Fujitsu propose une carte de clé produit pour les éditions Famille et Etudiant 2010 et Famille et Entreprise 2010 de Microsoft Office (32-bit). Il vous suffit de saisir la clé produit et c'est parti ! Vous pouvez aussi acheter la suite complète de Microsoft Office 2010 chez un revendeur informatique ou en ligne sur le site...
- Page 352 2007 qui convient pour débloquer la version complète de votre choix. Fujitsu offre un kit de licence multimédia pour Microsoft® Office Petite Entreprise 2007. Vous n'avez qu'à saisir votre clé de produit et le logiciel est immédiatement prêt à l'emploi. Vous pouvez aussi acheter un kit de licence Microsoft®...
-
Page 353: Glossaire
Glossaire Affichage à cristaux liquides. Type d’écran produisant des images par contrôle de l’orientation de cristaux dans un liquide cristallin. ACPI (Advanced Configuration and Power Interface) Interface avancée de configuration et de gestion de l’énergie. Adaptateur auto/avion Un dispositif qui convertit le courant continu d’un allume-cigare de voiture ou une prise c.c. d’avion en courant continu à... - Page 354 Au sein d’un réseau isolé, vous pouvez attribuer des adresses IP au hasard tant que chacune d’elles reste unique. Toutefois, la connexion d’un réseau privé à Internet exige l’utilisation d’adresses IP enregistrées (appelées adresses Internet) afin d’éviter les doublons. Les quatre numéros dans une adresse IP sont utilisés de différentes façons pour identifier un réseau particulier et un serveur hôte.
- Page 355 Amorçage Démarrage d’un ordinateur et chargement de son système d’exploitation dans la mémoire vive (RAM), à partir du disque, de la mémoire ROM ou d’autres supports de stockage. Authentification à clé partagée Méthode d’authentification réseau établie par la spécification 802.11, selon laquelle le point d’accès transmet au client un paquet texte que le client doit crypter avec la bonne clé...
- Page 356 bit/s Abréviation de « bits par seconde ». Unité utilisée pour mesurer le débit de transfert de données. Circuit électrique qui transmet des données entre l’unité centrale et les sous-ensembles à l’intérieur de l’ordinateur. c.c. Courant continu. Courant qui ne fluctue pas périodiquement dans le temps. Canal Plage de fréquences à...
- Page 357 Clé de chiffrement (clé réseau) Clé de chiffrement utilisée pour coder les textes de messages et pour effectuer les vérifications de l’intégrité des messages. La clé de chiffrement protège les données contre les interceptions non autorisées. Ce dispositif utilise la même clé de chiffrement pour coder ou décoder les données ; cette dernière est obligatoire pour que l’émetteur et le receveur puissent communiquer.
- Page 358 DHCP (Dynamic Host Configuration Protocol) Il s’agit d’un protocole qui permet à un ordinateur qui se connecte sur un réseau d’obtenir dynamiquement sa configuration. Il est utilisé pour récupérer automatiquement des paramètres nécessaires à la communication, tels des adresses IP. L’émetteur d’une adresse IP s’appelle un serveur DHCP, et celui qui reçoit est un client DHCP.
- Page 359 DNS (Domain Name System) Système d’adressage par domaines Fonction qui contrôle la correspondance entre l’adresse IP et le nom attribué à l’ordinateur. Il est possible de communiquer avec les ordinateurs dont les adresses IP sont inconnues, mais dont le nom est connu. Données Les informations stockées et traitées par un système.
- Page 360 Giga-octet. Un milliard d’octets. Horloge système Oscillateur à fréquence précise qui synchronise le fonctionnement du système et établit l’heure et la date. IDE (Intelligent Drive Electronics) Interface IDE L’interface IDE se caractérise par le fait que le contrôleur électronique du disque dur est intégré...
- Page 361 Infrastructure Nom d’une configuration de réseau local (LAN) sans fil. Ce type de communication utilise un point d’accès. Il existe également un autre type de communications appelé « Ad hoc ». Abréviation de « infrarouge ». IrDA (Infrared Data Association) Association pour le transfert de données par infrarouge.
- Page 362 Mégahertz 1 000 000 de cycles par seconde. Mémoire Dépôt de données et d’applications auquel l’unité centrale de votre ordinateur portable LifeBook a directement accès. Mémoire cache Bloc de mémoire intégré au microprocesseur, auquel il est beaucoup plus rapide d’accéder qu’à la mémoire vive et utilisé...
- Page 363 Module RAM ou module de mémoire vive Carte de circuit imprimé avec mémoire et circuit associé qui permet à l’utilisateur d’ajouter de la mémoire supplémentaire à l’ordinateur sans outil spécial. Mono Système qui utilise un seul canal pour traiter le son provenant de toutes les sources. MTU (Maximum Transmission Unit) Unité...
- Page 364 Partition Bloc d’espace réservé sur un disque dur, que le système d’exploitation considère comme étant un disque distinct et qu’il gère en conséquence. Pas de touche (clavier) La distance entre les centres des touches de lettres d’un clavier. PCMCIA PCMCIA est une marque de commerce de la Personal Computer Memory Card International Association. La PCMCIA (association internationale des cartes de mémoire pour ordinateur personnel) est l’organisme qui définit les normes relatives aux cartes d’extension pour ordinateurs.
- Page 365 Port COM Abréviation de « Port de communication ». C’est le connecteur d’interface série. Port E/S Connecteur et circuits de commande associés à travers lesquels transitent les données électroniques entrant et sortant de votre ordinateur. Port LPT (Line Printer Port) Port d’imprimante par ligne.
- Page 366 Programme Ensemble intégré de commandes codées indiquant à l’ordinateur ce qui doit être fait, ainsi que quand et comment le faire. Protocole Ensemble de procédures et de règles régissant la réception et l’envoi de données entre ordinateurs. - Méthode d’envoi et de réception de données - Processus utilisé...
- Page 367 ROM (Read Only Memory) Mémoire en lecture seule, ou mémoire morte Type de mémoire où les données sont stockées par transformation physique de la matière. Les données stockées de cette façon ne peuvent pas être modifiées par l’ordinateur et leur conservation n’exige pas de source de courant. SDRAM Mémoire vive dynamique synchrone.
- Page 368 TCP/IP (Transmission Control Protocol/Internet Protocol) Littéralement, « Protocole de Contrôle de Transmission/Procole Internet ». Protocole Internet standard le plus utilisé. TFT (Thin Film Transistor) Abréviation de « Thin Film Transistor ». Technologie d’écrans plats qui utilise une mince matrice de transistors pour commander individuellement chaque pixel de l’écran.
- Page 369 WFM (Wired for Management) Abréviation de « Wired for Management ». Vaste programme d’Intel visant à réduire les coûts globaux de l’informatique de gestion, sans sacrifier la puissance et la souplesse. WLAN (Wireless Local Area Network) Réseau local sans fil. Interconnexion sans fil d’ordinateurs et de périphériques dans un emplacement géographiquement délimité...
-
Page 370: Renseignements Sur La Réglementation
Renseignements sur la réglementation Avis Les changements ou modifications qui ne sont pas expressément approuvés par Fujitsu pourraient annuler le droit des utilisateurs d’utiliser le matériel. AVIS DE LA FCC Avis aux utilisateurs de postes radio et de téléviseurs Cet appareil a été testé et jugé conforme aux limites établies pour le matériel numérique de classe B, selon la Partie 15 des règlements de la FCC. - Page 371 Avis aux utilisateurs du réseau téléphonique américain Cette installation est conforme à la partie 68 de la réglementation de la FCC, ainsi qu’aux normes techniques relatives au raccordement des réseaux téléphoniques publiées par l’ACTA (Administrative Council for Terminal Attachments). Sous l’appareil se trouve une étiquette indiquant, entre autres, le numéro d’immatriculation FCC et le numéro d’équivalence sonnerie (NES) de cet appareil ou un identifiant du produit au format US : AAAEQ##TXXXX.
- Page 372 Fujitsu America Incorporated. Si l’équipement brouille les communications du réseau téléphonique, l’entreprise de téléphone peut vous demander de débrancher l’installation jusqu’à...
- Page 373 Les réparations de l’équipement de télécommunications doivent être effectuées par un service de maintenance agréé au Canada. Toute réparation ou modification, qui n’est pas expressément approuvée par Fujitsu, ou toute défaillance de l’équipement peut entraîner la compagnie de télécommunications à exiger que l’utilisateur déconnecte l’équipement de la ligne téléphonique.
- Page 374 Repairs to telecommunication equipment should be made by a Canadian authorized maintenance facility. Any repairs or alterations not expressly approved by Fujitsu or any equipment failures may give the telecommunication company cause to request the user to disconnect the equipment from the telephone line.
-
Page 375: Renseignements Sur La Réglementation De La Fcc
Annexe A : Guide d’utilisation de la carte de réseau local sans fil Renseignements sur la réglementation de la FCC Veuillez prendre note des renseignements suivants sur la réglementation relative à la carte réseau sans fil en option. Remarques et déclarations réglementaires Santé... - Page 376 Renseignements sur la réglementation et avis de non-responsabilité Cette carte réseau sans fil doit être installée et utilisée conformément aux instructions de la documentation livrée avec le produit. Toute modification apportée sans l’approbation expresse du fabricant peut annuler le droit de l’utilisateur de s’en servir.
- Page 377 (1) cet appareil ne doit pas causer d’interférence nuisible ; (2) cet appareil doit accepter toutes les interférences reçues, y compris celles pouvant causer un mauvais fonctionnement de l’appareil. Toute modification n’ayant pas été expressément approuvée par la société Fujitsu America Incorporated peut annuler le droit de l’utilisateur de se servir du matériel. Avis pour le Canada Le matériel destiné...
-
Page 378: Avant D'utiliser La Carte Réseau Sans Fil En Option
Avant d’utiliser la carte réseau sans fil en option Ce guide explique comment installer et configurer correctement la carte réseau sans fil mini-PCI intégrée (disponible en option), ci-après désignée sous le nom de « carte réseau sans fil ». Avant d’utiliser la carte réseau sans fil, lisez attentivement le présent guide afin de bien comprendre son fonctionnement. - Page 379 hoc sont donc également connus sous le nom de réseaux d’égal à égal. Un réseau Ad hoc est une méthode aisée et peu coûteuse de relier plusieurs ordinateurs en réseau. Le mode Ad hoc exige que les paramètres de nom de réseau SSID, d’authentification réseau et de clé de chiffrement soient configurés de façon identique sur tous les ordinateurs du réseau.
- Page 380 Réseau en mode point d’accès (Infrastructure) Réseau local câblé Modem ADSL Internet modem câble, ou similaire Point d’accès* Réseau local sans fil *Un concentrateur en option pour réseau local peut être requis selon le type de point d’accès utilisé. Manipulation de la carte réseau sans fil La carte réseau local sans fil est un dispositif en option qui peut être fourni avec votre ordinateur portable.
-
Page 381: Désactivation/Déconnexion De La Carte Réseau Sans Fil
• Les fours micro-ondes peuvent interférer avec la carte réseau sans fil car ils utilisent la même bande de fréquences (2,4 GHz) que les spécifications IEEE 802.11b/g/n. Les fours micro-ondes ne causent aucune interférence en mode IEEE 802.11a car celui-ci utilise la bande radiofréquence de 5 GHz. •... -
Page 382: Désactivation Par L'icône Dans La Zone De Notification
Désactivation par l’icône dans la zone de notification Notez qu’avec cette procédure, la radio ne sera pas éteinte, l’émission et la réception sont toujours actives bien que la carte ne soit plus connectée. Faites un clic droit sur l’icône Carte réseau sans fil dans la zone de notification en bas à droite de l’écran. Choisir Se déconnecter d’un réseau. -
Page 383: Configuration De La Carte Réseau Sans Fil
Configuration de la carte réseau sans fil La carte réseau sans fil en option peut être configurée pour établir la connectivité du réseau sans fil en utilisant le logiciel intégré dans Windows Vista. Il prend également en charge la plupart des solutions de sécurité... -
Page 384: Configuration Du Réseau Local Sans Fil Avec Windows Xp
Configuration du réseau local sans fil avec Windows XP Procédure Cliquez sur le bouton [Démarrer], puis sélectionnez Panneau de configuration. Si le Panneau de configuration n’est pas en affichage classique, sélectionnez « Basculer vers l’affichage classique » sur le panneau de gauche. Double-cliquez sur l’icône Connexions réseau. Sélectionnez l’assistant «... -
Page 385: Dépannage De La Carte Réseau Sans Fil
Dépannage de la carte réseau sans fil Dépannage Le tableau ci-dessous présente les causes possibles et les mesures correctives pour différents problèmes de réseau sans fil. Problème Cause possible Solution possible Connexion Nom de réseau Connexion en mode Ad hoc : Assurez-vous que le SSID et la clé WEP de réseau (SSID) ou clé... - Page 386 Problème Cause possible Solution possible Connexion L’ordinateur à Vérifiez si l’ordinateur est allumé. de réseau connecter est éteint. disponible Interférences RF L’utilisation de canaux RF identiques ou se chevauchant peut nuire au (suite) provenant de points fonctionnement de la carte réseau sans fil. Changez le canal de votre d’accès ou d’autres point d’accès en tenant compte du canal du périphérique nuisible.
-
Page 387: Spécifications De La Carte Réseau Sans Fil
Spécifications de la carte réseau sans fil Spécifications Élément Spécification Type de réseau Les cartes réseau sans fil Centrino Advanced-N 6200 (802.11abgn 2x2) et Atheros XSPAN 801.11a/b/g/n) respectent les normes IEEE 802.11a, 802.11b/g et 802.11n sur les applications Wi-Fi*. Débit (Commutation automatique) débit maximum de 54 Mbit/s (IEEE 802.11n à... - Page 388 « Type Wi-Fi » indique que le test d’interconnectivité de la Wi-Fi Alliance (organisation garantissant l’interconnectivité des réseaux sans fil) a réussi. La portée peut varier selon certains facteurs (par exemple, nombre de murs, réflectivité des matériaux ou interférences provenant d’autres sources de radiofréquences). *** Le chiffrement par clé...
-
Page 389: Utilisation De Bluetooth
Utilisation de Bluetooth Le module Bluetooth intégré est un composant offert en option pour les ordinateurs portables Fujitsu. Présentation de Bluetooth La technologie Bluetooth est conçue pour assurer la liaison sans fil à faible portée entre divers appareils mobiles, tels que téléphones, ordinateurs portables, imprimantes et caméras. La technologie Bluetooth permet d’établir des réseaux personnels (PAN) entre des appareils situés à... - Page 390 Les utilisateurs ne sont pas autorisés à modifier ce produit. Toute modification annule la garantie. Cet équipement ne peut être modifié, altéré ou changé en aucune façon sans l’autorisation écrite de Fujitsu. Toute modification non autorisée annulera les autorisations d’équipement de la FCC et d’Industrie Canada, de même que la garantie.
-
Page 391: Annexe B : Capteur D'empreintes Digitales
Annexe B : Capteur d’empreintes digitales Présentation du capteur d’empreintes digitales optionnel Il est possible que votre LifeBook soit équipé d’un capteur d’empreintes digitales sous le pavé tactile TouchPad, entre les boutons gauche et droit. Ce capteur sert aussi de bouton de défilement. Figure 42. -
Page 392: Première Mise En Marche
Grâce au capteur d’empreintes digitales, il n’est plus nécessaire de saisir votre nom d’utilisateur et votre mot de passe chaque fois que vous voulez : • Ouvrir une session dans Windows • Reprendre l’utilisation de l’ordinateur laissé en mode veille •... -
Page 393: Installation D'omnipass
Installation d’OmniPass Si l’application OmniPass a déjà été installée sur votre système, sautez cette section et allez directement à « Enregistrement des utilisateurs » en page 190. Pour savoir si l’application OmniPass est déjà installée, vérifiez si les éléments suivants sont présents : •... - Page 394 Suivez les instructions figurant dans le programme d’installation. Indiquez l’endroit où vous souhaitez installer OmniPass Il est recommandé de NE PAS installer l’application dans le répertoire racine (par exemple : C:\). Une fois l’installation d’OmniPass terminée, vous serez invité à redémarrer votre système. Vous pourrez ensuite utiliser OmniPass.
- Page 395 Désinstallation d’OmniPass L’ ’ UTILISATEUR DÉSIRANT DÉSINSTALLER ASS DOIT DISPOSER DE DROITS D ADMINISTRATEUR ’ DANS LE SYSTÈME I VOUS N AVEZ PAS DE TELS DROITS FERMEZ LA SESSION ET OUVREZ EN UNE ’ AUTRE AVEC UN NOM D UTILISATEUR POSSÉDANT CES DROITS AVANT DE POURSUIVRE LA ’O DÉSINSTALLATION D Pour supprimer l’application OmniPass de votre système :...
-
Page 396: Enregistrement Des Utilisateurs
Enregistrement des utilisateurs Avant de pouvoir utiliser les fonctions d’OmniPass, vous devez d’abord enregistrer un utilisateur dans l’application. Concept du mot de passe principal Les ressources d’un ordinateur sont souvent protégées par des mots de passe. Lorsque vous vous connectez à... - Page 397 ’ ’ ETTE PROCÉDURE D ENREGISTREMENT REPOSE SUR L HYPOTHÈSE QUE VOUS NE VOULEZ INTÉGRER ’ À ASS AUCUN PÉRIPHÉRIQUE D AUTHENTIFICATION OU AUTRE EMPLACEMENT DE STOCKAGE VOUS SOUHAITEZ DISPOSER DE CETTE FONCTIONNALITÉ CONSULTEZ LES SECTIONS CORRESPONDANTES DU PRÉSENT DOCUMENT Enregistrement de base L’Assistant d’enregistrement vous guidera à...
- Page 398 Dans Windows Vista : Cliquez sur [Exécuter l’assistant d’enregistrement]. Cliquez sur [Créer et enregistrer un nouvel utilisateur Windows]. Suivez les instructions données par l’assistant. Enregistrement d’une empreinte digitale L’enregistrement d’une empreinte digitale augmentera la sécurité de votre système et simplifiera la procédure d’authentification.
-
Page 399: Utilisation D'omnipass
Lorsque OmniPass a correctement pris l’empreinte digitale, l’écran Vérifier l’empreinte digitale s’affiche automatiquement. Pour vérifier l’enregistrement de votre empreinte, placez le bout de votre doigt sur le capteur comme lors d’une prise d’empreinte digitale. Si l’empreinte a été vérifiée avec succès, une empreinte digitale verte apparaît dans la fenêtre de prise et le texte Vérification réussie s’affiche en dessous. - Page 400 À l’invite d’authentification, vous devez fournir les informations d’identification appropriées : un doigt enregistré dans la fenêtre d’empreintes digitales ou votre mot de passe principal dans la case de mot de passe principal (l’icône en forme de clé). Mémorisation d’un mot de passe OmniPass peut mémoriser toute application, toute interface graphique ou toute autre ressource protégée par un mot de passe.
- Page 401 Le paramètre par défaut est Cliquer automatiquement sur le bouton « OK » ou « Soumettre » pour ce site protégé par mot de passe une fois l’utilisateur authentifié. Avec ce paramètre, chaque fois que vous accédez à ce site, OmniPass vous demandera votre mot de passe principal ou votre périphérique d’authentification d’empreintes digitales.
- Page 402 Connexion à un site mémorisé Selon les informations contenues dans Paramètres pour ce site protégé par mot de passe, OmniPass vous invitera ou non à vous authentifier lorsque vous retournerez à un site mémorisé. Ces informations peuvent être modifiées dans Gestion du coffre-fort. Les cas suivants s’appliquent à...
- Page 403 Connexion à Windows avec un capteur d’empreintes digitales Lorsque vous vous connectez à Windows à l’aide d’un capteur d’empreintes, la fenêtre de prise d’empreintes digitales apparaît à côté de l’écran de connexion Windows. Placez votre doigt enregistré sur le capteur pour que le système vous identifie.
- Page 404 Si vous désirez afficher les informations d’identification sauvegardées pour un site Internet mémorisé, mettez en surbrillance la ressource souhaitée sous Boîte de dialogue ‘Protection par mot de passe’ et cliquez sur Afficher les valeurs. En cas de réinitialisation d’un mot de passe ou d’expiration d’un compte, vous pouvez supprimer les informations d’identification sauvegardées dans OmniPass.
- Page 405 Pour supprimer une identité, mettez en surbrillance l’identité à supprimer et cliquez sur [Supprimer l’identité], puis cliquez sur [Appliquer] ORSQUE VOUS SUPPRIMEZ UNE IDENTITÉ TOUS LES SITES MÉMORISÉS ET LES BOÎTES DE DIALOGUE « P » ’ ROTECTION PAR MOT DE PASSE ASSOCIÉS À...
-
Page 406: Configuration D'omnipass
Configuration d’OmniPass Cette section vous donne un aperçu de la fonction Exportation/Importation et du Centre de contrôle OmniPass. Exportation et importation d’utilisateurs OUS NE POUVEZ PAS IMPORTER UN UTILISATEUR DANS ASS SI UN UTILISATEUR PORTANT LE MÊME NOM Y EST DÉJÀ ENREGISTRÉ Vous pouvez importer et exporter des utilisateurs dans et hors d’OmniPass à... - Page 407 Cliquez sur Exporter un profil utilisateur OmniPass. OmniPass vous invitera à vous authentifier. Une fois l’authentification réussie, vous devez nommer le profil utilisateur OmniPass et décider où l’enregistrer. Un fichier .opi est généré et vous devez en sauvegarder une copie dans un endroit sûr. Ce fichier .opi contient toutes vos données d’utilisateur OmniPass.
-
Page 408: Centre De Contrôle Omnipass
• Si vous exportez un utilisateur propre à OmniPass, vous pouvez importer cet utilisateur dans tout ordinateur exécutant OmniPass, à condition qu’un utilisateur portant le même nom n’y soit pas déjà enregistré. • Si vous tentez d’importer un profil utilisateur portant le même nom qu’un utilisateur déjà enregistré dans OmniPass, le processus d’importation échoue. - Page 409 Si vous cliquez sur Supprimer un utilisateur OmniPass, vous êtes invité à vous authentifier. Authentifiez-vous à l’aide des informations d’identification (ou de l’empreinte digitale enregistrée) de l’utilisateur à supprimer. OmniPass vous invite à confirmer la suppression de l’utilisateur. Cliquez sur [OK] pour terminer le processus de suppression ’...
-
Page 410: Dépannage
Paramètres de système Vous trouverez l’interface Options de démarrage dans l’onglet « Paramètres de système ». Les options de cette interface vous permettent de spécifier la manière dont votre ouverture de session OmniPass est associée à votre ouverture de session Windows. La première option, Se connecter automatiquement à... - Page 411 Impossible d’ajouter un utilisateur avec un mot de passe vide dans OmniPass Si vous rencontrez des difficultés pour ajouter un utilisateur avec un mot de passe vide dans OmniPass, vous devrez peut-être modifier vos paramètres de sécurité locale. Essayez d’abord la procédure expliquée dans la section Impossible d’ajouter un utilisateur Windows dans OmniPass.
-
Page 412: Index
Index remplacement remplacement hors tension À propos de ce guide voyant de niveau Adaptateur auto/avion BIOS Alimentation guide Adaptateur auto/avion utilitaire de configuration adaptateur secteur Bluetooth gestion informations supplémentaires mise hors tension Bouton d'alimentation/veille/reprise mise sous tension panne problèmes Câble de sortie c.c. sources Capteur d’empreintes digitales voyant... - Page 413 Garantie Connecteur Gestion de l'alimentation connecteur pour duplicateur de ports Glisser Conventions utilisées dans ce guide Coordonnées pour contacter Fujitsu Haut-parleurs incorporés Haut-parleurs stéréo Dans Windows XP : configuration de la carte réseau sans fil Déballage Installation Dépannage...
- Page 414 Lecteur de DVD Ordinateur portable Fujitsu LifeBook ouverture du plateau rangement problèmes voyager avec votre ordinateur Lecteur multimédia Ouverture d'urgence du plateau chargement entretien Panneau de configuration Pavé tactile TouchPad retrait boutons supplémentaires commandes utilisation voir TouchPad Lecteur optique Périphériques modulaires Logiciels pré-installés...
- Page 415 Utilitaire de mise à jour des pilotes microprocesseur puce Fujitsu Driver Update vidéo Verr défil Tableau de sécurité Tableau de sécurité et d'applications LifeBook boutons Windows Vista configuration configuration de la carte réseau sans fil désactivation...